Tamiya M16 Multiple Gun Motor Carriage (MGMC)
![Album image #1 Album image #1](/albums/img/3/6/8/1750368-21588-97-720.jpg)
![Album image #2 Album image #2](/albums/img/3/6/9/1750369-21588-20-720.jpg)
![Album image #3 Album image #3](/albums/img/3/7/0/1750370-21588-45-720.jpg)
![Album image #4 Album image #4](/albums/img/3/7/1/1750371-21588-86-720.jpg)
![Album image #5 Album image #5](/albums/img/3/7/4/1750374-21588-42-720.jpg)
![Album image #6 Album image #6](/albums/img/3/7/5/1750375-21588-46-720.jpg)
![Album image #7 Album image #7](/albums/img/3/7/6/1750376-21588-45-720.jpg)
![Album image #8 Album image #8](/albums/img/3/7/8/1750378-21588-72-720.jpg)
![Album image #9 Album image #9](/albums/img/3/7/9/1750379-21588-81-720.jpg)
![Album image #10 Album image #10](/albums/img/3/8/0/1750380-21588-86-pristine.jpg)
![Album image #11 Album image #11](/albums/img/3/8/1/1750381-21588-36-720.jpg)
Modifying figure WIP with epoxy putty. Oils over acrylic base
![Album image #12 Album image #12](/albums/img/3/8/2/1750382-21588-47-720.jpg)
Modifying figure WIP with epoxy putty. Oils over acrylic base
![Album image #13 Album image #13](/albums/img/3/8/4/1750384-21588-66-720.jpg)
Modifying figure WIP with epoxy putty. Oils over acrylic base
![Album image #14 Album image #14](/albums/img/3/0/1/1763301-21588-24-720.jpg)
Splashes, rain marks, road dust etc.
![Album image #15 Album image #15](/albums/img/3/0/2/1763302-21588-19-720.jpg)
Bottle of weathering materials
![Album image #16 Album image #16](/albums/img/3/0/3/1763303-21588-17-720.jpg)
Acessories. Oil paint over acrylic base
![Album image #17 Album image #17](/albums/img/8/0/3/1769803-21588-40-720.jpg)
Adding storage and homemade buckles and straps. Buckles are made from 0.1mm soldering wire
![Album image #18 Album image #18](/albums/img/8/0/4/1769804-21588-62-720.jpg)
More stowages, added tie-down loops for straps. tie-down Loops are made from 0.1 solder wire
![Album image #19 Album image #19](/albums/img/8/0/8/1769808-21588-19-720.jpg)
more straps, tie-down loops for holding the rucksack and others.
Коментари
32 16 June, 14:51
![](/profiles/img/103989-963-s.jpg)
Great work! Nice to see someone else sticking stowage to clothes pins for painting!
19 July, 11:37
![](/profiles/img/21588-581-s.png)
Thanks, @Doubtingmango. I love adding stowages, it helps make the model more interesting.
19 July, 15:14
![](/profiles/img/21588-581-s.png)
In case anyone is interested, I made this short video summarizing the weathering approach. Youtube Video
![](https://img.youtube.com/vi/OPo54l_gK88/maxresdefault.jpg)
19 July, 15:17
Album info
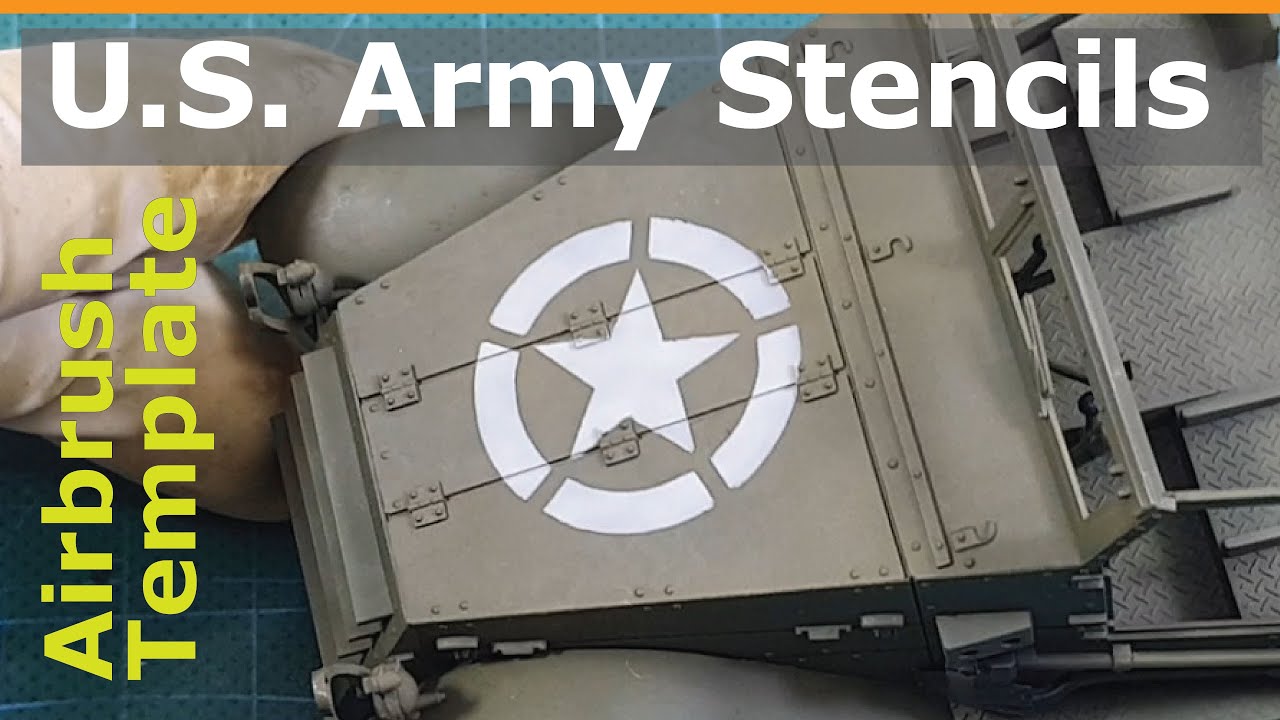
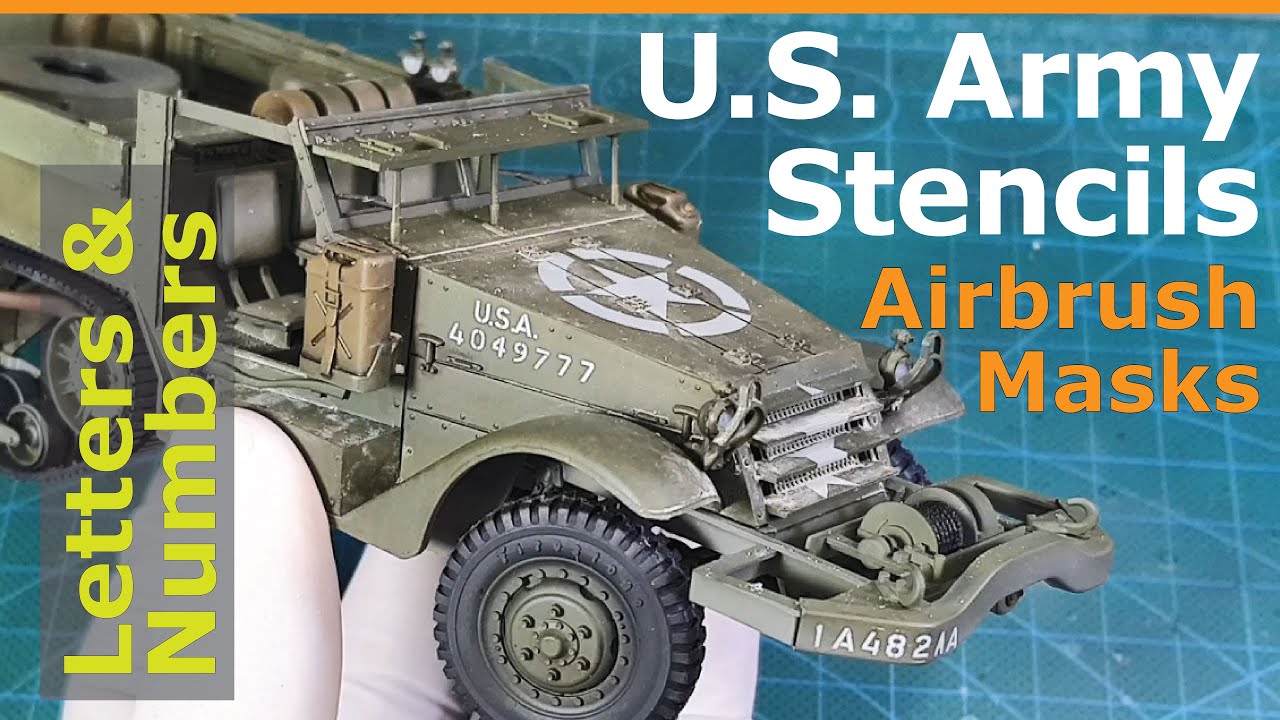
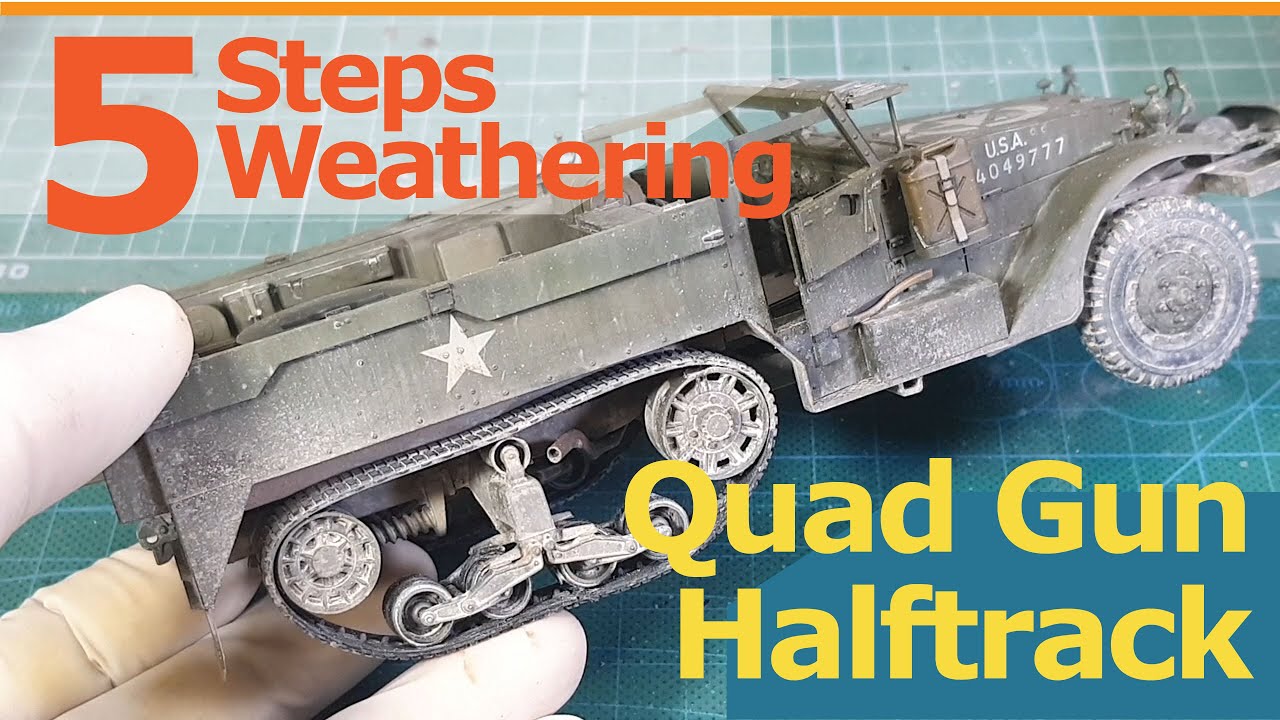
A simple yet well engineered kit. It is old but with a bit of care, i think this kit is quite promising. Iam mainly going to rely on OOTB but will use PE stencils to airbrush the markings. Here are how-to video clips for those interested. Airbrushing the white stars Youtube Video. And airbrushing the serial letters and numbers Youtube Video . Continuing with the build, I made another tutorial video on the 5-step weathering process Youtube Video
![](https://img.youtube.com/vi/ELkDvszDc7w/maxresdefault.jpg)
![](https://img.youtube.com/vi/DKPgb6oQfbs/maxresdefault.jpg)
![](https://img.youtube.com/vi/OPo54l_gK88/maxresdefault.jpg)