Ford Puma - Rally Monte Carlo 2002 - Reference pics

As usual, I start bu cleaning up the main bodyparts, removing all the flash and other unwanted castings.

Next I dry fit the chassis, body, safety rollcage and wheels to see if there are any unforseen problems. So far so good.

Next I trim and adjust the rearview mirrors and I replace the resin support of the rear wing by some photo etched leftovers because it was too fragile to handle.

Next I give the body a grey primer coat. Once the primer is dry I start by spraying the front of the body with Tamiya TS-18 Metallic Red. The yellow dotted line indicates to where the red should come, the rest of the car will be metallic blue.

So now I will have to wait until the red paint is dry, then I will mask the red area, after which I will spray the blue area. To be continued 😉

Once the metallic red paint is dry, I mask the body with BMF and Tamiya masking tape.

The interior of the body was masked as well, to avoid blue overspray into the red areas.

Next the metallic blue layer is airbrushed on the body.

As soon as the paint is dry, the masking is removed. The paint looks a lot better in reality compared to the pictures, where the metallic particles reflect too much.

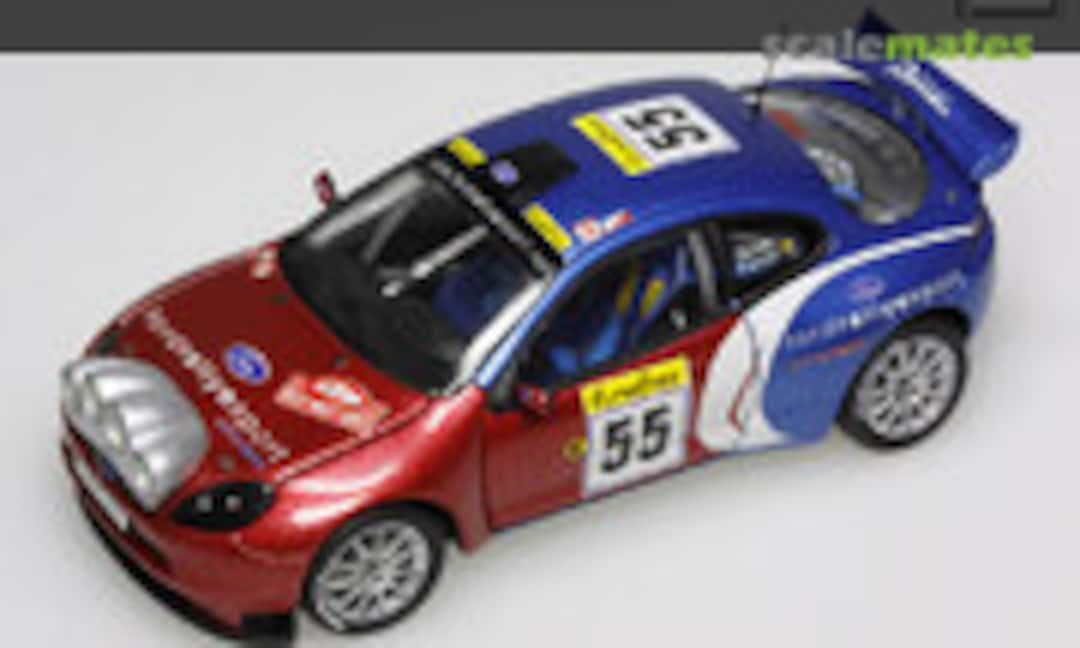
Dry fit of the Puma with the main (airbrushed) bodyparts.

It starts to look like a Ford Puma now 😉

So now I fixed all the decals on the car.

Obviously, this Ford didn't have a lot of sponsors...

Next I built up the interior. The non-existing safety belts wre scratchbuilt.

I had to sand off a part of the safety roll cage because otherwise the interior didn't fit into the body...

The construction of the body itself was also continued.

The headlights and windows were fixed to the body as well.

The remaining parts were detail painted and prepared; all what's left to do now is fix them to the body of the car and install te last details.

So this is how the Puma looks like with all the main parts fixed, before the final details have been installed.

From here on it's straith to the finish line of completion 😉
Коментари
1 30 May 2015, 21:29
The paint is Tamiya spray can paint, but I used an airbrush to apply it to keep better control.
25 June 2015, 15:45
Guy, You must have read my mind, as I was really impressed with the gloss effect you have achieved looks great. 🙂 👍
25 June 2015, 21:19