Harley-Davidson FLSTFB Fat Boy Lo - 2010 - Reference pics

This motorbike is quite a challenge, since there are not a lot of colors to make the bike look cool, so all I have are flat black, semigloss black and gloss black, apart from aluminium and chrome of course. Let's find out how this will go 😉

First we start with the engine block, which is assembled and sprayed flat black. The stud bolts are fixed to the engine, which will make it a lot easier to fix the cilinder heads later on.

Next we fix some small but important details such as the metal bolts and some photo-etched identification plates.

On the other side some aluminium engine parts are fixed as well.

I started to enhance some of the details by picking out the "six speed" letters and fixing the "103" decal.

Next I start to assemble the frame. A lot of work was put into the removing of the many seams running along the tubular parts of the frame.

Next the engine block is attached to the frame with real metal bolts. A few decals complete this image.

View from the right hand side of the frame with installed engine block.

Next the oil tank is fixed to the rear of the frame.

And the battery is installed inside the oil tank as well.

Now I can start to assemble the rear swing arm. Again a lot of time is consumed in the sanding of the many seams running along the tubular parts.

This is where the swing arm will be attched later on, but first I will have to tackle the rear wheel, which is a challenge, as you will see...

I read in an article of TMMI #227 that Phil Devos encountered some "paint peeling"problems when painting the satin black wheel centre. So I decided to try it myself, but using different materials.

So I used Tamiya flexible masking tape instead of the regular, and Tamiya X-18 acrylic paint instead of TS-29. I also removed the masking tape when the paint was still wet. The result looked ok to me, so I guess this method works.

Next I fixed the 2 wheel halves together. I sanded the ugly seam on the rubber tire away and put in on the wheel. Then I bolted the belt crown to the wheel. I don't understand why Tamiya decided to use 3 real bolts and 2 plastic ones...

Next I fixed the beautiful aftermarket Tamiya brake disc in turned metal to the other side of the wheel.

Finally I could install the wheel into the swingarm. The belt is already in place, although it still has to be tightened later on.

On the other side the brake calliper is fixed as well.

Then it's time to prepare the soft-tail shocks which are fully functional by the way. Here they are masked with Maskol, ready to be spray painted.

So once the shocks were painted, I fixed them to the swing arm, which went fairly easy.

But installing them into the bottom of the bike was a whole other story! It felt like I always had one arm too short... Eventually they went in after half an hour or so.

From this moment on, the model starts to like like a real motorbike. Tamiya also recommends the use of the central support from this moment on, to avoid damaging the bottom of the bike.

View from the right hand side.

Next the chain case is attached to the Harley. The gear pedals and the support arm are installed as well. I also fixed the "103" cover to the chain case, which I painted instead of using the decal.

Again, view from the right hand side, but the work at this side hasn't been done yet.

Now it is time to start working on the cylinders. Each cylinder is made of 12 discs, which are assembled on top of each other. I used metallizing buffing powder to give the edges a metaalic shine.

Next I painted the rest of the disc in flat black. Finally the 12 discs are put on top of each other to form a cylinder.

Here you see the finished cylinder in the front of the bike. The rear cylinder still has to be put in color.

Once the cylinder are fixed in place, I can continue putting together the cylinder heads. They are formed in a similar way, but this time they are formed with 9 discs.

Once the cylinder heads are put together, they are fixed on top of the cylinders by means of metal head bolts.

Here you see a close-up of the 2 finished cylinders, except for the rocker covers which still have to be assembled.

Now I can finally fix the rockers and the rocker covers on top of the cylinder heads. I also fitted the exhaust pipes.

Right hand view from the bike with the chromed exhausts. Almost a shame that they will be hidden behind the satin black exhaust pipe covers...

And here I fitted the exhausts at the end of the pipes, as well as the satin black covers.

View from the rear, which gives you a good look at the exhausts. they are made from turned aluminium (they came with the aftermarket kit).

The satin black covers take away part of the chrome splendor, but hey! It's not an Electra Glide of course, it's a Fat Boy Lo 😉

At the left hand side it's time to fix the horn and the spark plugs with their wiring.

And at the right hand side I installed the fuel injection module and the brake pedal.

In the meantime my air compressor broke down... Luckily Santa came early this year to bring me a new one. The front wheel was the very first part that I airbrushed with my new compressor.

So once the wheels were painted, the front fork was assembled and fixed into place. This model will be the first ever that I built using 2 different compressors 😉

View of the front fork from the left hand side. You can clearly see the aftermarket aluminium turned brake disc and the photo-etched "Harley-Davidson" logo.

Next I attached the reverse cover of the front fork, after which I could start assembling the fuel tank parts. Once the fuel tank is ready, I fix it to the bike.

Next the tail light is attached to the rear fender, after which it is fixed to the rear supports.

Finally I can fix the driver's seat on top of the frame and rear fender.

Overview of the bike so far, seen from the rear. The newly fixed fuel tank, rear fender and driver's seat give the bike finally the looks of a real Harley...

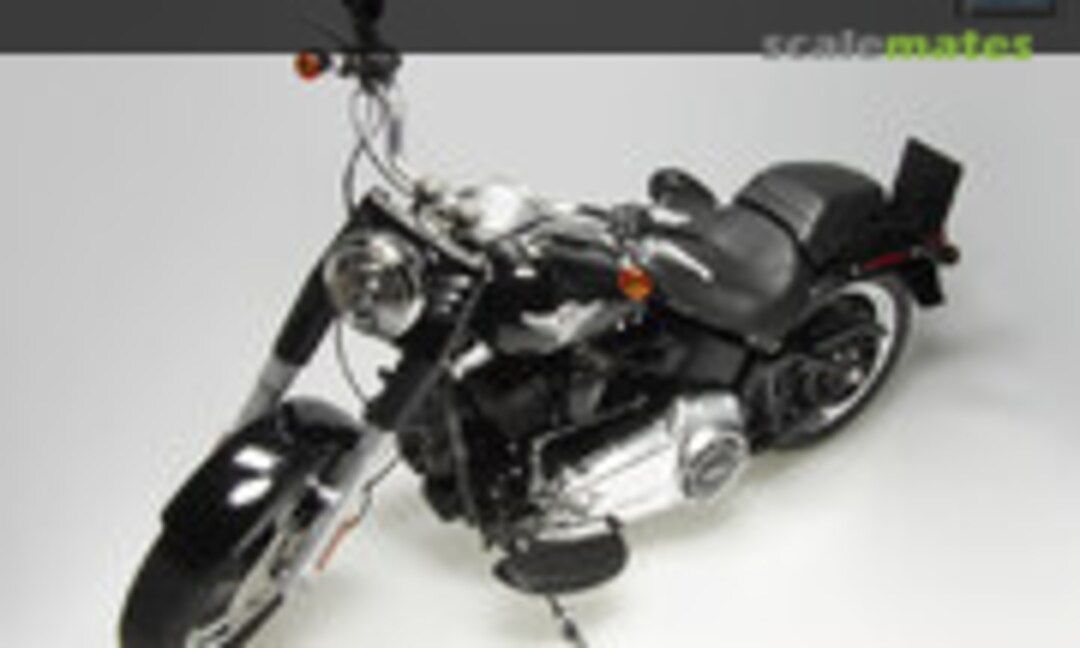
View from the front. The handlebar is still missing of course. This will be the final stage to tackle.
Коментари
1 10 December 2017, 12:38
Nice, something different on Your shelf between the masses of race cars 😄
10 December 2017, 19:38
Definitely pulling up a chair for this one. Looks great so far.
10 December 2017, 19:44
Wow! I'm impressed with your progress, it looks like a real bike! 👍
15 December 2017, 23:18
it looks fantastic!!!!. what did you use for the leather? it is simply perfect!
22 December 2017, 11:39
looking very good like this... nice build on a pretty big machine...
22 December 2017, 11:54
The leather is made by Tamiya, straith from the box! I didn't change a thing, because like you said it is perfect!
22 December 2017, 19:11