

Douglas Dakota

This one ? No

Or this one ? Yes, the Transport Wings decals are nice

This one is also possible

Electronics to be built inside

Control building position

Baseplate with Model Scenery Print. My clubmembers considered the concrete to be too bluish, so...

I made it over with a greyer print and Revell weathering powder

"real" electronics added : wing and fuselage lights, motors

and an Arduino Nano for steering the functions

Test before closing the cockpit : it works !

some progress: fuselage and wings assembled, white AK primer applied on top

AK black undercoat for ALU finish

idem: Black undercoat for ALU finish

Alu paint added, some surgery needed for fixing the circuits, but everything seems to work as programmed

catastrophy: broken dakota will go to other project

airfix dakota : landing lights work fine

airfix dakota : navigation lights work fine

battery packs and power bank : 5 V power supplies

arduino fitted, landing lights and nav lights work

as it is an airliner, the interior should look like an airliner.

The passengers arrived: Slater's assorted figures

wiring in the wing

Slaters figures as passengers

electronics check : OK

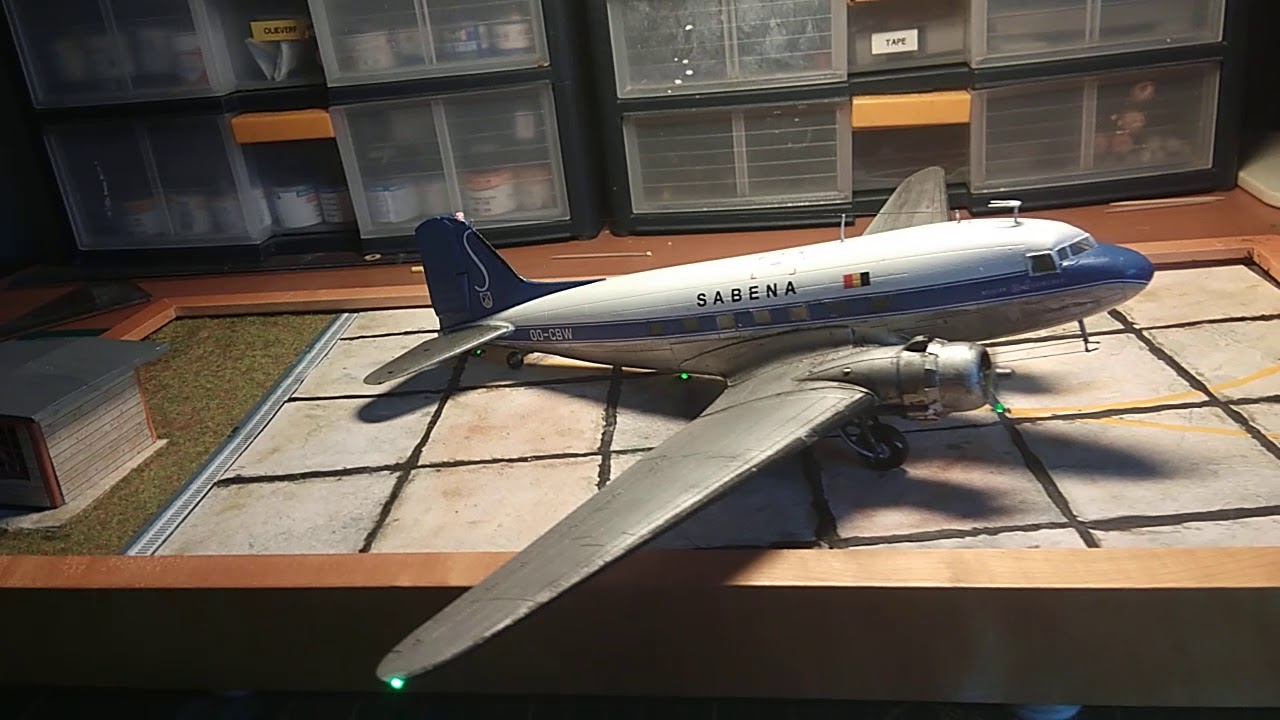
passengers and crew ready, cabin and cockpit lights working

Closing the fuselage

painting on its way

one engine fixed

one engine running

And two

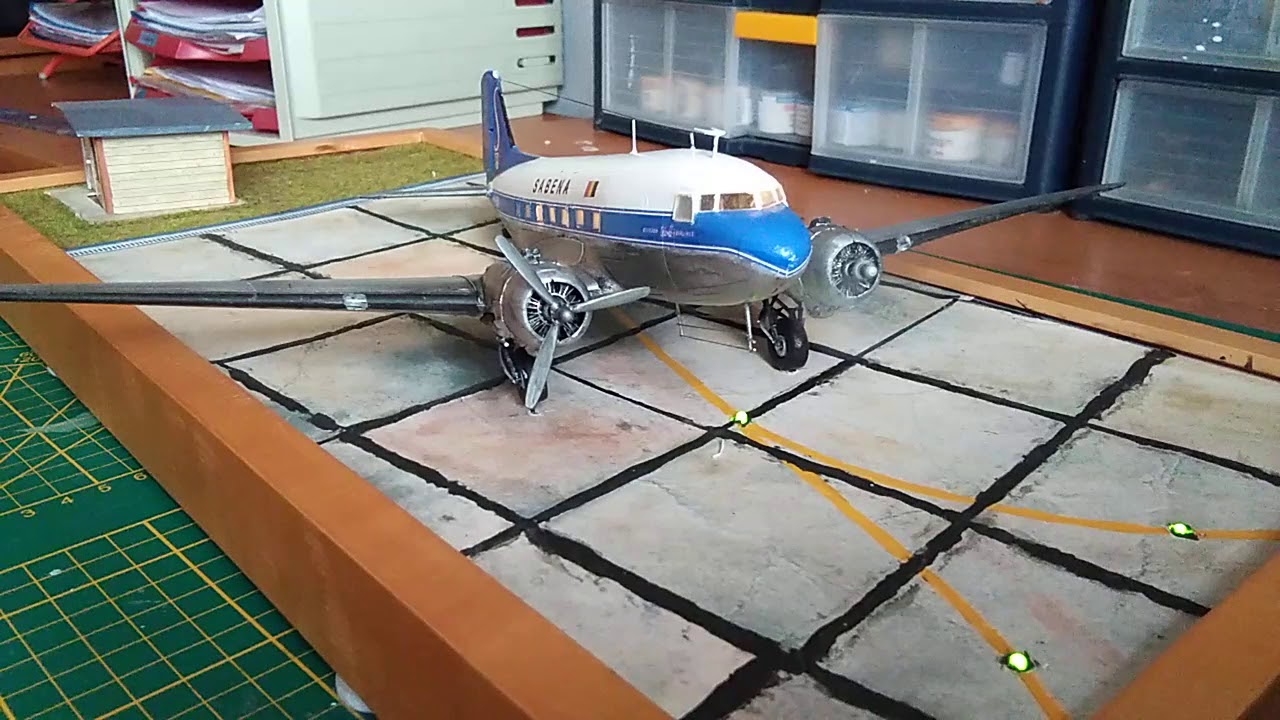
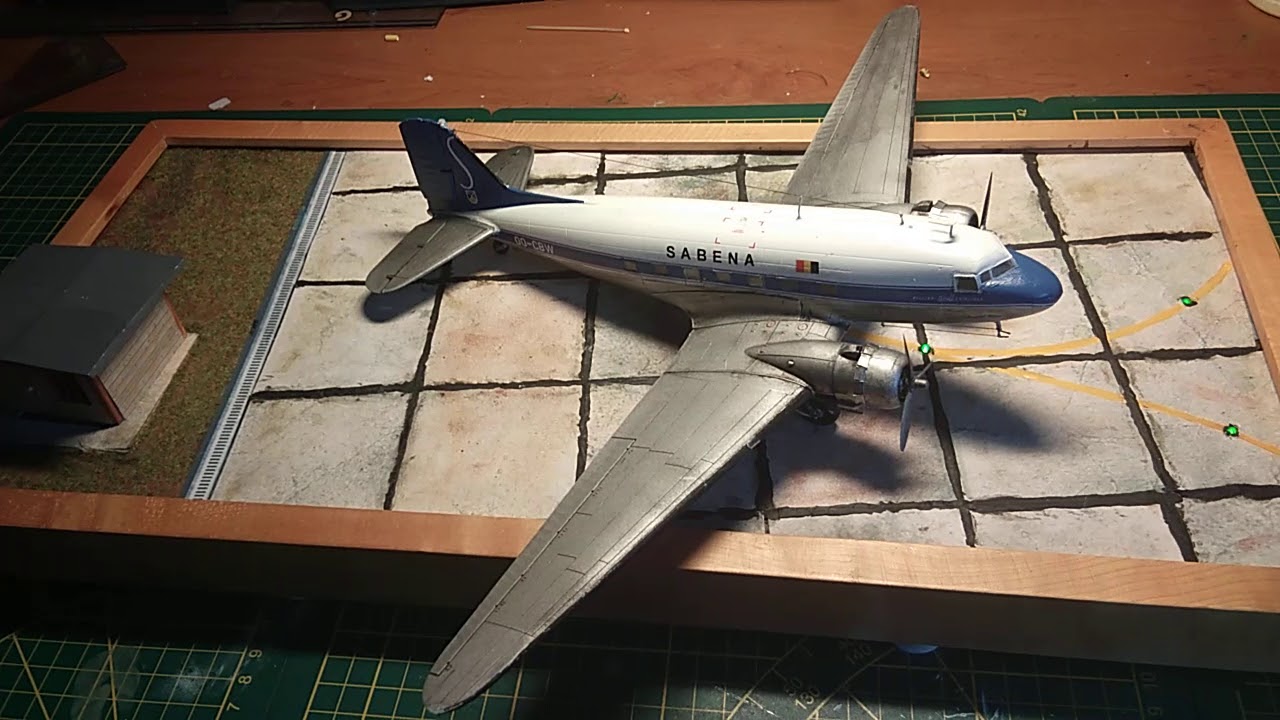
the base

a proximity sensor in the cabin

Underneath : wiring , an arduino, a mp3 player , a small speaker and the battery pack

front view

left engine running and nav lights on

both engines running

landing lights on

closer view front right

view right on tail

left side view

top view
Коментари
29 November 2018, 13:15
My clubffriends did not like the concrete apron (too bluish), this one is better I think.
21 February 2019, 15:22

You know I'm in. Also, I've noticed that YouTube videos from mobile URL don't display.
11 May 2019, 10:20
Project on hold, one of the motorwires broke off. I had to open the model, will restart with an Airfix kit.
11 May 2019, 10:21
The Airfix Dakota arrived, it looks even better than the Italeri, so my project will have a fresh start.
14 May 2019, 14:50
Awesome! I have the same 1/72 Skytrain box from Airfix and it's a sublime beauty, so I'm looking forward to watching you work your magic, Erik.
14 May 2019, 14:55
This is very good looks! Very nice work! Good luck with Airfix. I will follow for inspiration. If can I ask what electronic you use for motors and lights?
16 May 2019, 09:52
I watch those electronic project sometimes and it keeps me wondering: how long do they 'live' after completion? Or: are the batteries replacable?
16 May 2019, 10:57
Speaking for myself... it all depends on how you do it... if you're smart, you make it so the batteries are accessible. I've largely used 5v usb plugs, because that gives you the option of plugging it into a wall/computer or battery pack.
16 May 2019, 11:13
Michal, I bought the "stuff" on Ebay cheap from chinese vendors : prewired motors : 7x20mm Magnetic Coreless Motor and 4x8 mm Mini Tiny Coreless Motor Toy from a vendor called Motorhouse, it takes about a month to get them delivered in Europe. SMD prewired leds (10 for 5 Euro) from an other vendor ELEdoctor. There are other vendors too.
16 May 2019, 18:05
Lukasz : any 5 - 6V DC power supply will do (see pictures) Powerbanks are rechargeable . The 4 battery sets can be loaded with alkaline batteries (4 x 1.5 V) or with rechargeables ( 4 x 1.2 V) .
16 May 2019, 18:16
Usually the batteries are hidden in a base, so yep. They're replaceable.
16 May 2019, 22:42
I'm trying to figure out what you're up to. In the latest pic you've got two blacks and two reds running towards each of the engine nacelles. They should be run in parallel, no?
16 May 2019, 22:44
The thick sites are for the power feed that I will run along the undercarriage into the base, see picture 12 for the first attempt, the thin ones are for the landing lights. Motors and lights will run in a sequence programmed in the Arduino nano , hopefully.
17 May 2019, 08:11
I was confused because it looks like the thin wires are connected to the power supply. I can't wait to see what you do with the Arduino nano. I've had lots of fun playing with it too, successfully on both my Tintin rocket (programming a seven segment LED timer was a lot more work than it seems!) and my Nausicaa Ohm project using a motion detector.
17 May 2019, 10:28
The thin wires werd connected to the battery to check the landing lights wiring . As I broke some wires previously , I now check the circuits at every step . 🙂
17 May 2019, 11:10
Very Interesting, and something I would like to try. Thanks for the explanations on how and why!
17 May 2019, 21:33
Have to watch this one! Erik your work is amazing. The electronics really makes the plane live.
11 September 2019, 11:50
I just bought an other italeri kit as I discovered that I can also build OT-CWA with decals from my stash and the spare sidelines from the Tw decalsheet . It will be a sfb built.
11 September 2019, 12:46
The model is finished, lights and engines work, but still some synchronisation problems with proximity detector and sound
4 October 2019, 15:48
Looks great, Erik! Have any video of the airplane with lights and props in action?
4 October 2019, 21:39
At general request : some videos; I couldn't join them together; I hope the links work
Youtube Video ; Youtube Video ; Youtube Video ; use these links, please
9 October 2019, 10:39
YouTube videos only embed with the full URL, not the mobile version...
That being said, this is fantastic!
9 October 2019, 13:48
Album info
Douglas Dakota in Belgian markings with working engines, lights and sound


