
Novinky
přidal nové fotoalbum.
5 obrázky
Soil
1:35
The next dio was a Fire Support Base (I called it "Manassas") in the Central Highland of Southern Vietnam. Red earth, tr...


Projekt: Soil is more than dirt
Scratchbuilt
1 18 April, 05:07
As requested, this is a link to my soil experiment album. 🙂
Using real soil for dioramas | Album by gorby
19 April, 05:54
přidal nové fotoalbum.
15 obrázky
Using real soil for dioramas
This is the end result on my second diorama. As the PVA soil was drying I lightly sprinkled some of the dry soil onto th...


21 7 October 2024, 14:17
Wow you actually delivered. Thanks for the instructions on how to do it
7 October 2024, 14:37
WOW, that's entertainig to read. 👍
Please more "buildlogs" like this. 🙂
7 October 2024, 19:12
very interesting information, and delivered in gorby style, even better
7 October 2024, 21:39
Thanks Neuling, there's a very good reason it looks like the real thing...... 😄 😄
8 October 2024, 08:17
Looks really good! Theres no soil like real soil 🙂
Once i needed soil on a sunday... well... since then my plant pots are now officially called "model building accessories"
22 November 2024, 20:42
Many thanks for sharing! Great experiment with fantastic result. 👍
22 November 2024, 22:50
Different granularities for different scales? Would the finer grade make good desert sand if coloured? Did you wear a bowler hat and insist on being called Fred whilst sieving?
22 November 2024, 23:26
😄 😄 😄
Thanks mates. Hope it's helped someone.
You could be right John, although I'm far from an expert in soil as living in Coventry, most of it is imprisoned beneath concrete. Sieving it fine enough to pass as sand would be a bit of a pain in the rear end though. Personally I have better things to be doing with my time. Oh hang on, I haven't have I? 😳
23 November 2024, 07:34
Very instructive! You are encouraging me to make a project "soil and diorama". By the way: I've bought "Vietnam acrylic ground", because I cannot find red soils in Germany. It was easy to process, but after 24 hours it was still shiny ... so I had to use my watercolor box from schooldays.
1 17 April, 15:45
Adding paint to the soil/PVA worked quite well although I only tried it with black. Maybe reddy brown paint would work for the red soil.
17 April, 16:25
you can also airbruah the soil after is placed in the base. the same that you can airbrush the vegetation 😉
2 17 April, 17:06
Thanks to Gorby and Spanjaard. Very helpful advices, because I'm planning a diorama of the training ground of the Chiba tank school in the 40ies. So there will be the opportunity to try it out.
1 17 April, 17:17
Dear gorby, would you set a link of your soil experiments to my project/album "soil ...", please. Thank you Tom
19 April, 05:26


přidal nové fotoalbum.
111 obrázky
Iveco Hi-Way E5 Abarth - WIP
1:24
Thanks for watching everyone~


Projekt: Iveco Hi-Way E5 Abarth


36 5 March, 22:12
Maybe there is some mold release still on the plastic. Instructions often say to wash parts. I never do and never have had trouble but I guess it's possible?.
6 March, 12:19
Strange. Never had such issue with Italeri truck panels before. Don't think it is ABS - try to glue some sprue bits with Tamiya Extra Thin. I don't think this glue will work on anything that is not styrene. Never used Gaia primer - only using Mr. Surfacer and Mr. Priming Surfacer. Is the Gaia primer lacquer or acrylic? Not sure if you have already did it but try to scuff the panels with Tamiya 3000 or 2000 grit sanding sponge (or similar) before priming. Another idea worth trying is to clean the panel with IPA - maybe the release agent Italeri used don't come off easily with just water and soap.
6 March, 14:41
Oh no guys, this time it's just a straight build...
@Goldman - Yeah As you said, it doesn't seem to be ABS, and I sanded it and used a lacquer surfacer, but strangely the paint didn't stick. Washing with IPA is a good tip, thanks.
6 March, 17:44
Late to the party! Apologies, work has taken over my life 🙁
I'm definitely in for the duration, on this one!
8 March, 06:09
The paint is definitely your issue. Most of my trucks are painted with Tamiya paint. I've never had much luck with model air paint. AK doesn't work for me either. I find it best to use a primer, the lads have already pointed out the best, but I've also used Tamiya primer from a rattle can, as well as decanted. However, I've also used both Tamiya and Mr Colour, straight onto the plastic. Some colours over here, are hard to match, so I go to the automotive store and get the colour I want, and also the matching primer. Again, I decant these into a glass jar, and I leave the lid loose, to allow the gasses to fully disperse from the paint. After a day, I simply add a little cellulose thinner and then mix it up, and airbrush it.
8 March, 06:26
Custom decals - that's new. Really nice design. Looks like a huge amount of work
18 March, 19:05
Great idea scribing the part numbers. I used a POSCA marker to write them (usually the last digit is enough) but it is too easy to erase the POSCA marks by just handling the parts.
20 March, 20:24
Bummer with the fuel tank. I think all metallic paints are hard to mask. Sometimes it works most times you get these (unwanted but very realistic) "chipping" effect.
For fuel tanks I gave up "proper" metallic and just use Mr. Hobby Silver C8. It is not a metallic paint but it looks very good and very durable. Got this tip from Jan Rosecky excellent book "The Complete Guide to Truck Modelling"
7 April, 04:13
When you sand for gloss, don't you have difficulties that when sanding red areas in your instance, the dust ruins the white surfaces?
8 April, 18:10
I guess he used a top layer of clear gloss which was sanded and then polished. So, effectively the colors are protected by the clear coat
8 April, 19:09
@Andre - Yeah, that's correct. I had clear coated twice before sanding. 🙂
@Michael - And in that case, you can erase it by gently wiping it with a compound.
9 April, 02:41
Ah. Thanks for the inside. I understood that you sanded the colors to prepare them for a clear coat. Hence my question. Now it's clear to me.
9 April, 09:17
Italeri do have this kinds of stupid random errors in its kits. Annoying, but since Italeri is the only company that still offers European plastic moulded kits of trucks I guess beggars can't be choosers.
I *think* that there is no clear decal film between the lettering for the tyres to improve appearance. It will be almost impossible to hide the clear film on the rubber tyres. Not sure that having separate letters is the best solution. If you want I think MBM sells PE templates to airbrush the words on tyres.
13 April, 15:57
@Goldman - I'm ok without it. I don't care anymore. hahaha!!! Thanks bro~ 😄
13 April, 19:29
if the decals are still in the sheet (misaligned but there) its easy to scan, convert to vectors, align, make masks in vinyl and try to paint them with mask 😉 and if decals are gone, well, MS K knows how to vector them, and has the cutter already available 😉
13 April, 19:34
@Spanjaard - I thought about making my own decals, but I was too lazy to change the toner to print white. LOL
And since the base color of the self-made decal shows through a lot, it is better to avoid attaching it on top of a dark color. 😉
13 April, 19:51
i did not say anything about making decals, but masking to airbrush the missing decals 😉
13 April, 20:59
I'm loving what I'm seeing.
Honestly, my expectations were high, but you've done this "stock build" with the right amount of cheeky adaptations. It's not a clever, "this is what you do", it's more of a, "this is the correct way, to make it better"
And like all your other builds I've followed, the MS touch, is fully endorsed 🙂
15 April, 20:39
Super build so far! Attention and hopefully you can fix it: your licensplate at the front belongs to the rear. At the front you only have one round sticker after the letters UL (it's the city of Ulm in Baden Württemberg). The upper *round* sticker is from the TÜV (Technical Inspection Association), which means a road safety inspection. It's attached to the back.
If there were a hexagonal sticker (AU - emission test), the license plate would be for the front. But since 2010, hexagonal stickers have no longer been used.
15 April, 21:04
@Bozzer - Your compliments made me feel good. 😉
@Christian W - Really? I didn't know license plates had that kind of meaning.
I just picked a pretty one and stuck it on without thinking much about it.
I guess I'll have to change the front and back later or cover it with another decal, thanks for the clarification.
1 16 April, 02:37
Thanks everyone~ I'm always grateful for your support and encouragement 😄
1 16 April, 18:28
The question is..
Will this be your last truck, or the first of many?
But seriously, considering you were out of your comfort zone, did you enjoy building your beast?
18 April, 05:26
It was too big and the outer shell was divided, so there was not enough workbench space.
There were many times when it was difficult because there were no instructions on the attachment location or assembly order in the manual, and it was very stressful because the paint did not adhere well.
However, I think the assembly was quite fun.
And I want to make an Actros Grand Prix Edition and decorate it side by side. 😛
18 April, 05:40
MS, you gotta get yourself a Revell 359 Peterbilt. Those build up, beautiful. I'm not sure about availability in your country, but they're still popular on the website.
19 April, 05:26
")
přidal nové fotoalbum.
26 obrázky
Pontiac Firebird
1:24
Preparation of all needed things.


Projekt: Revell 07672: 1970 Pontiac Firebird
Scratchbuilt
7 18 April, 00:11
přidal nové fotoalbum.


26 28 December 2024, 05:16
"Removing seams from roadwheels the Jakko way." Thanks for the shout-out 🙂
Though TBH, I find it takes about as long as clamping the wheel in a vice and scraping the seam down — the lathe is less effort but not really a timesaver, IMHO. Could be that's down to my lack of lathing skills, though.
15 January, 09:46
It took a long time but it's fun. Not every day I get to use a lathe.
1 15 January, 13:51

As the kit is missing many parts, l will try 3d printing / scratchbuilding the missing parts. My resin printer isn't a very good one so it can be hard to get things to print correctly.
28 January, 05:31
Quick tip: you don't need to take photos of your screen — press ⇧⌘4 instead 🙂
28 January, 09:57
There is a lot of work to do to remove the supports. I did a quick and dirty pass on one side and it fits perfectly!
I scaled running gear and tracks from a 1:56 stl by 175% to get to 1:32 and it fits properly.
28 January, 23:25

All missing parts 3d printed by upscaling from 1:56 to 1:32. Suspension and tracks won't be glued on til after painting. Same with radio antenna as I'll just break it off if I add it now.
6 March, 03:05
I see you manage to do 3d printing 😮 lucky you. The tracks and bogies look wonderful 👍
1 16 March, 22:56
Pretty soon, with 3D printing, the only limit will be our imagination.
1 17 March, 19:53
That, and the time and effort you want to put into learning how to use the software and the printer … Both of which are what's kept me from wanting to do this myself 🙂
17 March, 21:07
Got kind of an acceptable gloss pink outcome. Respect to the car builders I see on here who put down perfect gloss coats!
2 20 March, 12:32
Painting the one part track and suspension takes a lot. I have literally worn out one brush so far, scrubbing in all the nooks and crannies.
30 March, 02:24
Like it, like it. Down to the leopard print blanket. Aerosmiths Pink is now my earworm. 🤘🥸👍
17 April, 17:12
That's part of my problem with it 😛 I don't like it AND it sticks in your head …
18 April, 08:39
Welcome to my earworm along with The Bird is the Word (thank you Family Guy 😫😵😵💫) I do find playing Motorhead at extreme volume seems to help. . . . . Pardon? 🤟🥸🤘
2 18 April, 11:09
I would have better off filling the holes for mounting the tools and cutting the pins off of them.
19 April, 02:37
I really want a cotton candy... 😛
@ Mark : Listening to Motörhead at extreme volume helps with everything...don't forget "Lemmy is god" 😄 🤘🏻
19 April, 05:16


přidal nové fotoalbum.
12 obrázky
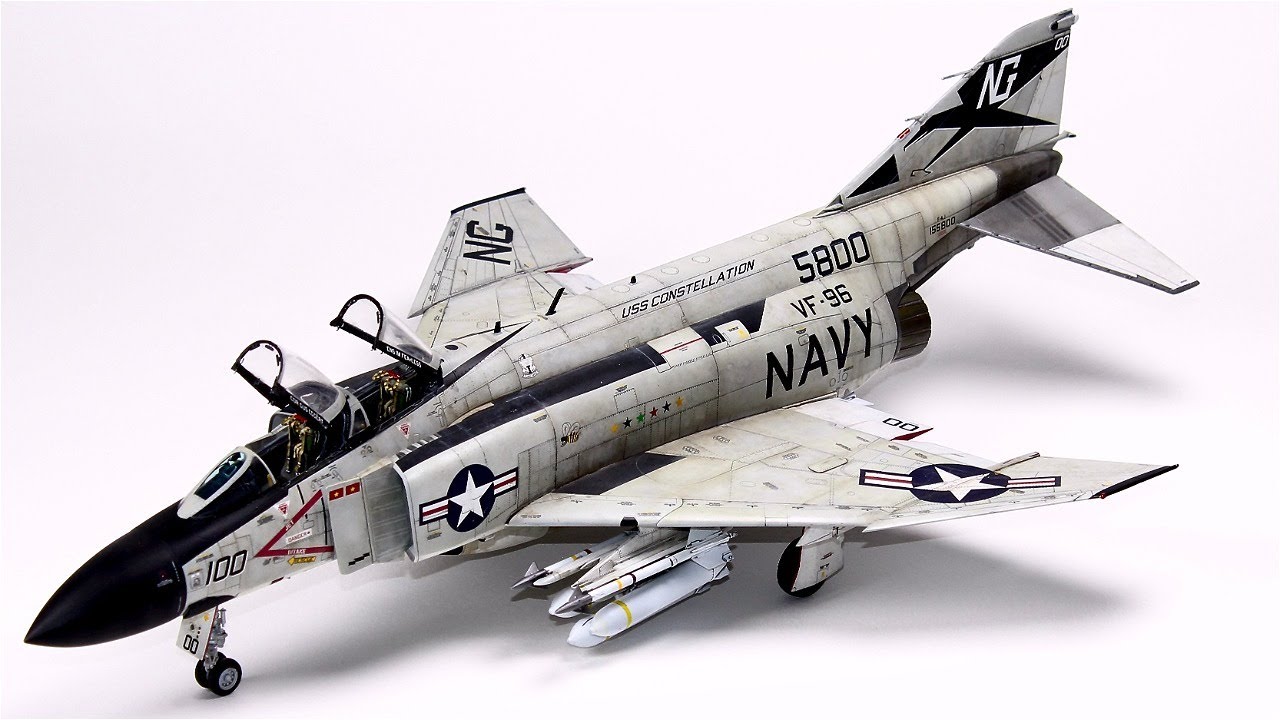
A-7E Corsair II, Hellenic Air Force, 1:72 HobbyBoss
1:72


Projekt: A-7E Corsair II, HAF, 1:72 HobbyBoss


23 18 April, 13:04
přidal nové fotoalbum.
70 obrázky
Trumpeter HMS Belfast w/ Flyhawk (Huge!) detail set
1:350
After over 2 months and more than 150h, I think ... it has finally finished! I thank everyone who has followed my projec...


Projekt: HMS Belfast 1943 Trumpeter 1/350


 1+
1+ 77 23 December 2022, 17:59
Hey zach Wilson, oh yes you can say that. I'm curious how I'll deal with it 🙂
31 December 2022, 15:22
Nice to see another Belfast WIP. You made an excellent start on it 👍
I started mine in 2013 (not a joke) but had a lot of time in between not working on the model. I hope to finish her soon. Feel free to have a look to my WIP here on Scalemates:
HMS Belfast | Album by Christian Bruer (1:350)
I used the Flyhawk Set as well, but also the White Ensign Set and scratch building.
Looking forward to your progress and Happy Modelling 🙂
Christian
1 January 2023, 10:06
@Christian Bruer: lovely work, christian! I can then use your wonderful model as a reference if I don't know what to do 😛
1 January 2023, 12:05
Q: How do you deal with any annealing issues? I thought that annealing metal small might melt off the smallest parts. Haven't tried annealing yet myself, except for a large PE piece on some project.
10 January 2023, 20:54
@Treehugger: I generally don't glow PE parts. I glue all PE parts with the MXBON superglue in viscous, liquid and very liquid. Due to the capillary effect, the adhesive quickly gets into the crack, so I can press the part with a pin, two seconds and the part is fixed. If small gaps remain, use a fine pin to put a very thin layer of superglue (it has to be very liquid!) into the gap and press it down again with the needle. So far it works very well for me.
10 January 2023, 21:01
Very nice progress. The PE work on the aeroplanes are very good.
19 January 2023, 01:51
R K check the hight of the boat deck house aft of the forward funnel. I extended the hight a few milimeter, otherwise the boats on the cradles below will not fit! Check image 112 - 118 in my WIP. Add the one or other milimeter more than I did because of some layers of paint on the deck, cradles boats etc.!
Nice progress by the way 👍
Happy Modelling, Christian
19 January 2023, 19:49
@christian Bruer Thank you for the hint! I had already seen that when looking through your pictures and in fact the height doesn't match.
20 January 2023, 18:35
Height correction made on the middle deck. Thanks to christian for the tip! 🙂
21 January 2023, 12:01
Fantastic progress and my hat off to with your photoetch work.
13 February 2023, 11:30
Don't put it to water! It is gonna sink with all those metal! 😜
Kidding aside: anxious to folliw along the last meters.
13 February 2023, 17:39
The final steps to completion! Tomorrow the flags will come and then there will be the final photos when the sun is shining!
26 February 2023, 19:11
excellent work Rene. What are you using to hold the smaller pieces in place as you glue them together? Looking at image 21 I am baffled by how precise and clean that work is.
27 February 2023, 15:50
Just received a picture of the original in London. Now you complete yours. 🙂 Great job, top result
27 February 2023, 20:32
Thank you so much folks! @zach: With a magnifying glass, a calm pulse and good superglue ("VMS glue on power!"), I somehow managed to do it that way. I was amazed myself! 😉 @Michael: You were in London and saw her? I envy you!
28 February 2023, 18:35
Well unfortunately it wasn't me who was in London, but a friend of mine. He visited the Belfast.
28 February 2023, 23:22
Wow this is just amazing work!!!! I can only strive to be this good of a modeler.
1 March 2023, 05:18
Fabulous. I've just invested in AIP's re-boxed version of this kit and if I can get looking half as good as your's I'll be more than pleased!
18 April, 14:49
Wow! Some inspiration to get moving on mine that has been on the shelf since atleast 2015 standing silent vigel with conning tower and a few turrets in place while time past it by it does feel like the result will be a little underwhelming when you see one with all those extra goodies
18 April, 22:36
What Product Type should items like this belong to? I would suggest "Materials"; the same would go for all sheets of stone work, bricks, corrugated metal, etc.
Cobblestone (MIG Productions MP 72-085, 1:72)
")
Cobblestone (MIG Productions MP 72-085, 1:72)
19 April, 04:31


Spelling should be corrected to "Constructor" in this Topic:
SCM Topic: Autocar Construcktor
SCM Topic: Autocar Construcktor
19 April, 03:26


přidal nové fotoalbum.
43 obrázky
1:72 - MATCHBOX - Hawker Hurricane
1:72


Projekt: 1:72 - MATCHBOX - Hawker Hurricane


 1+
1+ 8 18 April, 19:07
An Artitec brand kit with no. 10143 came up as a potential double when trying to register kit 10.143 (the correct number), but I cannot find any kit 10143 in searches. Weird. Anyway, 10143 can be removed as a double, if it exists.
19 April, 02:03
přidal nové fotoalbum.
4 obrázky
1/72 Revell F-16AM "Tiger Meet 2009"
1:72
Well 87's paint has finally started...


2 3 January 2021, 12:13
přidal nové fotoalbum.


5 12 April, 21:44
přidal nové fotoalbum.


1 3 January 2021, 12:11
There are two brands called PECO: one "PECO" and one "Peco" (not counting "Model Scene (Peco)".
For some reason "Peco" doesn't come up in brand searches. I have moved the few items there to "PECO" so "Peco" can be removed.
For some reason "Peco" doesn't come up in brand searches. I have moved the few items there to "PECO" so "Peco" can be removed.
19 April, 01:45
přidal nové fotoalbum.
88 obrázky
DeHavilland DH.88 Comet 'Grosvenor House'
1:72
That much for today. A few details and some touch ups are still missing. Maybe tomorrow I can finish it


 6+
6+ 83 4 December 2024, 11:33
Those familiar with the kit might have noticed the absence of the firewall. I simply lost it and decided that I will just omit it as it is invisible anyway.
5 December 2024, 17:42
A very interesting plane! You made a good progress with another (parallel?) project 👍
5 December 2024, 18:39
Interesting build and very promising start - I´m in for this 🙂
9 December 2024, 09:13
Interesting approach to simply sand the control surface structure in the primer. I'll keep my fingers crossed for a good result.
18 December 2024, 13:53
As a base for the red color, you need to use yellow, then the red will be bright.If you put red on white, you will get just pink.
18 December 2024, 14:08
Michael, using different primers for one top coat is my idea! The usage of my idea is geBIERenpflichtig! 🙂
18 December 2024, 15:38
Looks like you're the partial member of The Infanous Order of The Pink Primer 😋
18 December 2024, 18:19
@ Nicolas: I cross my fingers too. But looks like I have to do some homework before the final coat (see below 🙂 )
@ Denis: thanks for your input. I tested your suggestion on a scrab wing. With LP-7 I get a nice hue as well over white primer and pink base alike. Problem is that there is almost no difference between them. Over yellow (XF-3) the red receives a rather orange hue which I do not like for this project. But I am optimistic to finetune that and use lighter yellow or buff as base coat and see how that turns out. I'll keep you posted.
@Frank: So, se wollen erheben ne kleene GeBIER?!
Da trifft es sich ja gut, dass mein diesjähriger Adventskalender aus 24 Flaschen feinem fränkischen Bier aus 24 verschiedenen Brauereien besteht. Es wird mir eine Freude sein, ein-zwei-drei mit Dir zu teilen - in N?! In M?! Gruß 🙂
@Lukasz: I applied, but as PartPrimerer I am only allowed into the Entree so far. Full membetship pending. 🙂
Welcome Guy
19 December 2024, 09:52
Yes, I will be interested in what your red color will turn out to be. I recently painted small parts red, but there was a noticeable difference in color, depending on the color of the soil. Perhaps your LP-7 is better.
19 December 2024, 10:09
I tested a couple of base coat variations for LP-7. A nice combination in my eyes is achieved when using Mr. Hobbycolor H413 yellow as base for the darker areas and pink (Tamiya X-17) for the lighter ones. But that would have meant to redo the whole base paint. So I stuck to my combination and mourned the loss of contrast.
21 December 2024, 23:27
Add some white today and it will be perfect Xmas gift just in time 😋
1 24 December 2024, 09:43
Really great job. I appreciate your approach.
I didn`t test different base color. I used GS Aquarius H23 at first piece at black surfacer, and it wasn`t fine. I will use gloss yellow at 2nd piece.
How did you do such perfect wing bottom side. It looks really nice. I had relatively big gap there and some residual step although I precisely brushed big material layer out from both wing half. Maybe, the used glue did a step at the end.
I thing, that this, wings bottom, is weakest part of this model although, as you ar writing, engine nacceles also need some attention.
26 December 2024, 13:04
Welcome mates and thanks for your encouraging and funny comments. Bottomline I am quite happy with the shade of red. I just haven't made up my mind about how gloss it should appear finally. If I would have had access to a cutter I would have scanned the bigger decals and cut masks for painting the letters.
Now what's left are the tail skid and a few bits and pieces at the wings and the stabiliser.
@Jakub: wing assembly requires some scraping and dry fitting. With super thin cement I didn't encounter any issues afterwards. But there still remains a considerable gap towards the flaps and ailerons which I filled with super glue.
1 27 December 2024, 08:21
Thanks mates. Let's see whether the year is still long enough to finish the plane.
1 28 December 2024, 17:59
Nice 👍
Regarding the cutter - you know I can always help here! If you still want to do it may another mate can scan the decals ... or next project.
29 December 2024, 20:08
I agree with everyone; great job, nice result, and I like it very much.
30 December 2024, 21:10
Thank you all for sneaking in.
Couldn't finish it last year, so might be the first to be completed this year.
Wish you all a lot of happy modelling in 2025.
1 2 January, 01:27
Thanks mates for yor very nice feedback. Is a nice kit. Still pondering about a few details for a little vignette.
5 January, 12:23
The figures and other elements look great. Are they 3D printed or commercial?
13 January, 19:39
Thanks Christoph and Cuajete,
all items are commercial, some classic resin casts, some 3D-printed.
1 13 January, 22:27
The comet turned out beautifully 😊 - excited to see the finished dio my friend 👌🤞
24 January, 08:07
Thank you Thomas.
progress is a bit slow as the last figure I bought needed a decent makeover due to casting imperfections. Same with the barrels I bought. Issues I weren't used to from.Balaton and White Storck Models.
24 January, 13:47
Thanks Alec. Yesterday two figures were painted, the barrels redone and after I went full circle I am back again at the high base which I left for - first a bigger, then a smaller one with different layouts. Now I am confident with the actual concept and I am optimistic that I can still finish it for the Moson Model Show end of april.
1 4 April, 17:03
I like the red headdress; the pump on the barrel looks nice, and I'm getting excited about the completed dio.
14 April, 07:13
Thanks Nick and Jennifer for the heads up. I finished preparing the base and should be able to put things into place within the next days.
14 April, 15:15
Thanks Cuajete. Little by little I inch myself toward the finish line.
1 17 April, 07:03
přidal nové fotoalbum.
29 obrázky
Frog 1/72 Grumman Wildcat/Martlet
1:72


Projekt: Frog 1/72 Grumman Wildcat/Martlet


3 19 April, 01:26


")
přidal nové fotoalbum.
26 obrázky
hOBBYBOSS 1/48 RAAF F/A-18C
1:48


Projekt: HOBBYBOSS 1/48 RAAF F/A-18C
Scratchbuilt
1 16 April, 09:18
přidal nové fotoalbum.
42 obrázky
MENG LS-015 1/48 F-4G 
1:48


Projekt: MENG LS-015 1/48 F-4G
Scratchbuilt
2 15 April, 23:41
přidal nové fotoalbum.
18 obrázky
MENG LS-014 1/48 EA-18G 
1:48


Projekt: MENG LS-014 1/48 EA-18G
Scratchbuilt
1 15 April, 14:38
přidal nové fotoalbum.


11 17 April, 23:36
Very nice result! I like using craft paints too. Definitely more cost effective thank my beloved tamiya.
1 18 April, 02:51
Thank you Ben, yes the cost of the craft paints are pretty inexpensive.
19 April, 00:07


přidal nové fotoalbum.


13 20 January, 20:50
Air cleaners were created by cutting and stacking Evergreen sheet styrene and then sanding and painting. I came across this idea from another builder of the same kit online from a post from a few years back.
20 January, 20:56


/cs/search.php?q=*&page=newsfeed&fkSECTION[]=Newsfeed
search-solr.php?lang=cs
35
35
/cs/search.php?q=*&page=newsfeed&fkSECTION[]=Newsfeed
35
todo