Junkers Ju87 B-2/R-2 Stuka - WIP

I started with the cockpit, straith from the box. No extras were added.

I started with the cockpit, straith from the box. No extras were added.

I started with the cockpit, straith from the box. No extras were added.

Next the cockpit was fixed in the fuselage. I chose to accentuate the panel lines quite heavily.

The panel lines will be preshaded, a job I'm kinda afraid of, so Guido will come at my place to help me and show how it's done.

Next up are the wings. Same procedure for the panel lines. Fitting the upper wing and bottom wing parts didn't go so easily.

Because of this difficult fit, I have to sand quite a lot at the wing extremes. On top of that part of the plastic of the right bottom wing wasn't injected completely. So I decided to cut off the flaps, prepare the wings properly, and re-attach them.

The nose-cone with propellor dryfitted. This is a tricky sub-assembly with lots of small parts forming the nose once assembled.

Dryfit of the fuselage with the wings and the nose-cone. Still some more filling and sanding to be done it seems.

Dryfit of the canopy. I will propably fix it in closed position, since I didn't add any details to the interior. My next airplane will receive more interior detail.

First image of the repaired Stuka; the battle damage should be gone, or at least made invisible to the eye 😉

Guido came at my place to show me how preshading should be done, or at least how he does it; we're not sure if the 'real' airplane builders to it the same way, but this seems to work for us...

Top of the airplane was preshaded with flat black, the bottom was doen with a dark grey. Next were the wing tips and the strip around the tail, which should be yellow, so we decided to give them a white primer coat first.

Top of the airplane was preshaded with flat black, the bottom was doen with a dark grey. Next were the wing tips and the strip around the tail, which should be yellow, so we decided to give them a white primer coat first.

Next up: the yellow areas such as the tail and the bottom wing tips.

Next up: the yellow areas such as the tail and the bottom wing tips.

Next up: the yellow areas such as the tail and the bottom wing tips.

Here the Tamiya AS-5 light blue has been decanted from the rattle can to the airbrush, and then diluted with Tamiya Lacquer Thinner. It was airbrushed on the plane very carefully.

Here the Tamiya AS-5 light blue has been decanted from the rattle can to the airbrush, and then diluted with Tamiya Lacquer Thinner. It was airbrushed on the plane very carefully.

Here the Tamiya AS-5 light blue has been decanted from the rattle can to the airbrush, and then diluted with Tamiya Lacquer Thinner. It was airbrushed on the plane very carefully.

After a few hours of careful masking, I think the model is ready to be painted it's camouflage scheme...

This is the challenge: transform this side to a realistic looking aeroplane...


Unfortunately, the Stuka has crashed in a million pieces, and I can't even find all the missing parts anymore to restore it. Shit happens. The project looked as if it were terminated. However, after some time to recover, I managed to repair the damaged pa
Komentáře
14 May 2012, 11:57
You have done some really good work. Is this a Tamiya original or an Italeri rebox?
14 May 2012, 12:35
Its used to be said thats its a good kit, can you confirm? Nice and clean build, so far!
14 May 2012, 14:26
Thanks fo the info, Guido! Are the panellines as huge as they look on the pix?
14 May 2012, 14:57
As Holger said, the panel 'lines' are huuuuge, better fill 'em up completely ! 😉
14 May 2012, 15:26
@Holger: a good kit? I wouldn't say so. The fuselage parts fit well, but the wings don't. It's so bad that I had to cut off the flaps in order to be able to sand the wing parts into shape. On top of that, something weird is going on with the plastic: it splits in fine layers when you try to scribe or cut in the material. I've never seen that before. So scribing fine panel lines was impossible, because it caused splitting the plastic and I had to sand the bad plastic away. Scribing deeper seemed to help. That's why the lines are so huge. But we're going to try to improve things with the paintjob. After all, this model is just another guinea pig to try out some stuff; I'm far away from the skill level I reached in car modeling. I'm certainly aware of that 😉
15 May 2012, 07:55
Hey Guy, thanks for explaining your problem. Had a similar problem with an Revell M7 (Italeri rebox). Fortunately the materialthickness and scale didnt made the scribing a problem, but was not nice to clean the scribed areas. I solved the problem with grinding my self a scriber from an old needle.
But keep on learning and im convinced the Stuka will become great!
15 May 2012, 08:22
@Guy: Brittle material doesn't lend itself well to scribing, but splintering also is a function of pressure applied and the shape of the scriber. Also makes a difference whether one is scribing new panel lines or reworking existing lines.
15 May 2012, 09:05
Unfortunately, the Stuka has crashed in a million pieces, and I can't even find all the missing parts anymore to restore it. Shit happens. This project is terminated.
16 May 2012, 20:49
WTF! Sorry for that! Hmmm, sometimes, shit hits the fan... Do you plan to build a new Stuka in the future?
16 May 2012, 20:59
Well, i pulled myself together today and i tried to scratchbuild the missing parts. The stuka has been re-assembled now, although it doesn't look as sharp as before. But at least it will be built and finished, and the result will always remember me of the big crash of may 16th...
17 May 2012, 17:30
Awesome, thats great to hear!!! I hope you can progress now, without any incidents!🙂🙂🙂
27 May 2012, 18:46
The bottom of the Stuka has been airbushed by Guido showing me how it's done. Thanks mate, that was a great demo, and all it costed me was a piece of lasagna and 5 metal pins for the Cobra 😉 I hope I can continue the job without ruining the model...
28 May 2012, 07:34
You both will do it! And for a piece of lasagna, i would have showed you how to brush it, too;)
28 May 2012, 08:26
I'm gonna try my best; the masking has been done anyways. The painting will have to wait until tomorrow though, because now I 'have to go' to a BBQ 😉
28 May 2012, 10:37
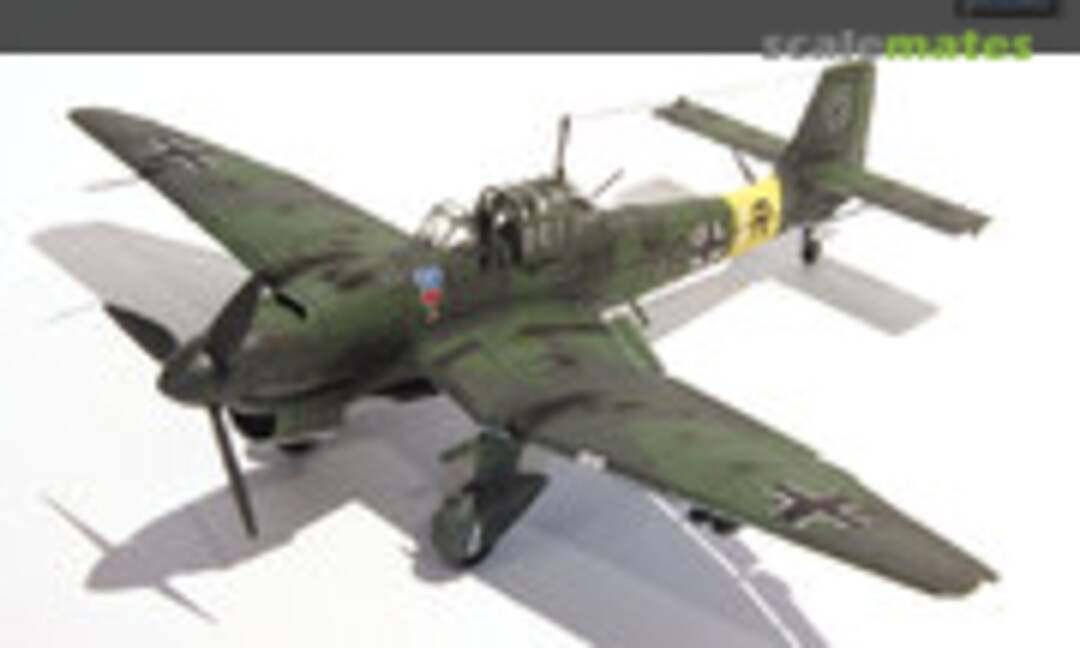
I've been spraying a lot since my last update, but since SM has been down for a while, I didn't get the chance to upload any pics. Now you get the whole lot
Currently I'm kinda stuck though, because the kit doesn't have any 'swastika' decals. I could understand this as a sort of censor action, but the odd thing is that my other 2 German WW2 Tamiya airplane kit, a Messerschmidt and a Focke Wulf, do have swastika decals. Weird.
Anyway, the missing decals have been ordered; it's just a matter of days. In the meantime I have fun with my Ferrari 126 CK kit 😉
3 June 2012, 20:55