McLaren MP4/5 Honda - GP Brazil 1989 - WIP

This is the real car that I want to replicate in scale. Recently, Fujimi has released this car as a 1:20 full plastic kit, but since I had already purchased this MSM transkit I intend to build it.

This is what you get in the transkit: a resin body + chassis, 2 front wheels, rear wing supports, a new windscreen and decals.

So I started to clean up the resin body and to enhance the panel lines. Next I fitted the Tamiya cockpit hub + seat.

Then I adapted the suspension arms to this resin body, which took me a day! I also had to 'steal' the front wing from the Tamiya donor kit.

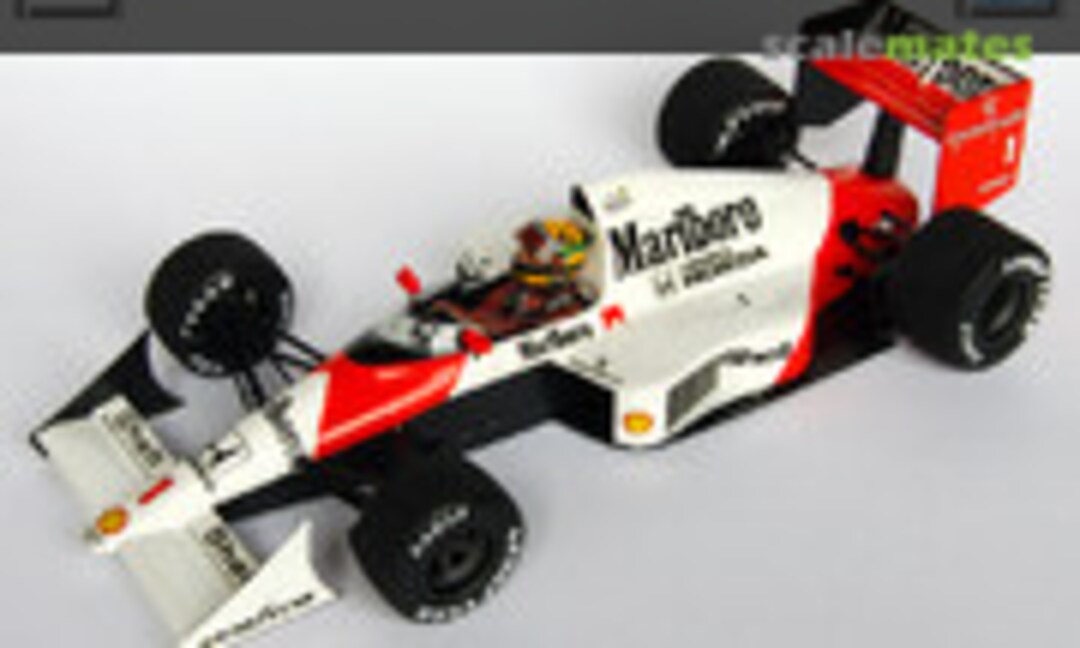
The MP4/5 didn't look the same in every GP! In fact, the only GP where Senna had the narrow cowling in front of the radiator was the Brazilian GP (see photo). Since this is the version which MSM chose to replicate, it is the version that I will make.

Now let's concentrate on the rear suspension. First I drill 7 holes to make sure I can always join the chassis and the body exactly the same way.

Next I clear out 2 important areas, by milling the resin material away. This results in dusty lungs and a very dirty workspace...

But it was worth the effort: the cockpit at least looks like it is possible for a driver to stretch his legs now.

The transkit provides in a part which should be used to replace the kit gearbox and rear wing support. But when I look at the rear of a McLaren MP4/5...

... and I compare this with a picture of the rear of a McLaren MP4/4...

I'm convinced that the resin part (to the right) is the gearbox of a McLaren MP4/4! So I decided not to use it and scratch the rear end of the MP4/5 myself (to the left).

I also decided to keep at least part of the engine instead of cutting it away completely, to ease the installation of the gearbox.

I had to cut away a part of the top and a part of the bottom.

At the bottom I closed the gap again with plastic sheet to be able to fix the engine to the chassis.

The hole in the engine's bottom will fit over the alumium tap that I fixed to the chassis.

Surprise! When joining the chassis and the body, I realize that the diffuser is NOT very symmetric...

But at least my idea of keeping part of the engine works. Here you can see the rear suspension dry fitted to the body.

It looks ok, but I still have to relocate the diffuser, and more importantly: I still have to check if the rear bodyparts fit between the suspension arms.

Relocation of the diffuser was not too difficult. Just cut and glue in place again.

This picture shows how difficult it will be to squeeze the rear bodyparts between the suspension arms...

Without the rear suspension, everything looks ok.

But I have no clue how to find out if the rear suspension arms will fit the gaps in the rear bodyparts, and I need something which is fixed to the chassis to be able to do some measurements.

After a good night's sleep, I found the solution: when I am able to join the lower suspension arms to the gearbox with the rear bodyparts in place, I could do any measurement I want. So I cut the lower arms away and replaced the joints by scratched parts.

Now it is possible to fix the bodyparts to the chassis, since I can put the lower suspension arms through the gaps. And it's a good thing I decided to do it this way, because the gaps were all in the incorrect locations! I had to relocate them all.

Same procedure at the other side. Fixing the bodyparts, measuring the arms, and relocating the gaps.

Finally the engine block + gearbox can be dry fitted to the chassis with the complete suspension in place.

The lower suspension arms can be attached or detached by simple bolts.

And now I can finally fit the body on the chassis with the rear suspension in place: some extra tweeking was nessecary, but in the end it out works out.

And on the other side everything looks allright as well...

I received a few remarks from fellow modelers who told me that the top cowling should be as wide as the bottom monocoque, which wasn't the case. After careful consideration, I decided to tackle the problem and add some plasticard to the bottom monocoque.

At the same time I sanded down the top cowling a bit, so they would meet somewhere in the middle. Now they are perfectly leveled. This caused some extra adaptation works of the front suspension. Finally I put the parts in white primer.

The primer had enough time to dry, so I did a final check of the body, and I slightly sanded it to remove tiny bumps.

Next I sprayed it with Tamiya TS-26 Pure White.

Now I will let it dry for at least 24 hours.

Next I will mask the body to spray the McLaren red...

Once the white paint is dry, I started with the masking job. I used BMF for the sharp outlines, and Tamiya masking tape to complete the masking job.

I also masked the bottom side (not visible here) to make sure no paint can slip underneath and ruin the paintjob.

I also masked the rear bodyparts which have to be Marlboro red as well.

And here are all the parts, besides the bodyparts, which will be spraypainted Marlboro red as well.

After the paintjob, I removed the masking as soon as possible to avoid 'breaking' of the paint when removing the tape.

I'm pretty pleased with the paintjob; the lines seem to be straith and clear.

Picture of the rear end of the car.

I'm glad that the rear bodyparts fit well againts the main body.

Next step was the decalling job.

It's a mixed combination of Tamiya decals and aftermarket decals.

Just for fun, I dry fitted the rear view mirrors to the car.

The decals still have to be polished, and then I will protect them with a clear coat.

And here I dry fitted the driver figure, to get an idea of how the model will look.

While the body is drying, I can still go on building the driver figure.

The body has been sprayed gloss red, next I put all the decals on, and finally I sprayed a flat coat over the figure. Now I can start painting details.

The body has been clearcoated.

The clearcoat is ok, but unfortunately, it changed the color of the Marlboro red...

I'm not sure if you can see it on this picture, but the red on the body looks more orange now, in comparison to the red on the rear wing which hasn't been clearcoated yet.

A second surprise came when I wanted to apply the decals on the rear wings. The 'Courtaulds' sponsor was not the same during the whole season. Here you see it during the Imola GP.

At the end of the season the 'Courtaulds' sponsor was altered. Since the decals available are those of the McLaren MP4/5B, looking like this one, I can't use them because I'm making the McLaren of the Brasilian GP. So I had to order an extra decal sheet..

That is why I didn't apply any decals yet to the rear wings. The other wing parts have been decalled.

In the meantime I concentrated on the driver figure. It was detail painted and shadows have been added. Next I fixed the safety belts.

The small white stitches have been drawn with a white color pencil.

The helmets have been clearcoated, and the face have been painted manually. I also painted the white of the eyes. Of course this is not finished yet. The helmet on the right is the MP4/5 helmet; the one to the left is a MP4/4 helmet.

I dry fitted the helmet on the body, to give the correct impression of the driver figure.

During his McLaren carreer, Senna used basically the same helmet livery/sponsors. But the helmet interior changed from time to time. Here it looks a tan color.

Here the interior looks bright geen.

And here it looks blue. I think he used these colors when he felt like it; I chose to paint the interior bright green because I think this was typical for Senna, no other driver ever used this to my knowledge.

So that is what I did. After the completion of the face I painted the bright green, next I painted the flat black protection.

And this is how the helmet looks in the body. Now I can start applying details like the vizor, the intercom cable, and so on.

Today I added some small but important details to the helmet. To the left side I added an intercom connection + cable.

The clear vizor was also installed and sealed with 2 aluminium rivets. Next I fixed the last 'Honda' decal to the vizor.

Today I dry fitted the helmet on the driver's body and into the cockpit.

I only now notice that a part of the 'Courtaulds' decal at the right hand side is missing, which probably happened during compounding (and before clearcoating). I'll have to solve this one as well...

Close-up of Senna behind the wheel.

And a front shot of the driver.
Komentáře
4 February 2013, 12:05
Next year, on may 1st 2014, it will be 20 years after Senna's fatal crash at Imola. As a tribute to the all-time best F1- driver I want to finish all my 1:20 kits before that day. So I started to build the 1989 McLaren MP4/5 this time...
4 February 2013, 12:38
I've got a Tamiya MP4/8 with rain-tires for his Donington car... perhaps I should start that one next 🙂
4 February 2013, 19:04
After a week of preparations to the main elements of the model like chassis and nody, I think I have reached the moment I can start applying some paint...
8 February 2013, 17:37
Excellent work! You must be a very patient man to keep fiddling with the rear suspension...
14 February 2013, 08:52
Every time as I ve a look on your workbench, I`m paralysed!!
Your skill is so unbelievable high, that I´m thinking I built only wrong model themes!
I must built a F1 racer once!
14 February 2013, 20:22
Like the motorcycle theme, I`ll do this! Yes, I will do it!
I hope we can talk a little bit about painting Formula One Racer in Mol? Would be cool!
Greetz
Dirk
14 February 2013, 22:04
Superb work Guy, I'm absolutely thrilled by your fine detail work. I get more and more frightened to start my kit. I just thought (like Jeremy Clarkson) how hard can it be?? But now...
26 February 2013, 11:04
Lol, frightening people is the last thing I want to do with my thread. On the contrary, I'm hoping to help people here and there where things start to get a little complicated or confusing...
26 February 2013, 12:11
Well yes, help is what I definitely need 😉 How do you paint the face? Do you use brush or airbrush, which colour, etc. I bought some eyeball decals and thought that would be nice. Do you have any experience with that? Anyway, you're work is always an inspiring example!
26 February 2013, 12:26
Faces like this one, almost completely hidden behind a helmet, are painted by brush. First a base coat of flesh (enamel) followed by a wash with some brown acryl, to prevent the base color from dissolving again. Next a little touch-ups with enamel again. The eye-white and eyeballs are done manually as well, but I think the eyeball decals are a good idea, I'l probably try that next time. But complete faces like the Jochen Rindt face are done by airbrush.
26 February 2013, 13:04
Thanks a lot Guy for your reply. I had no idea painting faces in two colours. I'll give it a try and will show results asap.
27 February 2013, 22:17
Although its a Mm - Mm - Mc - Mm - Mm an unpronouncable F1 car You've done a grand job there Guy. Faultless👍8)👍
28 February 2013, 07:36
Excellent Gweedo, took me a couple of seconds but it clicked, I've been laughing since... 👍😄👍
28 February 2013, 20:41