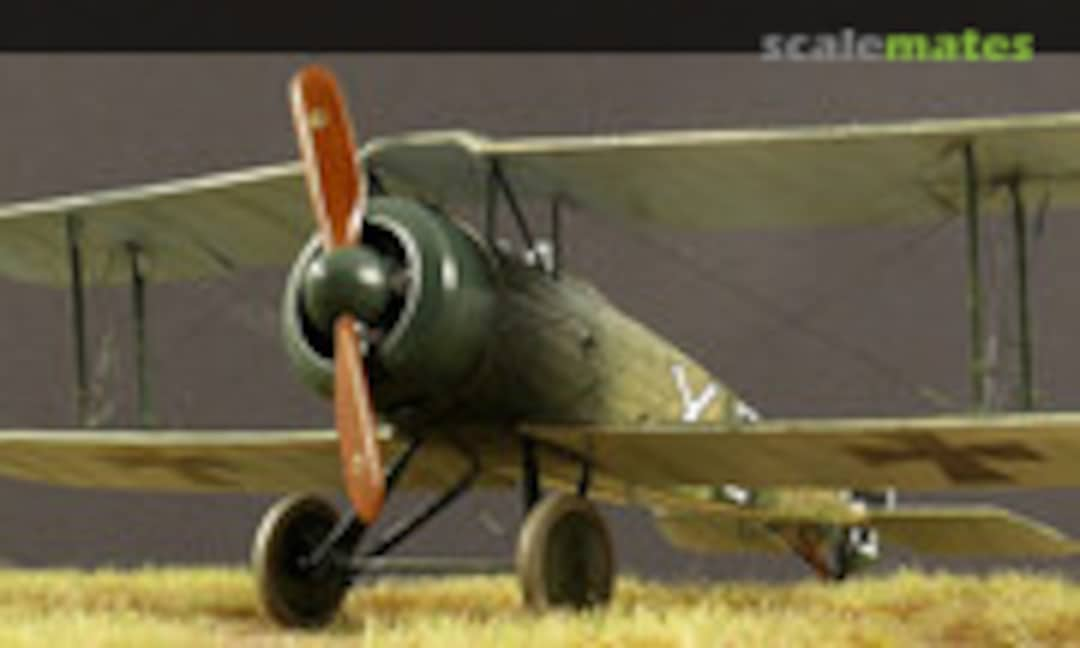
Work in progress - Fokker D.V

Another sacrilege: Limited edition kits are for collecting and not for building! No matter 😉
I really like the painting on the cover of the box!
I really like the painting on the cover of the box!

The first task was the removal of the ailerons as on my other birds. I primed the wings white and added the first PE parts.

The ailerons are glued in place and the ribs are masked for shading.

Here again the nice PE detail. The gap was covered with thin ply. It was not on all aircrafts done, but it is a interesting detail. And if I zoom into the crash picture of my plane, it may be there.

Shading done and unmasked.

The Datafile talks about linen or light blue on lower wing surfaces. I decided to use Drooling Bulldog "Pale Blue".
Sorry, the colors are not matching the model ones.
Sorry, the colors are not matching the model ones.

The upper surfaces are painted with Gunze flat linen, as base for the oil paint.

Finally I played with oil paints.


Created from 46 parts. Some spare parts are also included. Yesterday I mounted already the cylinders to the crankcase.

To insert the small "brass" bushes I use a 0.2mm drill instead of the provided tool.

Now all parts are painted with different Alclads.

At first an addition to the last update. I forgot to show the kit engine, in case someone wants to build this kit out of the box.

The rotary engine again alone. I used Dark aluminum, Exhaust Manifold on the heads, Hot metal sepia.
As little joke I used on one cylinder hot metal blue. It was replaced or running hotter 😉
As little joke I used on one cylinder hot metal blue. It was replaced or running hotter 😉

The finished engine from the back. I added thin copper wires.

And the front view in artificial light.

As next I thought about mounting of tail plane. I created two holders made from nickel silver and brass sleeves.

Instead of a thick plastic axle between both tail plane halves I used 0.6mm nickel silver wire. I made one piece control horns with a hole in the middle (instead of the four from kit PE horns) and soldered them to the new axle.

Later I need only two thin cuts in the end of the fuselage and can glue the unit in.

Front view. I used very wide veneer strips so the grain goes straight through.

The back view.

And the interesting side view. It shows a thicker wood on the back side but thinner at hub.

Dry fitting with cowling and spinner.

The painted airscrew together with the mentioned failed one and the kit propeller.

The pipes are 0.6mm brass, on the front the Connecto crosses are used.

The frame is completed with soldering.

The seat is plugged to the side frames with thin pins. The floor is replaced by a thin layer birch wood.

Also for the seat I glued two layers birch veneer and sanded it very thin.

Tinned in comparison to the kit seat:

After painting the kit frame grey green and the seat black (I know, normally only moving parts black, but the seat frame looks very dark on the photos) I mounted it. The back of the seat is a left over from HGW seat belts - a piece of linen.

I removed some kit details, which where not on the pictures, so I have to add some again. Here a switch on a PE rest and a switch in brass (PE from Parts).

The frame fits in the fuselage halves.

So I remembered my equipment for brazing with silver solder (a paste with flux, 610°C). Careful, the burner reaches 1300°C!
With this I brazed 0.6mm brass pieces to the axle of 1.0mm piano wire.
With this I brazed 0.6mm brass pieces to the axle of 1.0mm piano wire.

This was easy because the axis lies flat on the pieces.

Then I could solder small pieces of thin brass sheet metal on the side with an electric soldering iron without endangering the other connection. I then filed the sheets into shape.

This is how the struts of the kit will look like. If I get caught, I will exchange them as well.

Ok, I built also a pump for the cockpit.

The mostly self made stick and rudder pedal.

A better viewing angle

Rigging added.

I turned and milled small brass parts, a bearing for rotary engine and airscrew and replaced a small plastic piece by a real brass fuel cap.

According to the original pictures I formed some alu plates.

After painting control stick and rudder bar all parts are mounted.

And again in a side view.

The seat belts from HGW/Eduard are in place. A light washing with oils are also done.

A dry fitting shows, that some of the created details are visible later.

Ok, the original pictures shows even more details, but enough is enough.
The cockpit is mounted into one halve.
The cockpit is mounted into one halve.

Last check: Anything forgotten? Control wires! Added some.

Fuselage is finally closed and drying now.

The are already holes for both, but I think I need to move the filler out of the middle to avoid a conflict with the gun.

The struts are thin, fragile, round and would need a lot of cleaning. The photos of the fuselage structure shows streamlined struts, so I squeezed 0.7mm brass and soldered the N-struts in a crazy construction.

The struts.

Fits as expected, as I put the pins in the same distance into the wood before.

The rear struts are a single piece of squeezed pipe, but I can set the angle of the top wing with the length of the struts.

A missing thing was the tail framing to hold the skid and rudder.
I tried to replicate it from 0.6mm brass micro tube with respecting drawing and pictures. I run into trouble with size, angles, conflict with rudder horns etc.
Later I realized, that the tail construction looks very similar to a Fokker Eindecker, so I had also a look into the Fokker Eindecker Compendium 1+2. This was very helpful!
Now it is not completely correct, but a good compromise between reality and kit parts I hope! I used again a Connecto cross for the connection.

The two struts are so robust that they can hold the wing even without the rear struts! On the left there is one kit strut.

I added also pins to the landing gear.

The springs needs to be added after painting.

Before painting the fuselage I also have to match the armament.
The LMG of the kit lacked details (right bottom). Trainers war often without a gun or with older Spandaus, but I had trouble to fit a early Spandau from Gaspatch in. "My" machine was in marine usage, so I assumed they used a normal 08/15. From my Siemens-Schuckert build I have some left over of a Eduard set 648177.
The LMG of the kit lacked details (right bottom). Trainers war often without a gun or with older Spandaus, but I had trouble to fit a early Spandau from Gaspatch in. "My" machine was in marine usage, so I assumed they used a normal 08/15. From my Siemens-Schuckert build I have some left over of a Eduard set 648177.

I cut the closed barrel of, plugged one of the build master barrel sets (see the Albatros Dr.i project) on and manipulated the fuselage until it fits.

Here the back part is complete: 3 resin and 7 PE parts!

Painted with Alclad steel, followed by a thin layer Alclad gun metal and a dry brushing. Finally glued the barrel with jacket in place.

This fits now and can be stored safely for mounting after the paint job.

The skid is made from wood and has a metal end on the ground.

The fuselage is primed and I wanted to use the 3D decals provided (in double amount) by the kit. But I failed to use them. They are to be applied as normal decal, and later, after drying, the upper clear film should be peeled off. But it works for me only on parts of the decals. The upper foil is to sticky and parts of the decals peeled of from the model with it. Then I try to secure it there with clear coat, but the Gunze one dissolve the decal.
At the end I applied Eduard stitching PE. That is also 3D 😉
At the end I applied Eduard stitching PE. That is also 3D 😉

All the metal parts tinned.

The kit provides also some nice steps with rings. The steps are mounted on both sides to the steel frame and the canvas has some rings at that position to be able to put it over the steps.

After pale blue on lower surfaces ...

... I masked and applied linen color on top.

And finally I have applied the streaks with oils.

A rotatable paint stand is helpful.

After seeing the pictures here I think I will remove a bit more paint.

I removed more paint, this is the final version.


During the hardening time I thinned the cowling, because it was very thick. I would be possible to fit the engine, but at the end the two parts (because of the lower cut outs) separates again.
So I started the lathe!
So I started the lathe!

This time I used brass because it is easier to work with and it is not easy to apply paint to aluminum.

The rotary has enough space now. An article in the internet say 107cm diameter, +/-1cm. So I used 108cm which is 22.5mm in 1/48. The wall thickness is 0.4mm.

As planned I milled the cutouts on a dividing header.

I polished the cowling and since it is a bit on the heavy side, I soldered thin brass wires in for an easier mounting, but at the end it doesn't work as expected.

The tinned cowling prepared to be painted dark green with the rest of the metal panels of the fuselage. But I need to wait for the hardening of the oil paint before.

For mounting of the cowling I made a ring. At first make sure it has a tight fit (outer diameter), then I removed the inner part.

I glued the ring with cowling plugged on in place and tried with engine, it is able to rotate freely. Then I masked all metal panels and sprayed Alclad Dark aluminum.
On top of that a layer of a Gunze dark green. I decided for H302 because it has light grey touch, may be also from the alu below, as on the cover picture of the kit.
On top of that a layer of a Gunze dark green. I decided for H302 because it has light grey touch, may be also from the alu below, as on the cover picture of the kit.

After a drying I added the decals, here on one side of the fuselage, ...

... and the other side with the other parts.

A teaser (some things are glued, some only plugged on) how this bird will look like hopefully soon.

The plugged on cowling holds without glue.

My struts are made from 0.7mm brass micro tubing and real wood, of course with a hollow.

With 0.5mm brass and holes in the wings the struts are able to hold the wings without glue.

Tried different things for the safety bands. I was not able to glue thin alu strips cleanly, so finally I used 0.4mm masking tape.

Secured with Gunze Metal primer.

For the rudder I made a "one piece" control horn.

So the rudder could be mounted, interesting construction!

The next task are the control wires.

And in full view:

The landing gear was prepared yesterday and later painted

One Ikea drawer with a lot of prepared parts for a long mounting session.

A check reminds me that the steps are needs to be done before! The four steps (one spare) should be bend and glued in place. I don't like that because they can bend easily completely or break off.
So I drilled 0.3mm holes for a brass wire.
So I drilled 0.3mm holes for a brass wire.

The wire was soldered from below, here in comparison to the real step. The steps was mounted to the fuselage structure.

All four prepared.

After drilling holes and cut the wires I could mount the steps in a safe way.

Then I glued all the prepared parts in place.

After final mounting of the engine I added also the cowling

I annealed lightly and prebend a 0.2mm Nickel-Silver wire and glued it around the cowling as securing rope.

The wings are prepared for the rigging session.

At first I mounted the upper wing, the side struts and lower wing.

Now it is a biplane!

I wanted to mount the landing gear too, but the last of the four pins do not war to go in his hole. With bigger force I broke the complete gear off.

2 x 3 holes in 0.8mm brass micro tubing and soldered 0.5mm brass rod pieces into.

Struts are 0.7mm brass, plugged on the rods and soldered. The new axle below was already scratched some updates ago.

After tinning lugged as test fit the little Fokker, looks nice I think!

Earlier today I put oils to the linen of the wheels, which I forgot to do earlier.

I added wood to the back strut and covered the front struts with paper.

Paint is missing, but the new gear looks promising.
Shortly after that picture (I have moved the lamps for better picture light before) the heavy head of a lamp (with two light tube and a huge magnifying glass between them) crashes down to the bench only 10cm right of the model!
Shortly after that picture (I have moved the lamps for better picture light before) the heavy head of a lamp (with two light tube and a huge magnifying glass between them) crashes down to the bench only 10cm right of the model!

Reason: the adjustment and holding clamp breaks into parts! The round parts were still on the arm.

Remove the upper wing completely. With the metal struts that is somehow possible. The problem was mainly, that the pins go out of the prepared holes during glueing.

After modification of the slots in the wings for the struts and shorting the outer struts I mounted the wing again and rigged the wings using the great daylight today.

After the paint was dry I glued the struts into the fuselage. The axle was inserted and I tried to add the suspension, made from stretched sprue. It was not easy, because the axle rotates. The solution was a temporary fixing on the other side with copper wire. After that I added the gear rigging and plugged the wheels on.

Hard to take good pictures without the missing lamp.

I had also to cut some brass sleeves, because the prepared ones were not enough.

Also half of the aileron control cables are done. Two are missing, which I will add after mounting of the undercarriage due to needed PE parts on top of the wing.

I do not have before and after pictures, but see older ones.
In the side view there should be only a space of 5mm between upper wing and fuselage, but it was 6.5mm. An error of more than 20% is conspicuous! Now it is only a little bit more of the expected 5mm. Here are also 2 rigging wires missing.
In the side view there should be only a space of 5mm between upper wing and fuselage, but it was 6.5mm. An error of more than 20% is conspicuous! Now it is only a little bit more of the expected 5mm. Here are also 2 rigging wires missing.

The new undercarriage is primed and now painted to be mounted soon.

What is that?! I don't like the overall impression, looks much different to the pictures of the real bird.

According to the drawing the axle should be in front of the wing and the distance between axle and fuselage is too big.

I cut the rigging, removed the complete gear again (with intact suspension), removed the pins of the front struts. With soldering iron to the pin, very quick to leave the paint intact. The I filed down the front struts by more then 1mm. After glue in the pins the hole gear could be readded. The axle is now moved forward.

Also the distance between axle and fuselage is according to the drawing. I like the impression now!
There was no drawing of the gear without angle, so I used the size of the kit struts.
There was no drawing of the gear without angle, so I used the size of the kit struts.

The kit provides a windshield, but it is much to big. So I made a new one, below.
Another problem: the Spandau is in real much wider.
Another problem: the Spandau is in real much wider.

The gun should sit more right side (to late to correct), so I modified the windshield slightly.

Air screw and spinner was added now. I tried to apply my 1/48 version of Garuda logos, but they are much to big! Need to look for the 1/72 version.

The gear rigging is completed again, now also with a rope below the axle. This special kind of rigging looks nice!

The tail plane is now also mounted.

The soldered step added now. Please note the open side of the pipe.

On lower surface I had to fix the paint around the strut mounts.

The Fokker factory plate was as decal in the kit, but I used a nicer on from my spare box and applied this to bare metal foil.

Found also some Eduard Fokker serials, printed in a way, that you can't read the number.

I also masked the wheels and painted the tires in a flat grey.

The final view of this little Fokker Jewel (title of the Windsock article). The rigging is already metalized. Now only two PE parts and two control wires are missing and weathering needs to be done.

Today I made new metal parts for the lamp: the two parts in the middle. Not perfect, but works for now.

As last parts I added two bows for aileron control on the upper side, going into the wing cut. Here the bows are connected to a "one end" turnbuckle so the aileron is under control by this "V" of wires.

The last picture of this build report shows the weathering, mostly some oils below the engine. Here you can see the rotary through the cut outs.
Komentáře
41 25 October 2020, 17:23
Started a new project to get the mojo back. It works😉
Selected this one to try out the Fokker streaking. Was done in real with a 8cm wide brush.
25 October 2020, 18:09
I'm in! 🙂 My stash of WWI planes are growing and I'm really tempted to start to build one, and your work is really inspiring! 👍
25 October 2020, 21:05
Ah the next filigrane piece in progress.. Following and as always amazing so far👍
25 October 2020, 21:10
Is there any chair left for me? Wouldn't want to miss this!
25 October 2020, 21:15
A warm welcome to all of you!
Oh Björn, you got infected with the biplane wire entanglements virus? 👍 Very hard to get rid of😉 I guess you will stick to 1:48? I noticed some trend back to 48 after WNW dies. This will be interesting, your quality work applied to this category!
25 October 2020, 21:58
This Fokker needs an Oberursel U.I with 100 hp. Luckily this type of rotary engine is available from Small Stuff and I had it in my stash. The whole action from pic 10 to 15 included painting, mounting and weathering with oil paint took 2 hours 40 minutes. This was not my first engine made by Small Stuff😉
27 October 2020, 18:55
Welcome mates and I hope you are entertained well. Greetings also to the mates that press the Like-button!
29 October 2020, 17:02
Thx Gordon! A small update - a solution for clean mounting of a (moving) tail plane.
1 November 2020, 18:11
After a stroke of fate (hopefully the year 2020 will be over soon!) I tried to distract myself a little by continuing to build on the Fokker.
As usual for that time there were different air screw types mounted to the Fokker D.V
Some are very comparable to types I created already but some pictures shows a Garuda. Due to the wide blades those are looking interesting and since there is no air screw shown on my Fokker on the two known crash pictures I will go with that.
As additional references I used the "Fokker Eindecker Compendium 1" (great book!) and the book "German Propeller Makers of WWI: Part One", which includes Garuda. The shape is really complicated so my first try failed. This is the second one.
Not my best to date, but I will use it. The shape of the Garuda is really difficult to replicate!
13 November 2020, 22:12
"Not my best" he says... I strive to such imperfections.😉
Hopefully the distractions are working. I suspect many of us need them.
14 November 2020, 08:00
Of course there is a seat in the kit, but if I look on the reference pictures, there is a big difference. The seat looks very special for a specific reason.
The rotary with 100 h.p. was not very powerful for its time, so the Fokker designers tried all to save weight. The fuselage structure looks very fragile and so also the seat.
It is may be a bit too much work for a detail mostly hidden later, but I wanted to try also the Connecto crosses by Albion Alloy and want to use the seat as prototype for a bigger project. Some always try to convince me to do a scratch project and at least I have an idea now.😉
14 November 2020, 21:15
So, what do think of the connecto system? Is it worth it! 👍
14 November 2020, 21:22
Thank you mates! The crosses are a nice add-on to our scratch materials. I only ordered the wrong size, because the description on the online shop was wrong (informed them, this is corrected now). So I used here one size smaller, but with soldering it works too.
15 November 2020, 15:20
gorbygould, welcome to the show!
Today I took a closer look at the photos while having a coffee, among other things a large-sized picture of the front. I noticed the suspension in detail. The people at Fokker welded small cross tubes on the axle and small limiting plates on the sides to prevent the rubbers from slipping. How should I mount it durable? 🤔 It falls apart again when I solder it! 😭
Actually I wanted to continue building the cockpit to be able to close the fuselage. But I really wanted to see if the idea works and I could get the axle done with brazing. I love this feeling of happiness when it works! 😛
15 November 2020, 16:25
To be able to close the fuselage I continued to work on the cockpit parts.
21 November 2020, 16:40
Moin Bughunter. Mal wieder ein grooooosses Kino. Du hast geschrieben, dass du Piano wire (das gleiche wie Gitarrensaite? Aus Edelstahl?) hart gelötet hast. Ich habe immer gelernt/gedacht, dass man Edelstahl nicht löten kann. Habe ich mit meinen Gitarrensaiten mit Lötkolben probiert und nie geschafft. Wo steckt Dein Geheimnis?
21 November 2020, 18:39
Thx Greg!
Bernhard, das sind keine Gitarrensaiten. Ich habe das in den AJP Bausätzen kennengelernt, stand in der Anleitung "Piano wire", also Klaviersaiten. Sehen aus wie Eisen und lassen sich problemlos weich! löten. Super Material, wenn Messing zu weich ist. Bei der AJP Demoiselle waren die 3 langen Rumpf-"Bambus"-Stangen daraus. Habe die dann in ebay uk gefunden und mir ein paar Stücke 0,8 1,0 1,2 1,5mm etc bestellt. Die Achsen der Umlaufmotoren mache ich jetzt oft daraus, die Begrenzungsstücke weich gelötet. Weiß nicht, ob das Material rosten kann😉
Bei der Achse habe ich die Messingstückchen nur hart auf die Achse gelötet, damit ich die weiteren Teile weich anlöten kann, ohne daß alles wieder auseinanderfällt.
21 November 2020, 19:01
Och Gottchen...
Löten hat also etwas mit Eiern zu tun? Hart und weich...😉
22 November 2020, 12:05
Das Hartlöten passiert mit Lot, daß bei 610°C schmilzt. Willst Du das festhalten, "brauchst Du Eier in der Hose"😉
22 November 2020, 16:41
as usual, trying to get my jaw back in place after is dropped totally.... amazing detail bughunter. simply stunning. as usual 🙂
22 November 2020, 21:19
I think we should have "relative feedback/praise".... maybe I'll make it a request for Tim. So, for example, when I'm able to glue two pieces of plastic together without leaving a sticky fingerprint, the crowd should go wild with praise, but we'll reserve our applause for Bugsy until he does something truly monumental... but not for his run of the mill genius.😉
23 November 2020, 00:32
@bughunter : Und womit lötest du so heiß? Mein Welleman Lötkolben geht bis höchstens 450°C...
Nur zur Info, erst muss ich lernen weich zu löten. Oder eher "überhaupt zu löten", so *einfach* finde ich das nämlich nicht.😉
23 November 2020, 09:09
Oh Greg is in top form again!😉
Bilbo, niemand hat behauptet, daß Löten einfach sei, das erfordert Übung! Eine Frage des Timigs usw. Habe über 40 Jahre Löterfahrung und bin darin "gedrilled" worden😉
Hartlöten ist ganz was anderes, das geht nur speziellem Lot mit Flußmittel und einem Brenner. Gibt einen von Proxxon, die Flamme geht bis 1300°C. Dazu braucht es einen Schamottstein oder ähnliches als feuerfeste Unterlage. Braucht man aber normalerweise nicht für unsere Modelle😉
23 November 2020, 18:02
My first idea was to prime the fuselage - but stop, some preparation needs to be done before!
A good preparation works makes the later steps much easier.
28 November 2020, 22:00
That was a bigger batch in this project, see pics 88-95 😉
Albatros Dr.I | Album by bughunter (1:48)
Now I continued with the fuselage and tried again the famous Fokker streaking.
4 December 2020, 18:48

That is the back side of my Windsock Datafile reference, in front of me during streaking😉
4 December 2020, 19:19
Der Sp orn, Du meine Güte, wie herlich!
Mußte hier Leerzeichen einfügen, hat wohl was mit Erwachsenenfilmchen zu tun😉
4 December 2020, 20:02
Thank you mates! After the pictures I realized, that more paint needs to be removed, with finer structure. With oils you have a loooong time to fix it 👍
4 December 2020, 22:53
The streaks are finalized. During the hardening I started to work on the cowling.
5 December 2020, 18:49
Ich sehe schon das ist nicht deine erster Tanz mit der Drehmaschine! Erstklassige Arbeit!
6 December 2020, 16:04
An der Drehbank bin ich wirklich noch Anfänger, habe aber schon einmal eine Cowling für meine Nieport 17 "Flyboys" gedreht. Ich brauche dafür nur eine kleine Ewigkeit, da ich vorsichtig geworden bin. Nicht so leicht ist es, den innen den Bogen auszudrehen, wenn man nicht aufpasst hat mal schnell zwei Ringe statt einer Motorhaube!
Die Small Stuff Motoren sind "in Scale", daher dann die Bausatzhauben mit dem dicken Plastik zu eng. Manchmal genügt ein ausdünnen, aber es kommt vor, daß das nicht genügt.
6 December 2020, 17:28
Always a joy to follow your most interesting and accurate WIPs and to look at your amazing skills working with different materials.
Happy Modelling Christian
6 December 2020, 17:57
Nice job on that cowling. That's not easy to do, you are definitely past newbie 👍😉
6 December 2020, 18:13
Thank you mates 👍 I love this real multimedia (not TV and Co😉 ) work.
6 December 2020, 21:56
The struts of the kit are 26mm long, which is exact the distance between lower and upper wing. Since the struts are also at an angle, they are likely to be too short.
The "wood" on the kit struts is the same length as the struts, this seems to be a tribute to technology as in real life the wood is much shorter. Looks interesting, but would make the plastic struts unstable. In short, there are a few reasons to try it myself.
11 December 2020, 21:26
At least it is a biplane now, but I accidentally destroyed the landing gear.
13 December 2020, 16:55
You have really done a beautiful job painting the plane. Is the green just oil paint put on with a brush and removed a bit to show the under painting?
13 December 2020, 19:45
The paintjob is awesome Frank()
Sorry for the gear collapsed, but you will fix this easily
13 December 2020, 20:01
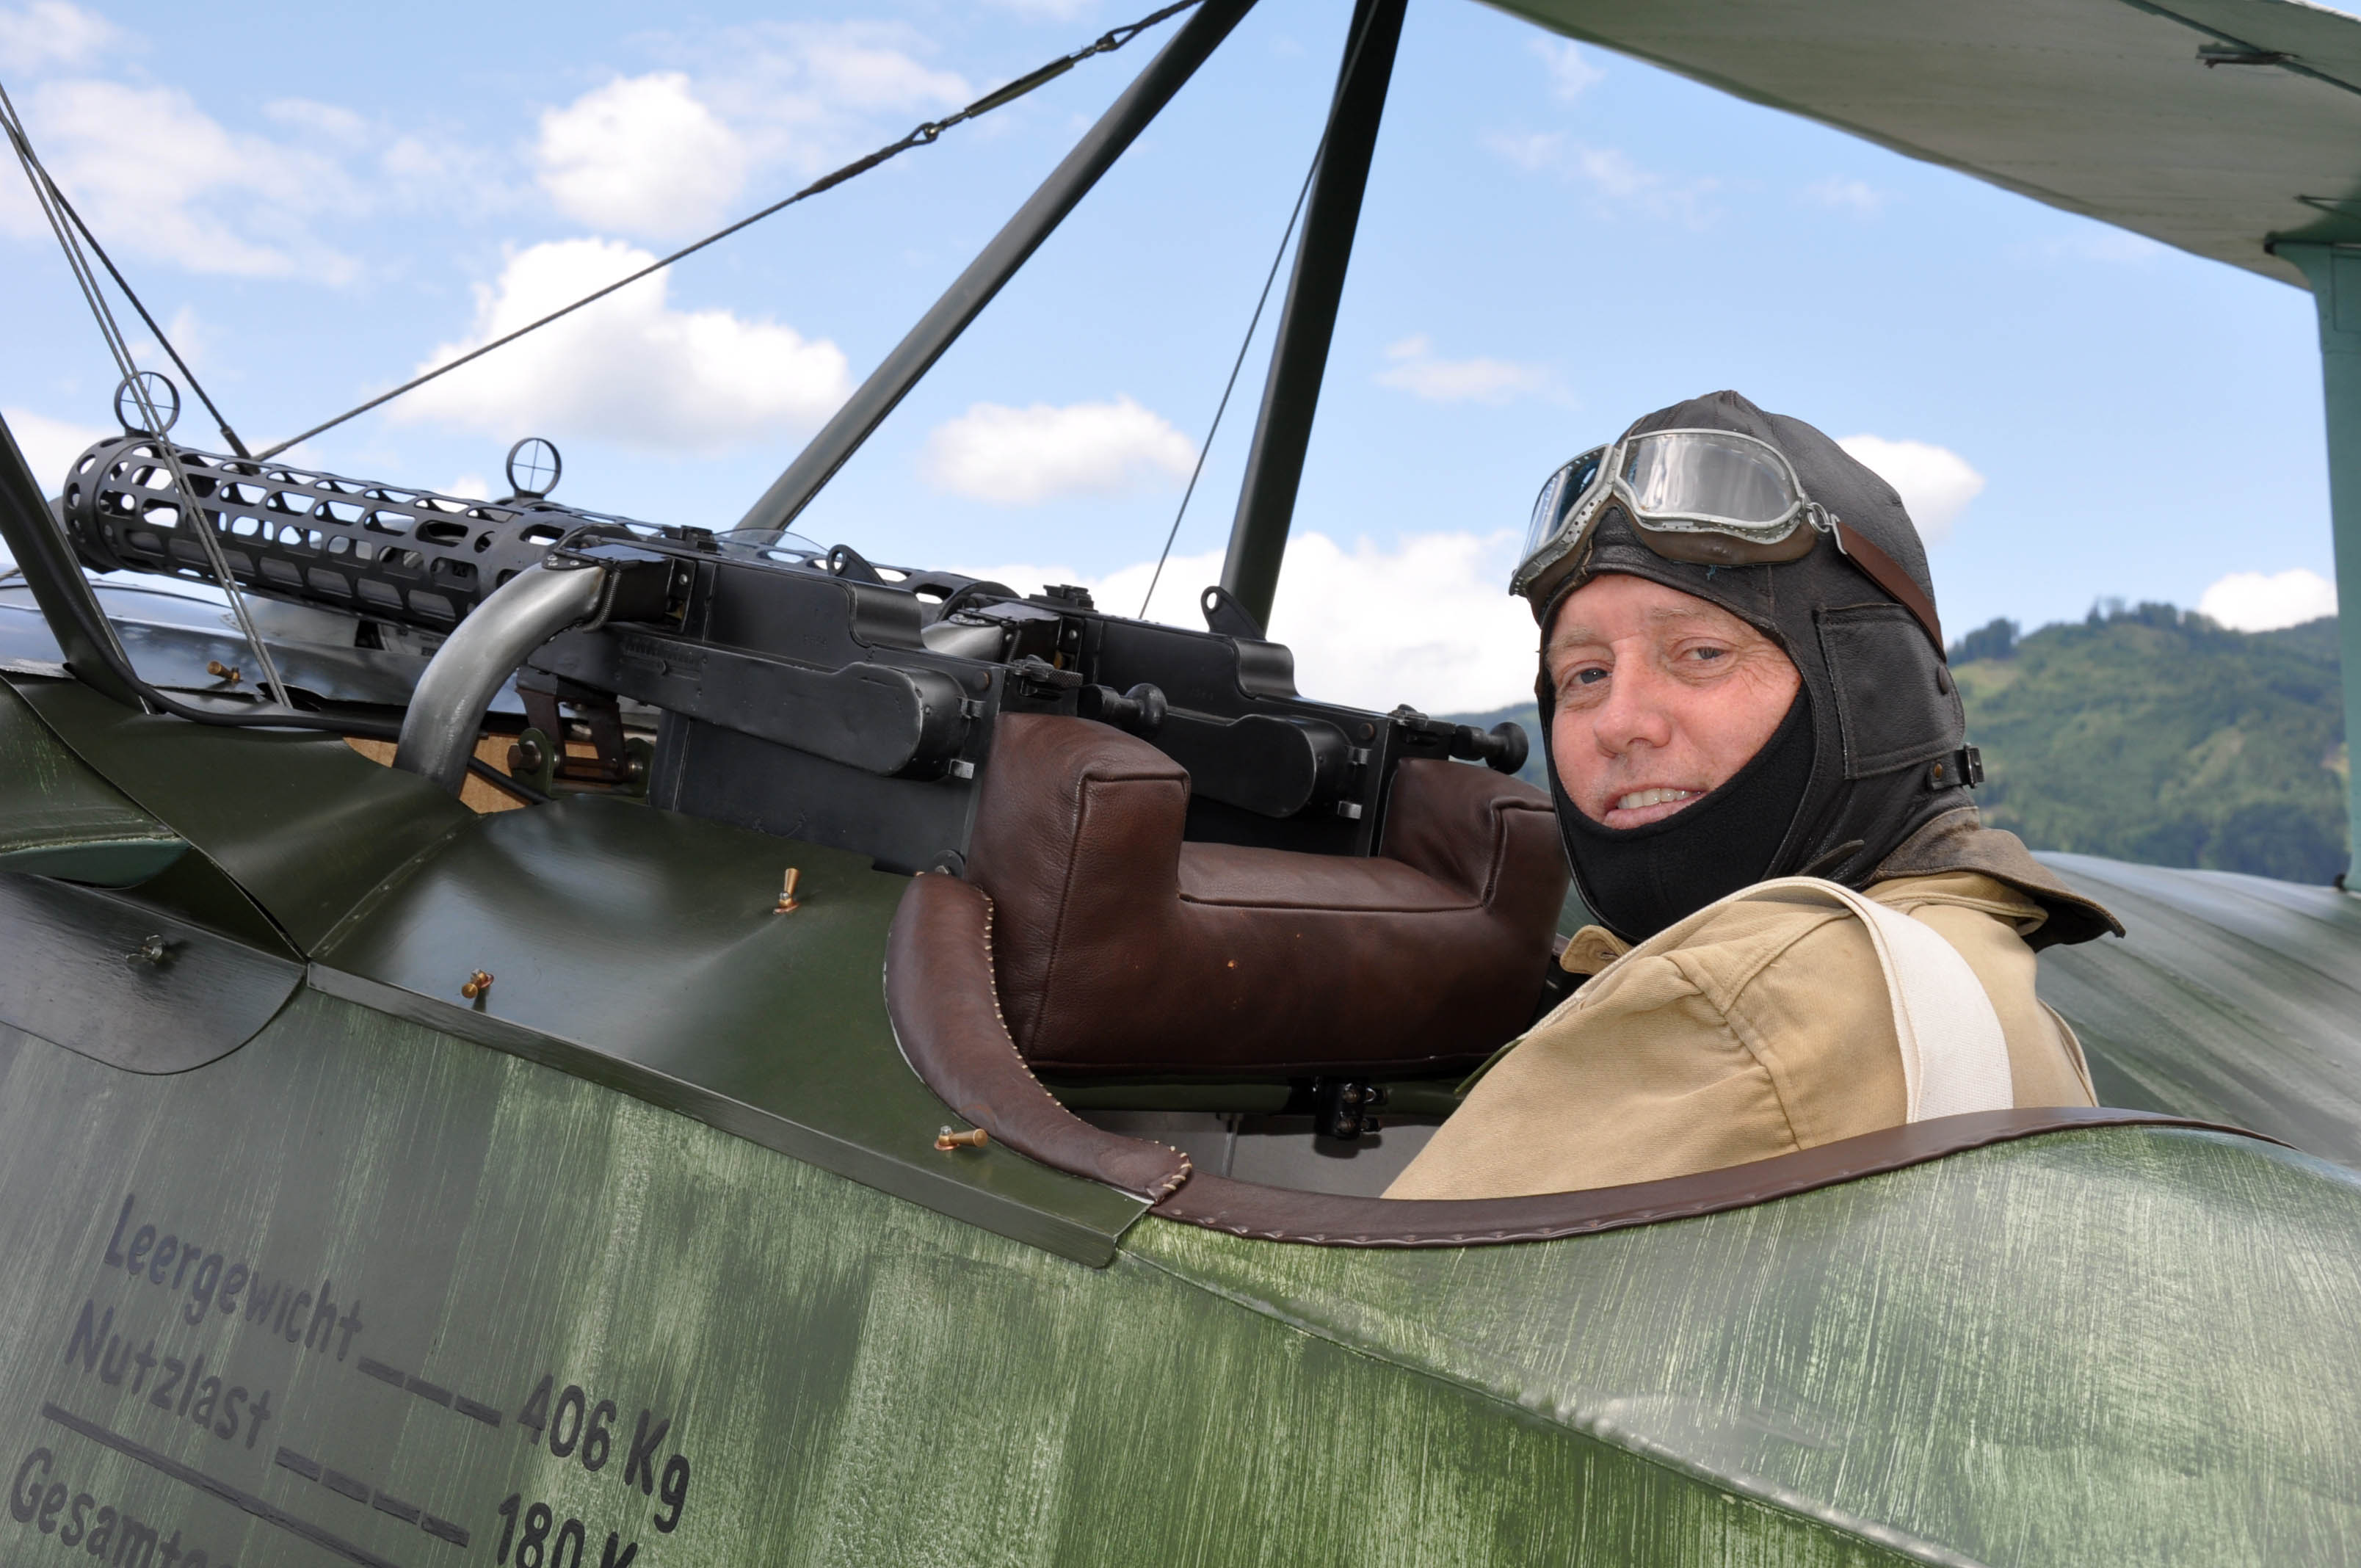
Thank you mates! Skywalker, I tried to simulate what was done in the Fokker factory. Underneath is linen (flat paint helps). On top they used a 8cm wide brush, put in green paint and paint in stripes with less and less paint. Then reload the brush and continue. That would mean in 1/48 a 1,7mm wide stripes. I found a very small flat brush and tried to simulate it, but it is not that easy. See pic71/72. I tried to brush the stripes with thinner finer and removed the paint further, until 73/74. Every aircraft looks different, so checking original pictures is helpful. Here the fields around the crosses were white before, so it was overpainted heavily and left only a small white border around the cross. Other D.V had much less paint.
See also the real Fokker Dr.I of Mikael Carlson: [img1]
There is a bug in ordering the pictures, I have to sort them again.
13 December 2020, 20:40
Thank you mates!
Today I had an idea and must check it immediately ... It worked 👍
14 December 2020, 21:44
Geez... just like that. Have an idea and it works... must be nice.😉
15 December 2020, 06:51
What incredible solution. There you did extremely magic things again....
15 December 2020, 07:26
Crash! Today I nearly lost the model!
Shortly after the last picture of the model (I have moved the lamps for better picture light before) the heavy head of a lamp (with two light tube and a huge magnifying glass between them) crashes down to the bench only 10cm right of the model!
Need to fix the lamp to be able to work in this dark late afternoons.
15 December 2020, 21:48
Pic 114: knowing you, you'll be able to make exact copies of the parts to repair the lamp... In wood! Just for the fun of it!😉
15 December 2020, 21:50
Wood would not hold the lamp head. I just checked: 1.9kg! May be brass?
15 December 2020, 22:00
Sure! Replicate two moulded zamac pieces in brass. Especially the circular serrations should be very fun to replicate.😉
16 December 2020, 08:04
Had the exact same issue with that lamp as well. Only had it for a couple of weeks. Bought it from Domino (in Belgium) and after explaining the problem they send me new parts to fix the lamp. I think they said it is a know problem with this lamp...
16 December 2020, 08:17
Oh man, was für ein Glück! Den Hersteller der Lampe verklagen?🙂
16 December 2020, 10:34
Yes, I have two Maul (bought 2012) on my bench. After 8 years it will be hard to argue against it.
Let's see if I can fix it myself.
16 December 2020, 13:19
You lucked out, if one can call it that, with that lamp failure. Good luck with the repairs 👍
16 December 2020, 14:39
Same lamp, same supplier, same problem.... I repaired it with a piece of aluminium. 4cm by 2cm by 1 cm
I can send you a few photo's if you like
16 December 2020, 14:52
Possibly I am a little crazy since I decided to fix a problem. The model is far from perfect. But since I noticed that the distance between upper wing and fuselage is to big I will always see that mistake if I look later into my glass cabinet. This is a typical property of this aircraft so I had to fix it.
Most of the rigging is also done.
18 December 2020, 17:40
Really great Frank, and luckily you were able to restore the gearwork
18 December 2020, 18:46
Thank you David and Daniel!
Daniel, at the rigging I passed you on the right?😉
18 December 2020, 20:59
Becaus you on't have to drill yours to ropes 🙂
But i think copperwire is no good idea. Glueing copper is not easy..
18 December 2020, 21:49
If I don't need functional rigging I use a "rubber" thread, I assume the normal one. I think there are also fine and super fine for 1/72.
18 December 2020, 22:51
Thank you Alec! This bird is mostly finished. Two PE parts with aileron control wires and weathering needs to be added. Lovely "Little Jewel Fokker" (title of an Windsock article)!
20 December 2020, 17:46
So again a model is finished! I really like the outcome, mainly due to the Fokker streaking and the scratched parts.
More soon in a new album.
Thank you very much for watching and your comments!
21 December 2020, 16:24
excellent as usual
please more details about the fix of the lamp😉 i may really need that one day....
21 December 2020, 17:01
This bird is finished! Please do not forget to view the final album: Fokker D.V | Album by bughunter (1:48)
@Spanjaard Sorry, I don't have pictures. I had no thick alu, but a thinner plate (I don't know which alloy). I glued the broken pieces with CA and "copied" them. For the long hole (the pin of the lamp) I squeezed both parts together with a thin layer of wood in the middle and drilled the hole. I do not know, how long it will hold the lamp 😉
21 December 2020, 18:35
absolute convincing work there Frank.
The underside of the engine cover just wow!!!
21 December 2020, 18:45
Grrrr! Today (two years after the first one) the other lamp crashed down with the identical problem! 😠 (see pictures 114 and 138 and the posting above).
Be really warned if you use these "MAUL" lamps, as Spanjaard warned too (see above).
Will fix it myself next year ....
21 December 2022, 20:25