Scratched spoked wheels in 1:48

I made a tool. The first tries failed, then I made an aluminum spacer on the lathe.

The next things are needed are two small rim halves, turned from aluminum on lathe. The hub was soldered.

The hub is here on the drill shaft, one half rim locked on the spacer and a first layer of spokes is wound in.

The second layer of spokes uses an offset row of nails and runs on top of the hub.

Now comes a tricky part!
The second half of the rim is put on top, needs to pressed down heavily and the rims are glued together with the spokes with CA.
The second half of the rim is put on top, needs to pressed down heavily and the rims are glued together with the spokes with CA.

After the glued is hard all the threads around can be cut and the wheel removed from the tool. I secured again with CA and cleaned the rim outside. I used some wheels from the spare box for the tires.

The tries are not yet glued, I painted only the spokes with some dark metal paint.

The outer diameter of the rim is 10mm.

So I made some legs from squeezed brass micro tube, and soldered them together with another tube below. All pinned. That was somehow straight forward.
The tricky thing was to connect the side with another bar! To get the right angles I put the upper pins into wood with some holes according to the plan.
The tricky thing was to connect the side with another bar! To get the right angles I put the upper pins into wood with some holes according to the plan.

So this is the final position ...

... here enhanced with a axle from browned nickel silver.

So this will be the gear on my next project, but it will be painted together with the fuselage later. After that the axle will be added with suspension.

The cowling was turned on lathe. Also drilled, milled and finally polished with a rubber stick.

There was a very nice and thin resin cowling in the kit, but I wanted real aluminum to be able to polish it.
And the resin has 5 cuts on lower side, but the drawing shows 7, looks also on the pictures like that.
And the resin has 5 cuts on lower side, but the drawing shows 7, looks also on the pictures like that.

Now it is clear, that this a Austro-Hungarian type and resin kit, so another comparison:

The new legs are much closer to the drawing.

Also in thickness:

The quality is not bad, but very thick sprue gates.

Another example are the wing struts.

After removing the sprue on the tail of the fuselage a cut out for the tail plane needs to be done.

On the wing I cut the ailerons. They are very thin for my usual brass wires but there were four visible hinges on each side, so I added nickel silver stripes.

A detail view. On the aileron there is a bubble.

I closed two bubbles with stretched sprue.

I cut and added the same hinges also on tailplane and rudder.

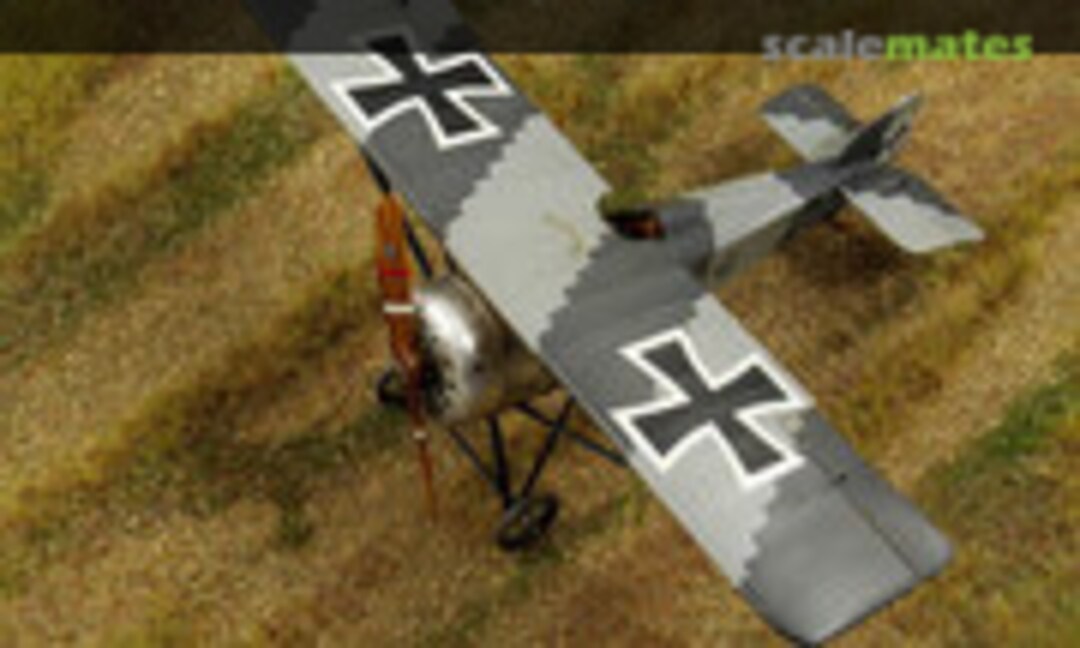
There is a picture from the back which shows the special shape of the ailerons, but the kit wing was flat. So I bent the ailerons with some heat. I hope they will stay in this shape for a long time!

So the first parts are primed now.

At least one subassembly in done - the instrument panel. There is guesswork, so I looked at other Aviatik types to get an idea. Eduard PE and some brass on real wood.


This engine type is not available by Small Stuff but I had the idea to take an 9 cylinder Le Rhone 110hp (and some spare parts) and combine it with the central casing of the kit. On the right side the kit cylinders.

I had to modify the cylinder mounts. Here with my cowling.

The rotary fits into the cowling.

Here I made again a low friction brass bearing.

Rotary glued to the bearing, painted and intake pipes are added.

For the intake pipes I drilled into the recesses of the casing.

After adding 22 valve rockers (there were 11 of each type for the 9cyl in the kit, but here I have to use the spares) I cut the "handles". The sprue can be used for easier mounting, as recommended in the enhanced Small Stuff manual (linked on the manual page).

As next the push rods were added.

This engine was nearly finished, here are pictures in the outer light on the balcony. You can see here some ignition wires.

For the push rods I drilled 0.22mm holes into the casing.

The finished rotary engine on my reference book about the production in Steyr.


The final picture shows the rotary after a oil paint wash in evening outdoor light. In real it looks more oily.

Successful test run!

Survived the test run without airsrew.

After gluing a block of different veneers I sanded it to shape. This time I had problems with delaminations. May be my wood glue is too old or the surfaces was to much polished. I should sand them with more coarse sandpaper to give the glue some grip.

With paint it looks better.

The back side.

Preview of the mounting.
After decals a final layer of clear coat needs to be added followed by the hub.
After decals a final layer of clear coat needs to be added followed by the hub.

... and running!

Beside the airscrew I masked the wind and tailplane.

Painted shadows ...

... and the only linen surfaces on this model.

On top of the fuselage there was a fine line, but I opened the fuselage there according to the picture from back.

I primed the inside of the fuselage, painted wood base and some wood structure.
Some frames made from real wood are also added.
Some frames made from real wood are also added.

A coating with clear orange made it more look like wood. The instrument panel (shown some postings before) is mounted. A base plate made of real wood is also prepared.

I had forgotten the brackets on the rudder pedals, now they are there.

I soldered a seat from brass.

Curved at the top and a base glued underneath.
I wanted to add a tubular structure on the outside of the seat, but since this is not visible later I dropped that idea.
I wanted to add a tubular structure on the outside of the seat, but since this is not visible later I dropped that idea.

The seat cushion was made from milliput.

Also the small cushion in the back. The seat belts are by Eduard/HGW.

Instead of using the plain kit stick I soldered a new control column, with real wood handgrips.
Forgot a picture before mounting it.
Forgot a picture before mounting it.

My new part compared to the kit parts. There is no information about the cockpit of this prototype, but I used the assumption, that it looks very common to other late types of Aviatik (summer 1918).

After mounting the base plate to one halve I added a upper belt.

To avoid a empty side I added an engine control.

At first I made a pump from 7 brass, nickel silver and copper parts. The copper wire is 0.2mm.
This is mounted on the right side.
This is mounted on the right side.

Now a frame from 0.7 and 0.6mm brass tube, for mounting a 0.4mm brass rod is inside.

With the same principle some more tubes.

I soldered clamps and holders.

To put the clamps in place I used CA. The height is of course adjustable 😉

To fill the huge opening of the fuselage I made a bullet storage.

To fill a hole in the front I made a fake fuel tank from wood and brass (Eduard PE frame). Is this now fake news?

And all parts together! Now it's a busy cockpit.
In principle very common with the Aviatik D.I in the Museum in Vienna, but the picture of the 30.40 shows a middle strut.
In principle very common with the Aviatik D.I in the Museum in Vienna, but the picture of the 30.40 shows a middle strut.

And why this effort?
As I said this bird was unarmed, but the pictures shows the mounts for the typical Schwarzlose MGs. So I could mount two of them.
The Gaspatch ones were a big help regarding size and fitting.
As I said this bird was unarmed, but the pictures shows the mounts for the typical Schwarzlose MGs. So I could mount two of them.
The Gaspatch ones were a big help regarding size and fitting.

And again in top view. The Schwarzlose MG is not fixed.

The lower surface of the fuselage was plated with 4 panels of wood veneer.

After a lot of sanding and wood primer I drilled the holes for the (already prepared) undercarriage.

So that is the look, with cowling hold by UHU Tac.

Finally the wood was painted and toned down. Sorry, my cam don't like it, it is not that red in real.

During research in Austria it was detected, that Aviatik used two grey shades. The paints are known in the RAL numbering, But:
I don't have those RAL greys (they are available in Germany from a railway modeling company)
It was a bit to dark. On the known drawing the black serial is very hard to read on the fuselage, on the pictures of the 30.40 the serial is better readable also on the dark painted part.
So I had to select two other tones of my available (not 50) greys.

Then I tried selected candidates in the airbrush and painted on styrene - don't like some candidates.
Finally I decided to go with Gunze H337 and H333. At first the bright grey and after a day drying time I applied self cat masks (electronic plotter) and airbrushed the dark grey.
Finally I decided to go with Gunze H337 and H333. At first the bright grey and after a day drying time I applied self cat masks (electronic plotter) and airbrushed the dark grey.

That is the result. Sorry, it is hard to show the real grey. I like it now. Both colour tones seems to harmonise somehow.

To protect the wood it was masked, also the cockpit. Then primer, sanding, primer, brighter grey.

After 24 hours after the last paint I masked the fuselage and airbrushed the dark grey. Nice contrast after unmasking.

Again.

At least the real wood looks like the drawing, the linen is ok and the grey tones was discussed already.

For the struts I squeezed brass tubes, soldered pins into them and created the N-struts in wood.

The N-struts are really filigree on drawings and photos, I guess the resin ones have to be that thick to be able to hold the wing. The soldered connections are cleaned and polished further.

The N-struts and the undercarriage (done earlier) are primed and also painted in the dark grey.
Only the outer struts are not yet done, but I need to get the size on the real model later. The N-struts alone are able to hold the wing.
Only the outer struts are not yet done, but I need to get the size on the real model later. The N-struts alone are able to hold the wing.

I also applied the self cut masks for the crosses and painted black using MRP NATO Black, which is a broken black.

And why masks? The decals are old, had already a bad experience with that printer, the white border was to small according to the photos and - the main reason - the decal crosses are too small!

The wing. I used MRP Insignia White, which is a broken white. But it covers not very good, next time I will start with a thin layer white and add Insignia White on top.

And as final picture the fuselage and the wing together, forgot the painted tailplane (other update) on the picture.


I started to prepare the outer struts, made from squeezed 1.4mm brass tube and 0.5mm brass pins.

But then I noticed I should work on the remaining alu parts for the front first!
I made an aluminium plate (a little thicker this time) which fits into the cowling. So this will be the firewall to the engine and it can carry the cowling.
I made an aluminium plate (a little thicker this time) which fits into the cowling. So this will be the firewall to the engine and it can carry the cowling.

The firewall is glued in place! Very careful work was needed due to tight fit, but with engine and cowling in place (not fixed yet) it is able to rotate.

Next the "ears".
The resin ones are 0.7mm thick, I wanted thinner ones made from aluminium of course to be able to polish them too. My grill tray aluminium was to thin, the thicker one not strong enough for polishing and other work steps.
Solution: turned again 0.3mm thin on the lathe, in same outer diameter as the cowling, and used segments of it.

But how to mount?
Only on the upper edge is a connection to the fuselage (open on lower side and on the back), glue to the cowling will not work as aluminium is hard to glue.
Solution: I drill a little hole and inserted a bow of a small nickel-silver stripe in. Also on the original pictures in high-res you can see something like that.

This will give the ear a solid mount later.

This bird has some strange maintenance lids - they are cooling vents at the same time, open at the back.
So I experimented a bit to create such lids.
So I experimented a bit to create such lids.

The other side needs even two!

Both sides are done.
As CA do not hold aluminium very tight, I added the quick locks made from 0.3mm brass rod. I used the holes to glue the lids with CA from the back.
As CA do not hold aluminium very tight, I added the quick locks made from 0.3mm brass rod. I used the holes to glue the lids with CA from the back.

I glued polished aluminium triangles to the fuselage sides. On top is the ear, still without glue.
I should have removed the little frame on the fuselage, now it's too late for that.
I should have removed the little frame on the fuselage, now it's too late for that.

May be you have noticed some little holes in the side panels. Here are the intake pipes missing. They have a special shape, so I failed to bend them using brass and copper tubes, even with using heat.
A friend gave me some leftover gold-plated electronic parts a long time ago with the words "As a model builder, you might be able to use them someday."
Someday was now and below the gold was brass. After the modification I tinned them.
A friend gave me some leftover gold-plated electronic parts a long time ago with the words "As a model builder, you might be able to use them someday."
Someday was now and below the gold was brass. After the modification I tinned them.

The holes in the panels are now big enough and the intakes have used color by chemical browned.

I wanted to mount the aluminium parts, but the work on the tail is easier with the model on the nose so the tail skid first.
Aviatik used some special construction covered with thin wood. I made this as wooden block from a piece of cherry wood, but my first try was to flat (the left one), so a second try. The skid are two layers of veneer, with additional two layers on the end.
Aviatik used some special construction covered with thin wood. I made this as wooden block from a piece of cherry wood, but my first try was to flat (the left one), so a second try. The skid are two layers of veneer, with additional two layers on the end.

Again some metal work. The rod is 0.6mm nickel silver, a tinned brass piece, an U-shape made form 0.1mm nickel silver (PE fret leftover by CSM) and a 0.33mm rod through the skid.

Theoretically it could steer, but I use the rod for secure mounting and glue it into a hole of the fuselage.

Dry fitting.

After some wood primer I put some small drops and strips of masking fluid and painted the wood dark gray. Masking removed to show a bit of wood - artistic freedom 😉
The size of the kit resin part is not bad ...
The size of the kit resin part is not bad ...

.. it is much to flat, as shown here.
My skid is glued in place.
My skid is glued in place.

As mentioned the suspension of the tailskid was missing.
The mounts are a nickel-silver sheet angles, bolted with rod. The "rubber" is hold by a rod, with a sheet soldered on top. The rubber lines itself are stretched sprue
The mounts are a nickel-silver sheet angles, bolted with rod. The "rubber" is hold by a rod, with a sheet soldered on top. The rubber lines itself are stretched sprue

A (not very sharp) view from below.

The model is hold safely now.

Now back to the front!
I mounted the rotary engine. The last missing cutouts on the cowling are done and the cowling protects now the engine. After that the side panels and intakes from the last update are in their final position now.
I mounted the rotary engine. The last missing cutouts on the cowling are done and the cowling protects now the engine. After that the side panels and intakes from the last update are in their final position now.

The top panel was already prepared in a raw shape but now finalized in size and with cutouts for the N-struts.

And also this panel is mounted.

I love to mount all the prepared parts, so I secured also the undercarriage and the N-struts with CA.

As often I drilled holes in PE frets, cut it in pieces, solder it on a strong piano wire and turn identical washers on the lathe. It is always a good idea to make some more for the carpet monster.

The washers are soldered on the axle tube.

The cockpit cushion is also painted black leather.
And now with the plugged on axle and airscrew a little teaser: what a lovely little bird!
And now with the plugged on axle and airscrew a little teaser: what a lovely little bird!

After painting the axle I mounted it with the suspension to the undercarriage.

Now the bird can really stand on his wheels for test, the "rubber lines" can hold it.

I finalized the length of the outer struts, ...

... tinned and primed them, ...

... and painted dark grey.

So I made two filler caps from brass.

This makes sense, as I added there the fuel tank. The second one seems to a the oil cap.

Another detail I noticed was a rope around the upper part of the cowling, starting in cut outs I already made before.
On the model it is a 0.15mm wire, hold by two Gaspatch anchor points. I hope you see it!
On the model it is a 0.15mm wire, hold by two Gaspatch anchor points. I hope you see it!

Since the wing is already lying flat, I glued on a lacing right away. Here I used a piece of Eduard 1/72 lacing PE, which I bend to the shape of the engraving in the wing.

And finally I painted the bands on the airscrew. I primed a light coat of white before, but the read comes out darker as I wanted. For the white I used "Insignia white" which is a off white, but looks very bright in real. The Jaray logos are also applied.
I think I will add a layer of clear coat.
I think I will add a layer of clear coat.

As during the last update I wanted to mount the wing - but stop: There was also a windshield!
I had to guess the shape because it was visible only in the side view. The drawing do not show it. So I cut a thing piece of clear foil, bent it in shape with heat and glued it in place with CA.
I had to guess the shape because it was visible only in the side view. The drawing do not show it. So I cut a thing piece of clear foil, bent it in shape with heat and glued it in place with CA.

A very small stripe cut from a PE frame has to act as frame to improve the adhesion, as the glue is not very strong on the foil and aluminium.
Unfortunately, some of the CA fume settled on the windscreen, but it was also on the real picture not very clean.
Unfortunately, some of the CA fume settled on the windscreen, but it was also on the real picture not very clean.

But then I mounted the wing and started to do the rigging with Gaspatch turnbuckles type C, anchor points and wire loops.

The rigging of the inner struts was more tricky.

I found no confirmation in my references, but in my eyes it makes sense and I added a aluminium panel to the lower surface, up to the point where the side panels ends.
In opposite to that the cross on the back of the undercarriage is visible on the side picture of the real one.
In opposite to that the cross on the back of the undercarriage is visible on the side picture of the real one.

There is also a cross in the front of the undercarriage. Both crosses uses Gaspatch turnbuckles type One End.

These are photos from below, so I'll also show the open construction of the side panels. You can see the cylinders of the engine with the naked eye. So oil and cooling air can go out on the back and lower side.

On the back side of the airscrew you can see the bolt heads on the hub.

On the front I added 0.2mm bolts.

In case anyone was wondering about the high-legged undercarriage: this picture clearly shows why it was necessary. The powerful 11-cylinder with its 160 hp needed a large airscrew to get this power into the air.

I straightened the warped wing at the beginning with hot water, but it had bent again a bit and left the outer wings hanging. So I had adjusted the outer struts to push the wing up. Inserting the struts was not so easy.
But now I am super happy with the result!
But now I am super happy with the result!

So that is the actual state. I used some grey ground to show the rigging.

Let's start a new update with a size comparison in my hand.

The front and wing are nearly done so I continued on the tail.
Here I drilled into the fuselage and added 0.4mm brass pipes as control wire outlets (the "patches " are not yet painted).
Here I drilled into the fuselage and added 0.4mm brass pipes as control wire outlets (the "patches " are not yet painted).

The kit do not contain control horns, so I used a stripe from a PE fret to make my own. The sizes are different.

The horns had a special shape so I made them thicker by soldering. The ones for the tail also get Gaspatch turnbuckles.

I noticed on the picture that also on the ailerons the wire to not go directly to the horn but to an additional movable element, so I added that too.

So I could mount the ailerons and connect the control wires.

The tailplane was added and the control wires added, from the outlets to the turnbuckles.
Another feature: please note the white arrows (decals from another kit).
Another feature: please note the white arrows (decals from another kit).

The arrows shows the mechanics the brass drain pipes, which should be clean and open. This was a wooden fuselage and these had problems with condensation water. As the back part is closed here are outlets. The OEFFAG Albatros used much more outlets (the arrows are in the Eduard kit, but the outlets are not mentioned).
The controls wires on lower side are also shown.
The controls wires on lower side are also shown.

Now to the accident of the headline!
I wanted to mask the rudder to airbrush the crosses, but here you can see the yellow resin!
I wanted to mask the rudder to airbrush the crosses, but here you can see the yellow resin!

To avoid another loop I made a new rudder from polystyrene.

The mount points prepared already so it fits. Now it is primed with my trusty Alclad primer (bites into plastic), painted grey and it drying now.

I continued on the wheels. Masked, sanded, primed, sanded, painted a dark grey Gunze H83 (a different shade as on the fuselage), and finally flat clear coat.

On the pictures the rims looks black painted, but with black the contrast was a bit high. So I brush painted the rims with Revell anthracite (the paint is a bit old, so not perfect).

The wheels are mounted now.

After the grey on the rudder was dry I used new masks to paint the very little crosses.
Here the inner part is black, removing the small line for white.
Here the inner part is black, removing the small line for white.

That is ok so far, I have cleaned the masking/paint borders after the picture. It touches the limit, what is possible with the plotter.
But the engineers at Aviatik was very friendly to the modelers more then 100 years later: dark grey on the fin, the other grey on the rudder only and the cross not over fin and rudder!
But the engineers at Aviatik was very friendly to the modelers more then 100 years later: dark grey on the fin, the other grey on the rudder only and the cross not over fin and rudder!

I started the weathering with little oil paint dots, then added oil and pastels. More later in a new album.
Komentáře
80 3 September 2021, 18:47
I have created spoked wheels from scratch for the first time. I am very happy with the result of my first spoked wheels!
3 September 2021, 18:52
You have every reason to be satisfied with this result, totally realistic result !
3 September 2021, 19:27
Jenseits von Gut und Böse 👍 👍 👍
Welches Material hast Du für die Speichen benutzt?
3 September 2021, 19:32
Amazing result! 👍 What kind of material did you use for the spokes? Is it some kind of fishing line?
3 September 2021, 19:38
They look really fantastic. I did something similar, but in 1/12, 1/48 is a different ball game. Respect!
3 September 2021, 20:17
Thank you mates!
Yes, the thread is 0.04mm fishing line (I do not know the brand, because I bought it on ebay for rigging purpose and it comes on black spool).
Spanjaard, you are right! The size makes it not easy and my first tries failed.
3 September 2021, 21:26
And of course, the rims must be exactly centred. I am very impressed with your skill, and the perfect results!
4 September 2021, 11:51
That's fantastic Frank!
In fact that's a very fitting name - 'Fantastic Frank'.
4 September 2021, 15:13
Oh, what a large audience! Welcome to the show mates, it will be enhanced to a real project and build report!
@Bruce, the wheels don't just run smoothly, they don't wobble either. I'll never manage that with holes in the kit wheels!
Alec, that is the order of the thread. Assume we start on top with the 1, the 2 is on opposite+30° (at 7 o'clock). 3 is then again 210° further (at 2 o'clock). The second nail ring for the other wheel side is the same, but all 15° shifted.
Sound complicated, but is easy once you have done it.
gorby, I need to ask Tim for a red-face-smiley now!
4 September 2021, 19:24
I have no words Bugs, I am just sitting here shaking my head. I did not know this was even possible. I am stunned. And impressed of course.
4 September 2021, 22:23
Incredible work - you have the skills and spirit of a master Deutscher Uhrmacher. Very, very nice.
Do you think that the fishing line will be strong enough to hold the weight of the plane?
4 September 2021, 22:33
Thank you mates, the first row fills up 👍
@John
I think the wheels will hold easily the load, because not one thread hold the load, the complete upper half of threads (2 sides on each wheel) are involved.
5 September 2021, 12:48
Looking very crisp 👍 I'm looking forward to seeing your next creation 🙂
7 September 2021, 07:05
Thank you mates, I hope that this build can be finished in one go since I do not need another shelf queen.
7 September 2021, 19:39
Mal wieder ein „Man sehe und staune Projekt. Please a very front seat!
10 September 2021, 18:55
Thank you mates and very nice to see you here Bernhard 👍
The idea was to do a quick build because not many parts are in the box, but it starts again to move into something special with a lot of modifications. A lot of guesswork because not many references are available.
11 September 2021, 12:28
An OOB build from Bughunter? Now pull the other one! You just can't do it!
11 September 2021, 22:45
Peter, that is now even more crazy! As you may see on the project page I added Schwarzlose MGs by Gaspatch Models to this project, but the model will stay unarmed! WTF? Stay tuned! 😉
12 September 2021, 15:51
Thanks! In meantime I worked on a lot of parts, but no subassembly is ready yet. But some pictures as a sign of life.
Here is a picture from the back which shows the special shape of the ailerons, which I mentioned in the picture description:
[img1]

19 September 2021, 16:31
Fantastic little engine.👍
Klugscheißermodus - I think the plant was in a city in Austria called Steyr...
24 September 2021, 19:59
Thx Christoph! OF COURSE - with the book on the desk, which I bought in Steyr! I'm getting old, short-circuit in the brain 🙁
Can't edit the posting, so here is the correct text:
This Aviatik 30.40 prototype uses a very special engine, as the 30.27 and 30.29. It was a 11 cylinder Rhone 160hp built in the city Steyr, but only delivered in small numbers.
That is now a absolute unique model of the 11 cylinder 160hp Steyr-Rhone! I could not repeat because I have no second casing.
24 September 2021, 20:19
I've just spent some time marvelling at the latest of your engines Frank. Wonderful work.
If the company which produces those detail sets doesn't use photos of your work, they really are loosing an excellent marketing opportunity.
25 September 2021, 06:28
Thank you gorby! I will send a link to this build to E. Knupfer (the master behind Small Stuff) once finished. He told me already, that he likes my planes 😉
25 September 2021, 16:52
Thank you Clifford and David! Not sure David, some people like jets and tanks more.
No progress - it was a sunny outdoor weekend 🙂
26 September 2021, 14:44
Extra for you Hanno a new picture, test run after test fit to fuselage.
26 September 2021, 15:57
Thank you my friends!
Bernhard, it was risky to run it without the load of the airscrew, but the airscrew is still on my ToDo list! 🙂
The 11 cylinders makes the space between them very tight, so the ignition wires and plugs can touch the intake pipes of the next cylinder easily. More then 11 cylinders would not be possible, also the powerful Siemens-Schuckert D.III uses 11 cylinders in one row. The 14 cylinder rotaries (as built in in my Deperdussin Monocoque racer) are using 2 x 7 cylinders in two rows.
27 September 2021, 13:00
Superb! Be sure to wipe the castor oil from the fuselage before painting 😉
27 September 2021, 14:05
Alec of course 👍 😉
Some new pictures added, as the airscrew is done now.
8 October 2021, 17:27
These wooden wonders you always craft are a real treat for the eyes, every time and again 👍
8 October 2021, 18:22
Thank you mates!
@Hanno I'm glad it is not to boring for you see details like wooden airscrews again and again. 😉
9 October 2021, 10:02
You're back with yet more poetry in various materials. When I see your work it reminds me of when David Damek tells us in the beginning of his videos that he'll make some "minor" improvements. I for one won't be surprised if you in the near future present us a full scratch build in 1:72.
9 October 2021, 10:23
Thank you Urban for your nice words!
If scratch build then unlikely in 1:72. Nearly all of my old struts are 1:48, only the fascinating PE only Stripdowns are 1:72, because there was only one in 1:48 available. And yes, I have an idea for a scratch build, but there are also a huge amount of kits in my stash, so it will take a while.
9 October 2021, 17:48
Your laminated wood effect on the propeller came out very nice.
10 October 2021, 00:43
Thank you Villiers, but this is no "effect", it is the same as on your sailing ship - to show wood use real wood 😉
10 October 2021, 12:03
Some more parts for the cockpit are done, but not yet ready for closing the fuselage.
13 October 2021, 07:58
The interior is looking very smart and purposeful - what a comfy seat too 🙂 The real wood certainly makes a big difference 🙂
13 October 2021, 08:47
Amazing work again Bughunter, those wheels are from a different world! I always really admire your skills and the and the ensuing results
13 October 2021, 11:11
Thank you mates for leaving such nice comments!
This prototype was unarmed. But as you can see in the project inventory I used in this project the fantastic Schwarzlose MGs made by Gaspatch Models. WTF ?!?
I must admit my AMS is incurable. But it is fun to see if I'm still able to handle such micro mechanics 😉 It was a bit tricky to get all in the right size.
Can I close the fuselage or have I forgotten something else?
13 October 2021, 16:08
Absolutely incredible, makes me feel so inadequate !! You are a master and I bow to your skills..
13 October 2021, 16:18
I am so deeply impressed with your skills (or should I say: superpowers) Bughunter - for me it seems beyond human possibilities to create such tiny details... Watching with interest and amazement, as usual 😉
13 October 2021, 17:14
Wow, thank you for your wonderful comments!
Simon, you are invited to visit my booth in Ried this weekend! The first exhibition after the shutdown 👍
13 October 2021, 19:42
I don't have the plan yet, but officially planned in Halle 16. But I gut an invitation to join another group in Halle 18, near the competition. My models are on a rack of 3 layers dark wood.
13 October 2021, 20:45
Awesome work, Bughunter! I look forward to seeing this build completed.
14 October 2021, 14:37
Thank you mates! As expected I was not able to finish this project for the exhibition in Ried/Austria this weekend, but I take a lot of the newer projects with me.
The fuselage is closed now and as a training for a wood plated Lloyd project the lower surface is plated with real wood. Pictures next week.
15 October 2021, 12:08
Today just a small update - as some of the users here have already seen it at the exhibition in Ried last weekend.
I think that was a good training to do it one day on wings and fuselage of a Lloyd 😉
19 October 2021, 18:19
Paint job: At the beginning I used some Alclad Canadian grey as brighter grey, but after painting the model I do not like the shade. I removed it with alcohol and start a more detailed research.
The fuselage was at the same state, but during removing the first try the primer was no more ok. So had to prime it again, sand and applied only the bright grey until now.
As so often, two steps forward, one step back.
28 October 2021, 20:08
Very interesting project and techniques. I wanted to do spoked trims with "your" technique for a motorbike but dreaded the effort. Watching with interest.
29 October 2021, 09:05
the result is really worth it Michael. The moment of cutting the plastic ones out of the rim, is quite scary, that is true 🙂
29 October 2021, 09:08
@bughunter: do you have a threading instruction? Meaning: which way or sequence to thread the thread around the nails?
29 October 2021, 11:22
Thank you very much for your very kind comments mates 👍
@ Michael See pic 1, for one side are the nails trough the lines (ignore them for now). Then you see the numbers on the nails, in principle 180° + 1 nail. After two rounds you are back on nail 1. The other side of the wheel is nearly the same, but use the second row of nails (slightly shiftet).
Me be I have another update today.
Cheers, Frank
29 October 2021, 11:33
Can anyone possibly help me?
Does anyone happen to have two decals, printed black on clear: "LINKS" and "RECHTS", around 5mm long each? May be also "Links" and "Rechts".
Have not something like that in my spares box 🙁
29 October 2021, 11:37
thanks alot for your explanation. I really have to tackle that one day. The result is really worth trying.
29 October 2021, 12:04
Now the promised update. Most of the paint job is done. The cutting plotter was (again) very useful in this project!
29 October 2021, 15:42
Thank you Christian!
I could not resist to plug all temporarily together, for two teaser pictures 🙂
29 October 2021, 16:03
Hi bughunter. Maybe I missed it, but which thread do you use for the spokes? Nylon?
29 October 2021, 19:03
Michael, it is very thin fishing line, I do not know the brand.
Bruce thx, but sorry that this will need some days as there are still many things on the ToDo list.
29 October 2021, 20:25
Still looking forward to that stage, bughunter 🙂 Every step adds to the story of a very fine build 👍🙂
29 October 2021, 21:03
Thank you Bruce and Clifford!
A new update after a while - please fasten your seatbelts!
Here is a picture of the original for comparison.
rcuniverse.com/forum..489&d=1375479038
8 November 2021, 18:01
Wow! You embrace every challenge and achieve success with flying colours 👍🙂 I'm learning so much from your problem solving and properly engineered solutions 👍🙂 And the wing undersides are a joy in themselves too 🙂
8 November 2021, 19:34
The hammer effect on the engine cover is beautiful. Your whole project is just remarkable.
9 November 2021, 16:31
Thank you mates!
Again some work with wood and metal, so the tail skid is scratched. Robust and working solution now. You know, a little original, not a model .... 😉
10 November 2021, 17:57
Thank you mates, I am very pleased that you like my little bird!
@Erik Schöner Ausruf des Entzückens - so muß das 👍 😉
12 November 2021, 12:14
The suspension o the tailskid is done and all the aluminium on the front is finally in place 😉
What a lovely little bird!
12 November 2021, 17:59
Your skills are soooo impressive, bughunter, that I feel more and more reluctant to present my models here... Fantastic work as always!
12 November 2021, 18:03
Fantastic work. All of it so far. Looking forward to the endresult
12 November 2021, 18:56
You live in a different modeling world than most of us.
The work just stands out and can take my breath away.
13 November 2021, 00:16
This is where models transcend modelling and become art….. I've said it before, just incredible
13 November 2021, 08:25
Thank you, dear mates, for your wonderful comments! This is the right kind of fuel to keep the thread steaming along 👍
It is important not to lose focus (with the next project in mind), because it is now definitely clear what the next project will be. Bets are accepted! 😉
To make sure I didn't forget anything, I wrote everything down on a ToDo list and ended up with a full A4 sheet!
I have also a question:
There is no front picture of the 30.40, but of the sister 30.27 with same engine, and I guess same airscrew. On the picture of the 30.40 from the back there is a dark band on the back of the airscrew. The front picture of the 30.27 shows this band too outside the cowling and a second one more center.
My color interpretation is red/white as Austrian colors. Anything against this assumption?
ibb.co/WgF719q
13 November 2021, 13:11
Beautiful hammered finish on the cowling. The whole build is exquisite. 👍
13 November 2021, 13:20
Excelent building, AWSOME, I love all those scratchbuilt. What a beautiful job. Congratulation
13 November 2021, 15:21
Keep assuming Bugs, your assumptions are way more knowledgeable than my guesses! I'm absolutely fascinated by this one.
13 November 2021, 22:04
I wanted to mount the wing, but it is always a good idea to check the references again. And yes, I discovered more forgotten details!
So another round of small details ...
15 November 2021, 19:04
It strikes me that the smaller the detail, the more essential it is. Without that fine wire, the panel edges now seem sharp. I still can't get my head around just how minute many of these components are... Filler caps? Why not 🙂👍
15 November 2021, 21:02
Thank you mates!
It started a few moons ago with a kit with few parts that promised a quick build. Now it has become another scaled-down original with countless details, but something like this is a lot of fun for me!
17 November 2021, 16:59
A beautiful little gem. The rigging came out very nice too. All the little scratch build details are now coming together and paying off.
18 November 2021, 05:44
Thank you mates! The mixture of the different materials creates a very realistic impression, especially in real life, even more so than in the photos.
It's fun to try to raise the bar a little bit at a time. After my Bristol Fighter "The crocodile" has the best rudder linkages, I have now experimented again for a realistic representation. More soon ...
18 November 2021, 07:39
It's hard to believe that's 1:48 and not 1:32 or bigger... Chapeau.
18 November 2021, 08:49
I always love to watch mates going the extra mile (or ten...) to achieve a great result. Thanx for explaining and sharing too.
18 November 2021, 09:27
Thank you mates! Bruce, a trained spider is a big help, as I showed here: 🙂
Siemens-Schuckert D.III Work in Progress | Album by bughunter (1:48)
18 November 2021, 15:36
Spiderbro loves scale modeling. There is nothing wrong with getting some help. 😄
The rigging looks amazing.
18 November 2021, 16:26
Ha! That's the explanation - a trained spider! In my own eyes, it seems much easier to train a spider than to make all that rigging by myself... Unbelievably fantastic work as always, bughunter. I am simply speechless...
18 November 2021, 18:10
Thank you mates! I want also say thank you for the Likes this model received.
As we live in golden times with all those accessories like the fantastic Gaspatch turnbuckles the rigging is not that complicated. After some models I found a way for me which works.
18 November 2021, 19:07
And the control wires's guides and fixings are fascinating too 🙂
19 November 2021, 20:54
Thanks! The problem is, when I have good references, an inner voice tells me that I have to reproduce what I see. If it doesn't work with the first attempt, I am forced to think about it for a while to find a solution. I think this is called AMS.
The second attempt of masking on the new rudder was successful 😉
20 November 2021, 14:48
Amazing work. I did not realize it was so small, which makes it all that more impressive.
21 November 2021, 02:42
Yes Clifford, it was even smaller as a Fokker D.VIII (or E.V)! The goal was to design a very light fighter with good power. The result: empty 366kg and 586kg full loaded. But it was not ordered into production because the powerful rotaries can't be used without "Voltol" oil which was not delivered by Germany as promised.
21 November 2021, 16:12
So this little Aviatik fighter is finished and this build report ends now. Thank you for accompanying us on this journey! I was very pleased that many of the visitors had the time to comment.
As soon as the final shots are taken, I will add them to a new album.
22 November 2021, 18:34
The pleasure was all ours! Thank you so much for the tour of your factory!
23 November 2021, 02:47
Here, Here, Peter and Villiers. It has been inspiring and very pleasureable 🙂
23 November 2021, 08:00
Thank you mates!
Don't miss the final album: Aviatik 30.40 | Album by bughunter (1:48)
23 November 2021, 13:29
Album info
For a new project idea I experimented to create real spoked wheels. The small scale makes it not that easy.