SIAI-Marchetti SF-260M - BAF - WIP

In this build I want to find the correct balance weight to avoid the plane to tip backwards. So I need a firm landing gear: I can't use the kit wheel struts so I scratch my own.

Next I make sure that the landing gear has a stable connection point. This is achieved using hollow aluminium tube (red arrows).

I also have to drill out the complete nose section because it is made of solid resin. Doing so destroys the forward wheelbay, so I have to make a new one (green arrow). It is not very deep, the more place I have to put the balance weight.

Next I fill up the complete nose section with lead balls. I had to retry this 4 times until I had enough weight to get the correct balance.

As you see, the complete nose section is filled up. The black areas are not stains or filth, it is where you can see the lead balls through the resin wall because I had to drill out everything I dare. I even damaged the nose on 2 spots.

The damaged spots were repaired with some superglue and flour, and the lead balls were fixed with superglue as well. Then I tested my construction by dry fitting the landing gear. It seems to work.

To be sure, I also dry fitted the tail. The reason why I need so much lead is simple: the tail section is full resin instead of hollow plastic, and by drilling out the resin in the front section I even removed some weight before adding it again with lead!

Before I concentrate on the fuselage, I will correct another mistake of the kit: the spinner. I did some measurements and some calculation, and the kit spinner is at least 2 to 3 mm too short. And it is not pointy enough either.

So I decide to scratch a new one from white metal leftovers. This material is pretty easy to sand with a Dremel, and another advantage is its weight on the nose. I fix a central axle to a block of white metal, and I start to shape the new spinner.

Once the spinner is ready, I cut the axle to the correct lenght, and I remove the props from the resin spinner. Next I fix some metal connection pins to them and I drill out 2 holes of the metal spinner.

I also fix the cowling front to the nose and I install a piece of aluminium tube in the centre, with the correct diameter to receive the central axle of the propellor.

Then I dry fit the props into the spinner and I dry fit the completed propellor in the nose section.

Because eveything is only a dry fit, the angles of the props and spinner are not quite right, but I'll get there when I will use proper glue. But the shape looks correct to me, and that is what it was all about 😉

Another shot of the plane's front section with the new propellor in place. Looking good, so now I can finally concentrate on the fuselage.

Next I installed the seats into the cockpit and I fixed some metal supports.

I also completed the left wing with some masking tape because I had to sand off this area.

I tried to engrave some panel lines but no worries, I already decided to get rid of them, they are no way near to what I wanted to achieve...

Dry fit of the canopy...

Before I put the plane in primer, I removed the attempt to form panel lines 😉

Next I started to paint the interior of the cockpit.

I also sprayed the seats and sticks. Now I have to wait for the PE-seat belts I ordered.

Now that the PE-seat belts have arrived, I install them on the seats. This is an important enhancement of this model because the cockpit will be very visible.

The PE-set was intended for a C-130 Hercules, but the belts can be used for this Marchetti as well.

Now that the interior of the cockpit is ready, I can start to figure out how to fix the canopy...

Here the canopy is dry fitted; I still have to fix it to the plane and make sure there are no openings left to the cockpit. Otherwise I would spray the yellow paint into the cockpit, which would be desastrous...

The canopy was fixed with white glue. Next it was masked with Tamiya masking tape. Now the plane is ready to receive some paint.

I sprayed the red parts first, after which I masked them as well. Next the yellow parts were sprayed.

After a short time I removed the masking tape to avoid the dried paint to 'break' off while removing the tape.

Next I sprayed the whole plane (canopy included) with Gunze Sanyo gloss coat.

Once the gloss coat is dry, I can apply the decals.

From below, not a lot t do, except for the 'shark mouth'...

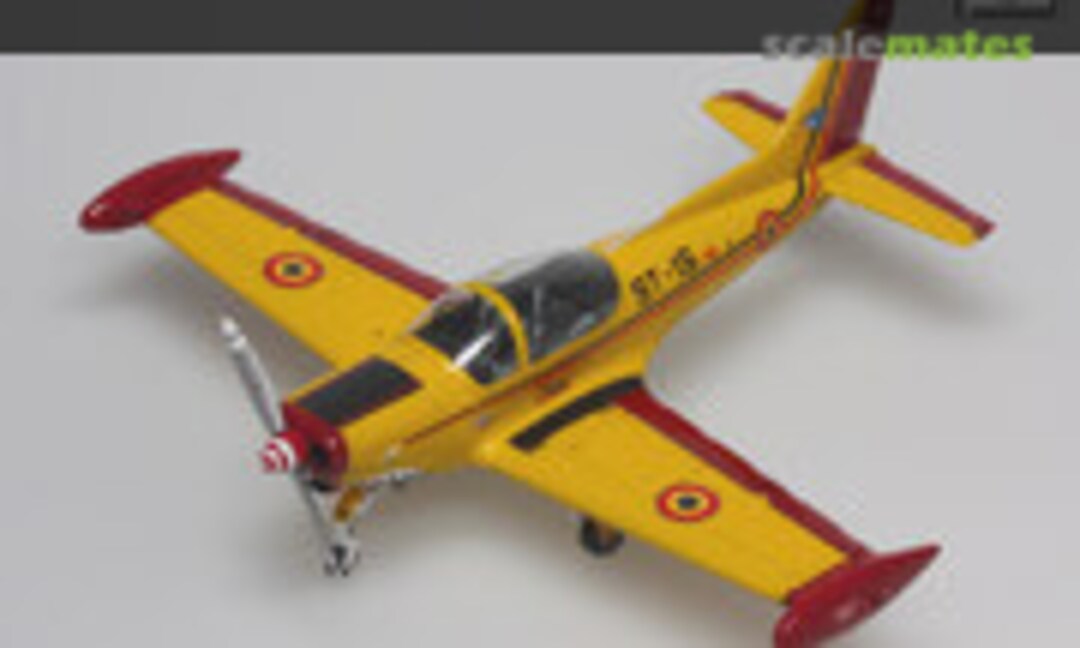
Top view of the plane.

Once all the decals have been applied, I protect them with another gloss coat.
Kommentare
5 27 August 2014, 15:05
This little model is so cute that I couldn't resist to start the modelling works right away😉
27 August 2014, 15:18
Looks great! A fantastic looking aircraft in real life, waiting to see how yours turns out....
28 August 2014, 00:00
Guy, it appears that the canopy problem hasn't been solved for 100%or am I wrong?
21 July 2015, 18:54
The canopy is a little wider than the airplane, but I closed all the gaps with white glue. So I could spray the plane without the risk of spraying yellow paint into the cockpit. Also, the problem seems to occur only at the left side; the right side is ok...
21 July 2015, 19:04