

Rescue! Black Cat Catalina PBY5A

Flaps cut out to bring some more life into this bird.

Quickboost engines further improved with push rods from steel

Here the engine is painted, washed and with its ignition cables added

I want to depict one blister bubble open. Time for my saw.

As quite a bit of the interior of this compartment will be seen, some further detailling was needed.

No 1:72 scale project without maschine guns from Miniworld.

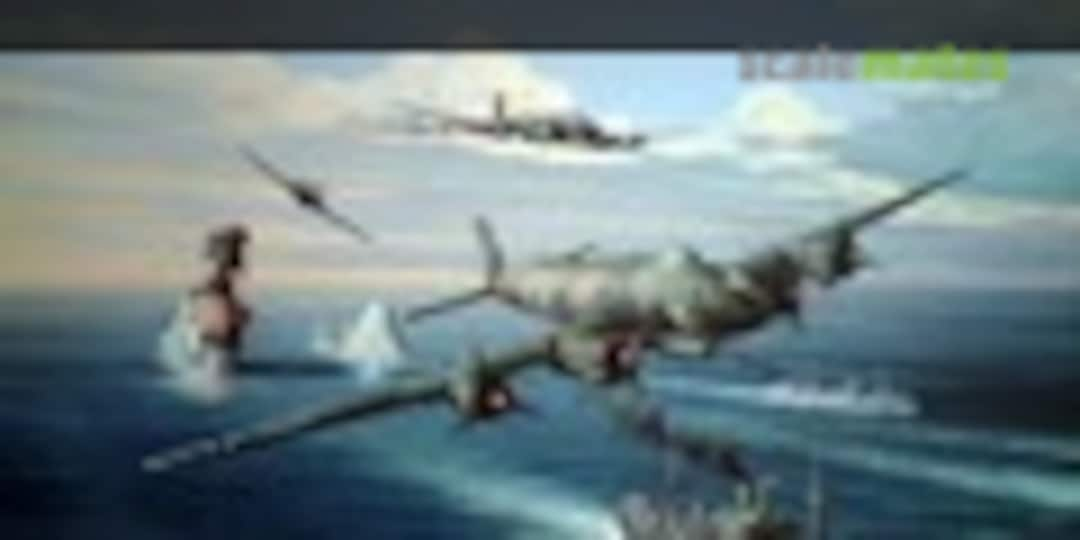
The rough layout of the intented scene.

And a close up

Back to the details. Forward bulk wall of the maschine gun compartment with ammo feeds for the guns and jump seats for the gunners

fire extinguisher and toilet.

Finally some color on

Machine gun compartment

Cockpit section

landing lights. The housing was cut out, the side and rear walls built up with sheet and the lights fashioned.

The result

The engines found their way into the cowlings. With both parts from Quickboost fit was disappointing and assembly required a bit of work.

Test fit. The two halfes go together quite easy.

For a rescue scene you need pilots. I chose P.J. Productions Navy Pilots of WWII

The interior color appeared rather yellowish when compared with reference material. I heard that zinc chromate was mixed with black to create interior green. So that's what I did too. I like the shade of the color now much better. The wheel wells were kept in zinc chromate. The bulkhead is sprayed interior green.

The photo etched seats lack cushions. Those are needed so that the pilots will be able to look out of the window and reach the pedals. I will fashion them from sheet and Milliput.

I discarded the kits MGs (the grey part). Using Miniworlds barrels and some photo etch I constructed the machine guns and build a support for them. That should be the last detailing step for the interior.

Having used zinc chromate as interior color I figured too late that the upper part of the cockpit and thus the inside of the glass part was black. So I scraped the paint off again to redo it.

Now done as I think should be correct

Some detail painting started


Things are coming together. Testfit of the rear compartments interior

Pilots are almost done. I used the pic in the background to choose colors

As the wing tip pontons will be shown in lowered position, the wing tip will be exposed. So I detailed it a bit

The rails at the bow of the kit are simplified. I cut them out and fitted the missing anchoring points

I hoped to close the fuselage by yesterday, but that was not to be. But pilots are in place with seatbelts fastened

Some detail painting, decals, weathering, dry fitting.

Finally. The fuselage is closed. Fit was pretty good.

The blister canopy compartment after weathering and dusting with everything except the machine guns in place.

Starboard side

Rear bulkhead.

Does not really make sense to show the ailerons deflected and to leave the rudder straight, does it? Only should have done that before glueing the fuselage halves together. This way it was quite a pain. And one which is not over yet.

Prepwork. Some filling and sanding. The rear contact areas of the canopy need to be lifted slightly to achieve good alignment.
The wing sits too deep on the central strut. I elevated it by about 0.7mm. Hope I do not have to pay for this when attaching the small support struts.
The wing sits too deep on the central strut. I elevated it by about 0.7mm. Hope I do not have to pay for this when attaching the small support struts.

Progress was rather slow. The tail required quite a bit of modifications to position the rudder deflected.

The rudder itself needed some attention too. Trimming was added.

The wings have been declared ready, were cleaned, primed, sanded and received a coat of Dull and regular Aluminum from Alclad. Next will be varnish, chipping fluid and zinc chromate.

The fuselage needs some more sanding. After a million times of dry fitting I hope that the canopy will align smoothly. I am eager to start with the paint job.

I needed some coarser work for a change. So I shaped the base for the - not so little - vignette.


The tail really gave me a hard time.

Now I consider it done. Let's see how it looks with the primer on.

Fit of the canopy is now ok as well.

After some fillingsandingfillingsandind she should be ready for primer now.

The areas where I want to depict wear received a coat of zinc chromate. Next will be chipping fluid and medium sea grey then.

Well, and light grey for the lower parts. Here after a bit of chipping. The light grey I mixed from flat white and H317 grey from Mr. HobbyColor. In the pic it appears lighter than in reality.

Primer finally. Unfortunately some more touch ups are needed.

According to my research the black cat Catalinas received their black paint on top of the standard Navy scheme. So I spent a couple of hours to delf into that with the help of the vast internet, books and friends who know a bit about this stuff. Fortified with all this knowledge I was finally able to tackle that issue methodologically. Now: Look and Listen! An appropriate amount of grey (Mr. HobbyColor No. 308) was lighted with some white untill it felt right. Then some cobalt blue went into this mixture until I liked it. And on with it onto the top surfaces of the wing. Highlighting some panels, lowlighting some others and splattering the whole surface with the help of an AK splatter mask. This section gives an idea of where I got with that.

I had a hard time with chipping with water and a stiff brush only. It took ages to achieve a bit of paint wear.

Then I remembered Windex and my tooth brush. Now things sped up.

But it is a thin line between intended wear and ruin. I am happy that everything will be covered with black again and that I will be able to have a second chance on some areas.

Still, I am quite happy with the overall result and look forward to apply my new expertise on the fuselage.

Final result

The fuselage needed some more touch ups. But now the metal coat is on.

Don't know why, but here I have some orange peel that has to be adressed

Another step with the dio. Wrapped the foamboard in cardboard. Next step will be filling the gaps, trimming, sanding, varnish and priming.

After chipping fluid zinc chromate followed, then heavy chipping.


Here wear on the floats and their supports after a light grey coat (ANA602)

The underbelly. Sealed with a coat of varnish after chipping.

Similar procedure on the fuselage as on the wings.


And that is where I am now

Now all figures are build. As the Catalina crews were Navy personnel too, I assume that they were similar uniforms as their comrades on ships. So I felt free to decommission two privates from an USS Gato class boat to my Catalina where they help the ditched pilot on board.
Kommentare
63 10 October 2021, 18:37
Following,...
Made a rescue dio with a Catalina myself some years ago - so I'm curious how you set it up... The start was already great 👍
10 October 2021, 19:13
Watching & learning. I will build this kit someday but not to this level.
10 October 2021, 21:22
Danke Leute. Thanx guys for your interest and your comments. Right now progress is quite good. Lets hope it stays that way.
10 October 2021, 22:32
Hi panorama - thx for your interessed....check out modellversium.de/gal..-pby-5-catalina.html
11 October 2021, 17:24
@Oliver @Juergen
I agree on that. That is about the feel of the scene I would like to convey too.
12 October 2021, 09:00
Really liking you details and scratch work, and the painting is looking very good too. The views into the interior really add lots, and are worth the extra care you took 👍🙂 I'm looking forward to seeing the next stages 🙂
4 November 2021, 19:15
Thanx Gary, Cuajete and Bruce for the nice feedback. A rainy weekend made some progress possible.
7 November 2021, 23:38
Praying for more bad weather, as the diorama seascape looks tremendous already 👍🙂
9 November 2021, 19:52
Count me in. Looking good so far and looking forward to see your water surface
13 November 2021, 06:31
Looking awesome. Will almost be a shame to bury that nice looking blue under the black. 👍
22 November 2021, 16:49
that is super impressive !! I will try to get inspired from your amazing work of the interior and chipping. Btw what chipping material and varnish you used ?
12 December 2021, 13:01
Your worn out Cat looks good! Nice paint job, looking forward to your next steps,....
13 December 2021, 11:41
@James: you are right. Sometimes I have second thoughts about the black. But my mind is set: it will turn black 🙂.
@Pierre. Thanks for your kind words. Concering my technique: I learned the hard way to seal my basic paint with a good coat of varnish (Humbrol or Tamiya clear varnish) to protect it from the following steps. In the past I used decanted hair spray as chipping fluid but switched to MIGs chipping medium for this build. I am disappointed by it. Basic consistency is more honey like and does not go through my gun. Thinning it with water does noch leave a nice even coat is I had with hair spray. Probably the mistake is all mine, but I have not figured out, what and where I did them. Another important lessen was to spray only thin coats of paint and not not wait too long before you start the washing process. Adhearance to these concepts made weathering of the hull easier than on the wing. On the wing I used Windex to soften the paint. As I did not have good success with a stiff brush I start my weathering with an old tooth brush. Its stiffness, yet flexibility prooved to be a good setup to wear down the paint initially. As soon, as wear shows I switch to a stiff brush to modulate the effect. When your done add another coar of varnish.
Puh, a lot of text. Hope it is clear enough and helps you avoid a few of my difficulties.
@Jürgen: Thanx, stay tuned.
13 December 2021, 15:38
nice chipping!
good surface for a well worn look
and I really like your pilots 😁
the whole thing looks like a very good dio to me...
22 January 2022, 22:46
Hi Simon, thanks for your encouraging words. Now that the project sat at the side for a while it is time to tackle the next hurdles. Namely finishing the machine guns at the aft compartment so that I can finally mount the bubble canopies and go on then with painting.
25 January 2022, 10:19
Oh Boy. It is really that long ago that I didn't commence. Shar, your like for the project refreshes my motivation to continue this one soon. And a late thanks to Thomas for the positive feedback.
20 May 2023, 10:59
Better check this one out, it's on the future list- I built it years ago and seem to remember it went well-yours too?
13 June 2023, 22:09
Hi Andy. The build didn't pose any problems whatsoever. Fit was really nice. Exterior detail is quite good. Interior detail is pretty basic - particularly around the blisters. I suggested an upgrade kit to CMK. Let's see whether they pick up the idea.
14 June 2023, 07:47
By the time I come 'round to building mine, they may have commissioned an aftermarket?!
14 June 2023, 07:58
Well, let's cross fingers. The Catalina is quite a popular plane after all and the kit is rereleased once in a while. So there should be a market for it.
14 June 2023, 09:14
Very nice progress Michael... an most impressive craftsmanship mate 👍
29 July 2023, 20:31
Album info
Revells kit improved with some scratch building, Quickboost parts, Eduards PE set and some figures from P.J. Productions and CMK.


Group Build
Sea Patrol Aircraft Flying Boats or Land Based will do! All nations and time?
1. Juni 2023 bis 31. Mai 2024
1. Juni 2023 bis 31. Mai 2024