
Noticias


Nuevo álbum de fotos añadido


14 28 March, 17:52
Thank you Villiers, for this and all other comments and likes. I will answer only here so I don't clog the news feed.
15 April, 06:10


Nuevo álbum de fotos añadido


53 1 December 2024, 19:43
Some of the detail work I see on 1:72 kits on this site is unbelievable - this is another one - fantastic work Davy 👍
4 December 2024, 20:25
I like your serious approach.
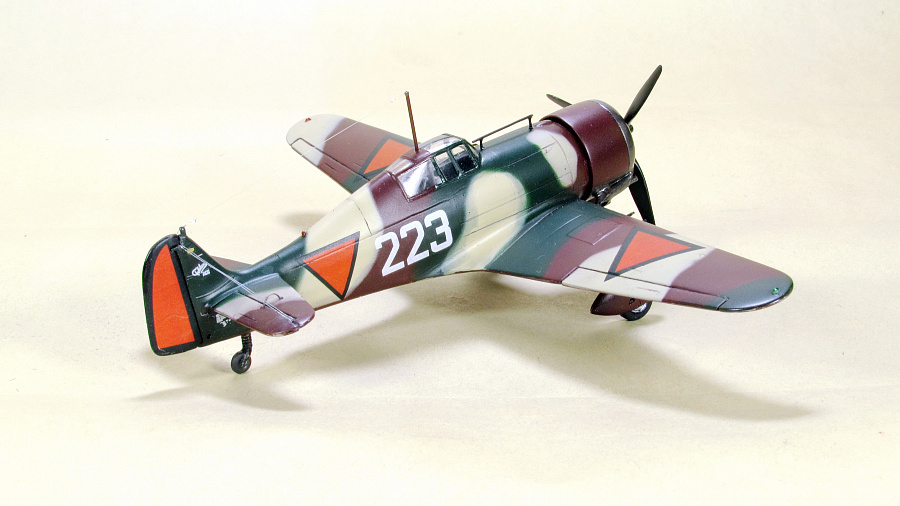
I have assembled two Fokker D.XXI 1/72. One of them was converted from the Novo set. The second one is from Special Hobby
[img1]
[img2]

4 December 2024, 20:50
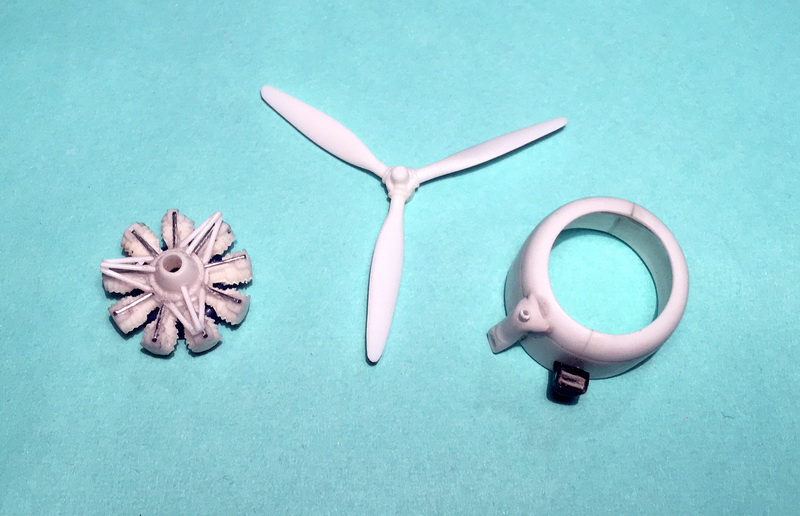
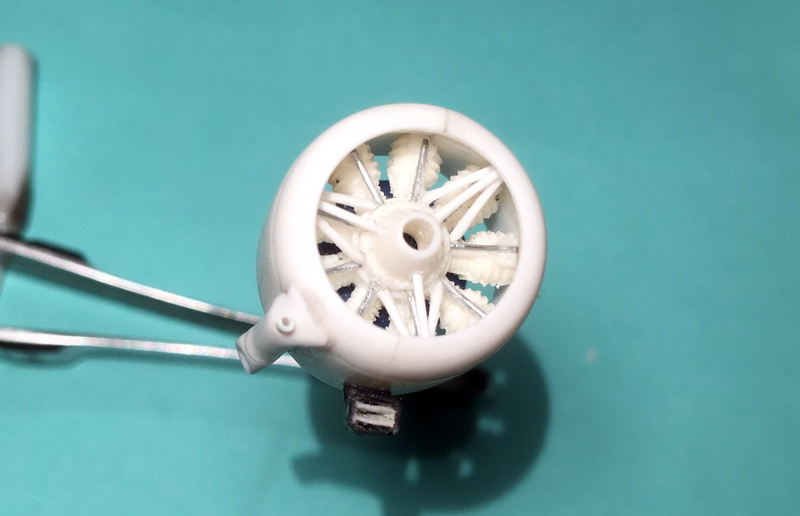
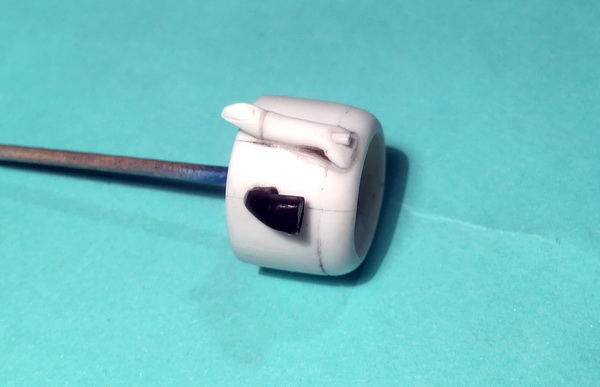
My version of the engine and hood. I took the details for revision from the Blenheim model Novo.
[img1]
[img2]
[img3]
4 December 2024, 21:04
Thank you very much every one! And looks really great Denis! 👍🏻👍🏻
6 December 2024, 21:49
Fantastic work on the interior. The exterior paint work is also very good.
14 April, 20:12
Nuevo álbum de fotos añadido
29 imágenes
Tiger 1 Late
1:35
Next thing will be the figures for the Tiger and Panzer IV.


Proyecto: Tiger 1

7 4 April, 23:01
Thank you guys! Still a bit scared of the figures, but I'll start them soon. I'm also working on a diorama atm. I originally planned to use it for the Panzer IV and the Tiger, but the Tiger is kind of too wide. I'll see if I can make it work.
15 April, 05:59


Nuevo álbum de fotos añadido
28 imágenes
Tiger Moth Work-In-Progress
1:48
The CMK wheel set is nice too! It offers 3 variants of rims outside (with DH logo cover, plain cover and no cover) and t...


Proyecto: De Havilland Tiger Moth


 4+
4+ 31 26 March, 12:03
After I got this kit as present - Thank you Kenneth - I found also some accessories. Luckily the kit was some years old so I found the sets cheaper. The start was triggered recently while I was cleaning my bench and working room. All the additional CMK boxes were to big to fit them into the Airfix box so I cut some of the bigger resin parts from the mold. But once they are cut I found myself mounting them.
Yeah, my first Airfix kit and my first CMK cockpit set 👍
26 March, 12:10
Hey Luke - you are the lucky first one! A warm welcome.
Just added some more pictures.
1 26 March, 13:21
Joining the audience for this build. 🙂
The cockpit looks great and the instrument panels look amazing!
1 26 March, 14:10
Welcome and thank you gorby!
The CMK set is really great so I have not used much from the kit yet and in opposite to other projects no scratch work is needed 🙂
1 26 March, 16:49
That'll be another great result 👍 You will be adding the rods that connect the throttles, the tailplane trim (on the left fuselage half), the slat controls (on the right fuselage half), the rudder bars, and to their respective destinations (engine, tailplane, slats)?
1 26 March, 18:18
Thank you Kenneth for the detailed information and pictures!
One remaining question on the right side of the cockpit, see picture 16 (part of the Eduard manual).
The parts 29 are the control of the slats, that's clear. But what is the purpose of the two levers 10? Should I leave them out?
7 April, 13:28
I've never ever seen such levers (10), and I wouldn't know what they should operate. One guess - and I repeat guess - would be for actuating retro-fitted wheel brakes on a modern, restored aircraft. Personally, I'd leave them out.
1 7 April, 16:31
That seems to be a good educated guess Kenneth 👍 So I have not mounted the levers (10).
In meantime I found some PDFs of original manuals! Very interesting drawings 🙂
In pic 16 Eduard showed two levers 29, the CMK cockpit set only one. May be there are updates with slat control in both cockpits but the original drawing shows this lever onll in back cockpit. So I followed the CMK manual. Now I understand also how this control wire runs to the upper wing and can clearly see it on the reference pictures of "my" Tiger-Moth.
Regarding the little maintenance lids: Eduard provides around 80 and the instructions where to add those. They seems to follow the original generic drawings, but on "my" Moth the layout seems to be different. For example they are sitting on the lower surface on the tail plane instead of upper. So I followed my ref pics here, but this task is not yet complete.
2 9 April, 19:11

Welcome to this build Alex and Lorraine!
Due to spring and nice weather outside not much progress as hoped, but may be some new pics soon.
13 April, 14:00
Welcome Marcel!
Added some new pics. Decided for a different mounting order. The instructions says to cover the engine early, but as the covers overlap the fuselage that complicates the paint job.
13 April, 20:14
Thank you Simon and Alec!
I tried to find a matching red and test sprayed some.
There was a bottle "Life Colours" (Elita Modelle) in my stash, originally intended for the 2CV car project last year (for the Charleston in red/black). It is called RAL3011 "Brown red" and is a very dark red. I will check tomorrow in day light again, but now in artificial light it matches the dark red of the decals nearly perfectly.
The dilemma: the red on the decals is very dark, but nearly all photos I found of the original seems to be a brighter red, see here:
commons.wikimedia.or..ttleworth_Collection
So I can use the paint and the decals, or use a brighter red and mask all the squares (which means more work).
Grrrrrr, always these decisions ....
14 April, 20:36


Nuevo álbum de fotos añadido


2 15 April, 04:56


Nuevo álbum de fotos añadido
103 imágenes
Iveco Hi-Way E5 Abarth - WIP
1:24
Nice~


Proyecto: Iveco Hi-Way E5 Abarth


28 5 March, 22:12
Maybe there is some mold release still on the plastic. Instructions often say to wash parts. I never do and never have had trouble but I guess it's possible?.
6 March, 12:19
Strange. Never had such issue with Italeri truck panels before. Don't think it is ABS - try to glue some sprue bits with Tamiya Extra Thin. I don't think this glue will work on anything that is not styrene. Never used Gaia primer - only using Mr. Surfacer and Mr. Priming Surfacer. Is the Gaia primer lacquer or acrylic? Not sure if you have already did it but try to scuff the panels with Tamiya 3000 or 2000 grit sanding sponge (or similar) before priming. Another idea worth trying is to clean the panel with IPA - maybe the release agent Italeri used don't come off easily with just water and soap.
6 March, 14:41
Oh no guys, this time it's just a straight build...
@Goldman - Yeah As you said, it doesn't seem to be ABS, and I sanded it and used a lacquer surfacer, but strangely the paint didn't stick. Washing with IPA is a good tip, thanks.
6 March, 17:44
Late to the party! Apologies, work has taken over my life 🙁
I'm definitely in for the duration, on this one!
8 March, 06:09
The paint is definitely your issue. Most of my trucks are painted with Tamiya paint. I've never had much luck with model air paint. AK doesn't work for me either. I find it best to use a primer, the lads have already pointed out the best, but I've also used Tamiya primer from a rattle can, as well as decanted. However, I've also used both Tamiya and Mr Colour, straight onto the plastic. Some colours over here, are hard to match, so I go to the automotive store and get the colour I want, and also the matching primer. Again, I decant these into a glass jar, and I leave the lid loose, to allow the gasses to fully disperse from the paint. After a day, I simply add a little cellulose thinner and then mix it up, and airbrush it.
8 March, 06:26
Custom decals - that's new. Really nice design. Looks like a huge amount of work
18 March, 19:05
Great idea scribing the part numbers. I used a POSCA marker to write them (usually the last digit is enough) but it is too easy to erase the POSCA marks by just handling the parts.
20 March, 20:24
Bummer with the fuel tank. I think all metallic paints are hard to mask. Sometimes it works most times you get these (unwanted but very realistic) "chipping" effect.
For fuel tanks I gave up "proper" metallic and just use Mr. Hobby Silver C8. It is not a metallic paint but it looks very good and very durable. Got this tip from Jan Rosecky excellent book "The Complete Guide to Truck Modelling"
7 April, 04:13
When you sand for gloss, don't you have difficulties that when sanding red areas in your instance, the dust ruins the white surfaces?
8 April, 18:10
I guess he used a top layer of clear gloss which was sanded and then polished. So, effectively the colors are protected by the clear coat
8 April, 19:09
@Andre - Yeah, that's correct. I had clear coated twice before sanding. 🙂
@Michael - And in that case, you can erase it by gently wiping it with a compound.
9 April, 02:41
Ah. Thanks for the inside. I understood that you sanded the colors to prepare them for a clear coat. Hence my question. Now it's clear to me.
9 April, 09:17
Italeri do have this kinds of stupid random errors in its kits. Annoying, but since Italeri is the only company that still offers European plastic moulded kits of trucks I guess beggars can't be choosers.
I *think* that there is no clear decal film between the lettering for the tyres to improve appearance. It will be almost impossible to hide the clear film on the rubber tyres. Not sure that having separate letters is the best solution. If you want I think MBM sells PE templates to airbrush the words on tyres.
13 April, 15:57
@Goldman - I'm ok without it. I don't care anymore. hahaha!!! Thanks bro~ 😄
13 April, 19:29
if the decals are still in the sheet (misaligned but there) its easy to scan, convert to vectors, align, make masks in vinyl and try to paint them with mask 😉 and if decals are gone, well, MS K knows how to vector them, and has the cutter already available 😉
13 April, 19:34
@Spanjaard - I thought about making my own decals, but I was too lazy to change the toner to print white. LOL
And since the base color of the self-made decal shows through a lot, it is better to avoid attaching it on top of a dark color. 😉
13 April, 19:51
i did not say anything about making decals, but masking to airbrush the missing decals 😉
13 April, 20:59
Nuevo álbum de fotos añadido


32 2 January, 21:43
Nice job so far! Reminds me to continue work on mine. I am also stuck with the fitting of the front transparent part. I use thin layers of evergreen strips to close in on the gaps, but I am not quite there yet…
4 January, 08:59
Thomas, thank you for your advice. I will see the old remains, maybe there willl be something "filler".
4 January, 12:13
What a fight this little helo puts up! But you seem to be on top of it, so I am waiting for the next steps!
23 March, 16:24
Mates! Thanks for the comments and nice words, it gives me strength.
1 23 March, 22:10
Thank you Nicolas. I did what I could. I hope there will be a better kit sometimes. Thanks again.
14 April, 14:40
Well done getting this little model over the finishing line. Congratulations!
15 April, 04:54
/es/search.php?q=*&page=newsfeed&fkSECTION[]=Newsfeed
search-solr.php?lang=es
35
35
/es/search.php?q=*&page=newsfeed&fkSECTION[]=Newsfeed
35
todo