
Noticias
")
")
")

")
")
Nuevo álbum de fotos añadido
89 imágenes
B-26B "The Milk Run Special"
1:72


Proyecto: B-26B "The Milk Run Special"


 1+
1+ 91 1 May, 11:47
Picture 8 : I screw up riveting on the second wing. 😅 I was thinking that doubling the number of rivet lines was a good idea on this part of the wing, turned out it wasn't...
I used Tamiya Surfacer to cover everything and start again
8 May, 17:37
Thanks for the explanation. I thought maybe you were implementing some hight end stressed skin technique 🙂. Amazing work all around 👍
9 May, 12:09
A real pain doing the riveting but so satisfying once it's done. Lovely work Romain.
6 June, 06:54
Thank you all for your interest ! This is my first attempt on riveting an all airplane, I wouldn't say it was painful, but rather a looong and sometime tiring job. Overall I really enjoyed the experience and the satisfation when highlighting the rivets with a black wash 👌
6 June, 07:38
Very nice work, so far. Riveting looks perfect 👍 I´ve just ordered a new release of Edugawa F/G Marauder, so i will look for some inspiration here.
14 June, 18:49
Thanks ! Yes, this new release of the F/G version is great news for all Marauder fan 👌
29 June, 17:04
Thanks guys, glad to finally paint something after all this preliminary work !
16 July, 14:35
my respect for somebody who can do a complete riveting of a plane... and you said it was your first? how, that looks truly amazing! beautiful cockpit too!
14 September, 22:17
Thank you all ! Yes first time, pretty happy with the result. I received good advices from my French "Sensei" Julien Haccoun 🙏
15 September, 10:15
Totally echo Roberts's comments. Awesome work so far on this build Romain.
16 October, 07:31
Many thanks everyone ! It means a lot during this time consuming project. The finish is acheived by cleaning and polishing the model prior to paint stage. Then by using well diluted paint for thin and smooth coats of paint.
16 October, 16:10
NMF finishes are more work, but so much more rewarding when done. Super metallics for me definitely the metals paints available.
17 October, 06:25
")
 'early version' (Hasegawa 08175)")
Nuevo álbum de fotos añadido


57 25 August, 10:13
These four pictures begin a project that should result in one of the largest models I have ever attempted. Not the biggest - the 1:32 Liberator holds my record here - but close!
However, the impressively large box contains surprisingly little and, also surprisingly, large components such as the fuselage, wings and tailplane are already assembled. Incidentally, these are made of fibreglass and require their own treatment.
These parts are also stable and clean. A bit of filling was required, as the traces of glue and filler on the seams are very rough and show air pockets. This will now be sanded, the cockpit sawn out and the windows drilled - well, modelling a little differently than usual! 🙂
25 August, 10:20
The panel lines look ok I guess. I mean, I would be happy with those panel lines.
25 August, 11:26
Like it , nice project.
I'm working on the Beriev Be-6 Armoured Flying boat,
Revisiting a kit after 33yrs.
All the best with yours...😃👍👍
25 August, 11:52
A true behemoth it is. I will surely follow this build with utmost interest!
25 August, 13:15
Looking forward to seeing this take shape. 🙂
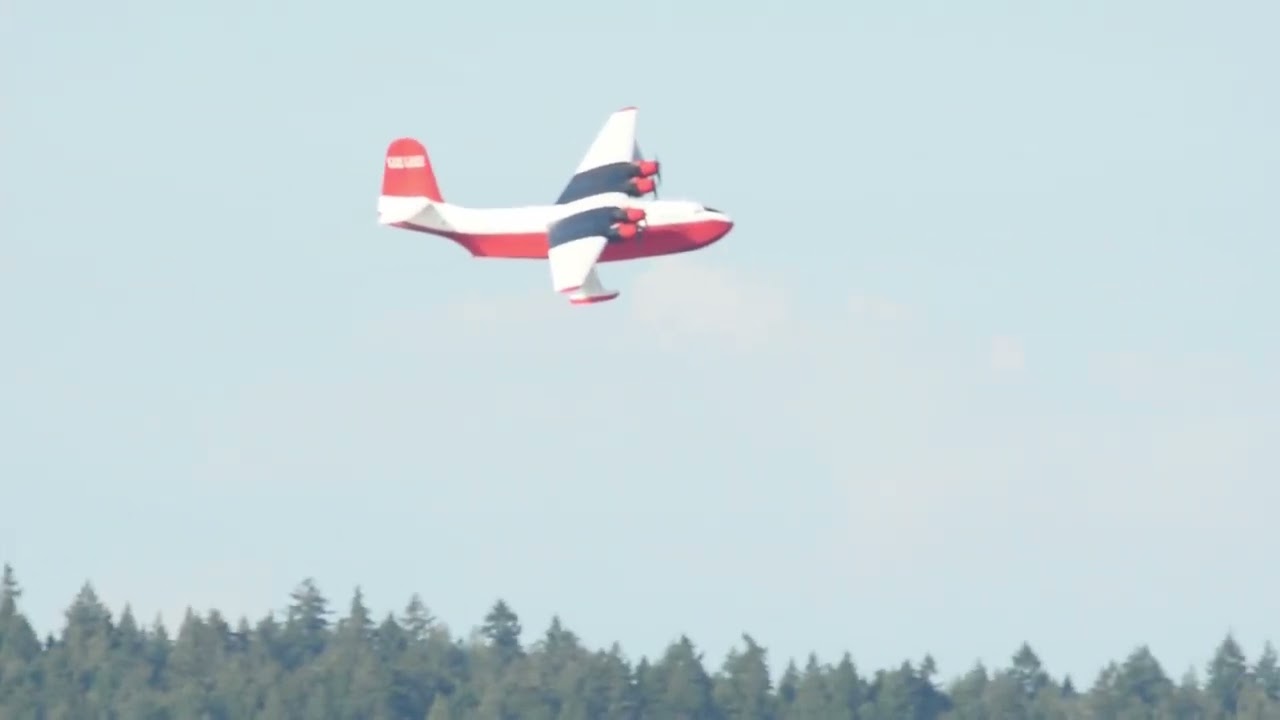
I believe the last Mars had it's final flight two weeks ago.
Youtube Video
Youtube Video
25 August, 13:22
I am very happy about all your interest! In fact, I also started this project because of its topicality; the pictures of the last flight of Hawai Mars are always a heart-warming pleasure; this one in particular, thanks Gorby for posting it!
Today I drilled the openings for the windows in the fuselage; I determined the diameter of the holes from kit glass parts. They seem a bit big to me, but we'll see. As I'm not going to use the clear parts from the kit, but want to make them with Klearfix, I could reduce the diameter quite a bit.
The next steps will be to finish sanding the fuselage seams - now only the top side has to be done - and then to glue the wings and stabilisers to the fuselage. To do this, I'm cutting solid steel rods to length, which I'll glue in place with a two-component adhesive.
The Mars should be ready by mid-October: I want to take it to the Euromodel in Ried, Upper Austria.
And yes, In fact, the more or less finished Fairchild F.91 had to serve as a scale model in the background! 🙂
25 August, 14:11
Du bist echt eine Bau-Maschine, Roland! Und immer kommt etwas sehr schönes raus! 👍
25 August, 14:26
The construction of Mars is progressing: I'll show you a few construction steps in a little 'time lapse'. Attaching the wings and tailplane with 2k glue worked well; the materials could be sanded smooth and fine afterwards. However, the brittleness of the fibreglass caused some difficulties; parts kept splintering off and had to be filled, sanded and re-engraved. As I always do the whole thing standing up, wearing a mask and under running water, this always turns into an almost athletic exercise 🙂 But now it seems to be over and the Mars is ready for its first encounter with colour... I took the two crew members under the cockpit canopy to make the proportions clear and to keep my options open for presenting the finished aircraft - who knows, maybe it will take off or fly?
29 August, 07:38
It's a bit of a monster! 😮
Doesn't look like an easy build but you seem to be beating it into shape. 🙂
29 August, 08:57
Wow... an unusual and gigant model... It seems like fiberglass is difficult to handle.
Great job so far, Roland!
29 August, 19:49
Thank you very much for your motivating feedback and your interest, mates!
30 August, 10:50
I have to follow that behemoth 👍 I don't think I'll ever find enough space to build one myself 😄
30 August, 11:00
My goodness, your models are just getting bigger and bigger! I cannot wait to see it finished!
30 August, 12:04
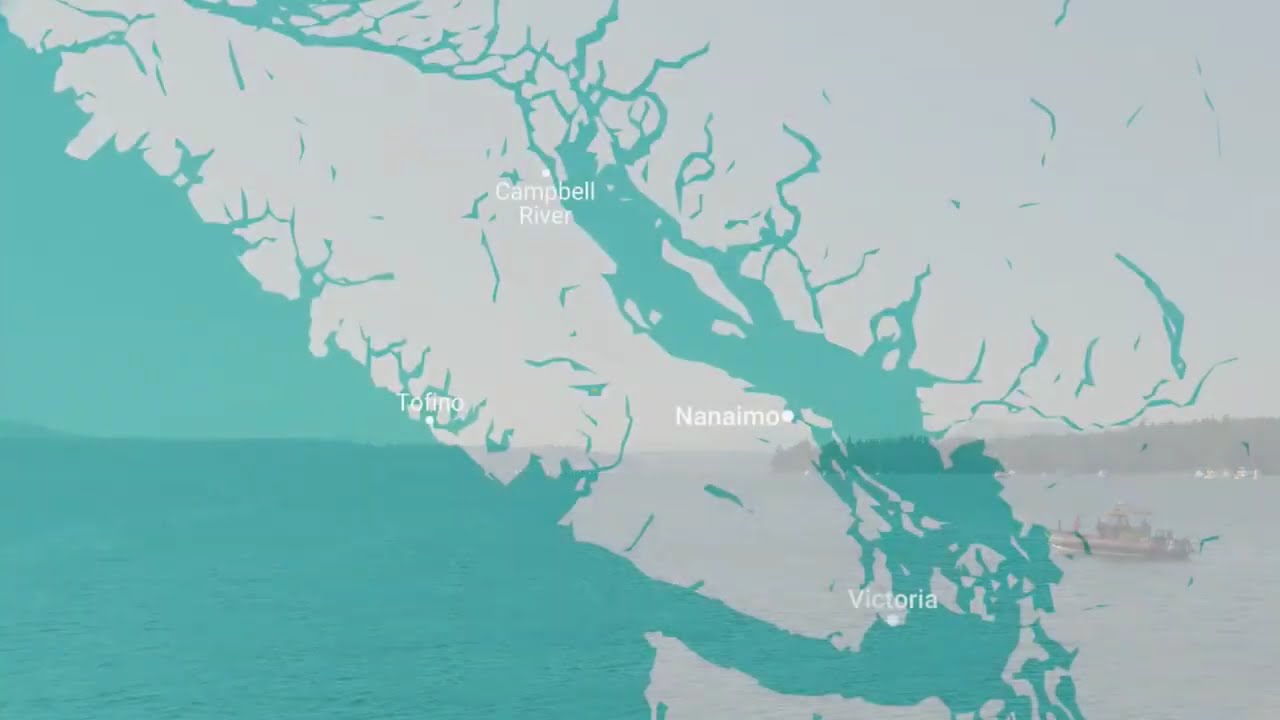
Following as well. Just saw its retirement flyby and landing in Pat Bay, Its Huge.
31 August, 13:19
Fortunately, the Martin Mars has reached the stage where the colouring and surface design will be the main thing; so far I've been 'plugging holes' again and again: the fibreglass surface proves to be quite brittle, damage is difficult to putty, and when re-engraving the lost panel lines it quickly happens that it cracks again under the carefully guided scalpel blade - and a new hole has already appeared. The new pictures show a few such construction sites, for example at the bow under the cockpit glazing or on the back of the fuselage between the wings.
But, all in all, in retrospect it's all half as bad, now I'm looking forward to the paintwork!
Thank you, mates, for your interest and feedback! Ray, I would have liked to have experienced that too!
15 September, 18:24
Roland, I was unaware of these problems with fiberglass and it is a shame that these kits are so expensive considering the quality of these materials. I think the worst is over. You can feel proud of the work done so far. The effort was worth it. Go on!
15 September, 18:31
Those are encouraging responses, yes, Cuajete, I think so too. Thank you both for your interest and comments!
15 September, 18:33
How big is the model??
Is it cast in fiberglass because it's to big for injection molding??
Nice to see the update 😁👍👍
The vent in behind the cockpit done now.
15 September, 18:50
Thank you friends! The Mars as a 72 model measures 84.5cm in wingspan and has a length of 48.5cm: huge, but not so huge that it couldn't have been made into an injection moulded model. The B-24 Liberator from Hobby Boss in 1:32 that I built this spring, for example, was significantly larger and yet still injection moulded.
What is now proving to be a challenging issue is that the acrylic paint I used does not seem to want to adhere properly to some parts of the resin fuselage and wing panels, even though I have meticulously and accurately cleaned the surfaces. And another thing: after I sprayed a first coat of white paint on the fuselage today, something became apparent that hadn't appeared before: the resin surfaces are covered with small air pockets, i.e. holes.... 'Much enemy, much honour' as they say in German! 🙂
17 September, 06:20
What are you using for primer? I almost always use tamiya spray primer as it usually adheres even to challenging surfaces. I have had trouble occasionally on some resin surfaces where I've resorted to krylon plastic compatible spray paint as a primer.
17 September, 11:59
That's a good question, thanks for the tips: I used glossy black acrylic paint here as usual - it actually looked quite good until yesterday, after a few days drying time, I started to mask off the black areas on the undersides of the wings....
I think I'll just carry on with Gunze and Tamiya acrylic paints - and touch up where necessary.
17 September, 17:07
Der aktuelle Zustand der Mars in Weiß hat noch nichts mit der finalen Oberseiten-Farbe zu tun, sondern bildet nur die Basis für das Rot der Unterseiten. Aktuell erstrahlt die Mars sogar in leuchtend Gelb: Dies sollte die Leucht- und Deckkraft des folgenden Rot noch weiter stärken. Der Aufwand wird allerdings dadaurch erhöht, dass immer wieder Spachtel- Schleif und Gravierbedarf auftaucht: die Resin Oberflächen sind äußerst uneben und voller kleiner Lufteinschlüsse, ein echter Jammer. Aber ich bin zuversichtlich, dass mit der steigenden Stärke der Lackschichten auch die raue Oberfläche etwas mehr Geschlossenheit zeigen wird!
21 September, 16:53
Sapperlot! I only wrote the text in German yesterday: here it is in English:
The current state of the Mars in white has nothing to do with the final upper side colour, but only forms the basis for the red of the undersides. At the moment, the Mars is even shining in bright yellow: this should further enhance the luminosity and opacity of the red colour to follow. However, the effort is increased by the fact that there is always a need for filling, sanding and engraving: the resin surfaces are extremely uneven and full of small air pockets, a real shame. But I'm confident that as the thickness of the paint layers increases, the rough surface will also show a little more unity!
Thank you very much for your encouragement and motivation! Yesterday I mentioned that Mars has now been coloured yellow as the last stage before the red - here are the pictures!
22 September, 09:55
Thank you Cuajete!
....and now in red! It's getting really exciting for me now. Not just the question of how I'll manage the masking for the white upper sides, but above all whether the colour under the adhesive strips will stay on them or - hopefully - on the model when I peel them off!
24 September, 06:26
I'm sure it does, Roland. That Mars looks great and the red color looks great.
Is the stand underneath included in the kit?
24 September, 18:59
Thank you! Yes, that's him. Doesn't necessarily look much, but is very useful when building
25 September, 13:15
Hi Roland 👋.
Is it heavy? Being fiberglass ?
I've read about the difficulty you had with Glass resin!
My dad used to make parts for race bikes ....and air bubbles very hard to avoid! Also cutting against the grain....tends to pull other strands.
Your getting to a better stage now and it's coming on nicely now...
I thought it was the Goose at first glance.. earlier in build.
Good luck with rest.👍👍
25 September, 13:43
Thank you both! Somehow it is really comforting and above all interesting that I am not alone with the problems with the fibreglass surfaces! Yes, the construction is fairly heavy, but above all it needs enough 'air space' above the workbenches when it is swivelled to get everywhere with the airbrush! 🙂
Well, the 'Spruce Goose' is still a dream - but one with a chance of realisation!
26 September, 05:28
The time has come! Now the layers of paint under the masking have to prove that they can adhere to the fibreglass surface and want.... prognoses say it will all be possible! In the meantime, the white has been applied to the surfaces, which definitely looks good on the Martin Mars.
4 October, 06:56
Thank you for encouragement!
I would like to show you the condition of the Martin Mars this morning: The red and white areas survived the masking quite well, only small areas had to be touched up with brush strokes, but the black areas on the undersides of the surfaces, on the other hand, remained generously on the adhesive tape. I masked them again straight away - I now trusted the red areas surrounding them - and sprayed over the black, applying a first coat of glossy clear varnish over everything in the same session. Now I have to break up the red and white edges on the fuselage with a cloth, well, the white always builds up beautifully... Maybe I can try out the decals tomorrow!
5 October, 09:35
It looks spectacular, Roland! Fingers crossed and looking forward to seeing the result. 👍
5 October, 17:03
Thank you very much for your encouragement and motivation - much appreciated! I'm all the more pleased to be able to show you the Martin Mars with decals! The decal material was anything but easy to apply and in some parts - with the red stripes - it broke into numerous stripes, but I'm all the more pleased to be able to show you the pictures of a reasonably well-marked Martin Mars! The engines and floats have been under construction for some time now and will soon complete the Martin Mars as it approaches the finish line.
6 October, 16:34
Excellent job ! The same plane is on the cover of the November 2024 edition of Fly Past Magazine. Fabulous work Roland
16 October, 20:34
ank you very much, Nick and Mr D! It's really quite inspiring to have a 'current' aircraft in the works. 🙂
I would like to show you a few current pictures of the Mars - the completion of which is slowly coming into sight. The surface qualities such as colour scheme and gloss level have been determined, the windows are in progress. One on the left side of the fuselage is still missing and the two small windows at the very front of the bow are so cracked by the drilling - the fibreglass material has its pitfalls - that I have to think of an alternative. Perhaps they will be finished with a decal.
17 October, 05:59
brave project, respect!
You will be rewarded with a result that is outstanding.👍
17 October, 06:20
")


")
 Hornet (Revell 4360)")
Nuevo álbum de fotos añadido
8 imágenes
This is not all it's cracked up to be …
1:48
Cracking across the tail decals. The gray smear is where I’d already started removing paint then though I really should ...


Proyecto: Phantom FG1 “Colonial Navy “


 5+
5+ 6 15 October, 15:59
This won't be in FAA colours as I don't have any more FAA decals for this era of phantom so it's going to have to RAF.
15 October, 18:42
Hi Dave pain in the but when something like this happens to paint..?
It's all a learning curve.
I snapped a canopy in two recently.
Don't let it put you off, Velejo paints are very reliable and don't let you down.
I purchase a basic colours set when l first set out and never looked back.
Good luck with sorting it out..👍👍
15 October, 19:05
Shame about the crazing as the model was looking very good. Do you know if it was the paint or the top coat which cracked?
15 October, 19:58
Mr D , nothing puts me off, as you say it's all a learning curve. Gorby, I "think" it was too heavy a paint coat,. I've stopped using pure acrylics. I now use Tamiya acrylics thinned 50/50 or more with cellulose thinners (and a mask) gives a super smooth finish and no primer needed to key
16 October, 10:48
I've not heard of Tamiya acrylics being thinned with cellulose before. Normally I use the Tamiya thinners and find that works very well.
16 October, 11:02
If you thin with cellulose (and leave it for a few hours) it breaks the particles down and gives a ridiculously smooth finish as well as etching into the plastic.
16 October, 12:40
Hi Dave 👋
It's bit to Harsh for modeling Cellulose.
Isopropanol alcohol or Tamiya thinner is better and safer.
Cracking can happen if X2 paint coats are drying at quite different times.
16 October, 13:04
Whatever works for you…with pure acrylics I've had issues with " lifting" ymmv. Just don't try it with anything other than Tamiya. Tamiya is NOT a proper acrylic . "Proper" ie water based acrylics just turn to jelly 😉
BTW the FAA phantom was done with Tamiya acrylics thinned with Tamiya thinners.
16 October, 14:48
Wow! That's quite the save. 👍🏼 Really nice repaint. 👍🏼 I like using lacquers like Mr. Color, MRP or SMS and occasionally thin Tamiya 'acrylics' with lacquer thinner as well. They spray fabulously and if I need to touch up anything I just come in with brushes and use water or acrylic thinner as to have the same color.
16 October, 19:32
Well done for pulling it back Dave, l like the new scheme..... Great aircraft 😃👍
16 October, 23:22
Nice work David. I've done something similar on a Tamiya Spitfire because of the decals. Looking forward to seeing the finished result.
17 October, 06:20
")
")
")
")
")
")
")
")
 DH9 (Roden 423)")
Nuevo álbum de fotos añadido
40 imágenes
P-38J (Robin Olds) [COMPLETE]
1:48


Proyecto: P-38J (Robin Olds) [COMPLETE]


8 16 October, 21:30
Looks great. I have the kit in my stash, will have to build it soon 👍
16 October, 21:50
After two hours, the whole cockpit, wings and "fuselage" were together. I got totally sucked in after the first two hours and it really got in the way of other projects! So fun!!!
16 October, 21:53
Biggest issue is the choice of D-Day markings. The white bands are 60 mm on each wing and on the booms. This makes the individual stripes 12 mm. Pretty easy once you see it. I started out with 50 mm white band. That was clearly too short.
16 October, 21:56
Model Master Neutral Gray on the underside and Vallejo 71.043 (US Olive Drab) on top. Lots of Tamiya Panel Line accent black overall.
16 October, 21:58
I have seen claims that Olds first two kills were in this specific aircraft.
17 October, 00:27
Really nice work DM....Lovely build.
Best story around Robin Olds in a P-38 was that he got behind a flight of 109's.....he was ready to open fire when his engines cut - dead. He had forgot to switch tanks to his internals when he jettisoned his external tanks. Instead of resolving his fuel transfer issues he just carried on lining up on the 109 and shot it down while in 'glide mode'. That's calmness under pressure for you.
17 October, 06:16
tiene este artículo
")
U.S. Main Battle Tank
M1A2 SEP Abrams TUSK I / TUSK II / M1A1 TUSK 3 in 1 Rye Field Model (RFM) 1:35
RM-5004 2016 Nuevos moldes 17 October, 06:15
Nuevo álbum de fotos añadido
30 imágenes
1/32 Revell Hawker Hurricane Mk.llB
1:32


Proyecto: Revell Hawker Hurricane Mk.llB
Scratchbuilt
10 16 October, 04:03
Finish looks legit; is that a semi-gloss or satin coat? Sometimes model planes have too much of a flat or matte finish.
16 October, 21:47
Cheers…legit is what we're all looking for…😉👍
I used the Mr.Hobby semi gloss rattle can just before applying the decals…then weathering on top. Was going to hit it with a flat coat but kinda thought it looked "legit" as is…😁👍
17 October, 06:15
")
")
")
")
")
")
")
")
/es/search.php?q=*&page=newsfeed&fkSECTION[]=Newsfeed
search-solr.php?lang=es
35
35
/es/search.php?q=*&page=newsfeed&fkSECTION[]=Newsfeed
35
todo