WIP - Sopwith Camel

White primer and a huge amount of tapes ...

Shading with thinned MRP NATO black

MRP linen color is on. But I need to replace it with a daylight picture!

The first thin layers of PC10.

In daylight the linen looks better.

I want to try the look of the blue, so I continued to work on the upper wing.
There is a white frame provided as decal, but with paint I can try to keep the shading. So masked all what is not white. I used MRP white. Insignia white or so looks better but the letters and fine symbols are white decals.
There is a white frame provided as decal, but with paint I can try to keep the shading. So masked all what is not white. I used MRP white. Insignia white or so looks better but the letters and fine symbols are white decals.

After inverse masking I brushed the blue (Gunze H15), which looks nice. Is with naked eye a bit darker.
Not perfect, but looks more like field modification 😉
Not perfect, but looks more like field modification 😉

I masked again the white and blue areas and the lower surfaces to paint PC10.

Why masking the lower surfaces?

Because the PC10 is sprayed around the edge.

The new Eduard 3D printed seats are fantastic! In black you can't see all the details.

Primed white.

Painted the first one with suggested paints.

For a second one on the right I used XF-55, then both with oils.

Both are finished with a darker oil wash.

In multiple masking sessions the ailerons are also done.

I started also to work on the fuselage internals.

I own also a PE set made by PART for the old Eduard Camel. As often there are crazy little things in this set! Here two straps (6 single parts).

I used the prepared straps to mount the fuel tank. Not sure about visibility later. The seat belts are Eduard Steel and are included with the 3D printed seat.

If the tank is in the back of the pilot he need to know about amount of fuel. So I created a fuel gauge according to my reference pictures. It is 0.6mm brass - thin like a bell wire! The 0.4mm inside diameter are filled with stretched sprue.

The last details are painted and rigging was added (0.1mm nickel silver and 0.3mm brass).

Some copper fuel lines and brass fittings.

All mounted into the right fuselage side. Please note the little protection on the wire crosses, made from thin paper.

Should be prominent when viewed from top, so it was worse the effort.

Tank and seat subassembly glued in place.
For the left side there is still something on the ToDo list.
For the left side there is still something on the ToDo list.

The engine bearing is done, as a rotary needs to be able to rotate! Made some support from styrene.

Glued in place.

Thinned the front a bit for a deep fit as I need all the available space for the engine.

I realized that Capt. Hinchliffe need some fuel, so I painted the gauge more than half full (with Gunze Clear Green, hard to photograph).

A made also a main fuel shut valve ...

... and a fuel filter.

The PART PE sets contains always wonderful but crazy parts. I decided to use the throttle lever assembly and cut the Eduard parts away.

All mounted in the left frame. The frame is now on the fuselage halve.
After the picture I notice the loose rigging line - fixed, and added a rigging line on the upper corner as on other side.
After the picture I notice the loose rigging line - fixed, and added a rigging line on the upper corner as on other side.

Both sides together.

And finally the view from above.

Prepared the Brassin Vickers. The PE parts had a very tight fit on the resin barrel! Added pins for easier painting and later mounting.

Painted with airbrush Alcad Steel followed by a very light layer of Alclad Gun metal.

Painted leather and wooden handle with brush. Finally a very light dry brush.

Again on a dark background.
Will be mounted later on aircraft for easier paint job.
Will be mounted later on aircraft for easier paint job.

I tried at first on a lower surface of the aileron to peel the carrier film of the new style of Eduard decals (below). Decided to go that way. The upper one still has the carrier on top. I have left the overhang as starting point.

To handle decals with no backup is always a bit of thrill. To remove the carrier from this uneven surface even more!

Also the bigger part could be removed in one piece.

I really like the result! Here is clear coat Satin applied.

Many steps:
- cleaning parts
- white primer
- masking
- blue paint
- masking
- grey paint
- gloss coat
- poseidon decals
- removing carrier
- tyre decals (only now because of overlap of carrier otherwise)
- removing carrier
- flat coat
- painting of ropes anthracite
- painting hub metal
- add valves of 0.3mm lead wire
- add a spoke of 0.1mm nickel silver
- weathering will be done later

The backside is only blue.

The most beautiful wheels of my biplanes.

Löök is the Eduard name for a series of instrument panels in resin with print on it.
As mentioned before my parcel with the panel go strange ways and was send back by customs to the sender. I got my money back and ordered one in between, which arrived shortly before Christmas.
That is the content. Again with Steel belts, but the PE plate is different to the one of the wicker seat as here some wires for the IP are added.

The parts needs to be cut from the lower sprue and on the left part a cut out of the thin black middle foil is needed.

All is mounted together with some kit parts and the guns. But I had a massive problem with a dry fitting. I removed parts and it took a while until I realized, that the middle part with the instruments needs to be thinned heavily on the back, otherwise the gun part in the back of the panel sits is a wrong position. The mount of the Löök resin panel is different to the mount of a kit panel!

Now it fits. The protruding instruments are better than the 3D printed SPACE series or the kit's etched parts. But next time I will probably stick with the plastic of the kit.

During dry fitting I noticed another problem: The MGs protrude over the cowling! The resin barrel is a bit longer then the kit part. Not much, but enough to disturb a property of the Camel. Eduard says "Drop in replacement." No, fixed that too.

The tail skid is very thin! May be it is enough from the bench to the cabinet but I'm sure not for my transports. I managed also to break off the tail skid of the Fokker D.VII during the build, and that one was thicker. So better replace it now.

Some new parts from metal and wood. The upper part is a "shoe" made from very thin foil soldered to a 0.6mm brass profile. On the kit plastic PE should be added for control linkage, but I integrated that.

My new skid is may be not that correct, but much more robust.

The kit skid needs to added before closing the halves. I glued a piece of wire in to hold the suspension, so the rest of my creation could be mounted later.
The fuselage is closed now. On the fuel tank you may noticed the fuel filler cap. The two other caps are missing as I managed to break my last 0.8mm mill bit and the 1mm one is to big for the smaller caps 🙁 New ones are on the way.
The fuselage is closed now. On the fuel tank you may noticed the fuel filler cap. The two other caps are missing as I managed to break my last 0.8mm mill bit and the 1mm one is to big for the smaller caps 🙁 New ones are on the way.

The control stick would need some cleaning due to mould offset, but I soldered a new one, as on my other Sopwith aircrafts.

Goal was to show the upper open pipes.

Here mounted on the front part of the fuselage with rudder bar and some control wires.

The front part was snapped in (the fit is impressive!) and fix with some glue. The back parts of the Vickers are also mounted.
What a busy cockpit!
What a busy cockpit!

The cockpit cover is only dry fitted, need some work.

With the naked eye some details of the cockpit are visible.

Today I got a belated Christmas present from my wife - Rudi Rednose's sledge was stuck in a traffic jam 😉 Not exactly this Camel, but very nice!

As I mentioned I had to order new micro mills. After they arrived I turned the two remaining smaller filler caps to 1.2mm and milled them with a 0.6mm mill.
That are wonderful two knife edge mill bits for alu and brass!
That are wonderful two knife edge mill bits for alu and brass!

Looks nice in the cut outs of the upper decking. You can also see my sanded cowling.

Now some words about the cowling.
May be you remember the older Eduard kits? If there was a cutout in a cowling you got two parts. Now it is different!
The sprue D is not in a great quality as the other 3 sprues and the reason seems to be that Eduard is using here a slide moulding technology. On the picture you see how it works, two mould halves and pins from the side in the middle for the cutout. This seems to cause a seam, which needs to be removed.

Eduard had a problem with this (new?) process, so you can notice here an incomplete front ring of the left.

I solved this problem with adding a front ring from the Parts Camel set. Not very sharp etched rivets, but a improvement for sure.

I painted also the struts, which have nice mount points, but are very thin. I do not like at the end my wood painting and my wife asked: "Why no wooden struts this time?" So I have now a bunch of nice little but rigid wooden sticks.

The kit offers 4 engine types: Clerget, Gnome, Le Rhone and the Bentley, which I need in this build. That are the parts.

Plugged together - not that bad, but I don't like the 0.63mm "pipes" at the front!

The Bentley B.R.1 (also the B.R.2) are not available by Small Stuff. But there is one available from Eduard for this Camel in the new Brassin Print series.
I a sturdy cardbox you will a manual, a little PE plate and two black resin parts (in the middle).
I a sturdy cardbox you will a manual, a little PE plate and two black resin parts (in the middle).

That are the engine parts alone out of the box, directly printed in a very hard resin (no comparison to the gray cast one).

On the back you can see the print supports, which needs to be removed carefully.

After cleaning and modification of the parts (I drilled a 1mm hole for my axle - needs to be centered!) plugged together with the PE parts in between. That was not easy, as I need to remove more than the supports, otherwise the intake pipes do not fit to the cylinder heads!

Here the front. You see, that the push rods are printed with the engine and much thinner compared to the kit part. But you can see also, that this little beast rolled from my bench after my modifications were done and lost one valve rocker and some push rods!

But beside this mishap the engine fits on the axle.

After thinning the cowling on the inside a bit the Bentley is able to rotate freely and smoothly.

But what to do now?
If you look for references (what I usually always do - this is a fun part of the hobby) you will need also to look for Bentley A.R.1 for "Admirality Rotary", which was later renamed to "Bentley Rotary". The engine was developed as a less troublesome replacement for the Clerget.
On Wikipedia you can find this wonderful picture, also in a high resolution.

The push rod looks still thick with 0.3mm on the printed engine. I know, that the resin push rods of the Small Stuff engines are 0.15mm, also on the Clerget. So I measured them on the high resolution pictures: yes, exactly that size also on the Bentley!
So I removed also the remaining push rods, painted the engine with Alclads and add new push rods from 0.15mm wire.
So I removed also the remaining push rods, painted the engine with Alclads and add new push rods from 0.15mm wire.

After mounting the parts together I added ignition wires (wanted to use Small Stuff spark plugs, but no chance to drill in this hard resin so I faked some). Same copper wires as I use on Small Stuff because I found the provided PE to thick.
Finally a light oil wash.
Finally a light oil wash.

A view onto the cylinders.

And from back. This is visible if you look through the big cutout of the cowling. I was not able to get better sprue gates.

Even if I prefer a Small Stuff engine I'm very happy with my first Bentley B.R.1 !

The kit contain a clear plastic part and a mask but I find those parts always to thick.
There is a PE frame and printed acetate sheet in the Part set. So I soldered the two parts.
There is a PE frame and printed acetate sheet in the Part set. So I soldered the two parts.

Cut out the foil and glued it to the back side of the frame.

The manual required wood paint inside the cover, but I painted the front alu.

Due to a more complicated masking I decided to paint also blue and leather now.

Cover is glued in place and masked completely.

Fuselage primed white.

Masking - shading.

Masking - linen paint.

Masking - PC10.

Masking - white

Until now all was ok.
And now the a lot of masking again.
And now the a lot of masking again.


And finally the blue paint.

That was not a 100% success ...

I squeezed 1.3mm brass to a airfoil shape.

That are the basic parts of a new undercarriage, build from 28 brass parts and 3 layers of veneer.

In the profile view you can see the "rolls" to wind in the suspension later.

Plugged together. Here is also this typical half axle made of 1mm nickel silver added. It has a hole already to be pinned in the middle.
BTW the kit axles was also 1mm, but the holes in the wheels a little bit bigger. I hate, if the wheels are not straight later, so I added 1.2mm brass bushes into the wheels.
BTW the kit axles was also 1mm, but the holes in the wheels a little bit bigger. I hate, if the wheels are not straight later, so I added 1.2mm brass bushes into the wheels.

It fits to the fuselage, here fully deflected.

And in neutral position.

The limiter of the suspension rubber lines are soldered to the half axles. Please note also the 0.32mm holes, which are later the rotation points.

All parts are finalized and the legs and the wooden axle holder are glued together.
Brass color is gone. Primed with Mr. Metal Primer.
Brass color is gone. Primed with Mr. Metal Primer.

Final dry fitting before painting. The axles are only plugged in.
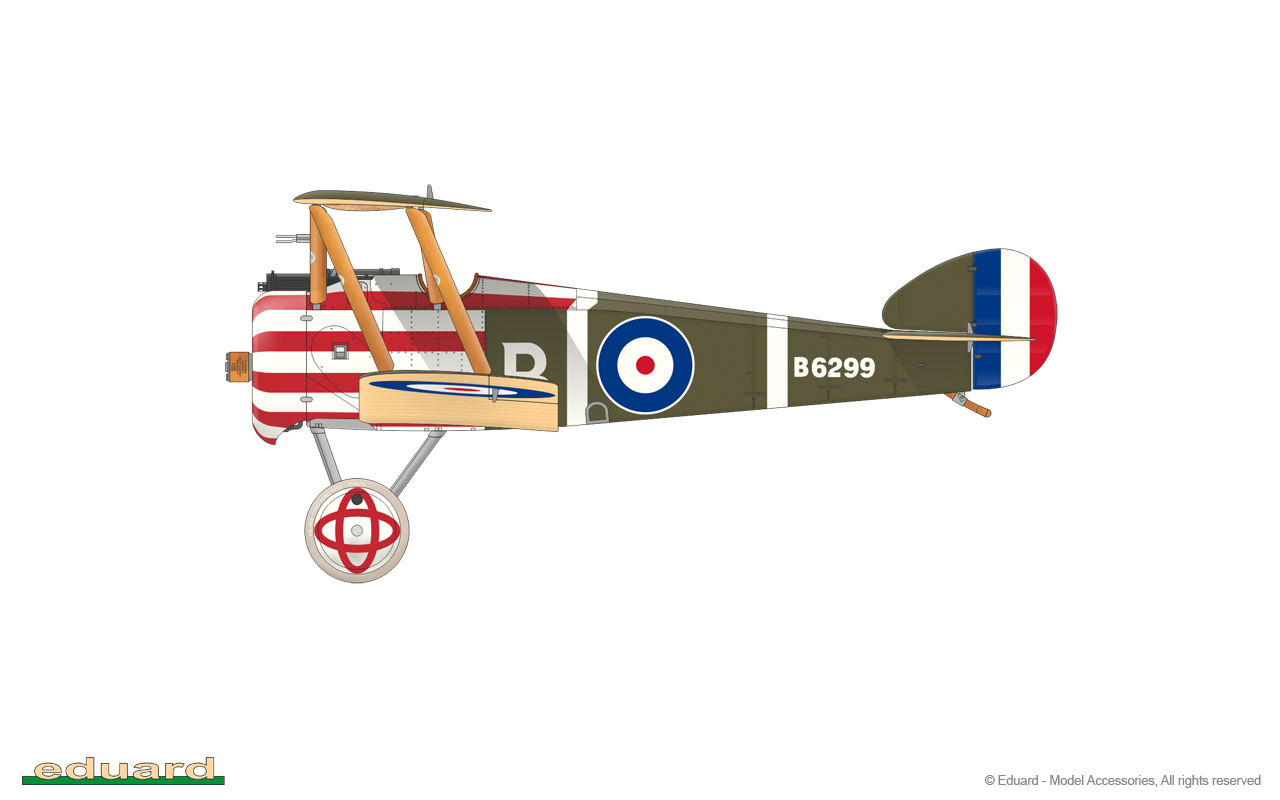
The color was a question for me. Eduard says grey, but I followed here the WNW manual: blue.
The color was a question for me. Eduard says grey, but I followed here the WNW manual: blue.

The gear was painted. I masked the wooden board a bit on lower side, as wet grass and little stone has removed the paint there.
After drying I mounted the axles with 0.33mm nickel silver. That "bolts" are secured with little plates on the front, with additional 0.2mm bolts. The "rubber" lines made from stretched sprue are also wound in to hold the axles and later the model.
After drying I mounted the axles with 0.33mm nickel silver. That "bolts" are secured with little plates on the front, with additional 0.2mm bolts. The "rubber" lines made from stretched sprue are also wound in to hold the axles and later the model.

The undercarriage is now mounted to the fuselage. I drilled out the brass bushes in the wheels slightly, so the wheels are now very close to the suspension. It matches the drawings.

And in a side view. The wheels are not yet fixed to the axles.

The decals provided by Eduard are very nice, here the fuel cap lettering.
Can't read it with naked eye, but the text is "PETROL GRAVITY"...
Can't read it with naked eye, but the text is "PETROL GRAVITY"...

... and "PETROL PRESSURE".

My plan was to remove the carrier film, so I take care that there are no overlaps and applied the decals in multiple sessions (carrier removed after 10 hours).

Even the stitching was no problem!

That is the result - no carrier film visible

After the decals I mounted the engine, the cowling is also finally in place. On the cowling front a little brass plate is added. It was part of the ring, but I cut it to keep it in brass.
The cowling is also secured with a rope and 4 securing plates with wing nuts (no, it is still no Wingnut kit 😉 ) from the Part set.
The cowling is also secured with a rope and 4 securing plates with wing nuts (no, it is still no Wingnut kit 😉 ) from the Part set.

The removed kit "locks" are now replaced by brass locks. Albion Alloy offers now also aluminum micro tubes, which I used for intake pipes.

On the backward side of the metal panel was also a securing rope. The kit fuselage already had a recess here so I drilled holes and added a wire.

This is now the actual state, right side:

Left side:

And from top, with the fuel caps. The sign on the back looks a bit different on the WNW kit, but I have no chance to change this.

A Rotherham air pump was used to put the fuel system under pressure during flight. There were different locations of the pump, on upper strut or on undercarriage leg.
Due to different struts and undercarriages Eduard respected that and offers here different parts with the pump. There are another parts without the pumps, so you dont need to remove the pump in the other cases.
This limited Edition kit provides even PE parts for the mounts (see 11 and 12) and a prop (17).

But I will not use all those parts!
Eduard wouldn't be Eduard if they didn't go a bit further: There is another Brassin PRINT set for the Rotherham air pump!
Eduard wouldn't be Eduard if they didn't go a bit further: There is another Brassin PRINT set for the Rotherham air pump!

You will get five different mounts (two of each type) as PE and some 3D printed parts in black resin.

Here a more bright picture, which shows three different props and three air pumps of 2 types.

I could see the pump well on the original photo, so I selected the matching parts, painted and mounted them.

The kit wings has some special shaped holes (different sizes on upper and lower wing) for the mounting of the struts. But this makes it harder to add pinned wooden struts.

In real you see some black metal socket between struts and wing. So I tried to use black sprue to fill the wing hole and mount the struts. But it fails, takes to long to made them, the 0.4mm pins break this plastic and it do not hold the struts well. So I need to think about another solution.

In meantime I solved the inspection window problem. Would be better to do it at first, but I ignored it at the beginning.
- Painted with wood, linen, alu and black.
- The inspection windows of the PART kit, which I wanted to use, cannot be used, as the recess in the kit wing is the same size.
- So I used the clear kit parts, but removed the moulded frame on top and polished them again.
- clear parts glued in with "Kristal Klear".
- PE frames from PART set added on top.

In the bigger middle window of the upper wing I had to cut the frame as it was too wide.

I found a solution for the strut mounts: I squeezed pieces of 1.0 and 0.8mm brass tubes with thicker wall of 0.2mm and glued them into the wings.
The opening in the upper wing was also painted to look like wood.
The opening in the upper wing was also painted to look like wood.

Same for the outer struts, here I added also thin brass wire as pins to the ailerons.

Since I was in "pinning mode", I also added pins to the tail pieces.

I masked the windows and added clear coat to the whole wing, which is now ready for mounting.

Here the "wood" from the top side. If you look carefully you can notice the first four rigging wires.

The inner struts are glued to the fuselage (the wing helps for positioning), then I glued the prepared wind shield in place.

The upper wing was added to the struts.

The next task was to start the rigging, at first the inner crosses. RAF wires was used on the Camel so NO turnbuckles! The terminals are made by Gaspatch.

For the main rigging I want to use the more flat and bigger EZ-line, but it is very hard to get it through the terminals!

Lower wings added, outer struts are in place and the landing wires, again RAF wires, are done.

A view from back. Here you can see also the metal plates from the PART set, which are added as step plate.

I tried to avoid twisting of the EZ-line.

The rigging in detail. The "fork" of the terminals will be painted black, the RAF wire metal.

I mounted also the prepared tail skid, the inner "suspension" is a metal wire able to hold the weight of the model.

And now a teaser in the last day light with wheels - it starts to look like a Camel!

Later I added the Clayton manufacturer logos on the struts, so that I can remove the carrier film tomorrow.

I continued with the double flying wires.

Here you can see the double wires, the undercarriage rigging including a normal turnbuckle in front of the wooden axle board. Also the lower maintenance panel has fasteners.

I forgot to mention this, I made a breakthrough in the lower wing, here in comparison to the wing of the second kit.

The double RAF wires looks nice.

And now the most crazy part I have ever done!
Two wooden cones, on a 0,3 nickel silver and 0.5 brass pipe "axle", with cuts in one of them to add nickel silver pipes. It can slide on some ropes. I guess you Camel experts know, what it is?
Two wooden cones, on a 0,3 nickel silver and 0.5 brass pipe "axle", with cuts in one of them to add nickel silver pipes. It can slide on some ropes. I guess you Camel experts know, what it is?

And mounted! The overall length is 4mm. After that I added also the MGs.

It is also visible from top.

And because it is so nice also in side view.

The crosses between the struts are also applied and the carrier film on the logos is removed.

And now a final teaser of the actual state. Here you can see the single turnbuckle clearly.

On the rudder the decals are applied, I had to paint the edges and found luckily matching paints in my stash (Gunze H33 and H322).

For the control horns I do not used the Eduard PE, but again the PART set.
To get a more realistic look I made the horns thicker with tin. On the right you see the aileron horns. Each type has a different size.
On the left you see the horns of the rudder. I added a 0.33mm nickel silver bolt and a slotted metal as hinge, to realize the double wire control as shown on my linked high res pictures.

For the mounting I started with the control wires to the skid, added then the tail plane. After the control wires ...

I added also the rigging. I used turnbuckles according to the mentioned pics, but that was not necessary. Later I checked old b/w pics - there were no turnbuckles. I let them there, it is a nice detail.

After clear coat on the rudder I added the control horns and the wires. Looks not nice, but it is easier to do outside.

After mounting the control wires are connected.

The completed tail, only some detail painting and touch-up are missing.

The Eduard kit pitot tube, and my own creation. I used some PART PE, but removed the etched flat "pipes" and soldered 0.3mm nickel silver micro tube and a wire which I sanded to a cone at the front, between the holders.

Painted black and mounted with 0.2mm lead wire as pipes. The pipes run into the upper wing with black rubber coupling, I guess to be able to remove the wing.

The pipes run inside the wing to the inner strut and again via rubber couplings into the cockpit.

On the lower wings I added two rings with a mounting stripe. I think they are used to secure the Camel on ground.

The ailerons are also added, including the control wires.

The prepared Rotherham air pump was glued to the gear leg. A thin copper wire passes the compressed air into the fuselage.

After adding the wheels he last step was a light weathering with different methods.
Sorry, this pictures are not perfect.
Sorry, this pictures are not perfect.


Now the airscrew.
There are 4 little white stripes in the kit as decal, but they are not long enough to go around. I assumed complete white rings. So I decided to mask and paint the airscrew. My first paint job failed. Finally I removed the paints completely and start from fresh. The type description is a nice detail, a decal of this kit.
There are 4 little white stripes in the kit as decal, but they are not long enough to go around. I assumed complete white rings. So I decided to mask and paint the airscrew. My first paint job failed. Finally I removed the paints completely and start from fresh. The type description is a nice detail, a decal of this kit.
Comentarios
79 1 December 2021, 20:27
Welcome to the show mates!
But I have to admit that there won't be as many scratch parts as in the last project.
2 December 2021, 14:48
New pictures. Need to wait now for drying, then mask again and paint the outer parts of the wing late PC10 (this is a special British green mixture).
2 December 2021, 14:56
Welcome and thank you for your interest! 👍
Ok, regarding oob - I plan to include some of the Eduard accessories. But ...
Now I realized, that the struts (0.7mm) and the undercarriage (0,6mm) are very flexible! 🙁 It is may be strong enough to put it from the bench to the cabinet but I have (strong) doubts about transport to exhibitions. And nothing is more frustrating than transport damage to a finished model (I've known this since a broken landing gear on my Nieuport 11). Let's see ...
6 December 2021, 16:27
Sometimes I get the feeling that I can't trust my eyes. Great accuracy & detail.
Not only the chairs are looking great 😉
👍
7 December 2021, 20:37
Hast Ameisen eingestellt, die dir die Sitze geflochten haben wa? 🙂 genialer Effekt! Wie ist es gemacht? 3D?
7 December 2021, 20:41
Yes, see comment below pic 11 and project inventory. This is 648659 of the new "Brassin Print" line. The parts are directly printed in black resin. Sopwith Camel seat (Eduard 648659, 1:48)
The Camel kit and it's accessories are impressive!
")
7 December 2021, 22:16
Welcome to the Camel build Ben!
I started to work on the fuselage, but I'm still waiting for my Löök set! The parcel was one month in the Europe post offices, because it was misrouted to UK. They noted this and send it back to Germany. But if something coming from UK is reaches the customs office in Germany at first. And finally after a month it was sent back to sender because tax declaration is missing. 🙁 Of course there was no declaration for a packet within Europe! So brain dead. The hotlines are useless too, because they cannot clear a situation like this.
9 December 2021, 17:28
Thank you mates fro comments and likes!
Nice to see you again Björn!
11 December 2021, 15:39
I knew you wouldn't be able to do an OOB build Frank, and it's all the better for the Bughunter touch.
12 December 2021, 15:03
Thx and also a warm welcome to the new guests!
Pierre, you are following Modellversium? Then you may be know already my style of modeling 😉
gorby, to use PE sets and available add-ons are oob for me 😉 So I added only some wires here.
12 December 2021, 16:42
Thx! With the help of the wonderful drawings in the Windsock Datafile and high res pics of a flying Camel in New Zealand I added all those fuel line on the left side. Now I understand this system. Before anyone asks: Of course it's fully functional 😉
13 December 2021, 17:08
I'm afraid I'd get in trouble with the head of the household because of the smell.
13 December 2021, 18:24
amazing details on all those fuel pumps, levers and so on... fantastic.
14 December 2021, 00:50
Thank you very much mates!
The hump that gave the Camel its name covers the rear part of the Vickers MGs, the front part is on top. Yes, there are also nice Vickers from Gaspatch, but the split ones from Eduard makes painting easier. Unfortunately, the barrel is not so nicely open at the front.
One of the next tasks is to try the new Eduard decals. Never made that experience! I do not like the heavy carrier film and will try to remove it.
14 December 2021, 16:37
Wow! After trying the new decal style on a lower surface I decided to peel - looks fantastic 👍 Thank you Eduard!
15 December 2021, 07:43
To peel or not to peel, that is the question! I decided to peel 😉 The result is fantastic 👍
One should decide before apply the decals: If you want to peel I would left the huge carrier as handle. If you don't want to peel I would cut out the decals right to the edge.
16 December 2021, 16:19
Thank you mates!
@James: sorry, have not noticed you post, because I was already editing my post. Need to ask Tim about this.
@Lochsa River regarding the inspiration, I found a new motto:
Build each model in such a way that the previous one becomes envious. 😉
16 December 2021, 18:32
Some remarks: The new style decals are in all kits since a year or so. Eduard never states in the manuals or so about the possibility to peel, because the fear to be responsible for problems (see Editorial of Info 4/21), but there was a HowTo and comparison in Eduard-Info 5/21 from page 52, which I strictly followed.
Another advantage is a easy weathering after carrier is removed.
I wonder, that no one mentioned this here, or may be I have not noticed. Some people seems to hate this new style. There are videos on YT doing strange things on them, don't try to follow that way!
16 December 2021, 20:12
I now actually recall reading about that in the Eduard newsletter. Glad you showed us how. It certainly looks painted on your model 👍
17 December 2021, 00:41
Great progress,as always a lot of your own improvеments and thats wonderful. I build exactly the same Camel at the moment .
17 December 2021, 06:30
I own also resin wheels, but I used the kit provided ones as they look closer to the original pic on this specific Camel.
Due to the drying times it took a while with that many steps!
17 December 2021, 15:07
Your attention to detail is phenomenal.
I hope you had an excellent Christmas Frank, and that your new year is a damn sight better than the rubbish ones we've been having recently.
4 January 2022, 08:42
Thank you gorby for your continued support 👍 And also for you and your family and allthe other mates here a happy and successful 2022!
I hope to finish more models in the new year as in the last one. 2021 only 4 models are finished, but the Mirage kit and 3 resin models costs more effort and time.
4 January 2022, 15:53
Welcome Urban! Just added some pictures of the fuselage front which is glued into the front now.
4 January 2022, 18:52
Those details in the cockpit O_O It's really astonishing. I will follow along
4 January 2022, 20:34
Looks amazing? I'm curious, what is that wide white and red fabric bit draped across the seat? I think it was in one of your Eduard sets. Is it a signal flag or something?
4 January 2022, 21:37
That is no flag, it is the seat belt 😉
The Sopwith do not use 4 belts as the Germans (shoulder and pelvis) but only a wider pelvis belt, but with 3 securing pins. I used here the Eduard Steel belt as provided with the seat, see also picture 19 of this album.
Sopwith Camel seat (Eduard 648659, 1:48)
Another option would be the HGW belts made from some kind of fabric. I used it on my Sopwith Dolphin, see here and the next picture:
WIP - Sopwith 5F.1 Dolphin | Album by bughunter (1:48)
4 January 2022, 21:54
Thanks! I'm not familiar with WWI planes so that was interesting!
5 January 2022, 13:19
I hope you all, Mates, have noticed or rememeber that Bughunter described this build as "mostly OOB" 😉... How should I call my builds, as up to now I considered them as mostly OOB... 😭
5 January 2022, 14:56
"Mostly OOB" - Bughunter is slightly comparable to when David Damek (PLASMO) says that he'll do some minor scratch building...
5 January 2022, 18:47
Mates, you made my day! OOB includes all the aftermarket sets 😉
Today I got a belated Christmas present from my wife - Rudi Rednose's sledge was stuck in a traffic jam. See picture 62.
5 January 2022, 20:36
This time again my special method - improvement due to an accident! A big update with many pictures and a lot of work!
That picture was somehow my template: [img1]?format=1000w

10 January 2022, 20:03
Good decision to change the push rods. This makes all the difference. Now this engine is a real gem.
11 January 2022, 07:12
I do agree with Alec K here! Maybe you will consider displaying the engine separately next to the finished kit, Bughunter?
11 January 2022, 16:45
Thank you very much mates!
This engine will be mounted definitely in this Camel! The good thing is, that the cowling is wide open and shows a lot. Even the back side is visible from below due to the cutout in cowling and recess in the fuselage.
But I have a second printed Bentley in my stash. Not sure about the marking of the second Camel of this kit, so which of the 4 engine types is needed? This follows much later.
Alec and Robert, I really think about a row of engines to show alone or next to the plane, presented like this Benz Bz.IV: Benz Bz.IV | Album by bughunter (1:48)
I have all of the Small Stuff tyes in my stash 😉
11 January 2022, 18:05
After multiple cycles of masking and painting the project has made a little step progress.
13 January 2022, 18:36
Thank you David!
I mentioned above the flexible landing gear legs and Christoph replied "Show us some brass." So we know, who is responsible.
I need to mention it: there are more the one variant of a Camel undercarriage, a check of references is needed! For my Camel I found wonderful reference pictures:
[img1]
[img2]
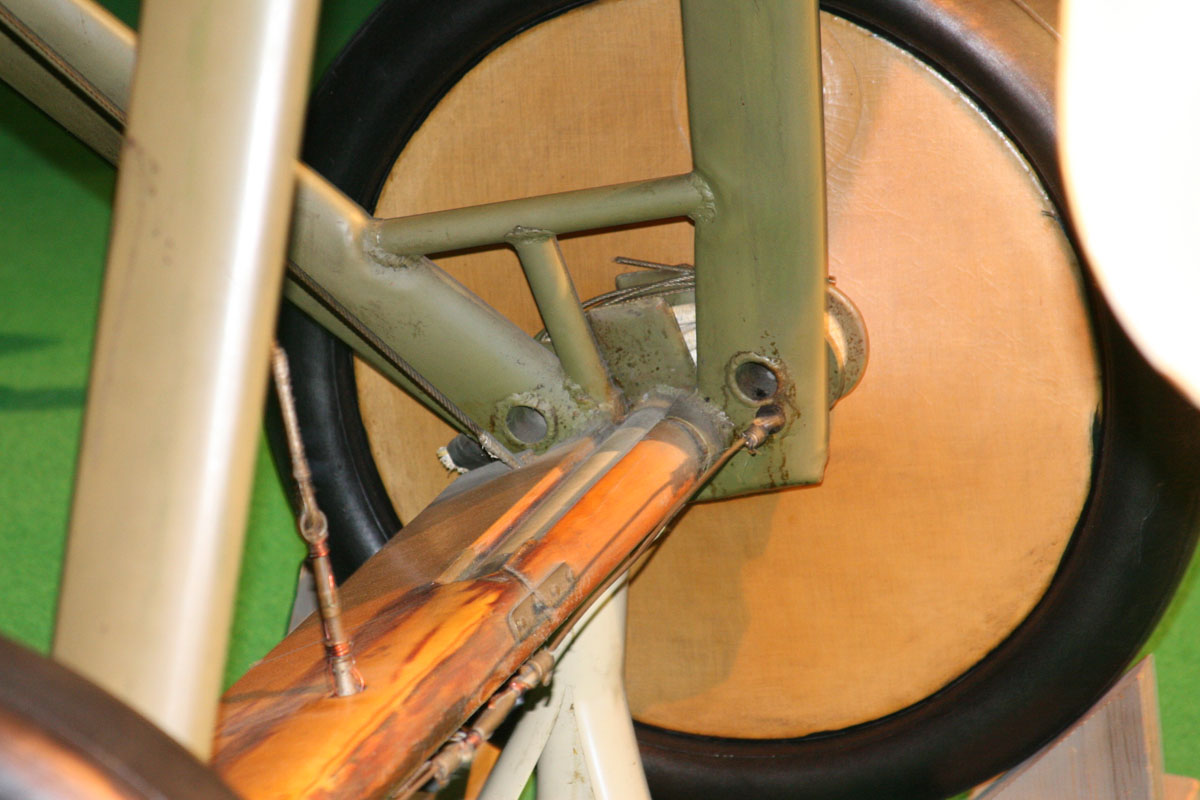
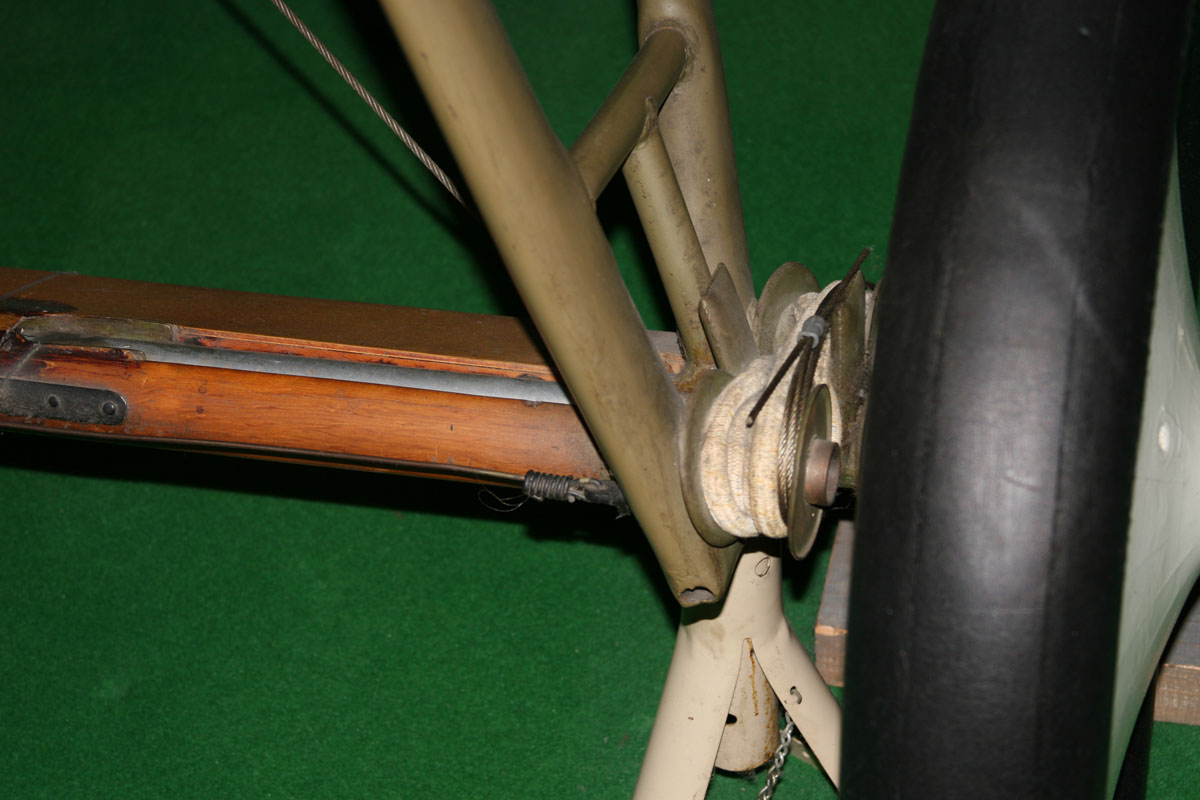
That was a lot of work, but now it is very robust. And now it is more compatible to the other Sopwith, since also my Pub, Dolphin and Triplane are equipped with brass undercarriages.
A cleanup and more work on the axles is needed now.
18 January 2022, 19:09
bughunter, again a build log giving inspiration and motivation to try out new techniques. Question: how do you fashion the main struts? Do you squeeze round brass profiles into oval shape or round square ones, or any other technique?
19 January 2022, 08:39
Thank you mates!
Michael, the legs are squeezed micro brass tubing (available in many model shops from Albion Alloys from 0.3 to 2.0mm in 0.1mm steps).
I'm now applying the next batch of decals ...
19 January 2022, 18:56
Once again I'm totally flattened by what you are able to create with wood, metal and a soldering iron, very inspiring 👍.
Love the blue and white livery !
20 January 2022, 19:24
Hanno, just as flattened as my Albion Alloy brass tubes? 😄 😄 😄 Sorry, the pun was obvious!
Thanks Hanno, yes that blue and white looks great. Unfortunately the masking was not perfect, that would have looked even better. I also had a matching light blue from Drooling Bulldog, but I didn't think of that at the beginning.
Maybe you can see the beast live soon?
20 January 2022, 20:43
The decal on the fuselage are done, in multiple session to avoid a overlap.
The possibility to peel the carrier off is great, especially for stencils and holes (like the fuel caps here).
21 January 2022, 18:17
Of course I would appreciate seeing this gem live,
do you plan on attending an exhibition ?
21 January 2022, 20:04
I have never visited the exhibition in Lingen, but despite the long journey, there are things you should do at least once in your life.
But I fear that it will fall victim to the virus this year too?
22 January 2022, 12:29
It most probably will, I'm afraid......... I took part there once and I must say that the dimension of it was really impressive. But generally I'm somewhat uneasy with exhibitions, and like you mentioned - it is quite a distance, from where I live as well, so I never repeated it.
22 January 2022, 12:46
Today nothing scratched, just an out-of-the-box build!
I will mount the pump on the undercarriage leg later, because I am afraid of damaging it while handling the model.
That is a nice piece of accessory (impressive use of 3D printing), which allows more then one pump. The detail is by far better than what is included in the WNW kit, despite the smaller scale.
22 January 2022, 16:21
Further amazing progress. I am surprised how easy you seem to be able to peel off the decals carrier film. I really had difficulties with this. Do you see a difference whether you apply the decals onto a gloss paint or a flat one? I found it easier to start the peel if I cut the thin edges of the decal. You experiences would be appreciated.
22 January 2022, 18:22
Thank you mates!
Michael, I followed strictly the recommendation in Eduard Info journal May 2021.
Applied on glossy clear coat, used water and added blue cap Gunze Setter as recommend. Decals pressed down and all water removed with Qtip. Peeled of the film after 10h and was surprised how easy this was. It was easier on the decals near a corner, here I could grab the carrier with little tweezers. On a plain surface I put a wooden tooth stick to a corner until it lifts up a bit and then removed it with tweezers carefully.
22 January 2022, 18:41
Thank you my friends!
Ok, if you like that picture so much: 125 is now the actual teaser 😉
23 January 2022, 15:56
I've given up trying to express my feelings about Bugsy's projects… I'll just continue to stand in silent awe and will notify you if anything changes…
24 January 2022, 07:03
Greg, good to know that you found this build in this flood of great models 👍
To avoid making this look too easy, I will show a failed attempt soon.
24 January 2022, 16:03
From someone else? I can provide you with many examples from my project list... 😉
24 January 2022, 17:56
it is a bit surprising the fuel system isn't actually functional, isn't it, Greg 🙂
25 January 2022, 00:00
You are so wonderful mates!
The strut mounts failed, but the inspection windows for the aileron pulleys are done.
25 January 2022, 20:51
Deine extrem saubere Arbeit lässt mich immer wieder staunen. Gerade jetzt, wo ich gestern erst wieder was versaubeutelt habe...
26 January 2022, 07:57
Thank you mates!
I think I can post new pics soon as it is a biplane now 😉
26 January 2022, 14:12
Now it is a biplane 👍 I really like the look of this Camel!
But there is still a lot of work on the ToDo list ...
26 January 2022, 17:27
Donnerwetter, what a fine work. By the way: how did this german phrase find it´s way onto this british plane? Do you have an idea?
26 January 2022, 17:30
The Clayton built B7190 was flown by Walter George Raymond Hinchliffe. He was commander of the C Flight of the 10👎 squadron RNAS in February/March 1918. He had been credited with 6 victories, survived the war but lost one eye in a crash. I continued to fly (with the one eye) for civil airlines until 1928. He was lost during a flight across the Atlantic.
The background of the german "Donner-Wetter" is not known, but it matches the devils and thunder flashes on the wheel markings.
26 January 2022, 17:46
Picture 107: true rubber band. You attention to detail and original materials is unbelievable!!!! Picture 137: the terminals look great.
26 January 2022, 19:52
Thank you mates!
The amount of details depends on the available references, and here I have a set of fantastic high resolution pictures of a flying Camel. That helps a lot!
And regarding the terminals: yes, we live in "Golden Times", so many nice accessories are available now. Not long ago I had to made my own ones for the Bristol Fighter, and now there are better ones which are even easier to work with 👍
At the moment I'm working on the remaining rigging, now with double wires and more ...
27 January 2022, 16:59
You don't think that incitement is without consequences?!?!
Now the most crazy part I have ever done!
28 January 2022, 17:22
I am just speechless now... I wouldn't even dare to ask about your remaining superpowers, bughunter 😉
28 January 2022, 17:27
I had to check to see that you hadn't swapped your usual scale for 1/8th for this build.
Astounding!
28 January 2022, 17:35
Thank you very much mates!
@gorby I have the 1/8 Dr.I on the roof of my living room, but this here is really the new Eduard Camel, I swear!
@Pepe yes, a nice model, but I think the master piece are still the DH2 Stripdown and Bristol Fighter. Most closely to the original is still the Aviatik 30.40, hard to beat.
But yes, it is fun to learn with every model and try to get better! Cheers, Frank
28 January 2022, 21:20
so colorful and perfect looking once again Frank..
This is your playgound mate wow!!!!!!!!👍
28 January 2022, 21:24
Jo Daniel, damit Du was zum Bestaunen auf dem Nachbartisch hast - wenn es denn mal wieder geht!
28 January 2022, 21:56
I just love watching mates going the extra mile. Very nice progress once again. That rigging turned out really beautifully but my favorite part is still the engine.
28 January 2022, 22:29
Thank you Michael! I must admit that the extra mile is only possible with good references. As you may know I'm also active in the forum.ww1aircraftmodels.com and there is also a member James Fahey, who has released some fantastic set of pictures. Here his high resolution pictures of the Camel: jamesfahey.smugmug.com/Hi-Res-Camel/ But this is a later Camel, e.g. the undercarriage is different and it has a Clerget engine.
29 January 2022, 12:51
This is so amazing. Ich würde mir beim Versuch die Seile anzubringen die Finger brechen.
29 January 2022, 21:19
Now the tail with a lot of control wiring and rigging is done! The ailerons will be the last step, as I won't be able to put the Camel on its back so easily.
There is a light at the end of the tunnel, or is it an oncoming train?
1 February 2022, 18:29
I'm absolutely certain it's not Victor Charlie with a lantern…… 😄
The tailplane looks superb with all the control cables installed !
Do you know what the story is behind the „Donnerwetter" being written on the fuselage ?
Not the most british term I would say ?
1 February 2022, 19:07
Hanno, see my answer from 26. January, there I wrote all my knowledge about the pilot.
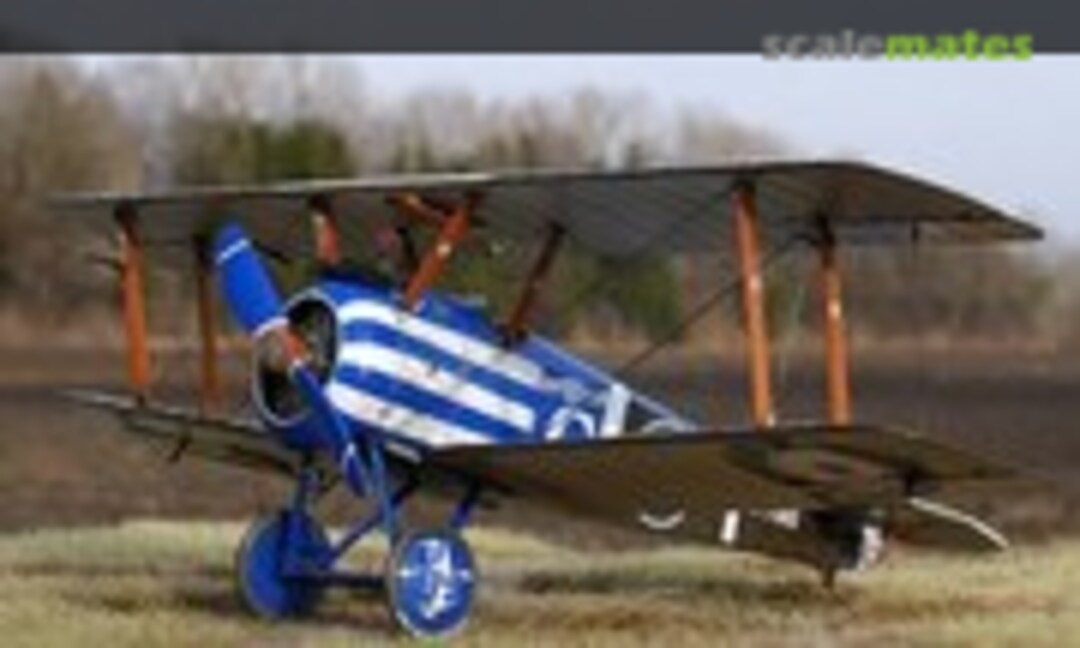
Now I know more about the squadron, the A-Flight has black stripes, the B red ones and the C blue. Eduard released today a new Profipack of Clerget Camels, which has the B6299 of the B-Flight as possible marking (the one of my T-Shirt shown above)
[img1]
This time the red stripes are decals!
1 February 2022, 19:28
There is one important part missing, but otherwise I can call this Camel finished.
2 February 2022, 17:38
Let me guess - a pilot is missing here? 😄 Looking absolutely fabulous (even without propeller in place...;) )
2 February 2022, 18:21
Beautiful work. The blue and white on the upper surfaces is really eye catching.
3 February 2022, 04:34
I can't see the Quirl...🤔
Another Model in Bughunter-museum-style.
3 February 2022, 18:28
Mensch Kerl, langsam gehen mir die Superlativen aus: waschechter Hammer, Meisterwerk, Juwel, klasse-Arbeit, Supermodel... alles hatten wir schon mehrmals!!!
...
...
...
Modellbauerisches-Kunstwerk in Museumsqualität. So! Das hatten wir noch nicht🙂 genau!!
3 February 2022, 18:38
Thank you mates!
Sorry Robert, I'm not going to clutter up the cockpit with a little fat pilot so that you can't see any of the beautiful details in it 😉
And Robert and Christoph: yes, the airscrew is the mentioned missing important part. That will be again something special and my first paint job failed. Finally I removed the paints completely and start from fresh, so that will need more time.
Danke auch Bernhard für Deinen sprachlichen Jongleursakt 👍
3 February 2022, 21:07
Einfach Spitzenklasse! Wie man sieht kann man immer noch was drauf setzen! Respekt!
4 February 2022, 08:23
And not to forget: OOB! (Just in case you thought otherwise for a moment) 😉
4 February 2022, 10:22
Bughunter - a little fat pilot? I expect to see a teletubby in your next build!
4 February 2022, 14:52
Thank you mates!
Ben, that bird was active long before TV was invented, so also no teletubby 😉
That build log reached its end, as the airscrew is finished and mounted with PE parts to the Camel. Once I have made the final pictures I will create a new album, attached to the project.
Thx for watching 👍
4 February 2022, 16:45
With a little luck I was able to use some sunshine today to take the final pictures. Don't miss them: SCM Newsfeed
4 February 2022, 19:17
Album info
Since I got this kit as a gift from my colleagues, this must now be the next project.
This seems to be a great kit so it will be mostly oob 😉