

SE.5a B139 - Work In Progress

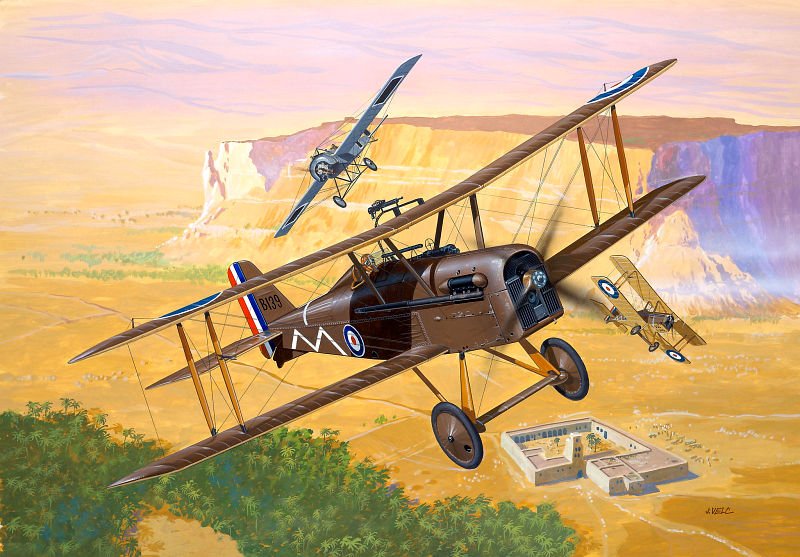
That is the boxart of Revell 04061 in 1:72 - what a beautiful aircraft!
Copyright Revell
Source: [img1]
Copyright Revell
Source: [img1]

Eduard celebrated their 25th anniversary with this kit in 2017. The Profipack with Wolsey Viper engine variant was the first and show this logo, the Royal Edition was the next one.

If I remember right the boss mentioned this part as example of the kit quality: the firewall between engine and cockpit.

The other side. Looks like beads embossed in sheet metal.

Ok, lets start the real work with the seat belts. The kit contains a 4-point belt, see the PE with Royal label. There are great pictures of SE.5a with these harnesses, however it turns out that the shoulder harnesses were only introduced after WWI.
So Eduard reacted and released a STEEL set (on the left), later kits has both option on the PE fret.
So Eduard reacted and released a STEEL set (on the left), later kits has both option on the PE fret.

But HGW reacts also fast and released a "Correction set" with two different belt variants. As I like those fabric belts I will use this set.

The belts are done. As the wide ones are on my Dolphin, Camel, DH-2 ... I used the other ones.

And a small teaser, how the belts are look like mounted on the seat leather. I closed the upper outlets for the shoulder belts with plastic.

Next wings. After Alclad white primer I painted the pulley windows with linen, wood and metal. I added the clear parts and PE frames (sorry, no pics). The ailerons are plugged on with brass wires. Then I masked the rib tapes.

After shading and removing the tapes that is the result on the upper surface.

On lower surface there are also light spars, less strong compared to the ribs.
I have to redo the tailplane control surfaces. I used the narrow chord option of the kit for the B4891 before changing my plans. The B139 need the wider standard ones.
I have to redo the tailplane control surfaces. I used the narrow chord option of the kit for the B4891 before changing my plans. The B139 need the wider standard ones.

The kit has some damn small parts, here pipes for the upper wing. I lost one while cleaning the sprue gate 🙁 After a while I gave up the search and made both of them new from wire and hose.

Here mounted on the middle part of the wing (not yet painted completely).

The lower surfaces are painted (sorry forgot a picture, the lower wing is here masked already for the painting of the middle fuselage floor).

After Alclad white primer I painted the linen surfaces and masked them. Then I used the first time MRP Sand primer as base for the wood. The wooden parts are painted with oils then (some days hardening). Finally a layer of clear yellow/orange.

The kit contains a huge amount of small parts, which needs detail painting. This takes a huge amount of time.

Also some details on the cockpit floor, e.g. a flare gun in a wooden box.

There are recesses on the outside of the cockpit framework for the rigging wires. So the rigging can be done with four wires, but a lot of glueing points.

The compass is a very nice detail! It is a clear part, and there is a decal for it? I have done it in a different way.
I masked the front lens with liquid mask, painted it in a bright metal tone (for later light reflection) and then black.
I masked the front lens with liquid mask, painted it in a bright metal tone (for later light reflection) and then black.

That is the result in full light. In the dark cockpit there will be only a little shine later.

There is a PE part and PE dials, or a plastic part with decals for the instrument panel. I used the plastic part because it has more structure and glued the PE dials to it.

The frame is glued to the floor.

Some more details added, also from the weapon set (part of the Royal kit).

There is another spare drum for the Lewis on the floor.

With a little bit of wash on all parts, here the fuselage sides, the fuselage can be closed soon.

The lower parts are from the resin weapon set 648299 (and a PE set), which is included in the Royal kit.
One can also use Vickers from GasPatch Models, but the split here allows an easier painting of the fuselage (after part below cowling, front part on top). On the lewis on top of the rail I glued already the hand grip - that was a mistake!
One can also use Vickers from GasPatch Models, but the split here allows an easier painting of the fuselage (after part below cowling, front part on top). On the lewis on top of the rail I glued already the hand grip - that was a mistake!

I checked again the original photo on the Imperial War Museum web site ( iwm.org.uk/collections/item/object/205125545), here this is a little part of a screenshot, done for explanation.
You will see: not handle at the at, but a longer wooden hand grip! This brings me to my actual Camel Comic Night fighter build. There is a 3D printed weapon set with three lewis, but two needed. Two has a short hand grip, one a long one. Luckily "my" Camel has two short grip guns, confirmed by a photo in my Camel book.
So I have stolen this Lewis gun for this project to save effort (see upper one in previous picture). I had only to modify the after mount.

I needed the magazines for the cockpit, so I painted the weapons at the same time.

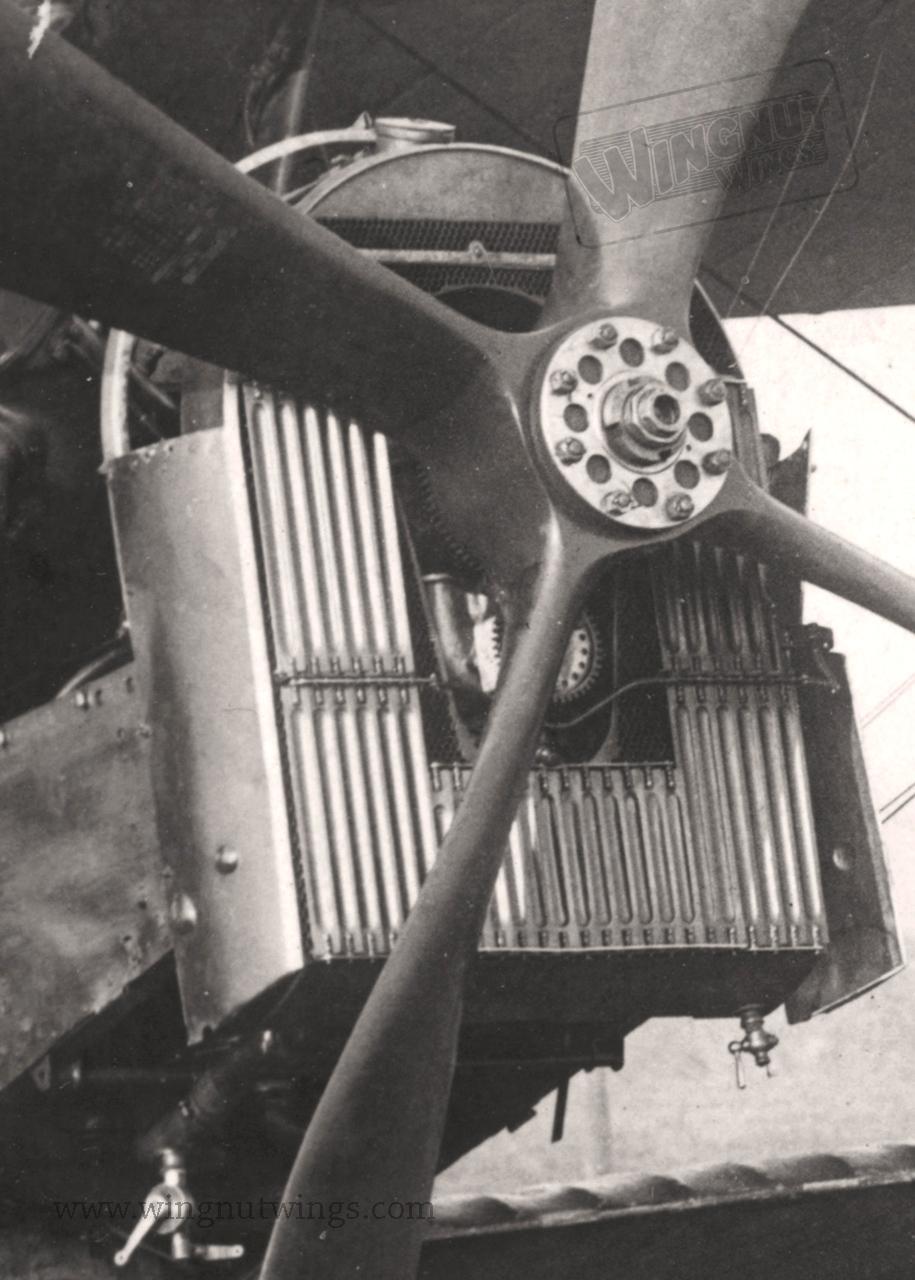
The kit radiators are nicely done. Left the Wolsey Viper, right Hispano-Suiza. But the extra sets (NOT part of the Royal kit) are nicer! See my Night fighter project for the Wolsey Viper.

The extra set has also a little PE fret with a nickel plating. I removed the radiator part and used a chemical browning.

The main radiator part is resin and fits perfectly to the fuselage mounts. I primed it with Alclad black and glued the PE part on.

Two kit parts form a cowling. Primed and painted Alclad Aluminium on both sides.

Masked the inside and painted PC 12 on.

Fits perfectly to the radiator.

The resin radiator set has also 3 individual parts for the shutters. I painted them Dark Aluminium. A wash will be done later after mounting.

The fuselage is closed with adding both side shells.

Not a perfect fit, but I created that little problems. I should have cleaned the glue lines more carefully!

1. On the left wall I added the engine control lever, plastic + PE from the kit. I added only two copper wires, according to my reference pictures.
2. The back part of the Vickers MG was added.
3. On the left border you can see a cover of a little store, but with raised panes lines. This I don't like.
4. The tank is closed towards the cockpit with a part painted aluminium.
2. The back part of the Vickers MG was added.
3. On the left border you can see a cover of a little store, but with raised panes lines. This I don't like.
4. The tank is closed towards the cockpit with a part painted aluminium.

Here you can see the closed tank towards the engine, also aluminium. The cockpit cover was then added too.
And for painting I closed the slots on the floor from inside 😉
And for painting I closed the slots on the floor from inside 😉

After the cover the headrest was glued in place. This is a optional part, not mounted on all SE.5a. If you want to mount it, the recesses in the fuselage halves needs to be opened before closing.
The raised lines of the little cover are removed and a sheet of styrene added instead. The hinges are brass wires.
The raised lines of the little cover are removed and a sheet of styrene added instead. The hinges are brass wires.

Tailplane and skid are mounted and all openings are closed.

The details of the kit are just wonderful, here a stitching line on the fuselage side.

The fuselage is primed.

Again the lower surface after sanding and prime again.

There is no picture of the lower surface of B139. Sometimes the lower surface was in the same color of the fuselages, sometimes the back parts linen. On the painting (see pic 1) there is a second SE.5a in background, showing a complete linen undersurface. According to the Datafile this was unusual. If linen, the only the linen part towards the tail and not the panels in front so I painted linen only there (with light shadows before, position of the stringers from WNW manual 🙂 ).

For the tail plane the wider chord control surface are prepared for the PC12 paint job.

Finally I masked again and painted metal panels with Alclad Aluminium to have a variation in the PC12 painting later.

For the undercarriage I drilled the axles and added brass wire for more robustness.

The complete undercarriage parts are painted. I need to think about the color for the "suspension". The white primer is visible.

I used the resin wheels set. Much nicer as the kit wheels.
Primed and painted the rubber dark grey.
Primed and painted the rubber dark grey.

Again masking, to have a little PC12 border on the front of the wings.
The resin wheel set has a little masking sheet, the Royal kit too.
The resin wheel set has a little masking sheet, the Royal kit too.

Wheels are painted PC12.

Fuselage in wings too.

Had some problems with liquid mask on the brass of the resin radiator, but this can be fixed.

The wings survived the masking.

Only very little trouble on the fuselage.

Some veneer glued to a block for an airscrew. The resin one is my template.

After a lot of careful sanding I have now a wooden 4-blade.
Unfortunately only with 6 layers, only later I found a sectional drawing showing 8 layers.
Unfortunately only with 6 layers, only later I found a sectional drawing showing 8 layers.

The beautiful prop boss from the additional 4 blade Brassin set (not part of the Royal kit).

The V8 Hispano-Suiza engine. Only kit parts. There is no Brassin engine but this is not needed.
It was very tricky to do my smallest bearing. Small enough to fit in the reduction gear in front of the engine. This causes the airscrew axle sits higher and runs in opposite direction, compared to the direct drive Wolsey Viper engine on my other SE.5a.
It was very tricky to do my smallest bearing. Small enough to fit in the reduction gear in front of the engine. This causes the airscrew axle sits higher and runs in opposite direction, compared to the direct drive Wolsey Viper engine on my other SE.5a.

View from top. The end of my bearing can be seen, but this will be hidden later under the cowling.

Airscrew on engine. Rotates easily with the lightest air flow 😉

I planned to paint the white marking anyway, so I masked them.

On the sides I drawn them in Inkscape with the help of the original photo in background.

For the cockades I wanted to use the decals, but I run into big trouble!
The decals of the Royal kit are printed by Cartograf and I have use them 5 years ago on the first model. But this time they cracked along the wing structures like rip tapes. I was no able to conform them to the surface. Can they become brittle if stored too dry? The cockades with the outer white ring was also a bit too big.
I removed all the small parts, drew masks and painted the cockades.

I used white, RAF Blue and Red from "Drooling Bulldog". The white was a bit covered with MRP Insignia white.

A masks and painted rudder is much easier then decals, especially if the decals are too small to put them around the corners as in this case.

The very little cockades on the fuselage was the reason why I wanted to use the decals, as the cutter has it's limit here on this damn small rings.
But the markings are applied now and this was somehow successful.
But the markings are applied now and this was somehow successful.

The decals used a very dark blue. So with the use of the "Drolling Bulldog" RAF Red/Blue I'm much closer to the references.

Sh...!! One step forward, two back.
Without notifying it I had white paint on my finger and stamped that to the wing multiple times 🙁
Without notifying it I had white paint on my finger and stamped that to the wing multiple times 🙁

After the painting I noticed some bad seam lines on the front, so I decided to fix it. New primer, needs sanding.

Last time I used masking fluid on the radiator, but I don't like the result. In some areas the primer comes off with unmask.
I was able to remove the radiator from the model so here also time for rework.
Primer, Pale Gold, and this time hair spray, then painted with PC12 again.
I was able to remove the radiator from the model so here also time for rework.
Primer, Pale Gold, and this time hair spray, then painted with PC12 again.

Much better result, now I like it.

A new front 😉

The tail number is applied. This was a time consuming task to get all individual characters in the correct position.

I discovered some irregularities on the surface of the airscrew so I removed the paint completely.
I like the little inner marks where the direction of the veneer changes.
I like the little inner marks where the direction of the veneer changes.

After wood primer again and sanding/polishing new painting of different clear paints. Now it looks nice.
Finally I painted the blade tips after masking, decided for grey (could also be linen, brass ....)
Finally I painted the blade tips after masking, decided for grey (could also be linen, brass ....)

The front side. The prop boss will be added after mounting.

There a more PE parts involved, the left one from the Brassin radiator set, the right one form the Brassin 4 blade. That is the back plate for the air screw.

To mount the little cogwheel of the radiator set some scratch work needs to be done.
I checked my reference pictures so the cogwheel seems to be part of the synchronization gear for the Vickers MG. So it needs to be far more forward, to reach another bigger cogwheel on the back of the airscrew.
I checked my reference pictures so the cogwheel seems to be part of the synchronization gear for the Vickers MG. So it needs to be far more forward, to reach another bigger cogwheel on the back of the airscrew.

So I made one with a knurled wheel on my lathe. Mounted at first the mounting plate and the the faked aluminium "cogwheel".

On the engine I added some ignition wires.

I wrapped tapes (made again from the AJP paper) around the inner struts.

The struts are glued in place. That is a perfect fit: some special shapes determine the position and directions of the struts in all angles.
V8 engine in place too.
V8 engine in place too.

And engine cover closed (I cannot open it, fixed with glue).

View from the other side. On the wings I painted the foot step plates. Will be look better with a wash.

And a little teaser I plugged on upper wing with outer struts and undercarriage, all without glue. I need to add more details and prepare the rigging before the wing can be fixed with glue.

That will be a beautiful addition to my collection!

I wondered about the little holes in the cowling. On high-res reference pics I found some brass valves into the intake pipes. So on my model, four small pieces of 0.4mm brass tubing now do the job.

In front of the radiator now there are shutters. Provided as resin parts in the Brassin radiator set. Painted with dark aluminium, the levers with darker metal. With oil paint wash it looks nice but I forgot to add a PE piece.

I lost the scope (or stolen for another project?). So I had to scratch one from stretched sprue. The ends are polished up to 12000. Light is going trough now. PE from kit added.

After painting added to the fuselage. To avoid brass painting I used two small brass rings.
Barrel of Vickers MG mounted too, with aiming cross.
Barrel of Vickers MG mounted too, with aiming cross.

View from top. Mask on window (for light on the instruments) removed.

Don't polish the window! Eduard got the wavy look right!

This bird used RAF wires, so no turnbuckles for the rigging! But terminals.
I had a half filled plate with terminals from Gaspatch Models from last project. So I put them on EZ-Line as preparation for rigging. So the little beasts can't escape either 😉
I had a half filled plate with terminals from Gaspatch Models from last project. So I put them on EZ-Line as preparation for rigging. So the little beasts can't escape either 😉

Put on the upper wing and added the first rigging lines, as far as possible.

Then I had to add the under carriage, because 8 of the flying wires ends on the gear struts. The undercarriage got also a cross.

The 16 flying wires are doubles. The focus is here on the backward double wires.

With the wing rigging done it looks now like a SE.5a

This is a single RAF wire terminal from Gaspatch Models,

If you think I used a fake Cent here another size comparison of a block with my finger.

Since I was asked for better pictures here one showing the double flying wires (the landing wires are single).

Again in a closer view.

Now the tail is rigged too. 16 additional terminals mounted.

The upper side. I used here two loops of EZ line, going through holes.

There are two complete kits in the Royal edition, so also two PE frets. So I have two bomb racks, but none of the 13 possible markings use it! So it was also not shown in the manual, how to bend it. But I found this in the manual of the Profipack 82131, here marking B use the bomb rack.
I used some chemical blackening solution, to avoid to cover details with paint.
I used some chemical blackening solution, to avoid to cover details with paint.

The mounting on the B139 was much more forward, as shown in photo and drawing in the Datafile Special.
I will not add bombs.
I will not add bombs.

The kit offers two nice windshields. On flat on top (shown here) and a half round one.
On the painting pic 1 you can see this flat one, but the real plane used the half round one, see pic 27.
On the painting pic 1 you can see this flat one, but the real plane used the half round one, see pic 27.

But where is this beast? I had it some days ago, because I checked the space while mounting the scope. But now it is gone. I spend yesterday a hour but was not able to find this bad visible clear part on floor or bench. Since the first SE.5a used this too, I have now two flat ones for experimenting.
I removed the window part (0,4mm thick) and prepared a metal frame (PE spare) and a 0.11mm foil.
I removed the window part (0,4mm thick) and prepared a metal frame (PE spare) and a 0.11mm foil.

After the base part was painted (provided masks not needed 😉 ) glued it to the fuselage and the window on top.
Looks good and thickness of glass is now more scale.
Looks good and thickness of glass is now more scale.

This is not a Wingnut Wing kit, but there are wingnuts for the Nightfighter Holt flares, with spares.

According to my references the angle of the windshield can be adjusted and secured with this wingnut.

Eduard provided a lot of spares for part 3 ...

... but only one is needed to control the shutter.

Then I have done the control wires on the ailerons.
I soldered control horns to a base plat and "bolted" that to the aileron. One turnbuckle per aileron is also integrated.
I soldered control horns to a base plat and "bolted" that to the aileron. One turnbuckle per aileron is also integrated.

For the rudder there are double control wires. But how to connect them?
After thinking a while I used Eduard "Stretchers" 48915 and soldered double ones to the control horns.
After thinking a while I used Eduard "Stretchers" 48915 and soldered double ones to the control horns.

May be you get now a better idea after mounting the control horns to the rudder.

Rudder is now in place and four control wires are connected.

Because of my original plans to build another machine, I had cut the Eduard pipes according to the instructions. But now I need the long ones!
The kit provides little plastic parts, but I used glowed 0.4mm nickel silver to have real pipes and avoid cleaning. The exhausts are black primed.
The kit provides little plastic parts, but I used glowed 0.4mm nickel silver to have real pipes and avoid cleaning. The exhausts are black primed.

I also noticed that the exhaust pipes on the B139 were a bit different and a bit thicker after all, just like those of a machine still flying today. Here are my new scratched pipes made of 1.6mm brass pipe on a picture (copyright James Fahey) of the real exhausts. The picture is displayed on a Tablet PC with my new pipes lying on the Tablet.

The pattern of the holes is like the original and was difficult to make. I have a 0.3mm milling cutter, but milling this on the small Proxxon milling machine with the dividing header failed.
In the end I drilled it carefully by hand. Anyone who has ever tried to drill a pipe knows how easily the drills slip away.
The tinned brass tubes pushed onto the front parts.
In the end I drilled it carefully by hand. Anyone who has ever tried to drill a pipe knows how easily the drills slip away.
The tinned brass tubes pushed onto the front parts.

Here a closer view and clamps added, see one on the globe. They are soldered from 2 PE parts from the kit and a small brass stripe.

Another pair of clamps in the middle. Darkened with chemical browning.

Another closer view of the clamp.

Before drilling, I cut the tube, bent the back flat and soldered it shut. Here is a detailed view.

Painted with a flat Gunze russet, followed by a thin layer Alclad exhaust manifold and a bit more on the outlets.

And mounted!

The outlets on the sides of the cockpit.

Also on the right side.

View from top

And a focus on the clamp in the middle.

The control horns are added to the control surfaces.

It is easier to apply the control wires outside of the model.

Tailplane is complete now. The control wires are connected.

Sync gear, airscrew, hub are finally mounted. A valve (part of the kit) painted brass and added.

The kit provides some very small fuel pipes. But instead of cleaning and painting I used lead wires with a small piece of tubing. On the Cent is one example.

Here it is mounted between the strut and the engine cowling, others are below the top wing.

On the right outside of the cockpit I added a ignition device. It is a individual kit part (for easier painting) and there is a crank handle as PE, which should be painted brass. After looking to a ref pic I used a brass wire 🙂

The Lewis MG is also painted (e.g. with fake wood grip) and mounted.

That was the last part!
Comentarios
81 22 November 2022, 21:21
Welcome to the show my friends! 👍
I added a description about the background of this project to the project page, and the album.
22 November 2022, 21:57
The first pictures shows the seat belts.
BTW, if someone like to follow closely: Eduard has re-released the Hispano-Suiza Profipack this month 😉
23 November 2022, 16:54
Welcome to all of you! There is still some space in the first row 😉
After the wing pictures today, the cockpit will follow tomorrow.
24 November 2022, 17:38
Taking notes on your technique to depict the lights going through the formers for later. That's looking perfect.
24 November 2022, 18:21
Dietmar, nice to see you here!
David, not only the SE.5a, I think all the late types using the powerful V8-engines, like Dolphin, SPAD and so on. That was making a difference. There was also a single Albatros with an experimental V8.
Mathieu, I have not taken so much pictures this time. May be my other projects are also helpful in this regard, e.g. this one Airco DH-2 | Project by bughunter (1:48)
The shadows on the lower surface depends on the upper surface. If it was painted dark (no light going through) you see bright rib tapes, and dark in between. If the wing was linen only, you will see dark ribs and light between. The upper surface is a different story.
It is always helpful to browse some original pictures.
24 November 2022, 19:09
The cockpit is finished. It needs some time with drying of the oil paints.
According to a review this kit contains 124 plastic and 67 PE parts. And I added some additional sets with a lot more parts. This review says it is a complex kit and if I remember correctly I had to take a break on my first build. But this time it went well!
25 November 2022, 09:34
Thank you mates! But we can also thank Eduard for these fantastic details!
I added new pics of the weapons. The order is not completely correct, as I needed the drums for the cockpit, this was done in parallel.
25 November 2022, 18:16
The resin set of the radiator was worth it! It makes painting the individual parts much easier compared to the all-in-one injection moulded part. The details are much better too.
And I found an additional one for a future project at MBK for 3€ 😉
26 November 2022, 11:10
Fuselage is closed and all parts are prepared for the PC12 paint job. Keep your fingers crossed for me!
26 November 2022, 17:47
The more you show us, the more I feel like buying the kit - particularly as I messed up an SA.5 build in small scale some 20 years ago.
26 November 2022, 18:19
Feel free 👍
As I said there is a re-release of the Profipack, and Eduard has a Black Friday, or better weekend:
eduard.com/eduard/se..mp;searchparam=se.5a
26 November 2022, 18:23
Thank you David! My way is may be not perfect (I still try to improve my painting and learn from others like BAT21), but it is one way.
27 November 2022, 12:16
The main PC 12 paint is applied. Little scratches after the pictures as the MRP paints are not very robust and can be scratched easily.
27 November 2022, 18:51
Markings are one. Painted them all after trouble with decals - not perfect, but ok.
The decals of the Royal kit are printed by Cartograf and I have use them 5 years ago on the first model. But this time they cracked along the wing structures like rip tapes. I was no able to conform them to the surface. Can they become brittle if stored too dry? Never had trouble with Cartograf decals before.
29 November 2022, 18:36
I'd have to imagine issues with cartograf decals are rare indeed. Always had good luck with mine. Still looking good.
29 November 2022, 18:42
Time for fixes! Many things reworked.
The next batch of pictures added.
1 December 2022, 18:22
Thank you Guy! It is always fun to have all the prepared subassemblies form a little original.
2 December 2022, 12:31
Just been admiring your lovely prop.
(Which isn't a sentence I expected to use today). 😉
2 December 2022, 13:45
Thank you gorby! It was worth remove the paint completely and start from fresh. Now I like it.
You may know, that every user has a Wishlist attached to his account. But there is also another wishlist for this X-mas event in some weeks. So I put proxxon.com/en/micromot/28536.php to this list. With a bit of luck and I can then sand the airscrews into shape much faster, at least raw 😉
2 December 2022, 16:11
Oooooh nice! Tool p o r n. 🙂
Some of that Proxxon stuff is very appealing.
3 December 2022, 06:33
Today only a little bit of work on the front.
For comparison of pic 90 here is the original shutter in front of the radiator.
[img1]
3 December 2022, 20:06
Unbelievable as always and even the macros show no weaknesses in detail.....👍
4 December 2022, 11:12
It's a biplane now and 22 (in words twenty-two!) rigging lines of RAF wires are already added 😉
6 December 2022, 10:36
Wings and undercarriage are rigged now. 34 lines with 66 RAF wire terminals are added.
But far form finished: tail rigging, all control wires, windshield, Lewis MG with mount, ....
6 December 2022, 21:12
Please post a closeup of the rigging detail, especially the double lines...such a good look..thank you!
7 December 2022, 00:30
Yesterday it was a bit dark. I will try with daylight.
Until then, you may have a look here (and the following pics). The same method on my recent DH-2.
Airco DH2 | Album by bughunter (1:48)
7 December 2022, 06:19
I am trying to see your whole process. The little slide down pieces from Gaspatch are hiding what the actual connection is. The look is awesome and clean but what are you actually connecting the EZLine too?
7 December 2022, 08:04
See the manual of the terminals here: Resin Turnbuckles RAF (GasPatch Models 48235, 1:48)
I drilled blind 0.3mm holes before the assembly. Then glue the EZ-line (used because of the flat apperance) into the first hole with CA. Make sure there are two terminals on the line in right direction!
Then cut the EZ-line a bit shorter then needed. Then put the other end with tweezers into the second hole and glue with CA - hold it for some seconds. Now you have a straight RAF wire line. After drying slide the terminals to the end points and secure with CA. The terminal "legs" hide the holes and will be painted black.
")
The RAF wire terminals are also available in 1:32. On a 1:32 model I would used them for main rigging, and the 1:48 for smaller rigging points like the tail. On my 1:48 I have to use the same size for all.
7 December 2022, 08:25
Hmm, I don't think it is helpful to have additional parts between the terminals and the wing, as seen on this original picture (a Camel in this example):
[img1]
The RAF wires are flat steel bars with threads at the ends, so no turnbuckles but just those mounts at the end. And the "fingers" of the Gaspatch terminals are in real a flat peace of steel bracket, coming out of the wing, where the terminal is bolted on.

And I must admit that it is very difficult to get this EZ-Line threaded through the terminals in both directions. It is very handy to have thousands of curses ready for this task!
7 December 2022, 09:40
The hole is too small to use such tools. In 1:48 the terminals are very, very small! The outer diameter is around 0.38mm.
In the middle of the manual is "thread or EZ line", in the red box on the right it specifies 0.1mm.
7 December 2022, 11:45
Looking amazing and am in awe of how good the wire bracing looks and especially in such a small scale. 👍
7 December 2022, 18:01
Lochsa, I just used tweezers and a lot of patience. I think everyone will have its own way to handle this.
As you requested I added some more pictures.
Thank you James! I used this solution already on my DH-2 (not the stripdown, the normal one), Dolphin and Camel and I was convinced by the look.
7 December 2022, 20:45
Your rigging is utterly convincing. I can see why you'd need to have your bagful of curse words at the ready while you're doing it. Amazing work.
7 December 2022, 21:03
Thank you Kyle, your nice words are highly appreciated!
@Lochsa
There is also the option to use the Eduard solution called "stretchers" for this kit, if you can live with the look.
SE.5a stretchers (Eduard 48915, 1:48)
I have used them on the first SE.5a of this kit, as the Gaspatch parts was not yet available at that time.
")
8 December 2022, 17:48
Lost this damn little windshield! I know Eduard would provide a spare part, but need this TODAY! So I fixed it myself.
And I found a good use of the mentioned stretchers 😉
8 December 2022, 20:28
Wow Frank, you've done a lot of top quality work on this since last I looked. The neatness of your rigging always amazes me.
4 January 2023, 15:51
Thank you, friends! Due to a trip over Christmas and other things, nothing happened for a while.
Now I have resumed work on this bird with the exhausts. Because of my original plans to build another machine, I had cut the Eduard pipes according to the instructions. Now I need the long ones again after all.
I also noticed that the exhaust pipes on the B139 were a bit different and a bit thicker after all, just like those of a machine still flying today, of which I have great photos.
You guessed it - now some scratch work comes into play. That was tricky, more with pictures soon.
4 January 2023, 18:16
The new exhausts are painted and mounted now. Assembly was a complicated task because of the smallness of the parts. But the really difficult thing was to make the pattern of the holes 48 times smaller than the original.
But it looks really great now and was worth the curses 😉
5 January 2023, 17:28
When I saw pic 120 I thought "he can't do this"...
I was wrong.
Amazing detail.
5 January 2023, 17:59
Danke Christoph!
My pipes are in pic 120 too 😉 I used a tablet PC with the original exhaust on display and put my scratched pipes on the tablet. But it was hard to take a picture without light reflection and a lot of moire effects.
5 January 2023, 18:15
I thought, sooner or later I will get tired of Bughunters superdetailations. Well, at least not so far. Impressive again.
5 January 2023, 18:27
Your commitment to detail is always astonishing. Really great stuff as always.
5 January 2023, 19:14
This build was close to oob 😉
By the way, picture 27 confirms this shape of the exhaust pipes. As so often, there were many variants. With my other SE.5a I had it easier: the night fighter had a large flame damper, for which Eduard even includes two perfect pairs in resin in the Royal kit. Only one variant needs them.
6 January 2023, 11:32
Ah yes. I see that in picture 27. Didn't notice the many holes in the exhaust the first time I scrolled through the album.
6 January 2023, 12:06
Mee too. The quality of pic27 was not enough to determine the layout, but good enough to confirm that is the same layout as in pic120.
6 January 2023, 12:18
Remarkable neatness! When I try and do something similar it just looks like the part has been machine gunned.
6 January 2023, 12:24
Yep, OOB is dead. Just say'n…
Amazing superdetailations ( I love that term) as always 👍
6 January 2023, 13:24
Over the last few days I have only been able to do a little for health reasons (I had pain in my finger joints). I hope that this does not mean the end of model building!
Now there are no more parts left, everything is mounted on the model. Only some paint on some details and weathering is missing.
At the moment there is no weather for the final photos anyway.
10 January 2023, 19:03
Truly astonishing. I hope your fingers continue to cooperate with you.
10 January 2023, 19:17
Thank you very much mates!
Believe me Kyle, I really hope so! Aging is not for cowards!
10 January 2023, 22:14
Don't miss the new album with the final photos here: SE.5a B139 | Album by bughunter (1:48)
11 January 2023, 17:20
Album info
The B139 is a beautiful fighter, but it is not a option of the kit.
It is also shown the Windsock Datafile Special.
I will use the beautiful PC12 color shade of Mr Paint (MRP-254).
The markings are easy enough to be painted. For the serial number I will use a generic decal set.


