
Fil d'information
possède cet article
")
Ammo Cases Tank & Artillery
Verlinden Productions 1:48
2227 4 October, 01:16
")
")
")
veut cet article
")
In Country A-6A, EA-6A,F-4C, F-5A, F-5C, EP-3B, F-100D, A-37A, EC-47Q, EC-47P
Wolfpak Decals 1:72
72-025 2009 Nouvel outillage Multi sujets (7)4 October, 01:04
a ajouté un nouvel album photo.


64 19 June 2023, 19:38
This weekend both Essex and Hancock kits were started. You can compare these two on my garden table, Essex being a short hull version and Hancock one of the later long hull types. Therefore Hancock has the Ticonderoga Pontos set. I threw in a dozen of airplane sets and pillaged the Ion Model figures stock for about 420 seamen to take the stations. While making the requested change to the rear elevator (see shipmodels.info/mws_..pontos+essex#p919517 ) an error was discovered in PE part 605 and this can only be solved by completely scratching it. Also, I'll open up one rear elevator so I have to adapt the deck edge to that. The Hancock kit got some travel damage to the hangar deck, so that will have to be repaired too. But I think this is a good start to the project.
19 June 2023, 19:52
The hangar doors present a compomise that I can't accept, showing some inside detail but with all gates closed down and an exaggerated thickness. I decided to remove all of them, beginning with the Hancock sprue. You can compare with the original Essex sprue. To replace the partially closed doors, I can choose between Evergreen grated plates (subtler paneling though one-faced) or the same metal foil as used earlier.
24 June 2023, 22:56
The walls of the Hancock are now built. I found out that there are not enough Pontos PE doors of one design to replace all plastic ones, so Hancock and Essex will be getting a different type. A drawback to the hangar walls is the absence of locator holes. I made some pins myself. The plane cockpits were not in stock and will arrive later.
31 March, 01:55
Read a lot about the Essex-class carriers, really interesting history and very interested to see how your ships turn out 🙂
31 March, 02:02
Thanks, Rando. Today the second ship's hangar was closed off. In the Essex model I didn't need to remove a part of the hangar deck, so now there's a minute difference in the distance of the rear deck to the island structure. The fault should be in the Hancock bow section. I closed down some of Essex hangar doors, but I kept a peeping hole for the elevator shaft that I moved to the right like in Hancock.
2 April, 00:02
This is some project Steven. These are not exactly small models (i have one myself - CV-13 USS Franklin)....and so much extra detail you are adding. Watching in admiration. Great work so far.
2 April, 06:18
Thanks, Gary. The first PE parts are bent for the stern and the boat cranes of Hancock, after the hangar wall seams are removed with Tamiya filler. One part of the wall is badly fitting and needs to be shortened.
5 April, 01:27
Lots of PE particles are now assembled to giant deck support structures. I accidentally used the Essex front deck instead of the Hancock one, so I had to remove the PE plate causing half of the ribs to jump of again and restore this to the Hancock deck. Now I'm about to begin the same again for Essex, that has a slighty larger hollow under the flight deck.
8 April, 01:40
Nice progress Steven. Shame about the mix up but we all human, im sure at one point we have all used a wrong part or miss assembled.
Keep up the good work....and enjoy your build time.
8 April, 10:01
Thanks for the acclaim, now Essex is also loaded with PE parts under the front deck. I also removed the rear lift floor in the hangar deck, because it will be visible through the side doors. The deck edges are getting PE plating with the correct catwalk acces doors and fire station hatches, but I'm still thinking about methods to remove the space behind these PE parts. Drilling is not enough.
12 April, 12:38
Thanks Gary. The update today shows the reshaping of the Hancock bow. The angle of the kit bow is too shallow, so I cut out a wedge in the side and plied it back. The bottom part was split and clamped shut tighter, using sprue "rivets" to hold it closed. A lot of sanding followed, even after I had installed the port 40mm hubs on the hull. Another problem were the 18 doors that needed to be removed from the island structure, so I used my Proxxon for that. An extra is the comparison between 5inch/38 mounts from the kit, Flyhawk (yellow) and Pontos (Brown). Pontos is more detailed, Flyhawk has PE details and the kit is built up from different parts.
20 April, 10:19
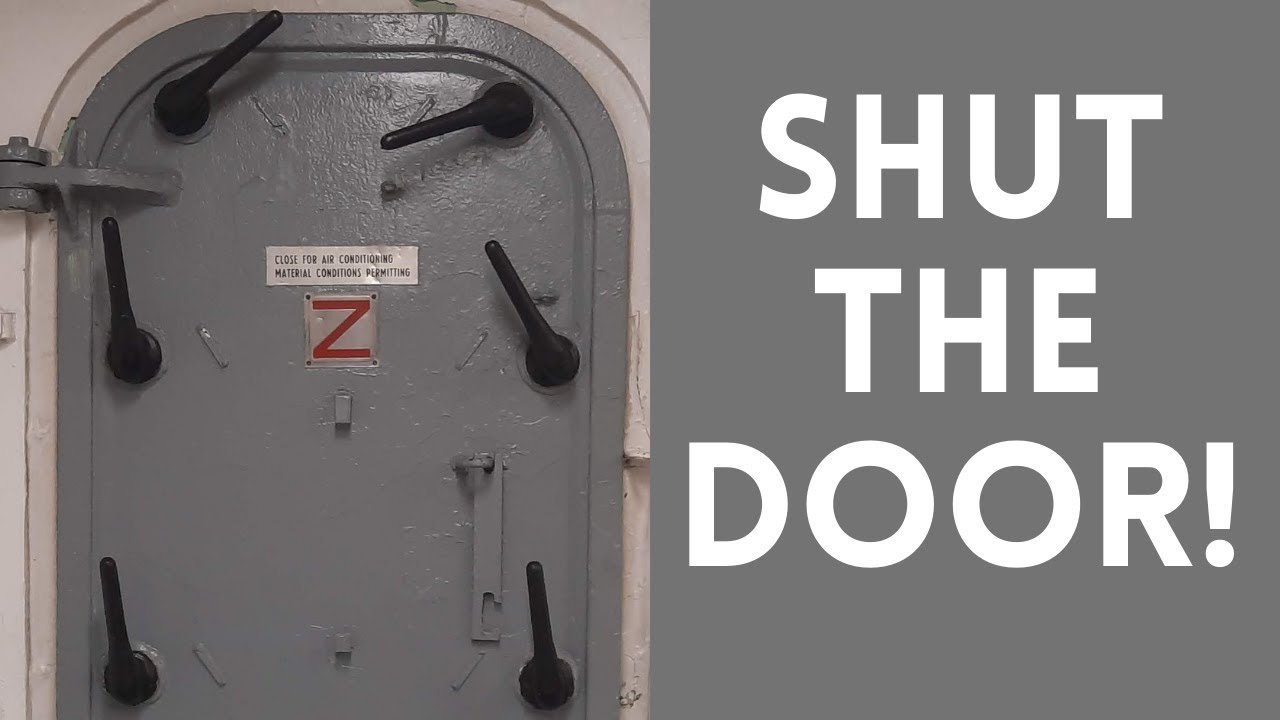
Thanks, Pietro. The islands now both have all watertight doors, and Hancock's island is already a bit further down the line sporting ladders, a PE walkway, the pri-fly cabin and a almost fully equipped smoke stack. For a movie about choosing the right watertight door in your model, see Youtube Video . I did find the correct type on some detail pictures in my books.
23 April, 13:24
A 45 picture update about Hancock's island. I made changes to the building plan where I saw the reference pictures didn't follow them. Loudspeakers were added. A cutout in the bridge deck was removed. The venturis on the different levels were added, but some don't extend far enough. Some of the PE hatches on the director towers needed to be scrounged from the ABSD project remains. All kinds of radar antennas are added, some I didn't find or identify yet, like the "stovepipe" antenna encircled on one reference picture. The SC-2 radar needed to be put on the platform for the side SK radar position. I did make the rear mast for the smokestack position, but removed it again because there is no trace of it in the reference. It might still be used on Essex.
26 April, 00:35
Thanks Christian. Again a large update with changes to the Essex island. The front structure is made identical to Hancock and some scratched galleries are added. I decided to move Essex to the march 1945 scheme. Pontos has some parts for 1944 Hornet that are useful here, like the bridge walkway. Some areas like the stern will have to be adapted too. The same radar antennas are used, but some of them on different positions. I now added more airplane PE to the inventory, some of these should be finished to be able to close down the hangars.
2 May, 13:12
The Avengers are now getting their PE cockpits, and the interior of the hangar is painted white.
6 May, 00:59
Thanks, the airwing continues with the Helldivers, the Hellcats and the Corsairs, that had the hardest fit, so it's a good thing I had only six of them. I still have the same amount of planes not getting a cockpit.
8 May, 00:25
Detailing of the port air outlet, the catwalk and starboard galleries of Essex. For Hancock it's only the outlets that were repeated. At first I was cutting small mesh parts, but it's better to cut them as a whole and add a PE crosshair. In the Trumpeter planes there is a tendency in the wing base to be cast offset (see color image) resulting in a skewed wing position when the fuselage halves are assembled. I'll often have to correct the angle. All plane fuselages have been fixed now and in the Helldivers and Avengers the seams are already filled and sanded.
11 May, 00:36
The Helldivers are first to be completed with PE parts. The Pontos airbrakes are an improvement over the kit ones, and they can both be used for stretched wings or retracted ones. I drilled open the wheel wells. In the Hellcats, the cowling is incorrectly cast with one lower opening, so I shoved a node in each one and sanded it flat. A new opening is drilled and an oil cooler vent is then cut out under that. Takes quite a while.
14 May, 15:06
The Hellcats are now all having a revised cowling and they also have a brass tube for the new prop position. The wheel wells are all drilled out and I made 10 scratch pairs because I only have 32 Pontos pairs for 42 Hellcats. For the Corsairs the wheel wells are rectangular which is a real pain to scrape out. The Avengers are still to be detailed, beginning with the tail wheels.
18 May, 00:52
That are quite a lot of planes you're doing.Defintely will complete the build
18 May, 11:59
I think so, Lode. Don't you fancy a carrier build yourself? You probably have a Yorktown 1/200. Today the painting of the airplanes was started. The wings are painted white but this I might have to redo in grey, they're too coarse. The planes are in grey now. I cut out the propellers and I needed extas for the Hellcats, so I changed the 6 optional 4-bladed Corsair props into 8 3-bladed ones.
21 May, 01:35
ton of little airplanes will certainly make a great flight deck, picture 359 seems an MC Escher design 😉
21 May, 06:23
Currently these planes are enveloped with gum to spray the camo on them. This is extremely tedious because the gum is not always adhering well and it must be sculpted exactly the same on each plane. I now painted the hangar floor in Lifecolor Deck Blue 20b (don't mind the overspray) and I also built the side elevators. This is a very nice fit from Pontos, but the netting supports are erroneously numbered 36 and this part is not abounding, nor does it fit the purpose. In stead of it should be used part 10, that was left in just the right numbers. The repair of the 5 inch/38 resin housings was first done with putty but then I wanted the outline to be improved and I made impressions with a knife flat and a drop of CA. Then break off the knife and a straight edge will result.
24 May, 15:21
The 5 inch guns are now all detailed according to reference pictures of the ships. Essex was different than Hancock, it had no blastbags nor ladders. But in the end I noticed I used the wrong type of ladder, so maybe those will be removed. For the single guns one double gun barrel was wrongly shipped, so I lengthened that one with a 1mm Albion tube. Also some small parts are not provided in the needed quantity, or the option of placing PE steps was not shown in the manual.
27 May, 12:48
The long range antenna pylons of Essex are according to the Pontos manual, but they copied this for Ticonderoga and that's incorrect. The 3d pylon should be left out for long hulls and so I can drop a 10th pylon for Hancock. One of the ladders for that can be used to complete the double 5 inch housings. Because of much unclarity in the manual I made many wrong folds on the catwalks and had to reassemble lots of parts with stress cracks. Also the deck edge elevator has a chain lift system that is now constructed out of a very fiddly frame that also breaks easily. But the end result is sturdy enough.
31 May, 00:43
All planes are now in sea blue and ready for the last camo paint. The prop tips are painted in yellow. Some wings were stripped, others were overpainted in light grey.
5 June, 10:50
Midnight Blue is almost completely added on all planes, only the Avengers still need the tail completed. Some of the wings had orange peel and were redone.
7 June, 01:02
Thanks Gary! It went on with the elevator shafts, the Avenger tail colors, the propellers that were masked with a metal roundel (after 2 hours I now have painted about half of them black - on two sides!) and then finally the cockpit set arrived and I soon had some new Helldiver and Hellcat cockpits. I wanted the Dragon Avengers to have a PE cockpit too, but this was a very tight fit even afer milling as far as I could in the fuselage interior.
11 June, 23:59
Thanks, David. Now it's decal time. 196 roundels on the wings, as many on the tails and again for the callsigns on the tailplanes. Essex has a horizontal white line that was trimmed with scissors and Hancock has a horseshoe. Still some more are coming, but for the numbers some research will be necessary. All decals were treated with Daco Sol. Plane interiors ar painted Vallejo Interior Green. Hellcat propellers are also painted.
14 June, 00:28
Thanks for the comments! Today most of the canopies are cut up, ground thinner and applied to the fuselages. I'm left with the Hellcat open canopies, these just don't look the part and I will probably have to remove part of the tail to fit these.
1 July, 22:58
I found a hack for making the perfect 1/350 Hellcat open canopy. Use 1/700 two-bar railing cut to four stanchions and bend this over the middle. By now I have placed all clearparts on the airwing. I now started t add the number decals on the Helldivers. You shouldn't follow the Pontos Hancock tailfin indications, these appear wrong as the number is always below the omega sign.
3 July, 20:01
Thanks, Gorby. All crates now are sealed with Pledge and the props are installed. For the Helldivers I needed to scratch prop spinners out of clipped spheric node ends.
6 July, 00:49
Tamiya grey panelliner wash is used on the top side of the airwing. I will be using a different shade for the bottom.
10 July, 00:36
A brown wash was done on the grey undersides of the planes. The also got rigged, each of them with a scrap PE antenna mast. The Avengers got guns in the turret and now I will paint all the canopies on the outside.
12 July, 00:41
All surfaces got a matt cote with Vallejo Polyurethane varnish, for the other side I avoided the gum because it removed some of the decals. Then all the wings could be fixed with a little drop of CA glue. There are no fitting locks for the stowed position of the wings, so all of them had to be manipulated in exactly the same position.
15 July, 00:38
And more still to come. The update shows the closing down of the hull bottom with a waterline plate, that needs to be filled in with a lot of CA to get a smooth fit at the bow. The anchor deck is painted and the anchor chains are added (1 set was sufficient for both). The rear elevator shaft of Essex got a trompe-l'oeuil bottom part because the extreme right side is visible from the outside through the hangar hatches. The bow portholes are deformed because of the modling and are all replaced with Pontos portholes, of wich you get enough to complete the hull.
18 July, 00:22
The decks are closed down after sanding the bottom. Some of the Pontos PE is interfering with itself, so that's clipped. I have some overview pictures for you, with the island and main guns in dry-fit. Now the catwalks can be added.
20 July, 00:25
Remarkable work!
I still can't get over that you are building two 1/350 carriers at the same time. Madness I tell you. 😉
20 July, 04:50
There is reason in it. For example the catwalk supports you see in this update, in stead of stopping at assembling 75 for one ship, you can do another batch for the second one, in stead of finding yourself a few years later in front of that task with the memory of those first 75 ones and having to do that all over again. I even found errors in one Pontos instruction that could be corrected with the other one.
Further in this update: fixing a sag in the deck caused by tensions in the connectors, just saw through the connectors after the deck is fixed to the hull. Also the ladder booms and a lot of Pontos steps that are either not present where expected to not fall off the ship, or that are mentioned in the manual but not used on the pictures. I also fixed the antennas to the catwalks.
25 July, 23:45
There is enough material to build 25 quadruple 40mm Bofors, so I made them. Nevertheless you only need about 8 per ship. Now I'll start on the 130 single Oerlikon 20mm guns. Here the margin is much less, but the fit of the stands is bad so they have to be clipped a bit.
30 July, 20:54
It seems that in 1944 Essex' gunshields were modified, so I had to remove a part from them. For the Hancock model this is not necessary. Every step in the 20mm guns is repeated 125 times, so that takes a toll.
1 August, 23:45
Every time I see this I'm blown away by the effort you are devoting to it. You certainly have a lot more patience than I have.
2 August, 06:32
With these little guns it's tested daily, Gorby. But now they are all done and painting can almost begin. The Hancock 20mm guns were finished when the handwheels were added, but the Essex guns are like on the reference pic and needed an Evergreen Mk.14 visor and a piece of scratch PE for the air feed pump.
4 August, 20:40
In this update I scratched the fuel lines on the hulls, covered the deck ends with sheet metal, made the directors, added all Carley floats and placed the HF-antennas and some missing stuff on the islands.
7 August, 09:58
The floater net baskets are made while the Deck Blue parts are masked on both ships. I tried out the excellent Eduard searchlight sets and used this on both, they outshine the Veryfire ones I used on Hancock first. Now back to the tedious masking of Hancock.
11 August, 00:57
I never thought I would say this......they're "bulkheads", not "walls". Forgive a former carrier mariner, but some of the lingo they jammed into my brain stuck. I also can't stand movies with officers wearing their lids indoors. : ) Your PE work is inspiring!
11 August, 02:00
Impressive amount of photoetches and details, my head is spinning, admiration and respect!
11 August, 09:17
If my work attracts the real carrier operators, I feel as humble as a pollywog. Thanks for the replies, today you can see the finishing of the masking phase and the Gunze primer coating. I used cardboard to close up the hangar hatches, I made it fit well enough to not need any glue. The next coat will be a complete cover of all parts with Lifecolor pale grey.
13 August, 22:47
The hulls are at last painted black and can be unmasked. Some overspray was inevitable and can be removed with post-shade. The deck is first tainted with Gunze Midnight Blue and then faded with a light sand primer. Transverse girders are marked with an Aqualiner. To Hancock I added a paravane guide to the bow. The deck fit of Essex was perfect, now let's check out the other one. When the island is dry-fitted, it seems to have the right look from the pictures.
23 August, 00:43
Thanks Gorby! Now both decks are applied, some setbacks needed to be resolved. In both ships the deck edge elevator was not fitting between the PE constructions to the outside of the hull. I should have corrected this before painting all. I did succeed in removing and reattaching the PE without all too much paint and PE damage, it might not be visible after the repair job. Hancock got the elevator level with the hangar deck and Essex got it stowed in vertical position. This is only possible with retracted safety netting, so that too was moved. I also made a schematic walkthrough showing how I needed to remove the front internal hangar bulkhead of the Hancock model, that seemed to have some badly fitting extra parts to the Essex original sprues. This didn't sit flush with the front elevator edge, so the wooden floor wouldn't fit below the well. It seemed impossible to resolve without opening up the front deck part, but there was another option. I sawed a large hole in the bottom plate and milled through a support plate and the extended hangar floor to be able to push the bulkhead out of the hangar. I then fixed it flush with the well and puttied the floor taht was left a bit mangled by the milling tool. A large part of this will be covered by the wooden floor.
24 August, 22:32
The deck PE particles are pre-painted after being primered grey. Even with this primer they scratch easily. The wooden decks of Hancock and in larger measures Essex must be cut out where the PE parts come. Some of these aren't even pre-cut and must be traced form the parts, like the barriers. I know that laser lines must not overlap, so they wanted to avoid drawing the near-vertical lines over the planking. Because of that, it's better to do the barriers first and then the expansion joints. The gutters around the deck are added with Hancock and will now be completed on Essex.
28 August, 01:01
A bad day at the wharf, the deck markings of Essex were botched because of a bad primer on the PE parts and bleeding of the white paint under the tape. The chipped PE I can handle, but I don't know if the wood can be cleaned up to have the same blue as it was doped in. I'll try to overpaint with the Lifecolor Deck Blue and then again some light sand brown for the weathering. You also see a correction that was needed for the deck edge elevator floor. This is extended too far out in the models if you want the elevator in the down position. I could saw it out in Essex, but in Hancock the hull apparently was not flush with the wood deck safety railing PE part. I just added a new front for the elevator. I also made a new better fitting third elevator edge for Essex, you see the earlier attempt at the top and the badly etched Pontos one on the right. Now I'll go and repaint that deck.
29 August, 20:00
Thanks, Ben, it's fixed now and I added foot markings to essex and srubbed off deck numbers to Hancock. The islands got their deck blue surfaces painted on, so they were now fixed to the hull. I started also to clip a new Tori Factory gunnery crew and compared this to Ion Models figures. These are a bit smaller but easier to clip.
2 September, 01:30
Thanks, Gorby, that's all done now. On the new pictures you see about 500 crew for the two ships. Most of them are Ion Models figures from 6 and a half sets of carrier personnel + pilots and navy figures on leisure. I also corrected errors in the build. The 5 inch platforms closest to the bridge of both ships had to be reversed, which went quite smothly because of the paint layer between the CA glue and the PE. I then added the railings but when I arrived at the Essex port sponson, I found out that it had been revised in 1944. It was made identical to what is seen on Hancock. So I yanked it off and scratched something even better, with some Pontos PE parts meant for the bridge in it. And then I thought of the number of elevators I had built in lowered state, all of those need a total of 70cm safety railing of which I had none. So I'm now clipping some ordinary PE railing so it becomes 1 bar railing. Only two elevators to go and then some painting again!
5 September, 20:18
I scratched, painted and applied the safety railing for the elevators from the generic L'Arsenal railing set. Then I found out that Trumpeter should not have included the Essex center deck section. The port deck edge has a completely different shape. Because all was already finished, this lead to some rigorous action with a circular saw, holding the PE parts out of the way with a pencil and then repurposing the walkways removed for the 20mm gun gallery that was relocated further aft. Hancock now got 3 out of 4 guns, one needs to be repainted.
8 September, 01:30
The AA guns are all installed and the figures are primed and washed. They will now be painted individually.
10 September, 13:51
Then watch my collection of tractors, changed form threeweelers to Clarktors, and my forklifts and bombcarts. Also the torpedoes are finished with their carts and about 20 propellers of 1mm all to be plied.
13 September, 23:53
Very nice work on all the extra bits, particularly the tractors. It would be good if you could include something in the photos, like a scalpel blade so we could gauge how small these things are.
14 September, 06:23

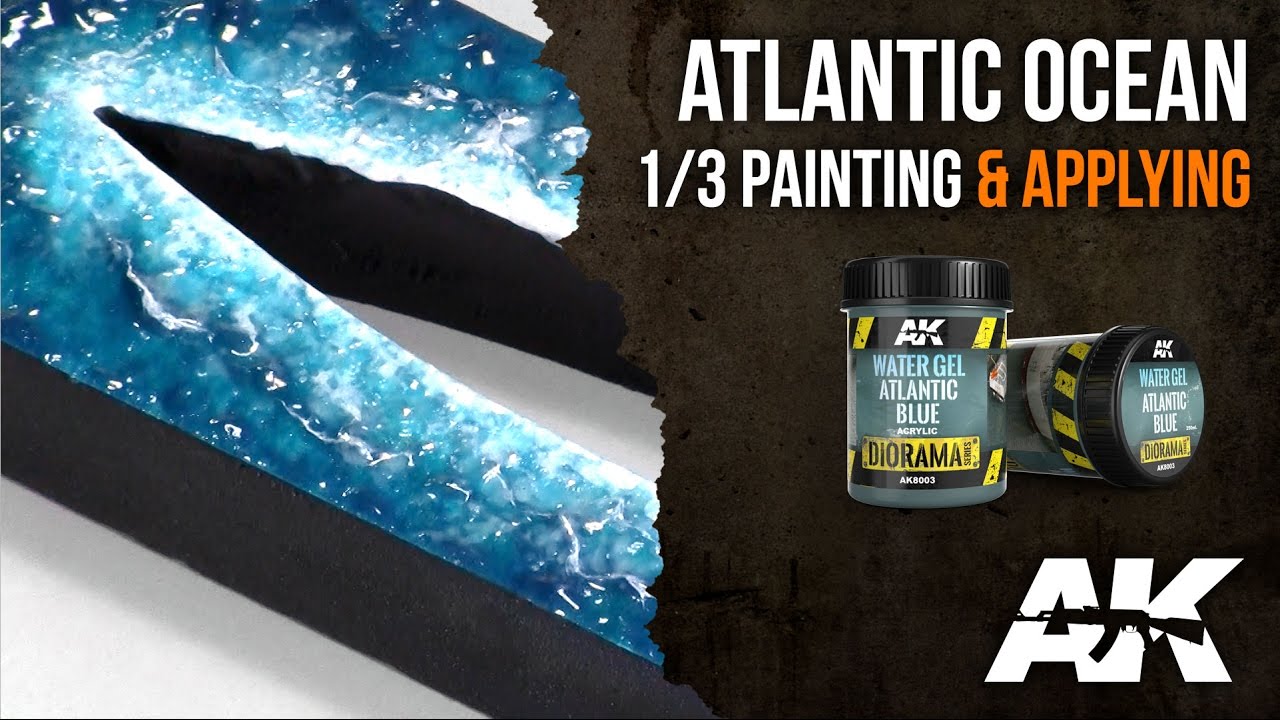
Dio bases are now created for both of the ships. Showcase dimensions will be 85 x 25 x 20 centimeters. The water will have a styropor bottomplate with plaster to smooth things out. eventually AK Pacific water paste will be used, I think I'll go get a new pot of that tomorrow.
17 September, 20:26
Thanks, David. Weathering products are now added to the hulls: Tamiya black and grey wash and the Lifecolor liquid pigment deck weathering set.
22 September, 00:56
Exauisite builds! The extreme level of flawless PE work, attention to detail and scale of modifications towards historical accuracy is astounding! Even the insanely small aircraft's are uplevelledmin detail! Simply amazing! ❤️❤️❤️
I noticed that you use CA glue for the PE Parts, do you solder any of them?
22 September, 15:18
Thanks, CaptGPF, for your inspiring comment. I never mastered the art of soldering and most of the parts are too small to use that anyway.
22 September, 20:54
Essex already left the slipway, tomorrow it's Hancock's turn. Both had their paint scratches and were then coated matt. I painted the nameplates from the kits gold after some thorough filling and sanding the backside. Lettering was painted in dark grey. The AK Pacific water product for Essex is now slowly curing and it seems there will remain a nice core of turquoise in the blue. Waves will be added later on.
24 September, 23:50
The ships get their wake with AK foam. Hancock is slowing down to receive some landing planes, while Essex is imitating a picture on full speed. The antenna pylons are added, for Hancock in the down position and for Essex up. The name plates are now fixed to the frame. I'm starting to rig now.
27 September, 23:27
Amazing progress Steven! Do you apply different layers of blue water to create that effect?
28 September, 05:39
Any tips for painting the letters on the name plate?
If only Trumpeter offered a brass plate with raised lettering, then one could simply airbrush on black and sand off the top, leaving shiny letters (I've done this on other name plates). Super easy and it looks super nice and clean. Instead, with plastic it is going to be much harder to paint the letters right.
28 September, 06:03
Thanks people! @CaptGPF: it's the thickness of the layer that causes the blue to go deep or not. Therefore it is not predictable where the lighter tones will appear. You apply one layer, wait one day and aoply some more if it shines through where you don't want it. But not too much or it will go one shade.
@Treehugger: the letters are delineated enough to pencil them. I do this with Vallejo model color mostly without thinning so it wouldn't run where it is not needed. If that happens, I scrape the wet paint off with a scalpel. That leaves no marks because the base layer was from a can. I imagine what you can try is filling the void with maskol or wax but I doubt that you can get the lines straight like that.
28 September, 08:11
Printers use some kind of firm roller. Get paint on it and roll it over the raised letters. Would that work?
You can help getting the wake a different shade by painting the base on which the water paste goes. Youtube Video
28 September, 08:18
Today an update about the rigging of the long distance radio antennas and the signal flag lines on the island. For the first I used the Arnold book and for the second the Trojca island plans. Cooper thread was used for insulators. I did scratch the pulleys for the flags out of a generic PE nuts and rings set like in the last few projects.
1 October, 00:55
Thansk fir the kind comments. The rigging of the ships is done. This includes the landing brake cables and the barrier ropes. Then the complete airwing was fixed to the deck.
4 October, 01:02
possède cet article
")
Engine/Propeller Set
5 Cyl Kinner B5 Engine and 2 Blade Prop US Types Aeroclub 1:72
E038 (EP038) 198x Nouvel outillage 4 October, 01:01
a ajouté un nouvel album photo.


6 23 September, 02:31
I got the Mod 11 Block 1B version of this kit because I found it on sale for a good price. What I didn't know (until I started building it) is that this kit is basically RPG's MK -15 Phalanx CIWS kit plus the different parts needed to build the Mod 11 Block 1B version. I wasn't paying close enough attention to the instructions when I started building, and ended up assembling the tracking radar enclosure using a panel for the standard MK-15, and I didn't catch the error until after the glue had set. While trying to figure out what to do, I discovered that this kit had all the parts to build the standard version, so I downloaded the instructions from Scalemates, and happily continued building the standard MK-15 . . . until I got to the barrel assembly. I had to drill out the barrel support blocks with much larger drills than indicated in the instructions, and then when I test fit the barrel assembly to the gun mechanism, I discovered that the barrels were about 7 or 8 mm too short. The Mod 11 Block 1B uses a shorter barrel. I eventually solved the problem by affixing a piece of brass tube to the gun mechanism to lengthen the socket that accepts the end of the barrel assembly. Once painted and assembled, the fix shouldn't be too obvious.
23 September, 11:59
")

a ajouté un nouvel album photo.


10 11 September, 16:13
Thanks for following along guys! Progress is a little slow as I'm working on a parallel Hs 129 build that involves a lot of CMK and Aires aftermarket, along with Taurus engines. Once the wings are on though, I should be able to move the two builds along fairly quickly.
3 October, 17:50
a ajouté un nouvel album photo.
32 images
Outono / Autumn 1944_Jagdpanzer Tiger (P) Elefant
1:35
WIP. Those Blanket lines Will be corrected.


Projet: Jagdpanzer Tiger (P) Elefant


16 9 March 2015, 02:53
Thank you for your comments. Very old italeri kit. Waited for years for a zimmerit solution...
9 March 2015, 15:53
Kim, Coming from an real Expert in the subject like you, is a great complement, Thanks.
9 March 2015, 19:06
I'm not an expert, just someone shares the same hooby like you. Keep up the good work mate.
10 March 2015, 07:03
HeHeHe. For me your work is great, so if not an Expert I'm sure you are a Great modeller.
10 March 2015, 14:46
Thank you very much Timothy. It's on hold, because I thought in put some figurines in the tank and a horse rider or so in the trail next to it. I'm not very good in figurine faces... I've yet to try the oils on them😉
22 March 2015, 01:22
Thank you very much for your kind words Fabian, and Donald... as I wrote the kit waited years for a Zimmerit solution... All my latest projects are missing the figurines hehe...
22 March 2015, 20:22
Hey I know the pain of not doing faces as well, but all we can do is learn from others and do what fits our liking
22 March 2015, 22:50
Agree. I Think the most important is practice... A lot, with new technics. I'm confident that with oils it's going to be better...
22 March 2015, 22:57
Some ad on photos. I thought to put some figurines on the side track but for now, I'm going to try a messenger...
20 June 2016, 16:17
Ubercool!!! Love your work sofare! Very beautiful camo pattern on the elefant! 😉
11 December 2016, 20:30
Damn Rui, that camo pattern is wicked! The mud effects are also impressive!
21 September, 00:14
I agree with CaptGPF, also that tree is really good. What did you use as leaves Rui ?
21 September, 00:42
@ CaptGPF, Thank you for your comment. I hope you liked that Wicked 😄 😉 this Is an old project that is on hold as well as the photos. I hope to take better photos and complete it.
@ Mr James Thank you for your Nice words. I hope you also liked that Wicked 😄 The tree is a bonsai that had died, I cut some leaves because they were too big. If I remember correctly, I spread small wood shavings and other natural ones that I had in my vegetation stash on the ground.
Also, I thank the new likes. Apreciated
21 September, 11:48
I'm very happy to say that I've returned to my mancave this weekend after a to long hiatus.
So to start I preferred a lighter job, although painting horses is not, in my opinion, easy.
Let's see what this will give...
29 September, 21:02
Nice to see you back at the bench, and another shelf queen resurrected. Horse looks great imho 👍
30 September, 11:52
Great job breathing life into an old kit, and I can't think of a better use for a dead bonsai tree! Looking forward to the finish!
30 September, 12:22
@Alec, Thank you for your kind words and support. It is always great for me to receive such encouragement, even more so, when they come from a master modeler.
@Doubtingmango thx mate, I agree with you., but hey, I can only return to my bench on weekends, só it Will take some time to finish. For me the most important thing was getting my mojo back.
@Gorby, Thank you very much my friend, for your motivational words. They are always very important to me.
The horse will still improve, I hope. At least that's what I'll try to do without ruining all the work that has already been done 🤔 😉
30 September, 21:37
Looks great! The coat should shimmer like a newly minted US penny. (Shiny Copper). I'll follow!!!
4 October, 00:56
")
a ajouté un nouvel album photo.
34 images
Su-34 Fullback Fighter Bomber build log
1:48
And put it up its feet, temporarily... :-)


Projet: Su-34 Fullback Fighter-Bomber


28 11 September, 09:47
Great!! I like the first parts of you cockpit entrance section. I want to build something similar on mine, when I start it in sometime....
12 September, 05:39
I build this kit myself. It was a nice build without big problems. I follow. Are you gonna replace the nose and back/apu or you gonna leave it?
12 September, 06:39
I do have a resin nose in my stash, but I don't think I'm gonna use it: there's too much butchering of a fine kit involved for too little gain....: as I can't really tell the shape difference anyway?
12 September, 09:13
Nice, will follow this one. Built the KH Su-34, also detailed the avionics bay a little. Are you going with the egg plant grey scheme?
14 September, 09:45
I'm going with the eggplant grey scheme indeed 🙂
And I think I'll do some more cable booms in the main gear wells
14 September, 18:42
")
")
a ajouté un nouvel album photo.


97 12 March 2015, 16:12
Hi Kevin, Thx for your words and reviving the this album 🙂
@ John Thx for your compliment words 🙂
18 July 2015, 22:53
Very nice diorama.. lot of details. that's give always realistic appearance.
Good job!
23 July 2015, 03:34
No oils, no washes, no filters, no pigments (except in panzer II, I think) no aftermarkets, no PE.
Just a badger 200, and lots of humbrol enamel. That was it. Off course the end result shows all that. 🙂
24 July 2015, 01:23
You are welcome sir. If it doesn't have wings or rotor blades, I don't have a clue. I just sent all of my armour to Hunter Cummings.
24 July 2015, 01:33
HEHEHE I understand, mate.
For me is more, if it as wings it must be on ground with some vehicle around, LOL
is this a lyric??? (((😄)))
P.S. Lucky Hunter...
24 July 2015, 01:40
Love this. Reminds me that I:
1. Built these first in the 1970s (badly)
2. Tried correcting and superdetailing them in the 1980s (giving up after countless hours)
3. Bought more accurate, better detailed and much more complicated kits 1990- now (very few finished)
This reminds us that great results can be achieved with simple old kits. Just add skill. It what's in the modellers fingers and head is as much as what in the box that counts.
Brilliant work Rui!
26 December 2021, 10:56
Thank you for your kind comments, mates. Sorry for the late reply.
In this case first I build the pz III, them the halftrack, them I think it was the pz II (built by my sun and painted by me), them I recover the jeep, built in another Century 😄 or vice versa, not sure 🤔 it was a dinamic evolutive Dio, mostly becouse I had the space to add more kits 😉
@Neil, I've to agree with you. Slowly I Will try my best with better and more e expensive kits that I've in my stash. Also looking forward to see what you Will do Next 😎
@Markus, I'm glad you like this enough to comment.
4 January 2022, 17:00
Thank you Bobisek, yah I think they were nicely adapted, mainly the guy in the side hatch. This is an old Dio but thx for reminding me 😉
4 January 2022, 17:31
One can really taste the sand between the teeth and feel the Dust everywhere.
Great atmospheri result Mate.. Congrats Rui!!! 👍👍
5 January 2022, 00:21
Thank you for your kind comment, Daniel. Really apreciated.
Yap, for me the desert means lot's of dust 😄
This is part of another álbum with more photos of this Dio:
Tunís | Album by mig (1:35)
5 January 2022, 00:50
Wow! Looks fantastic Rui 👍 I think Daniel summed it up well. You can indeed 'taste' the sand!
15 January 2022, 23:54
Thank you Mate. I've learn a lot since, but I apreciate your kind words very much 🙂
16 January 2022, 00:00
Thank you Stefan, Nice of you to stop by and comment this old work. I'm glad you like it.
19 January 2022, 23:51
Thank you Mates. Very kind of you to comment. Apreciated. (You know how much I like your work too, so even more important to me).
I think I've evolve a lot since this One, but I sure enjoy a lot DAK scenes and in this case all this 4 kits.
22 January 2022, 14:47
Also reminds me Rui just how inspiring those early Tamiya boxarts were. 50 years on and they are still amongst my favourites. I don't know who painted them but he had an amazing style combining pinpoint accuracy of vehicles and people with an almost abstract use of colour. Try discerning a 'correct' RAL colour from them...
22 January 2022, 16:14
@ Neil, couldn't agree with you more. Even nowadays, you look to a pile of 1/35 tamiyas and even the sides are almost Impossible to resist.
@ C Jackson, Thank you for your kind comment, I'm glad you like this One. Apreciated.
22 January 2022, 17:01
I put together a Pinterest board with my favourite Tamiya box art illustrations Rui, including some rareties. Whilst the recent ones are okay, none beat those 1970s ones in my view.
pinterest.co.uk/newc..tamiya-best-box-art/
23 January 2022, 10:46
I fully agree with Neil and Rui about the Tamiya box art which really was trend setting. I have collected the box tops.
23 January 2022, 11:31
@Neil, Don't know why but the ones I like the most are the ones wth the subjects Over white
@Neuling, Over the years I've done that, as you know. And I've done a photoalbum:
My love for the Hobby | Album by mig
You could do One too?
23 January 2022, 15:10
I am choking on dust and sand just looking at this, beautiful and very authentic!
20 July 2022, 21:19
Hi Mina, Thank you very much for stoping by on this one. It was my 2nd dio (I Think).
when I finished the Pz III, I miscalculated the size of the base and then I added the halftrack, then the Pz II (made with my son), but there was still a lot of space left so, I ended up recovering the jeep (made n years before) to add it.
I'm glad you found it whorthy of your kind words. Apreciatted
21 July 2022, 22:21
Excellent dio Rui. I love how busy it looks. So many details, I could look at it for hours 🙂
23 May 2023, 06:59
@ gvizbi, thank you for stopping by and comment this oldy. I Know you also like Afrika Korps and your excellent examplar model's. Maybe that's why you like this one 😄
@ Mr James thank you. I'm glad you like it. This is one Dio that was evolving for years. The big initial base always left room for another addition 😉
@ David, thx. You are too kind, mate.
23 May 2023, 21:14
One piece of advice, your painting of figures is great but one small thing to make them pop would be to buy a sheet of archer eye ball decals, I use them a lot but youll need to use a hole punch to cut them out.
24 May 2023, 05:45
@ Mina, thank you for your advice, noticed, but this guy's where painted a longe time ago. I think I've made some nice progress in figure painting since them, (I like to believe) but I and others always consider that in this scale and to look from 50cm or more, I don't need to give such emphasis to the eye balls, normally I use only a bit of darker color. I'm sure your suggestion will achieve better results than that white big staring toyish eyes that to often we can see in faces. Also I avoid spend money on aftermarket
@ James and Clifford, thx for your comment apreciated
24 May 2023, 20:35
Thank you Randy for your nice comment on this oldie. I really enjoyed doing it, as I was adding models while I had space in the base that was intended just for the panzer III the figures and the halftrack. 😄
You can see more photos here:
Tunís | Album by MIG (1:35)
I don't remember anymore why I ended up making 2 albums at the time 🤔
22 September, 21:24
")
Anybody know how to aquire?
")
4 October, 00:28
vk.com/market/produc..48-114983756-9597705
the price is in Rubles and converts to around 36 bucks. Your going to pay double possibly triple in shipping. Unfortunately as it is a recent manufacturer and the U.S. Currently has a complete ban on ANY Russian made products you may be waiting on this one a few years.
4 October, 00:50
")
")
")
")
")
")
veut cet article
")
WWII Germany - Signs ATTENTION Mines (Metal, Wood)
ETA Diorama Accessories 1:16
658 2024 Nouvel outillage 4 October, 00:33
")
")
")
 3Door Hatchback \"Custom Version\" (Hasegawa 20715)")
")
 (Wingnut Wings 32027)")
")
")
")
a terminé cet article
")
Dornier Do335A Pfeil & Kübelwagen Type 82 Set
Tamiya 1:48
25206 2023 Ensemble de modèles Multi sujets (2)4 October, 00:28
/fr/search.php?q=*&page=newsfeed&fkSECTION[]=Newsfeed
search-solr.php?lang=fr
35
35
/fr/search.php?q=*&page=newsfeed&fkSECTION[]=Newsfeed
35
todo