
Actualités
a ajouté un nouvel album.


8 26 April, 14:37
Thank you very much! Unfortunately, there are a few issues... some decals have deteriorated over time, and the red stripe didn't turn out as it should have.
26 April, 17:30
Curious as to what others use as a gloss, satin and dull coat. The best dull coat I have found and use is Testors Dullcoat from the bottle airbrushed. As far as gloss I use Quik Shine floor polish airbrushed. I haven't found a good choice for satin however. I'm not sure if a 50 50 mix of Testors Dullcoat and Quik Shine are compatible? Thoughts ?
1 1 May, 00:10
So far, depending on what it's being sprayed over, I like the Mr. Color Gloss.
1 May, 00:24
I have also used Liquitex artists mediums but I'm not 100% convinced with them.
1 1 May, 00:54
I like the Vallejo flat coat. It's duller than dullcote and far less toxic and expensive.
For gloss I use Tamiya x-22 and I like the result but it's $$$
1 May, 02:52


a ajouté un nouvel album.


12 27 June 2023, 19:40
Wow! I can't believe I didn't see this! I love the dramatic, yet subtle mods! ❤️❤️❤️
1 1 May, 01:09


a ajouté un nouvel album.


4 18 January, 00:51
The 1957 Ford Fairlane has appeared in several movies, including Thunder Road, Die Another Day, and The Adventures of Ford Fairlane.
18 January, 21:08
a ajouté un nouvel album.


17 18 January, 01:09
Thanks Bozzer. It is for a club monthly contest coming up on Villains. Elsewhere you will find my Joker Goon car. Harley Quinn (Dr. Harleen Frances Quinzel, PhD) a former psychologist who fell in love with the Joker during her internship at Gotham City's Arkham Asylum. She has transformed into the Joker's villainous accomplice Harley Quinn. Her relationship with the Joker is known for its abusive and codependent nature. Harley Quinn possesses multiple superhuman abilities, having won a gymnastics scholarship at Gotham City's Gotham State University. Harley Quinn is skilled in using various weapons, often employing weaponized clown-themed gag items, including pop guns, rubber chickens, and a gun that shoots a boxing glove, as well as oversized pistols and mallets, the latter being her signature weapon.
1 18 January, 21:05
Thank you Rui S. Perhaps not as interesting as the Polar Lights Coca-Cola or Herbie but it is for a contest of Villain vehicles.
25 January, 21:42
a ajouté un nouvel album.


8 3 April, 18:05


a ajouté un nouvel album.


12 11 October 2024, 00:41
An interesting build. We have a club contest in November for dive bombers. I selected this one because it seemed like a good kit to build. I was a bit concerned about painting the canopy, but a fellow club member told me that FrogTape® Delicate Surface Painter's Tape worked great. It allows you to see where to cut as it is somewhat translucent. The aircraft is two-tone although my paint choices may not have brought that out as well as it could be done. As to the stars, all I can say is that it is a Navy aircraft!
11 October 2024, 17:40
Thank you Ben M and Troy Campbell. No masks available so I used FrogTape® Delicate Surface Painter's Tape. It is translucent enough and much cheaper than Tamiya tape.
1 1 May, 01:02
a ajouté un nouvel album.


39 16 December 2024, 18:05
Hope I can make it interesting to follow.
The kit doesn't seem very complicated and the Eduard photo etch is mild level. Just the open doors are a new thing for me. They might cause problems when painting and building modules together.
1 20 December 2024, 11:12
I think this project will pick up pace now when I have finished Schleswig-holstein. This is the first ship I build with waterline option and it was very hard to fix the hull seam. I did several cycles of filling, sanding and priming and still it is very visible.
23 February, 09:06
Thanks Villiers! My daughter asked me today if I had only built two ships and one small plane after working such a long time. She looked incredulous when I told her that was actually the case🙂
2 23 February, 20:57
The notorious "pocket battleship" Graf Spee! Taking a seat for this one!
1 27 February, 20:14
Very nice clean lines on the hull. My respect working with the small and delicate photo etch assemblies.
4 April, 19:00
Thanks Villiers! The PE isn't very complicated on this kit but I do feel I have made improvements since my last ship.
1 4 April, 19:52
Thanks Agnius. I'm trying to stay focused on this project and progress has been good lately.
Unfortunately I had an accident today, I dropped the turmmast on the floor and two PE pieces were knocked off. I think it is repairable and could have been much worse.
10 April, 20:16
Thanks J35J, Ricardo and Jörg! I'm happy with the painting, trying to find the right balance between the contrast effects and realism. I know ww2 ships and planes shouldn't look like space marines but I like when shading and highlights make models pop a little.
1 11 April, 12:57
Working on the boats and the result is ok for my Graf Spee. But comparing them with the boats Jörg are doing is like comparing a kids crayon painting with the Mona Lisa😥
1 30 April, 18:35
Come on, your boats look very good. And I build on a larger scale, which is easier. 😉
30 April, 18:57
a ajouté un nouvel album.
31 images
Bell XP-77
1:72
Decalling done. I chose 915 in her later stages of testing - aparently after hand over to USAAF. I identified 4 liveries...


Projet: Bell XP-77


46 10 February 2022, 20:20
As I travel often between Germany and Poland and did move my workshop to DEU I decided to duplicate it in Poland as to not loose time without my hobby. This is my first pararel project in the workbench in Poland. Another short run.
10 February 2022, 20:31
Unusual model... Following!
Lucky to have duplicated your workshop 🙂 👍
10 February 2022, 20:46
Cleaned up the wing today and deepened the first wheel well. Did use pattex sos glue to fill the edges. I can not reccomend this glue enough - it works far better than any filler and is easy to sand. I use it also as glue where possible as it gives a strong join.
11 February 2022, 19:53
@Cuajete and Guy: welcome! I bought jut the tools needed to do simple kits so I do not waste my time on not modeling 🙂
11 February 2022, 19:59
Deepend the second wheel well and removed the injection stubs. The plastic is very hard to sand but very easy prone to overscraping wit a scalpel blade. This is going to be a greater challenge than the hawk.
13 February 2022, 18:54
This little gem will need a lot of TLC. I looking forward to following your progress.
14 February 2022, 01:35
Watching with interest for sure! (just a word of warning here, Patryk - I remeber from one review of this kit that the vacu canopy is too small - have you checked it already?)
22 February 2022, 20:44
Thank you for joining Robert and Daniel! @Robert: I did a search for builds of this kit - there is a problem with canopy fit but nothing not to overcome. I did actualy stumble on an open canopy picture of the XP-77 during the search - the canopy didn't slide back but went rotating downwards flush into the fuselage so only the front frame is visible after opening. If I will have to much problems with fit I might replicate it in the open position.
23 February 2022, 12:55
Open canopy surely would add more interest to this fascinating plane, Patryk 😉
23 February 2022, 13:38
Managed to cut of and sand the resin from the castings block, unfortunately breaking the rear cockpit wall in the proces. Glued it and the control stick to the tub with pattex sos glue. Additionaly i managed to prime the resin parts.
Thank you for joining and the comments Mates!
6 March 2022, 16:41
Dry fitted the resin inserts - they fit very good to the fuselage halves - no sidewall trimming needed. After that I primed the back portion of the seat and the insides of the fuselage.
13 March 2022, 17:40
First layer on the resin parts and fuselage interior painted. I prefer to brush paint small parts in this scale, saves a lot of time of paintbrush cleaning and after a clear coat and wash you don't actually see any difference. The Ranger V770 engine on 99% of pictures I have seen was pained Neutral Gray, so I went with this suggestion. The instruction states that it was black.
18 March 2022, 14:59
Second layer on. Started some detail painting in the cockpit and did clean up some of the kits parts. Thank you for joining Villiers!
19 March 2022, 17:44
Did some rought preliminary detail painting on the seat and engine - it will be corrected after the second layer. Need to get sone rust and copper colors from my workbench in Germany to finish the engine detail paintig. Did also test fit the exaust ports to the fuselage sides - much trimming was needed for both the ports and fulelage to get a good fit. You can see the difference - lower on the picture is the fuselage side which is allready corrected.
20 March 2022, 18:24
More datail painting and silver drybrushing for the seat and cockpit. Small corrections needed, the camera catches more than my eyes. Next a coat of clear flat and a dark wash awaits.
28 March 2022, 10:37
Managed to glue the cockpit together, working on parts cleanup, which is extremely difficult due to the plastic beeing extremely sanding paper resistant. Reworking the exhaust system to beter match the original.
22 May 2022, 16:30
Cleaned up all of the parts and sanded them to 2500 grit, now they are ready for priming. Assembled the propeller and glued the engine front in one of the fuselage sides.
25 December 2022, 16:44
Fingers crossed 🙂
One of special features of this plane was, that the canopy was not opening by sliding, but rotating backwards into the back fuselage. 🙂
Youtube Video

25 December 2022, 23:23
Thank You for this valuable reference Robert! It helped to solve some questions that I had, might reeork the exhaust system after seeing this.
26 December 2022, 08:28
Primed the small parts with the 1st layer of Tamiya spray matt black.
26 December 2022, 18:08
Did prime the other side of the small parts with the 1st layer of tamiya black matt. Rescribed one side of the fuselage as the original scribing was almost invisible and added a document pocket to make the cocpit a bit more busy. Did also put the first layer of Interrior green to the front wheel bay.
30 December 2022, 18:32
Glued the wheel bay and cockpit to the fuselage side today. No issues with fit.
3 January 2023, 20:39
Thanks Mates, dry fitted the fuselage halves together and no issues besides some putty will be needed in the lower part of the front fuselage. The wing will need some shimming of material where it meets the front wheel bay but nothing significant. Having more fun with this one than the P-36 or the mainstream U-2A.
3 January 2023, 21:39
Some advice needed dear Mates: what glue is best to use by vacuform canopies? This is my first attempt, do not want to mess it up.
3 January 2023, 21:41
In such cases I first glue some pieces of stretched sprue (made square-ish in section first with a knife) around the edge of the opening (in distance from the outer edge equal-ish to the canopy thickness) and then I use drops of thin cyanoacrylate glue one-by-one letting each flow under the edge of the canopy and dry for few seconds before applying the next one... But it is quite time and nerve consuming...
3 January 2023, 21:49
Well, I guess there are as many ideas as the mates who use the vacu canopies. I'm afraid of putting together transparent parts and CA glue, so I either stick to some sort of PVA/Kristal Klear (forget the sanding afterwards) or UV glue (usually Bondic, can be sanded after drying very well in UV light).
4 January 2023, 11:12
Thank You for the advice Łukasz, maybe the ye olde card modeling technique wil be also a feasible solution - butapren glue 😜
4 January 2023, 17:14
Bondic is a good idea, much less risky than CA glue - the UV setting glue was available in Germany under Revell brand too (I bought such a set few years ago while visiting Erfurt)
4 January 2023, 17:59
Ahhh, butapren, never forget 😁How did it go?
- Granma, have you seen my butapren?
- Nope, but have you seen that dragon in the kitchen?
For the non-Polish readers: this glue used to contain trichloroethylene when we were young 😄
4 January 2023, 18:42
Welcome Thomas!
@Łukasz: Thats a good one😂. I remeber in my town the nice lady that worked in the shop that had then in the 90's would sell me only one tube at a time because she was concerned about my health.😜 I was a card modeler for many years, converted to plastic only a few years ago.
4 January 2023, 21:06
@Robert: Thanks, I will try too look it up next week in Germany.
4 January 2023, 21:08
In injected plastic, it usually works to protect the cockpit from the ciano by immersing it in Future (or similar) and letting it dry before gluing with ciano. In vacu I don't know, but I guess it will work too. However, I wouldn't risk it if you only have one copy of the vacu.
5 January 2023, 20:00
@Cuajete: thank you, this is an interresting method indeed. Thinking about making an opened canopy which will reduce the effort and show more detail in the cockpit.
6 January 2023, 20:17
Progress so far. Added weight to the fuselage an closed it. Managed to paint most of the small parts also. Fit was good in regards of joining the fuselage. A long sanding session awaits in order to get a smooth effect before adding black primer. Also rescribed the panel lines as they were too shalow. Also need to rework the exhaust in the closed position as depicted on the reference I got.
1 May 2023, 15:30
I will Robert! It will be done, currently working on 5 projects divided between homes in Poland and Germany, so it might take some time. Thanks for still beeing here!
1 May 2023, 15:42
Update: scribed the lover wing using photo s and the 1:48 czech model kit as references. Small corrections will be needed but under a few coats of black primer and then silver the effect will be ok. The kit had almost no detail on the underside of the wing.
19 August 2023, 19:06
The fight continues. Rescribed the right side and reworked the exhaust according to photos and the czech model kit. Painted all the small bits. Looks maybe a bit rough on the picture but pretty much ok for the normal eye - it will be refined before priming
22 December 2023, 19:15
The fight continues. Did attach the wings to the fuselage, the fit was very poor. I filled the gaps with pattex sos glue which I use as filler with very good results. Sanded one side with 800 grit sanding paper and got a flush join.
27 January 2024, 17:58
Done also with the other side with rescribing, reshaping of the exhhaust system anf filling and sanding gaps between the wing and the fuselage. The underside awaits.
31 January 2024, 12:06
The old Special Hobby kits are not for the faint of heart.
Keep going. Looks good what you achieved so far.
I like the Pattex super glue too.
31 January 2024, 19:47
Thank you for you kind comment Michael! I am satisfied with the progress so far as it is a very challenging kit to get right.
31 January 2024, 20:04
Work continues. Rescribed and scribed all the missing detail as seen on period photos. Got over the hardest part which was canopy attachment. Dipped it with a german equivalent of future clear first, then fitted it to the fuselage and carefully worked around it with super glue to good effect. Need to do this a few times in order to blend the canopy into the fuselage. There were some gaps between the canopy and fuselage but they were filled succesfully with super glue.
8 April 2024, 17:36
Great job with the canopy, Patryk! The finish line is on a horizon now 😉
8 April 2024, 18:37
Patryk, you did well to immerse the transparent part in Future to protect it from the gases produced by the cyano.
You are doing a fantastic job with this kit 👍
8 April 2024, 18:50
Thank you for your kind comment. The build will still take some time as I want to experiment with the new eduard 3d panels and see if they can withstand spray can painting. I will try to coat them with this german Future gloss equvalent as I already tested it on decals and several spray can paints and sealers and this stuff withstands everything I was able to test it on to this time.
9 April 2024, 10:37
Completed the sanding around the canopy. I am very satisfied with the result. It is maybe not visible on the picture but I managed to get a flush connection of the canopy to the fuselage.
21 April 2024, 18:21
Attached the horizontal stabilisers with pattex gel glue to have time to tweak their position as they do not have any attachment points. Had to sand both to get a similar look as one was bigger as the other. It is ready for painting, now on to test the eduard panel decals and to see how they stick to the plastic and react to tamiya spray paints.
22 May 2024, 18:32
The fight continues. Corrected the rudder and reshaped the nose a bit to more resemble the original - unfotunately the ca gel I used went into reaction with the painted resin engine and I need to repaint it after I paint the fuselage. Did prime it with the first coat but unfortunately found many areas to correct - its an old short run after all. Did rework the cooling system - it looks better live then on the picture. I think it begins to turn out ok. Time for the next coat.
1 10 March, 20:43
After 3 surface correction sessions it is finally ready for the first coat of paint.
3 10 April, 17:54
Main paint job done. Now on to seal it and to start detail painting.
1 15 April, 17:56
Paint work sealed and small detail painting done. The panel lines were highlighted with tamiya panel line accent black. Next another gloss coat and decalling. The model is too glossy so I decided that the final coats will be matt.
19 April, 19:14
Decalling done. I chose 915 in her later stages of testing - aparently after hand over to USAAF. I identified 4 liveries that 915 had in her lifespan:
1. Without stenciling with Bell logo;
2. Without logo, with stenciling, gun ports covered;
3. Without logo, modified stenciling, gun ports open;
4. Gate guard without stenciling with red added to stars and bars, big type description on nose an stripes on rudder.
The first 3 also have been seen on 916.
I went for option 3 as it is good documented besides the uderside of the fuselage. I used FOXBOT P-39 AIRACOBRA stencils. The kit decals are somewhat brittle - if using the microscale system do not set as this will give you only a few seconds untill the decal is immovable which I learned the hard way on the upper wing national marking. Sol is enough after the decal settled on its own. I did the same with the FOXBOT decals and it worked fine. Upper and underside decals are my best guess based on the P-39 layout - no photos of the underside exist to my knowledge and the upperside is hard to see.
3 30 April, 18:11
a ajouté un nouvel album.


24 29 September 2024, 22:28
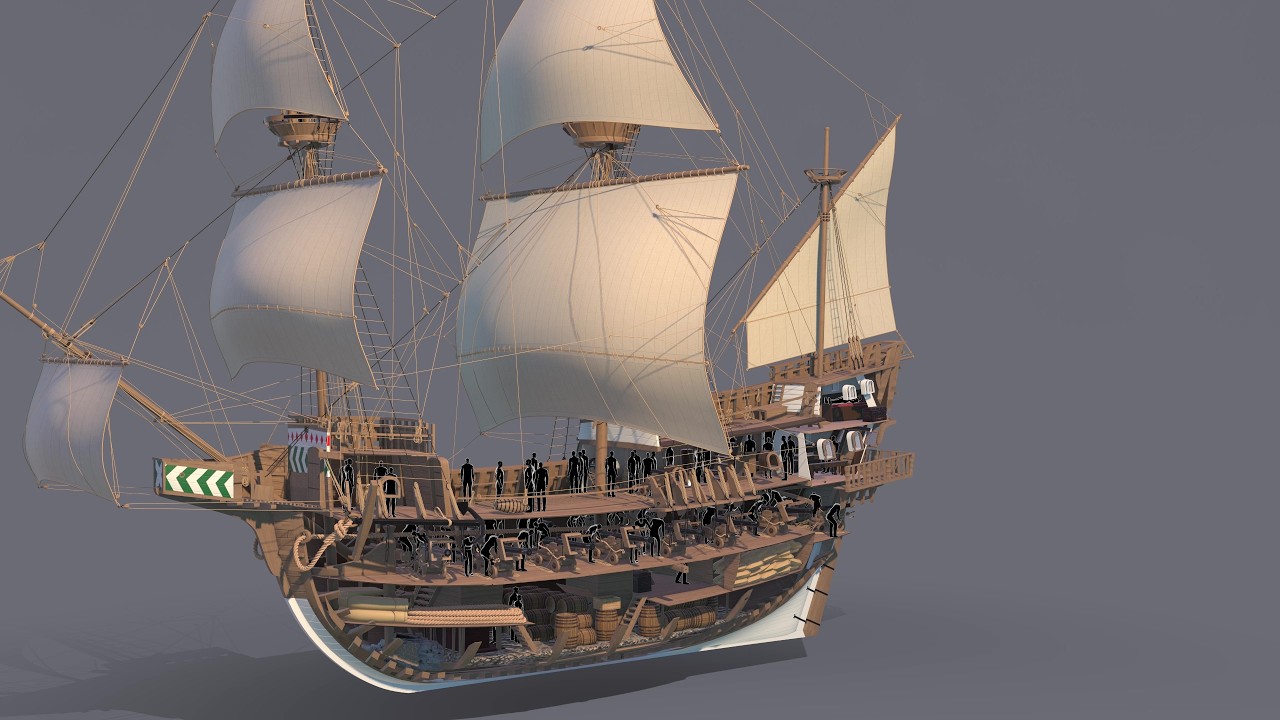
Hmm. I realize now I should have painted the deck first. It's my first ship.
30 September 2024, 01:03
Good grief this kit is older than me. I thought it was just dinosaurs which are older than me. 😄
Interested to see what you can do with it.
14 December 2024, 09:38
And people actually crossed oceans in these oversized bathtubs
14 December 2024, 12:14
Yeah this kit is one of the oldest I've built. Still, going to try to make it look good.
14 December 2024, 14:46
It looks quite toy like, but it is a cool subject.
Will follow this 👀
1 14 December 2024, 15:14
I'm excited, this looks to be a bigger project. Do you know how many pieces there are?
4 January, 22:18
Major colors now blocked out. Need to do next round of masking and painting after the blue dries.
1 19 April, 18:14
Painted after masking and did some detail painting. Will have to mask and paint the hull two more times I think.
1 21 April, 01:55
a ajouté un nouvel album.


4 21 April, 01:44
what's the lore behind this model ? why does it have russian markings ?
1 30 April, 16:24
Great work! (there were a lot of russians fighing on the side of Nazis during II WW, see for example: feldgrau.com/WW2-German-RONA-Kaminski-Brigade/)
1 30 April, 19:09
Since this very variant of ho-229 is just huge What-if, I decided to go down this What-if route even further. It's not just a russian marking, it represent, at least in my fantasy, the infamous Russian Liberation Army(Русская освободительная армия). I saw a fictional picture of me-262 in ROA camouflage and marking before and when I decided to build this model I thought the ROA markings would be fine here.
1 May, 00:48
a ajouté un nouvel album.


28 25 March 2021, 11:26
Sticking to the Japanese theme, this was staring at me from my stash, begging to be build 🙂
Being a Meng kit, this will be a treat after the AZ kikka....
25 March 2021, 11:29
This is now ready for paint, hope to paint it this weekend if I can find the time 🙂
26 March 2021, 17:50
Ah very cool Jan is infected with the Nippon What If Virus...🙂
Well done and great progress so far Mate 👍
1 April 2021, 12:22
Thanks Daniel.
I was infected a while ago, seems the incubation time is over now 🙂
1 April 2021, 12:33
You got a Reppu or Keiun in your stash?
perhaps an idea for a mini gb in the future 🙂
1 April 2021, 12:51
No, I have not, I do have a zero, Ki98 and a shiden though.... Zero Group build would be Nice
1 April 2021, 13:20
Always wanted to take a hand on the A6M8 by Hasegawa that sleeps in my stash for nearly 20 years now.
Mitsubishi A6M8 Zero Fighter Type 54/64 (Hasegawa 51946, 1:72)
")
1 April 2021, 13:36
Very nice progress Jan 👍
Did I just hear Zero GB?! 🙂 I'm in!
@Daniel: Is that the A6M8 with resin cowling and so on? I use to have one but ended p using it for spares since I was not impressed with the quality of the resin parts. A couple of years back Hasegawa issued another A6M8 in all plastic (kit no. 09821) You can still pick one up for under 25,-€. Worth having a look 😉
Mitsubishi A6M8 Zero Fighter Type 54/64 (Hasegawa 09821, 1:48)
")
1 April 2021, 13:45
I have a 1:72 hasegawa A6M3 in my stash, was just about to start on a Hurricane, but like the thought of a zero gb......
Mitsubishi A6M3 Zero Fighter Type 22 (Hasegawa 51315, 1:72)
")
1 April 2021, 14:02
Hi Sebastian,. Yes the Resin Cast is the reason why the kit is still in its box🙂
But 1/48 is not my scale sorry
1 April 2021, 14:04
Scalemates Mitsubishi A6M Zero Group build 2021 (1. Aprilie pana cand 31. Decembrie, )
Just added the group build to the list of events 🙂
1 April 2021, 14:24
Daniel I have the utmost respect for you '1:72 people' 👍 I'm currently working on Arma's Yak-1 in said scale....boy I couldn't do that kind of tiny stuff all the time 😛
So....who's creating the GB then?! 😄
1 April 2021, 14:26
All done!🙂
Thanks Sebastian, I used valejo aluminium and new wood and a fine brush for the chipping.
2 April 2021, 13:30


a ajouté un nouvel album.


11 27 April, 14:43
Thank you.
I may have gone a little heavy on the weathering as I was trying out some new techniques.
30 April, 23:26


a ajouté un nouvel album.
22 images
Focke-Wolf Fw 190F-8 (WIP)
1:72
And it's finished - the problem with the corrugated surface from the chipping fluid is still there, but disguised!


Projet: Focke-Wolf Fw 190F-8


 2+
2+ 35 6 February, 20:28
Thanks... the cracked paint is "fixable"... more worried now about the weird texture... I think I'll spend a fair amount of varnish + sanding to disguised it...
25 April, 23:48
That's a wrap! Thank you for following, final photos can be found here: Focke-Wolf Fw 190F-8 | Album by RReis (1:72)
30 April, 23:34
a ajouté un nouvel album.


2 30 April, 22:23


a ajouté un nouvel album.


35 4 March, 22:01
Cheers Gary, Gorby as I mentioned to Robert it could be painful and a meandering journey of bitter tears, but you are welcome. 🤘🥸🤟
1 13 March, 08:43
Its all practise,and a sign of a good modeler if they can turn a kit around,Good luck with it.
13 March, 11:13
Cheers Gary, but you may see a phenomenon over at M'bro me turning 360 in frustration. 👍🤣🤘
13 March, 12:33
Hello Mark, it looks good to me 👍 The cockpit is really nice. Keep the good work going on! For example, on picture 11, i can´t find any imperfection 😄
1 22 March, 10:51
Hi Jakub, I hold up my hands I copied/referenced the cockpit from your current excellent build of the aerial police car. I must admit too that Pic' 11 was one of my better projects 😜and the subsequent six that followed. 🥴👍🤣🤘🥸🤟😜
1 22 March, 11:01
Thank you John for the like and everyone else too who pushed the button. 🤟🥸🤘
22 March, 11:04
Sand, pint, sand, pint, sand, nah! Pint! 🍺 Pint! 🍺 Pint! 🍺 Good work so far mate.
1 22 March, 19:53
Like the sound of that Neil👍 Going forward that shall be my working practice 😅 Cheers for the compliment too. 🤟🥸🤘
1 23 March, 12:19
pic No. 6, the real a/c has this offset of the "centerline" at this part. Please check references.
23 March, 13:24
Thanks neo for the pointer. But I'm building it O.O.B. And to be honest I really don't care, if it looks fairly like a 109 then it looks like a 109.
1 23 March, 15:38
neo sent me a PM, explaining the misunderstanding. So, if you're going to like my reply I would hesitate to hit the button. Many thanks Mates.
23 March, 16:15
Keep fighting Mark! Love the Eduard kits, but I always laugh at the "Weekend Edition" title. I mean you still need to eat, sleep, use the bathroom…
2 29 March, 22:55
True. Doubtingmango (Fuck, I'm exhausted typing that out) can we shorten it to Dou, or go? Besides the Loo and Fries, Yer gotta ave' a Beer. I'll werk' the Heavy Bag termerrow ' at the gym 🙄😅 Ave' A Good Un' Mate 🤟🥸🤘
1 29 March, 23:32
Thank you John, for the like and everyone else too who liked the album. 👍🥸👍
5 April, 04:25
Nice start and I feel your pain. I just finished a Hasagawa/Dragon FW190 from 1992. At the time of purchase this was state of the art. I finished it and posted the results on my page if you care to look, but I couldn't wait for it to be done. It came very close to a life on the Shelf of Doom but escaped that fate. 😀
1 8 April, 16:31
😄😄agreed ! Eduard had great box art but nothing beats a Tamiya build. Beautiful work on this one. Can't wait until the final pictures.
1 16 April, 01:24
Nick, Eduard. Nice box art, enticing, beguiling and alluring. Detail Mhmmm! Construction infuriating, decals frustrating. Still like them however. I think I have just described Marriage 😳 😅
1 16 April, 10:18
Still looks fantastic! Fortunately, it looks like the black is the most effected in the decals. I would sand with high grit (2500 or higher) paper and then paint the black... Looks great so far!
1 16 April, 15:54
Desert Marlin thanks yes she's kept her looks. You are right about the black, there was some indication on the other crosses in that grey blooms were appearing. I used a cotton bud to press them out, but unfortunately when applying solution to that cross it broke. I agree way to go high grit and paint, but I'll let them settle a bit longer. 🤘🥸👍
1 16 April, 16:49
Keep fighting the good fight Mark. Looks like the end is in sight! Nice mottle job by the way 👍
1 25 April, 19:38
Doubtingmango, John thank you both for the compliments. Aye John just the dangley bits and sticky out bits to put on and final weathering etc. 🤘🥸👍
26 April, 07:34
a ajouté un nouvel album.


12 26 April, 18:57
@DerMattes I've been working on them since I returned from the show. It's a challenge to say the least... 😅
30 April, 21:26
Thanks for sharing, great exhibition! Is the ME 323 in 1/72? it is a quite big build😅
1 30 April, 21:46
a ajouté un nouvel album.
10 images
Italeri Fiat 131 Abarth
1:24
One of my favourite Fiat's from the 1970's. You don't see many around in New Zealand any more as they have mostly rusted...


Projet: Fiat 131 Abarth

11 23 April, 12:02
Nicely done, David, I don't think the rust problem is unique to New Zealand.
30 April, 12:33
Thanks George. You're right, the rust issue was everywhere. There's a beautiful late model 131 near me that somehow survived. It's so nice to see it driving around.
30 April, 22:18
a ajouté un nouvel album.
15 images
MiniArt Lathe Machine
1:35


Projet: MiniArt Lathe Machine
Scratchbuilt
30 April, 20:22


a ajouté un nouvel album.


47 24 January, 16:34
Taking a seat too. (Remember to install the rear/dorsal window (CP 8 ) before installing the wing - in the way proposed in the instructions it does not work well...)
2 26 January, 07:15
Very well done indeed! Great to see you coped well with the transparencies, which are the weakest part of this kit in my opinion 👍
1 29 April, 15:18
a ajouté un nouvel album.
42 images
ESCI/Humbrol | No. 4060 | 1:48 | Aermacchi MB-326K Impala
1:48
2023/24: OOB build of the vintage '81 ESCI 1/48 kit.


Projet: Aermacchi MB-326K IMPALA

53 4 December 2023, 11:03
Thanks Gorby! 🙂 and to others for liking also. Pretty much finished this one now, armament added, etc... More images to come soon... 👍
12 July 2024, 11:22
Hi Felix and Desert Marlin. Thanks very much for your kind words. I have a few builds that are now complete, so reveal images coming for a handful of albums soon! 😉 Thanks also for the likes all 👍
1 14 October 2024, 20:17
Hi mates 🙂 Here's another build I've finally crossed the finishing line with! Have got around to adding the reveal photos, hope you like it 🙂 enjoyed this one, a pretty tidy kit tbh 👍
1 29 April, 10:00
Thanks mates! You're all very kind to comment and say such nice stuff 😊 I really enjoyed this build. For an old Esci kit, I think it built up pretty sweet! Albeit simplistic by today's standards I appreciate. Thanks also to those who have seperately liked too 👍
1 30 April, 21:17
a ajouté un nouvel album.


36 6 March, 20:16
While being on holidays last week I came across this kit in the local hobby store.
I was very happy to get it, but disappointment appeared when I looked at it more closely back home - Hasegawa kit with raised panel lines! 😮
So, I decided to give it a quick go, no rescribing included.
6 March, 20:18
Hi Łukasz! I had this kit, but I changed it when the Platz one came out. I'm sure this Hasegawa one will have a magnificent finish in your hands.
Nice cockpit 👍
7 March, 19:33
Thx, I believe Platz is way better, but after bringing it 9000kms back home, I decided to stop hunting for Platz, it's a very rare sight!
7 March, 21:06
Welcome mates!
Of course I wouldn't be myself if I haven't started adding some handmade details.
I try to restrict it to cockpit only so far 😄
I plan to start priming next.
12 March, 19:50
Wow, a model of an aircraft I haven't heard of! Will it be red and white like the photo?
13 March, 21:19
Love it and that camo will be interesting. Every time when I hear Fuji I think film cameras hah
1 14 March, 04:23
Welcome to my little white and red project.
Tomorrow I'm off for Bytom Scale Modelling Festival, but I hope to spray something on Sunday.
2 14 March, 15:45
Herzlich wilkommen JK 👍
I managed to spray some pink this evening, enjoy 🙂
15 March, 21:15
The plan was to highlight the raised panel lines with a pencil and wash the recessed ones with dark gray marker and then to cover everything in white until they're slightly visible.
I have the feeling my cunning plan worked so far.
18 March, 19:59
Clever trick with the pencil, I have a set of AK acrylic pencils, and I will definitely try them.
1 18 March, 20:52
Started decalling and well the decals' fit is poor if not worse- see the pics.
Luckily Signal Red marker by AK is almost the same shade of red. And the orange will be corrected using AK orange marker too.
2 22 March, 20:40
This is coming along quite nicely! Great save on the decal misalignment issue with the AK paints.
1 6 April, 08:33
Completed. Not very happy with the raised panel lines and the thick decals, but here it is.
Will add some daylight pics tomorrow.
1 30 April, 21:15
a ajouté un nouvel album.
40 images
U96 Das Boot 
1:144
Finally delivered to its new owner :-)


Projet: U-Boot Typ VII C U96 Das Boot


51 1 December 2022, 05:15
A really nice model, shape wise,
Btw, Revell is about to release a 1:144 kit of the IX submarine. Apparently the kit has been delayed from earlier this year, release still pending by the looks of it. Some have preorders put up, but I'll wait for it to come in stock at my local hobby store.
28 November 2023, 10:16
I've seen the test shots at the Dutch IPMS show last Saturday, I must say it looked rather crude. It's supposed to be available in 2024
28 November 2023, 11:08
I have just found out the U-boot on the poster is in fact U-572, not U-96.
The picture has been taken from the bridge of U-96 by Buchheim, who was on board of U-96 as a war correspondent. The picture is printed in his book U-boot krieg.
en.wikipedia.org/wik..oned%20on%2029%20May.
2 December 2023, 14:54
Rudders and screws added.
This is a really nice model indeed 🙂
4 December 2023, 15:46
Got some painting done, brushed on, as I have a serious lack of time, and really wanted to get on with this one.
6 February 2024, 14:11
Great job so far, Jan. Keep it up! (Is it all brush-painted?)
11 February 2024, 12:41
Thanks mates.
Yes, I've painted it all by hand Robert. During the weathering stage I always use a brush anyway, and I decided to do it like this so I don't have to set up the paintbooth.
11 February 2024, 14:36
I'm using the paint that Revell included in the box by the way, it is ideal for hand painting 🙂
11 February 2024, 14:37
That's impressive nevertheless. Brush painting such extensive surfaces is a master-class skill for me.
11 February 2024, 16:14
You're too kind Robert.
Like I said, the paint is very nice to use.
11 February 2024, 16:39
Although I usually like my models to be historically correct, I may swap the decals for the ones in the box anyway, seeing this is the 40th anniversary edition of the film.
14 February 2024, 08:17
Thanks mates!
It will soon be off to the display cabinet of a mate, who is a uge fan of the movie. He has bought me another one of these, in exchange for this model ☺️
26 March 2024, 17:58
a ajouté un nouvel album.


4 30 December 2020, 15:18
Added some more damage, and started to make new seats as the old ones did not fit.
2 January 2021, 09:20
Did you ever find time to finish this one? If so, please post some more pictures!
30 April, 19:32
No Finn, I have not finished it as I tend to get sidetracked by so many other things 🙃
30 April, 21:12
a ajouté un nouvel album.


11 28 April, 16:02
The "Love forever" (pic 92) is the most romantic thing I ever saw in this hobby! Sniffle...
30 April, 21:02
a ajouté un nouvel album.


21 2 April 2024, 16:08
Ignacio von Braun, because it's difficult to drive a tank if you can't see. I guess you could go into battle with your head hanging out of an open hatch, but that makes no sense. The extra plates were on either side of the vision port.
30 April, 20:37
/fr/search.php?q=*&page=newsfeed&fkSECTION[]=Newsfeed
search-solr.php?lang=fr
35
35
/fr/search.php?q=*&page=newsfeed&fkSECTION[]=Newsfeed
35
todo