
Hírfolyam
")
")
megszerezte ezt
")
“Hold the rope, Willi!” Panther Ausf.D, Bergepanther, le.gl.Einheitz-Pkw Kfz.4, German Drivers  ICM 1:35DS3516 2022 Készlet Több téma (3)
26 August, 06:46
új fotóalbumot adott hozzá.


9 2 August, 04:14
Following this to learn. If possible, please include some pictures of how you make the rear lights and blinkers look realistic. I'm really struggling with it 🙈
25 August, 10:18
1. Lights. You have to paint it using clear paints and rapid thinner. (dry coats high psi 20-25. )Then dip it into floor varnish. It makes clear parts more transparent. The last thing will be to glue a transparent film(foil)on the back of the lights. for example hasegawa mirror finish.
25 August, 13:53
Great work so far! The dash is amazing, the chassis looks like the real one!
25 August, 18:44
@Istvan
Anyway, not my best build. Paint job is not perfect because I experimented with thin coats and unfortunately metallic coat is too thin.
26 August, 06:27
@CasModeler Thank you for your reply and good advice. It's very nice how the community of experienced builders help with knowledge. We don't have the floor varnish available here (Norway, Europe), but I will look for an alternative 👍
26 August, 06:46
")
")
")
")
akarja ezt
 (Hobby Design HD02-0387)")
Lancia Delta S4 Detail-up Set (PE + Resin + Metal Parts) (For Beemax B24020)
Hobby Design 1:24
HD02-0387 20xx Új eszköz 26 August, 06:41
")


befejezte ezt
")
Pz.Kpfw. VI Ausf. E Tiger I Mid. Production Standard/Cut Away Parts 2in1 with full interior & workable tracks
Rye Field Model (RFM) 1:35
RM-5100 (RFM5100) 2023 Új alkatrészek 26 August, 06:39
befejezte ezt
Pz.Kpfw. VI Ausf. E Tiger I Mid. Production Standard/Cut Away Parts 2in1 with full interior & workable tracks
Rye Field Model (RFM) 1:35
RM-5100 (RFM5100) 2023 Új alkatrészek 26 August, 06:39
")
új fotóalbumot adott hozzá.


5 24 August, 13:21
")
")
akarja ezt
")
VAL-4 Black Ponies United States Navy Rockwell OV-10A Bronco
Fireball Modelworks 1:48
FMD-13-48 2007 Új eszköz 26 August, 06:34
")
")
")
")
")
")
új fotóalbumot adott hozzá.


8 25 August, 10:13
These four pictures begin a project that should result in one of the largest models I have ever attempted. Not the biggest - the 1:32 Liberator holds my record here - but close!
However, the impressively large box contains surprisingly little and, also surprisingly, large components such as the fuselage, wings and tailplane are already assembled. Incidentally, these are made of fibreglass and require their own treatment.
These parts are also stable and clean. A bit of filling was required, as the traces of glue and filler on the seams are very rough and show air pockets. This will now be sanded, the cockpit sawn out and the windows drilled - well, modelling a little differently than usual! 🙂
25 August, 10:20
The panel lines look ok I guess. I mean, I would be happy with those panel lines.
25 August, 11:26
Like it , nice project.
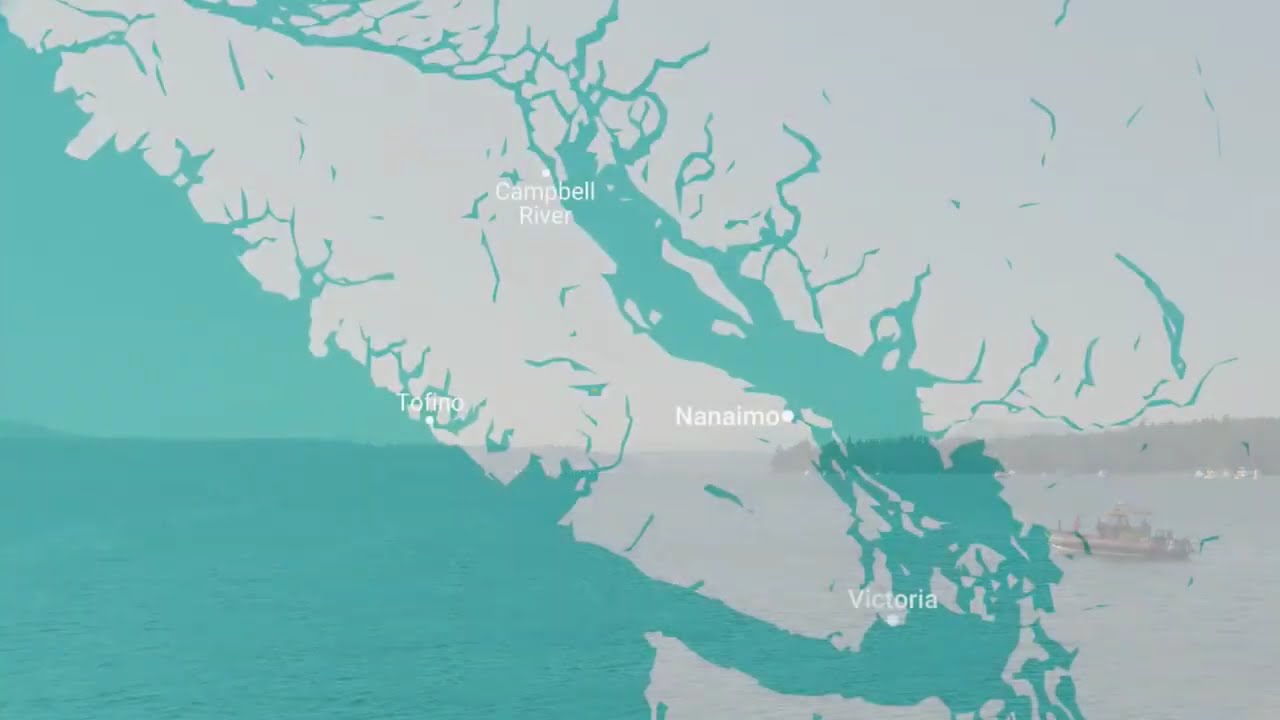
I'm working on the Beriev Be-6 Armoured Flying boat,
Revisiting a kit after 33yrs.
All the best with yours...😃👍👍
25 August, 11:52
A true behemoth it is. I will surely follow this build with utmost interest!
25 August, 13:15
Looking forward to seeing this take shape. 🙂
I believe the last Mars had it's final flight two weeks ago.
Youtube Video
Youtube Video
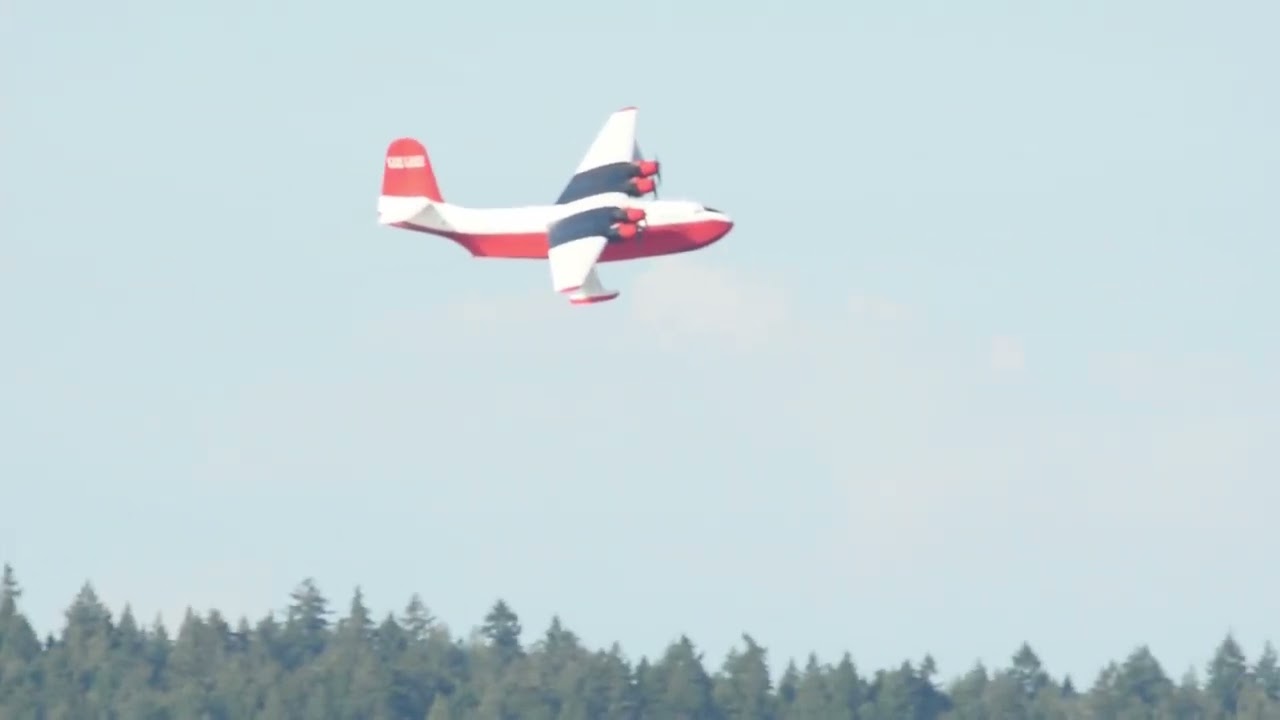
25 August, 13:22
I am very happy about all your interest! In fact, I also started this project because of its topicality; the pictures of the last flight of Hawai Mars are always a heart-warming pleasure; this one in particular, thanks Gorby for posting it!
Today I drilled the openings for the windows in the fuselage; I determined the diameter of the holes from kit glass parts. They seem a bit big to me, but we'll see. As I'm not going to use the clear parts from the kit, but want to make them with Klearfix, I could reduce the diameter quite a bit.
The next steps will be to finish sanding the fuselage seams - now only the top side has to be done - and then to glue the wings and stabilisers to the fuselage. To do this, I'm cutting solid steel rods to length, which I'll glue in place with a two-component adhesive.
The Mars should be ready by mid-October: I want to take it to the Euromodel in Ried, Upper Austria.
And yes, In fact, the more or less finished Fairchild F.91 had to serve as a scale model in the background! 🙂
25 August, 14:11
Du bist echt eine Bau-Maschine, Roland! Und immer kommt etwas sehr schönes raus! 👍
25 August, 14:26
")
")
")


")
")
")
megszerezte ezt
")
Lotus Ford Type 79: Front and rear suspension
Falcon Scale Models 1:20
FSM-11-C 26 August, 06:29
/hu/search.php?q=*&page=newsfeed&fkSECTION[]=Newsfeed
search-solr.php?lang=hu
35
35
/hu/search.php?q=*&page=newsfeed&fkSECTION[]=Newsfeed
35
todo