

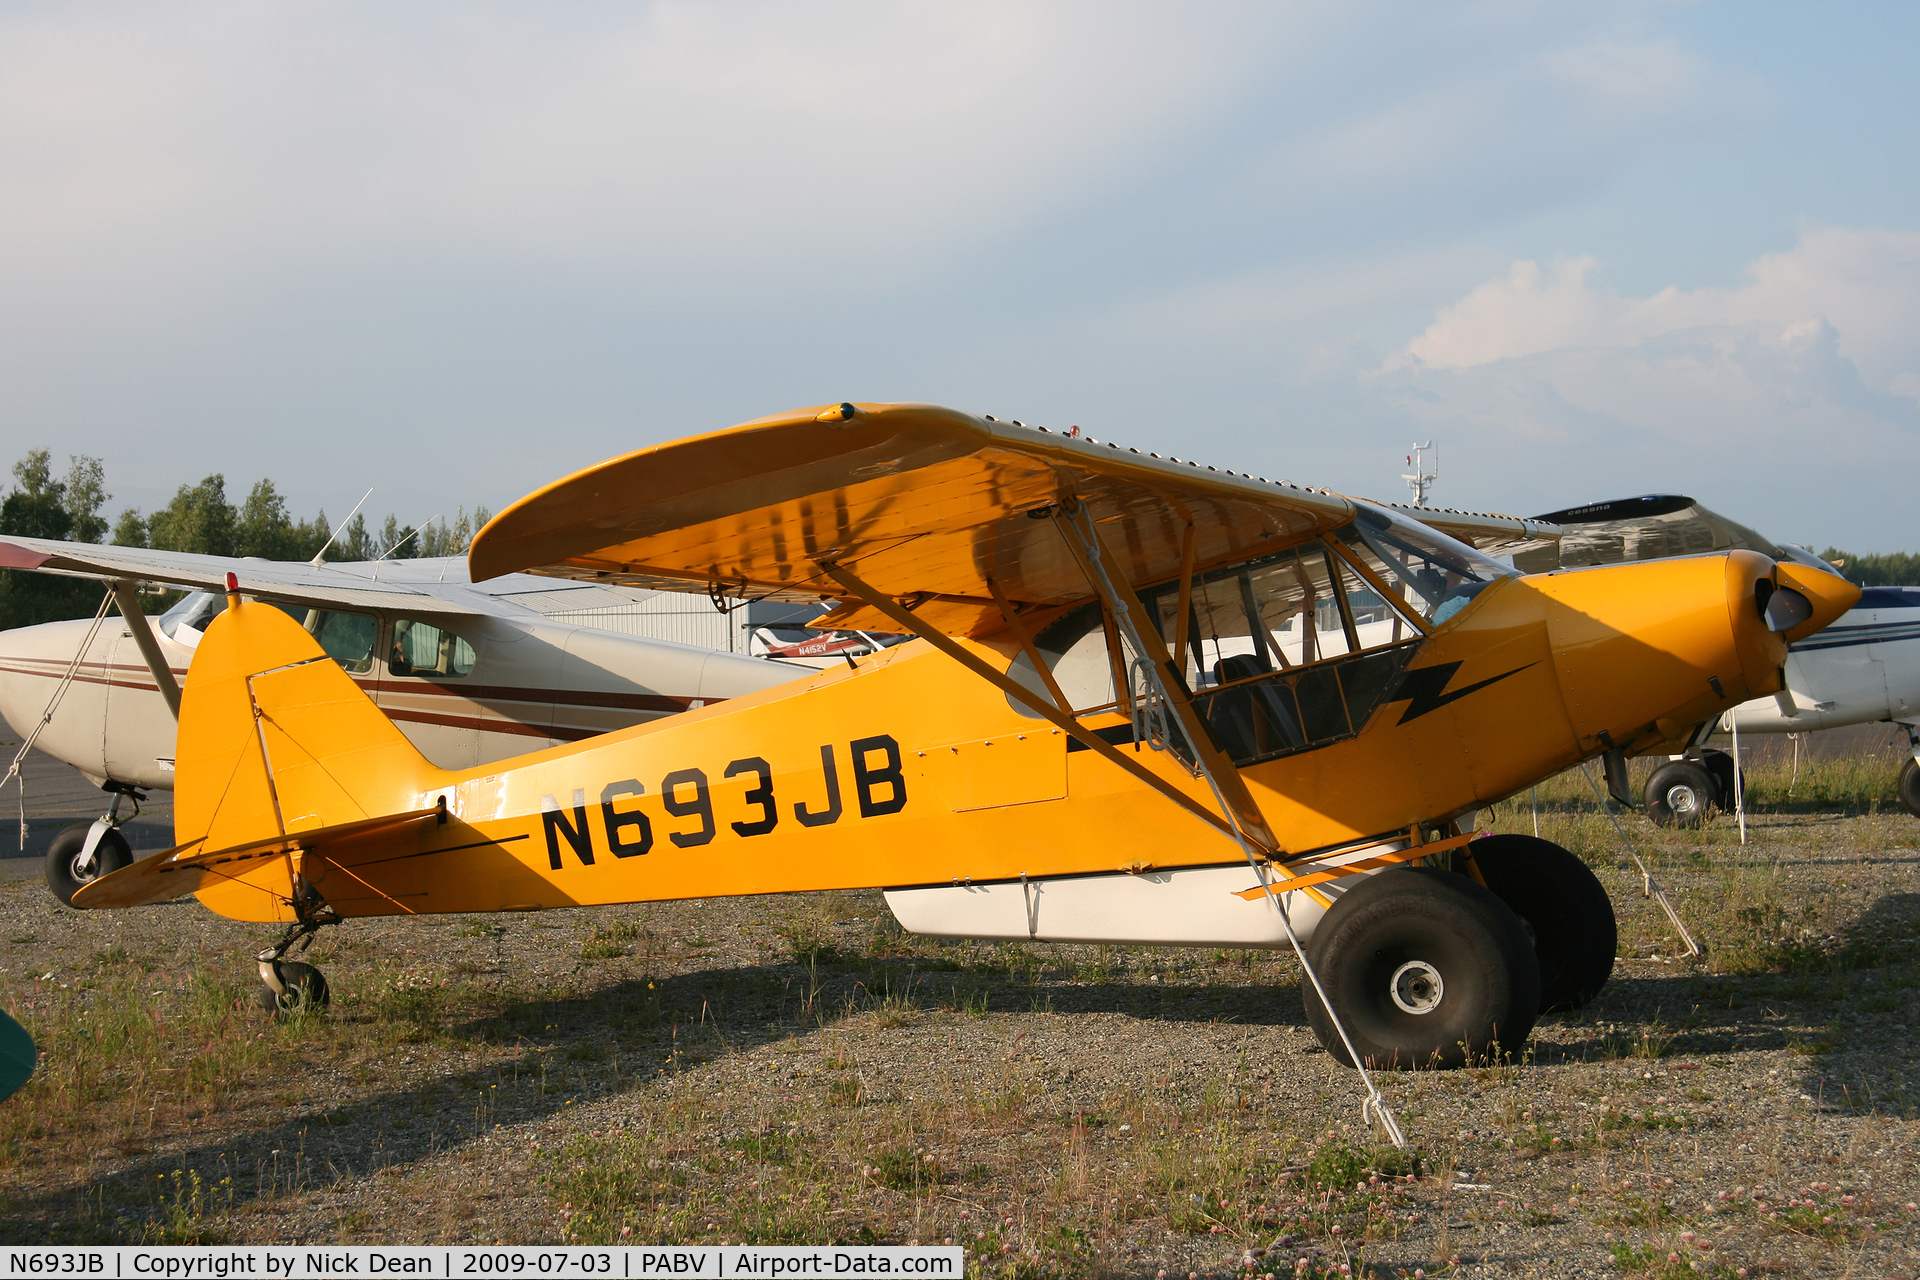
Piper PA-18 Cub N693JB

Sanding off the underneath of the balloon tires to simulate the low pressure tundra tires

Airscale instruments and scratch-build radio and transponder

Drybrushing

Painted instrument board with airscale decals

The "cargo" and the garmin gps unit 😉

Garmin GPS unit


Cockpit with the HGW seatbelts

Engine

Engine front

The fit is really not good. A lot of work with putty ahead.

After a lot of sanding I primed the cub with grey vallejo surface primer.

Had problems with some clocking while spraying the primer. Which leads to even more sanding..

Second coat of vallejo yellow. The preshading is still very pronounced.

About six laxers of yellow later..

Needs another coat of yellow in certain areas. But my yellow is empty.

Added the decals.

Some imperfections due to the varnish.

Added some details to the gear

Added details to the strut.

Still have to do some minor clean ups and the weathering. I want her to look really muddy just like a real bush plane. Not sure how it will combine with the yellow.


Hozzászólások
15 17 January 2020, 22:36
I am check in to this build. Got this kit in my stash too and your progress looks very good.
23 February 2020, 07:02
Thanks a lot bat-213 and Marco Gallmann. I have another one in my stash too because I want to build the alaska state troopers version aswell
29 March 2020, 01:40
The yellow turned out good. One of the hardest colours to get to lay-down evenly.
What are the "details" on the front of the struts.? Not sure what those lines would be for?
3 September 2020, 11:46
Thanks Jasper and Gordon. Applying the yellow was a nightmare. I think it took about 8-9 coats and the color ran and created puddles.
I'm really not good at airbrushing and I still need more routine. I'm not sure about the funkion of the cables on the strut either. But I saw them on some reference photos and thought it would be a nice addition.
3 September 2020, 16:03
The aileron control wires run up along the front of the struts. Great work so far can't wait to see it finished!
3 September 2020, 16:16
Aileron cable runs behind the strut. Was thinking maybe an Antenna co-axial cable for radios for the State Trooper version...
[img1]
3 September 2020, 16:41
@Tom Beighley: Thanks 🙂
I can't find the reference picture anymore. But I'm pretty sure it showed a black cable on the strut and the aileron cable behind the strut on a yellow cub - Probably some weird custom modification (There is a lot of crazy stuff out there - I even found a cub biplane during my research). Can't tell if the cable supplied an radio antenna or so as the picture just showed the strut viewed from the cockpit.
It's just a test build (I got another cub, I will build at a later stage) - not 100% accurate - just to try things out, improve my skills and learn something new. I made way too much mistakes already. Today it slipped out of my hands, fell on the desk and got damaged (But I could repair it). Hope I will get it ready by the end of the week so I can start something new😉
9 September 2020, 04:07


