
Novità
")
aggiunto un nuovo album fotografico.


20 25 August, 10:13
These four pictures begin a project that should result in one of the largest models I have ever attempted. Not the biggest - the 1:32 Liberator holds my record here - but close!
However, the impressively large box contains surprisingly little and, also surprisingly, large components such as the fuselage, wings and tailplane are already assembled. Incidentally, these are made of fibreglass and require their own treatment.
These parts are also stable and clean. A bit of filling was required, as the traces of glue and filler on the seams are very rough and show air pockets. This will now be sanded, the cockpit sawn out and the windows drilled - well, modelling a little differently than usual! 🙂
25 August, 10:20
The panel lines look ok I guess. I mean, I would be happy with those panel lines.
25 August, 11:26
Like it , nice project.
I'm working on the Beriev Be-6 Armoured Flying boat,
Revisiting a kit after 33yrs.
All the best with yours...😃👍👍
25 August, 11:52
A true behemoth it is. I will surely follow this build with utmost interest!
25 August, 13:15
Looking forward to seeing this take shape. 🙂
I believe the last Mars had it's final flight two weeks ago.
Youtube Video
Youtube Video
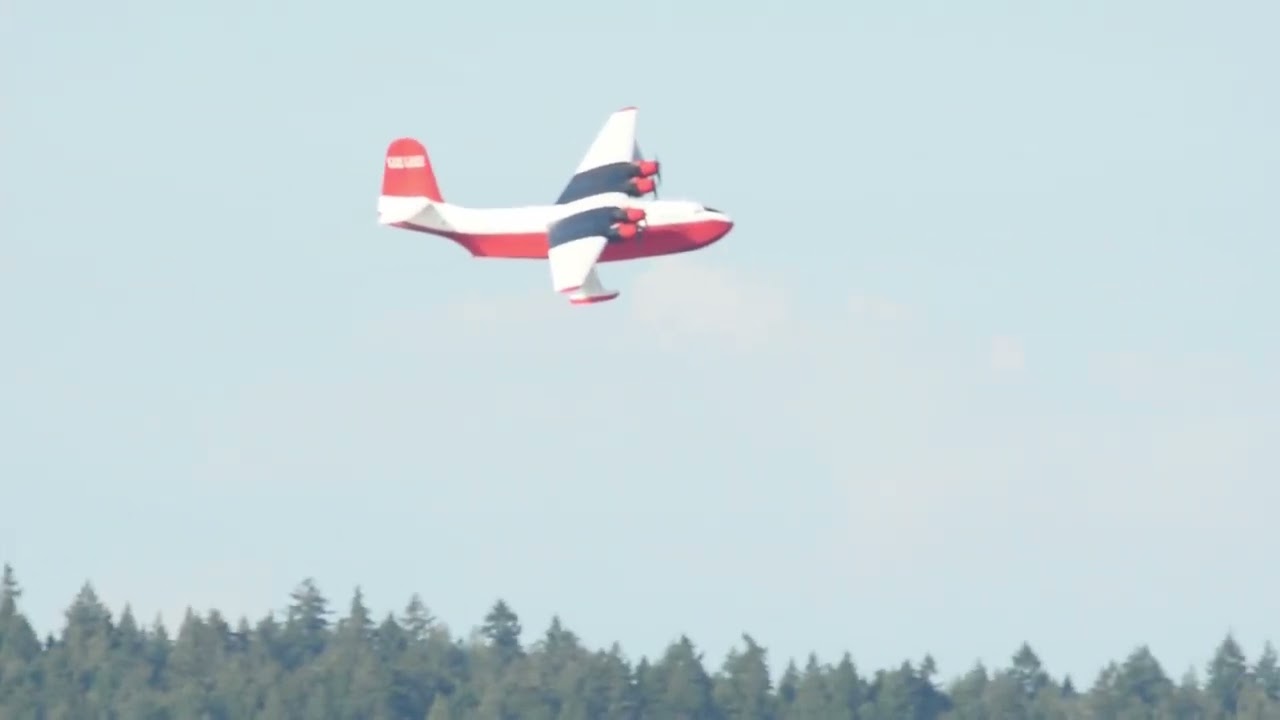
25 August, 13:22
I am very happy about all your interest! In fact, I also started this project because of its topicality; the pictures of the last flight of Hawai Mars are always a heart-warming pleasure; this one in particular, thanks Gorby for posting it!
Today I drilled the openings for the windows in the fuselage; I determined the diameter of the holes from kit glass parts. They seem a bit big to me, but we'll see. As I'm not going to use the clear parts from the kit, but want to make them with Klearfix, I could reduce the diameter quite a bit.
The next steps will be to finish sanding the fuselage seams - now only the top side has to be done - and then to glue the wings and stabilisers to the fuselage. To do this, I'm cutting solid steel rods to length, which I'll glue in place with a two-component adhesive.
The Mars should be ready by mid-October: I want to take it to the Euromodel in Ried, Upper Austria.
And yes, In fact, the more or less finished Fairchild F.91 had to serve as a scale model in the background! 🙂
25 August, 14:11
Du bist echt eine Bau-Maschine, Roland! Und immer kommt etwas sehr schönes raus! 👍
25 August, 14:26
The construction of Mars is progressing: I'll show you a few construction steps in a little 'time lapse'. Attaching the wings and tailplane with 2k glue worked well; the materials could be sanded smooth and fine afterwards. However, the brittleness of the fibreglass caused some difficulties; parts kept splintering off and had to be filled, sanded and re-engraved. As I always do the whole thing standing up, wearing a mask and under running water, this always turns into an almost athletic exercise 🙂 But now it seems to be over and the Mars is ready for its first encounter with colour... I took the two crew members under the cockpit canopy to make the proportions clear and to keep my options open for presenting the finished aircraft - who knows, maybe it will take off or fly?
29 August, 07:38
It's a bit of a monster! 😮
Doesn't look like an easy build but you seem to be beating it into shape. 🙂
29 August, 08:57
Wow... an unusual and gigant model... It seems like fiberglass is difficult to handle.
Great job so far, Roland!
29 August, 19:49
Thank you very much for your motivating feedback and your interest, mates!
30 August, 10:50
")
")
")
")
")
")
")
possiede questo oggetto
")
FRS.1 Sea Harrier Falklands 40th Anniversary (includes Royal Navy Tow Tractor)
Kinetic 1:48
K48138 (48138) 2022 Nuove parti 30 August, 10:47
aggiunto un nuovo album fotografico.
26 immagini
Romanian lAR-80 Fighter 
1:48
Not to much in the way of gapping to fill ??


Progetto: Hobbyboss IAR-80
Scratchbuilt
17 13 August, 21:46
Thanks, Appreciate the interest, lm reality new to the hobby about 14 months, finding my way with techniques.
Weathering n panel lines need more learning.
The IAR-80 was decent price from HB and liked the paint scheme...bit different
👍👍
18 August, 13:25
Thanks J35.
Nice to have the interest, HB instructions bit weak!
They said to paint interior charcoal black like on the FW-190.
But l checked n the Romanian lAR interior was grey/blue.
Engine building next 6 parts deal.
Cheers 😃👍
20 August, 11:14
Good to have you along Miguel, engine n wings next,
A small amount of the wing is seen through bottom of cockpit, the HB instructions didn't mention painting it first!!
But the fit of the model be ok so far.
👍👍
21 August, 09:08
Love the idea of filling with acrylic, never thought about it. Does it hold well though time?
26 August, 13:14
Hi, Yes lve used it alot and holds up really well , l find the fillers a bit messy and more trouble than it's worth on small gaps.
You do need to allow overnight drying with it for best sanding results.
😀👍
26 August, 13:42
Brilliant! The putty really can create a mess with finely molded details
26 August, 15:01
Yes it has a habit of filling in panel lines n bits not necessary!!
This technique is same as using alot of paint to fill a gap or high build primer ect...just becomes part of the paint layer as it acrylic too.
But it's not for big gaps!! As there is a bit of shrinking overnight.
Be onto marking rivets next step after sanding... Then need to make choices on open or closed canopy???
26 August, 19:18
If anyone dare look away from that then every romanian within a 20 km radius will undo all your progress like a bunch of wolves eating a sheep
26 August, 19:29
")
")
vuole questo oggetto
")
German
3.7cm Flak 37 Anti-Aircraft Gun w/Crew Tamiya 1:35
35302 2009 Nuove parti Argomento multiplo (2)30 August, 10:47
")
 Command Version (Takom 2181)")
")
")
possiede questo oggetto
")
PZL P-23 Karaś II 1939 version with an additional antenna and Świątecki bomb carrier
Mirage Hobby 1:48
481601 2021 Nuove parti 30 August, 10:43
possiede questo oggetto
 (Omask 74830)")
F-86D Sabre Dog wheel bay plugs (for Revell/Academy)
Omask 1:48
74830 30 August, 10:43
")
")
aggiunto un nuovo album fotografico.


2 29 August, 17:57
So I just finished this little Italian job. The decals came out with a lot of the edges showing, which then got a lot worse when I added some washes. I used Microset on the decals, and then sealed them with Tamiya semi-gloss before the washes, but it actually looks like the washes got under the decals. Any thoughts?
29 August, 18:04
It looks like you haven't spray gloss coat before you applied decals. Or decals didn't set well. There are two solutions. One is lacquer thinner. Put the thinner with fine brush in dots over the place where you have silvering. Thinner should destroy the film. If it raises paint under, just leave it, it will settle back. Important thing here is that, once you applied thinner, you shouldn't touch decal for something like 20 minutes, at least. Second way is mix of sugar and water, half - half. You make a hole with a needle on the decal, than you put mix on the top. It should enter in the space between decal and paint and, when drayed, make a gloss film in between them which will act as a gloss under the decal. Wipe excess mix with wet cloath and you are done.
29 August, 18:28
How annoying. I've never heard of the sugar water trick from Bogicevic. I'll be interested if this works. If the thinner, sugar trick fails, what else can you do but use a scalpel to cut around them, since you've sealed it,
29 August, 19:05
Thanks mates! I believe Bogicevic is right. I think I did fail to gloss coat before the decals. I think I'll try the sugar water first
30 August, 10:42
")
")
")
")
")
")
vuole questo oggetto
")
T-44M / T-54 model 1949 / AT-T / BTM-3 / BAT-M /MDK-2M
Friulmodel 1:35
ATL-176 2017 Nuovo stampo Argomento multiplo (3)30 August, 10:37
")
")
")
")
/it/search.php?q=*&page=newsfeed&fkSECTION[]=Newsfeed
search-solr.php?lang=it
35
35
/it/search.php?q=*&page=newsfeed&fkSECTION[]=Newsfeed
35
todo