
Novità
aggiunto un nuovo album fotografico.


113 29 June 2023, 12:47
Great project! Your cockpit detail is superb, taking notes for when I get to mine 👍
29 June 2023, 13:11
Thank you Alec! I know, that this variant of Ar 234 is something like ,, what if or luftwaffe 46´´ , which is usually not may cup of tea. But i hope, it will look cool on my display case 🙂 ( especially with the Julia)
4 July 2023, 09:01
Thank you Jan!
I´ve finished the cockpit. Engine nacelles are done ( quite a hard work), wings are glued to a fuselage. Now, i´m repairing and adding same new panel lines.
23 July 2023, 21:04
Very nice processing und fine cockpit. I'm looking forward to the finished plane. 🙂
2 September 2023, 08:44
Thank you, Alec, for your feedback. I didn't know, how to represent those bolts, that were on real aircraft. Than i decided to try this relatively new product from Eduard. And.....i think, its OK. ( I did not count the number of bolts 😄 )
31 October 2023, 10:40
Good idea. Did you highlight the rivets after painting the frames black?
31 October 2023, 12:41
Yes, i did. Primarily i sanded the rivets with very fine sanding sponge to uncover the layer of silver color underneath. But it was not 100 % OK, so i highlited the rivets by drybrushing them with silver oil color.
31 October 2023, 19:32
Superb so far! The effort with the fasteners for the canopy frame was worth it.
12 November 2023, 18:00
Thank you very much, gents, for your comments!
I must add some last details and make few final touches. I hope, that soon i will be able to make pictures of completed model.
13 November 2023, 15:09
Great painting on this lovely build and the subtle weathering is a great touch. Great build
21 November 2023, 13:41
Dane díkec!
Thank you, Mr James!
Right now, the build is completed. I hope, i will make some pictures ASAP
21 November 2023, 19:38
The four engines look great on the Arado. Very nice work on the weathering.
21 November 2023, 20:07
Thank you, Vincent and Daniel!
Finally, i made some pictures of comleted model.
30 November 2023, 11:22
Nice piece! Those four engines added a lot of interest to the plane. Looks very good! 👍
30 November 2023, 11:23
Glorious finish. That thing slung underneath is superb, very well done Jakube 👍
1 December 2023, 14:37
")
aggiunto un nuovo album fotografico.
14 immagini
Orion 2001 Spacecraft
1:144
First layer of white


Progetto: Orion 2001 Spacecraft

11 10 August, 00:50
aggiunto un nuovo album fotografico.


59 8 November 2023, 21:10
This project will have both pilots on the intercom and watching the engine startup process. That is why the same type figure is used in both cockpits. They both monitor the engine to ensure that the EGT and RPM is increasing appropriately. Each has their hand on the control stick to be able to open their MIC as they confirm everything is normal at start. The plan is to have the aircraft loaded with a Nuke (Apache Cruise Missile?). Seems appropriate to me for the days we live in now...
8 November 2023, 22:16
Maybe go for resin seats as well?
Seems like kit plastic never can compete with resin seats. 🙂
Though, I no longer crave for resin interior for the cockpit because of the work, but seats are ok.
9 November 2023, 05:17
I'll paint these up and see if I can tolerate them. If they are too bland, I have time to change my mind! Thanks for the idea!
9 November 2023, 21:25
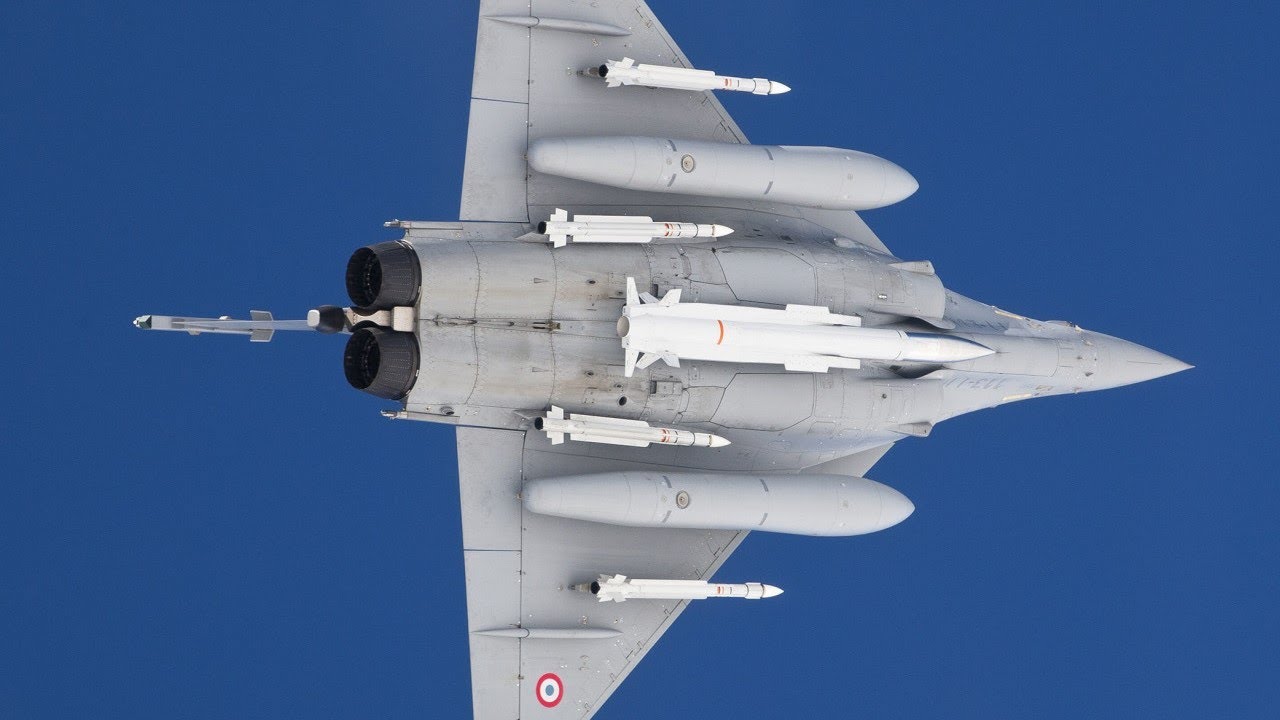
Great video of the weapon that goes with this version of the Mirage 2000N
Youtube Video
25 November 2023, 00:46
As I have begun work on this kit, I am yet again struck by the lack of information in the variations and options provided in the kit. For example, the tail tip is not called out that applies to the 2000N version. While the nose of the 2000D is provided in the kit, it has to be modified to make it correct for the 2000N. Oh bother…
20 July, 02:40
Selected "most appropriate" tail tip and mounted the correct nose to fuselage.
21 July, 20:04
Okay, now I'm excited to get some paint on this cockpit!!! ResKit, you guys have done some great work with your 3D Resin Printing!
16 August, 18:29
Oh, did you fiddle with the nose part to make it match the N version, or did you have to buy aftermarket nose for the N version? I have this kit in my stash, but haven't really looked any it yet.
28 August, 05:43
I'm using the D nose but converting it to an N version. I'm also closing the "sucker doors" on the inlets to represent an engine that is not yet started... I'm assuming initial hydraulic power is applied from the APU and auxiliary hydraulic pumps have brought the gear door up. I'm going to close the speed breaks for pre-engine start configuration...
28 August, 17:36
Looks like BAM has some corrected noses still need the N one. Maybe reach out to him. I could use the corrected nose for this kit also. The Reskit stuff looks amazing.
bam-models.com/produ..2000-corrected-nose/
30 August, 13:57
Thanks for the heads up! The BAM nose looks fantastic! Sadly, the 2000N nose has a pitot tube and does not have the RDY antenna lines. It seems that much of the 2000N systems are somewhat earlier than the -5 systems. Everything I can find on the 2000N seems to be somewhat austere compared with the 2000-5. The ResKit cockpit is worth every penny!
30 August, 14:59
Like it 😀👍
Nice when the pilot looks like he's actually doing something and engaged with the craft.
30 August, 15:22
Thanks. It's really sad to remove detail from the ejection seat, but that is the only way to get the pilot in place...
30 August, 22:47
The pilot is from REEDOAK. They have several different figures in various poses so the realism can be developed based on the aircraft scenario. This model is being build to represent events just prior to engine start.
31 August, 01:50
Remaining cockpit items:
1. Glass
2. Decals on seats
3. A little more weathering
4. Fix pilot's France Flag
5. Add WSO's Right shoulder patch
6. Check that I can get the canopy actuators in after everything is assembled...
7. Add HUD glass
1 September, 03:07
The glass and HUD went in great! I had to lightly sand the edge of the glass to get it to fit snugly into the ResKit frame between the front and back seats. I used 1000 grit and lightly buffed all the way around the edge. Fits perfectly!
3 September, 16:01
Cockpit is done! Looks like the ResKit cockpit tub fits perfectly! Lots of trimming to get the crew in the proper fit. Right now, I think it's ready for final checks before fuselage join. The forward control panel needs some sanding for fit, but it does work. I have left the seats, pilots and control panels loose until final fuselage join just to have "wiggle room" before closing. I was able to adjust the forward control stick to make it match the pilot's hand more closely. Just need to check a few more things and then join the fuselage halves!
4 September, 22:19
attention aux couleurs sur les notices kinetic etc , certaines sont fausses!
5 October, 11:29
The pilots look like they are impatiently waiting for you to finish the aircraft so that they can fly!
6 October, 00:31
aggiunto un nuovo album fotografico.
8 immagini
Sherman M4 Calliope
1:76
All wheels can turn/rotate


Progetto: Sherman Calliope

1 22 September, 00:09
")
aggiunto un nuovo album fotografico.
23 immagini
Finnish MiG-21bis 
1:72
Mask on place


Progetto: Finnish MiG-21bis "Non-realized edition"


11 3 September, 20:24
Like a Mig 21 👍👍
The extra work looks good.
What were the holes you had to fill ??
11 September, 21:40
Welcome, mates! @Mr D Those holes I opened and then filled are auxiliary air doors that seems to be open always when the plane is on the ground.
12 September, 20:10
Coming along nicely now , Nice decals set..👍👍
How do you find the KP plastic??
Keep up good work...nice subject 👌
13 September, 21:58
Thanks! 😄 I think the plastic is pretty nice. Not too soft and not too hard, but maybe closer to hard. The kit itself is challenging. Seemingly pretty detailet parts with rivets and all, but the fitting is bad. I have already lost some rivets due smoothing seams and filling gaps.
14 September, 07:03
")
")
")
aggiunto un nuovo album fotografico.
17 immagini
F-16XL-2 Delta wing Falcon
1:48


Progetto: F-16XL-2 Delta wing Falcon

35 30 September, 18:21
This might be the quickest build I've ever done. From idea to here in two weeks. Some small things left before it's finished, and of course a base. The camouflage is supposed to look like the Zebra scheme on the later Dutch NF-5 fleet. Did I get it right?
30 September, 18:26
Niiiice! I have imagined this kind of build, glad to see it materialised by someone. Looking forward to the end result.
30 September, 19:57
")
")
 (MiniArt 36071)")
")


possiede questo oggetto
")
Micro Brass Tube / 0.3mm OD x 0.1mm WT x 305mm L
Albion Alloys
MBT03 6 October, 00:22
aggiunto un nuovo album fotografico.


38 11 July, 21:06
Oh ya!
Built a couple of Broplan vac kits, a real challenge but great for the feeling of overcoming a challenge and creative accomplishment
11 July, 23:27
OMG, what a challenge! 🙂 Those panel lines look quite uneven, will you try to rescribe them or just take them for what they are? In any way, I am super curious how these sheets of plastic can be turned into a model, so I will watch with interest!
12 July, 02:31
Welcome mates, the panellines are aweful but the material is so thin, i'm scarred that i cut right trough it when i try to rescribe them.
12 July, 06:24
Following. Got my first vacu kit this weekend. I hope I can learn something here.
16 July, 14:48
Hi DuperScale, I built a couple of Broplan vac ATR kits, converting one 72 500 to a 42 300. A few pics of the work in my "albums" if you're interested in the kind of model you can achieve from a Broplan kit with a bit of work…sweat and tears, foul language, alcohol and time….
16 July, 23:24
DuperScale, how about scribing into a layer of primer paint?
This way, scribing should be a lot easier afaik, scribing into the primer layer of paing, and not plastic.
This guy on youtube did this, on regular plastic models though.
20 August, 05:21
As for the clear parts, I wonder if it could be done this way
1) Cut out a square/rectangle shape, removing the oval form from windows. The larger the hole the better, to create some extra space around the old window shape. Enough space to work with putty later on.
2) Glue in a flat thin strip of transparent styrene on inside of model.
3) Glue in a square/rectangle shape transparent styrene, outside the model, laminated with the existing strip of transparent styrene on inside, so double layered.
If keeping the new window parts larger than the old window shape it should be easier to use some putty after adding masking tape that have the shape of the old windows. The larger these new outer square/rectangle window shapes are, the easier it is to add putty to create a smooth surface, then hopefully the center part is clear enough, to mask off the final shape of the old window shape, before painting.
Afaik a common issue using Mikro Kristal Klear is that you can't sand the clear part afterwards, because the clear part is like rubber iirc. You can iirc easily remove this clear part though, just poke/pull it out. Unsure if there would be any residue left after removing the rubber like liquid clear stuff after it dries.
20 August, 05:25
Another thing one could do with clear parts an idea:
1) Glue in a long strip of transparent styrene on inside of plane.
2) Add some kind of epoxy or something that can be sanded, without the epoxy damaging the underlying transparent styrene.
3) Idea is to use the liquid stuff to fill in the perfectly shaped holes for the windows, then sand the liquid stuff flush after it dries.
What won't work imo, is doing multiple rounds of adding liquids to create some goo that goes transparent. I think if you sand this stuff multiple times adding more liquid stuff, you get a flawed result I think. I tried something like that with gloss varnish, trying to build up a solid clear shape. Did not work as expected.
20 August, 05:35
In this thread, and in photo #13, the guy apparently put tape outside, and poured clear resin on the inside to fill the window holes. Unsure if such resin will react and maybe eat up or warp any thin parts ala vacuum kits. I guess this can be tested with some scrap plastic if having some piece left over.
Boeing 737-530 Smart Wings 1:144 | Album by Zbynek (1:144)
20 August, 07:35
The UV transparent resin is usually sandable (to some degree), maybe that might help?
Similarly to Treehugger I'd reinforce it with a transparent styrene from the inside of the fuselage anyway.
Or you might leave the windows open and fill them with Kristal Klear after painting - this is what I did on my Jetstream, Avanti & Yak-40. But if you want to seal it with gloss varnish, remember to keep very thin layers (guess how I learned it 🙂).
[img1]
Blue Jetstream (SP-KWN) | Album by Woody (1:72)
Avanti! | Album by Woody (1:72)

20 August, 07:59
Hi, thanks for the input mates. I'm quite happy with the kristal clear on the small windows and i think i do it like Lukasz said. After everything is done i do the windows as the last step.
The windscreen window could work but i think i used little to much of the kristal clear.
20 August, 16:10
Like the cockpit..👍
Lots of work but doing a 👍 job... Be rewarding when done.
17 September, 20:48
The kit is coming together very good. You are skilled and brave!
Great to follow the journey to see the final result. 👍🏻
30 September, 19:28
possiede questo oggetto
")
Brass Tube / 4mm OD x 0.45mm WT x 305mm L
Albion Alloys
BT4M 6 October, 00:20
possiede questo oggetto
 (Albion Alloys SFT4)")
Aluminum Micro Tube Assortment - 305 x 0.3/0.5/0.7/0.9 mm (4 Pcs.) 0.1/0.3/0.5/0.7 mm I.D. (Respectively)
Albion Alloys
SFT4 6 October, 00:18


")

possiede questo oggetto
")
Slide Fit Pack 4 Pieces / 0.3-0.5-0.7-0.9mm 305mm Length
Albion Alloys
SFT2 6 October, 00:14
")
possiede questo oggetto
")
Micro Nickel Silber Rohr Set 0,4mm - 0,6mm - 0,8mm
Albion Alloys
SFT5 6 October, 00:12
aggiunto un nuovo album fotografico.
10 immagini
Zvezda 1/72 Soviet Army M4A2
1:72


Progetto: Zvezda 1/72 Soviet Army M4A2

1 6 October, 00:11
possiede questo oggetto
")
Mi-24 in Czech and Czechoslovak service Dual Combo! - Limited Edition
Eduard 1:72
2116 2016 Nuove parti Argomento multiplo (2)6 October, 00:11
")
/it/search.php?q=*&page=newsfeed&fkSECTION[]=Newsfeed
search-solr.php?lang=it
35
35
/it/search.php?q=*&page=newsfeed&fkSECTION[]=Newsfeed
35
todo