

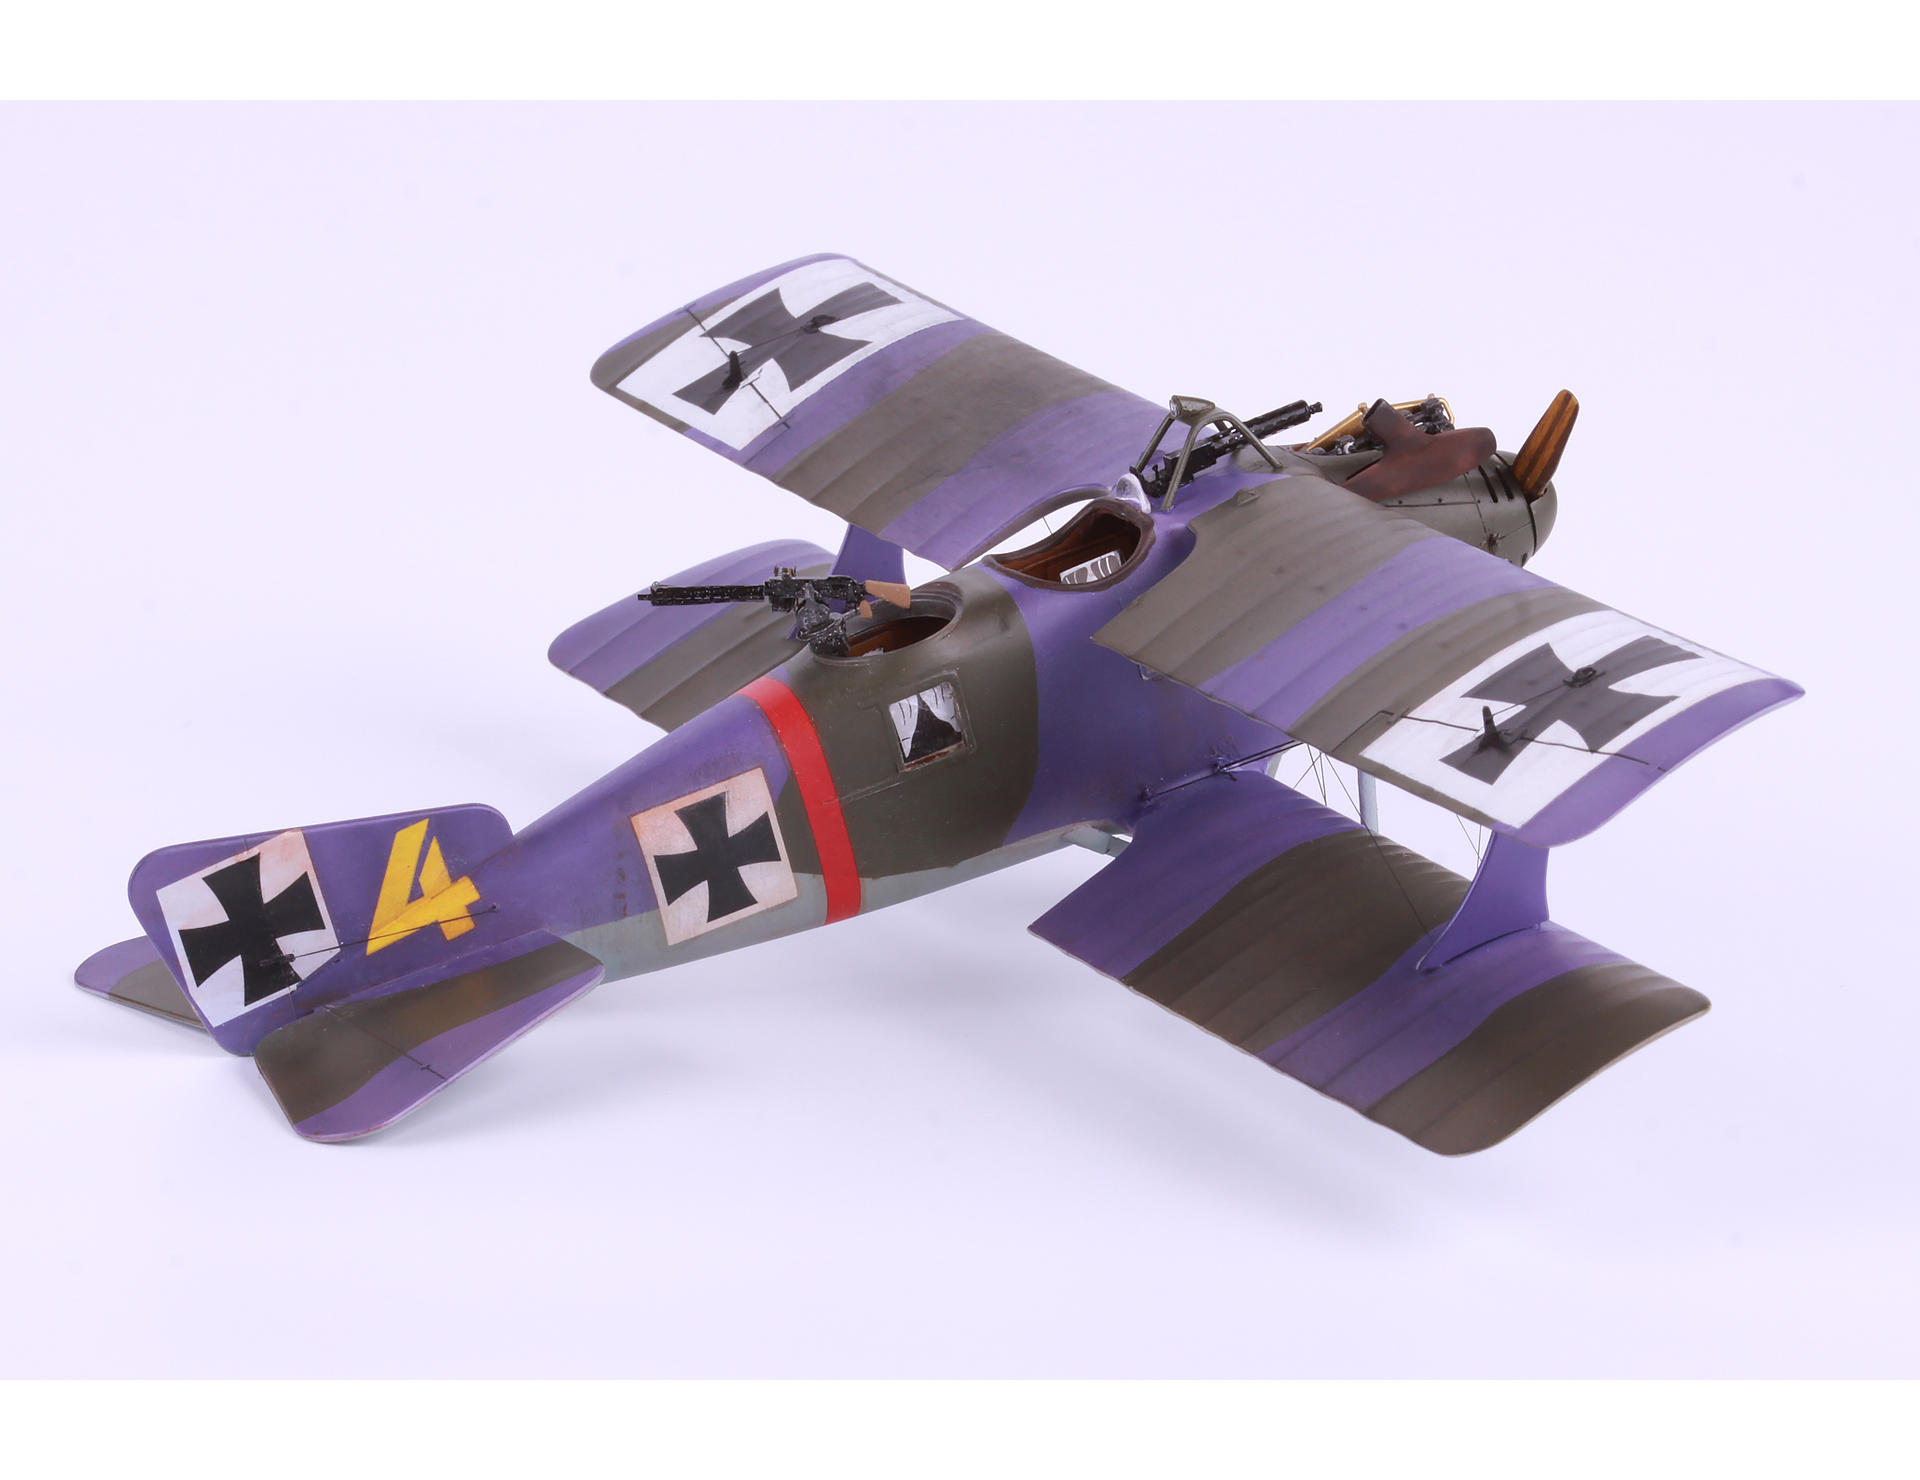
Eduard Roland C.II - 'Walfish', (Whale).

Very nice set of PE parts. No.32 might be a challenge.

The 'fish scale' pattern.


wooden rings are in evidence in the model interior and are rather unusual in that they all slope.

To start with I painted on a diluted mid-tone brown

Afer a coat of gloss varnish to seal things I mixed up a darker brown by adding a little black to the original brown

With the bulkhead in place and the camera trap door painted in it all starts to make sense

The window panels need some serrious trimming to fit. Also dont fit the throttle till the PE dash is in place. It wont fit with the line up holes. The PE dash is slighly oversize and you need to adjust the throttle down a bit.

Just trying out the main elements for fit. Not bad. None of the bulkheads are actually upright which makes lining up a bit tricky. Note - removed throttle.upright

And with a few more things in place. I like the PE belts. Very nice. Mind you I wouldnt want to loop the loop. Surely they must have had more belts than this ?

I have finally settled on a very pale green. I tried a blue first but no......The wings have had three coats of enamel and a top layer of varnish to seal.

Now need to tone down the gaps between the spars with some weathering. Now it gets interesting.

The PE parts certainly do add some nice detail. I particularly like the camera with the pistol shutter release. And the little radio tuner - v.nice. The painting is a bit rough but works ok at scale.

Experimenting with highly dilute brown/black wash. First time I have tried this technique so should be interesting.

Yes that kinda works ok. Once the main fuselage is weathered it will work a bit better.

With nearly all the interior kitted out its getting a bit cramped. I am going to be quite reluctant to say farewell to this interior but it really is time to say goodbye.

I found the camera had to be moved further back and down than in the instructions. I dont think that matters much. ASfter all it was a hand held camera so could go anywhere.

The set of five decals joined up fairly well. Fitting around the window frames was the starting point and then they nicely floped into position. The geometric pattern did not line up exactly but I got an acceptable result.

A little trimming of the decals was required after setting. All of the windows had to be cut out from the decal.


With a few more bits stuck in place and the rigging painted its starting to come together.

I think Eduard have made rather hard work of this by requiring major surgery on the provided gun parts

The Parabelum LMG 14cal.

Spandau LMG 08


The main components of the gun assembly.


Commenti
20 July 2017, 11:54
Its coming along nicely, mostly. Just a few gotchas mentioned in the captions.
8 August 2017, 21:41
I've had this one in my hands more than once....watching with interest!
10 August 2017, 08:05
Looking good! Always amazed and inspired by the effort and techniques people put into the wood and canvas of wwI planes.
13 August 2017, 08:40
Thank you Martin and David. Its a bit of an experiment this technique, but so far, so good.
13 August 2017, 09:43
Looks great and not like a decal at all. At first glance i guessed you masked that off and sprayed the scales. 😮
21 August 2017, 14:34
Thanks Eric. I am enjoying the build. There is a lot in this little Eduard kit so i'm taking my time over it. The decals are really good David, if a little tricky. Not sure you could achieve such a concise result by masking and spraying. Might be a challenge to try one day!!
21 August 2017, 14:46
Thanks very much Stephen, Alec and Cuajete.
I am getting into the final stretch now. I am pretty new to rigging so please forgive my crude first attempt at making eyelets. It is an art form all of its own!!
Now, just need to put together the machine guns with a lot of separate PE parts. Gulp!
30 August 2017, 22:30
Thanks very much David, Choppa, Timothy and Martien. Yes it is a nice looking plane/model. Unusual as well. I would certainly be happy to build another one. Maybe the Wingnut Wings versions;
wingnutwings.com/ww/product?productid=3109
wingnutwings.com/ww/product?productid=3110
They look fab. Mind you they all do. Just kinda pricey but probably worth it.
31 August 2017, 17:44
Wow, this is really awesome! What a cool scheme and you nailed it.
31 August 2017, 19:54
Thanks Taarna and Michael. Yeah its a great scheme. I was really torn between this and another of the options in the Eduard kit.
[img1]
See what I mean ? They are all really cool.
Oh well, just have to buy another one.
31 August 2017, 20:51
that one looks more like a racing livery 😄
Love the little gunners window with a curtain 😉
31 August 2017, 22:09
Would love to see you do the other scheme. Especially with those nice curtains in the windows. 😄
1 September 2017, 07:18
Yes I am tempted David. They are a nice touch and come as decals in the kit. Got a few more on the bench first.
1 September 2017, 09:15
Thanks Glenn. I like your ID icon. V.funny. Unless you live in Guam.
6 September 2017, 12:45
And I think that's it pretty much. Had great fun with this model. A real challenge.
11 September 2017, 17:58
Good job on the Walfish! A nice addition to your collection....
5 November 2017, 09:22
Magnifique! Très beau travail. Best regards from France.
5 November 2017, 09:30
Album info
Step by step build.
You can read a more detailed blow by blow account of this build on my personal website at;
sites.google.com/sit..3-eduard-roland-c-ii

