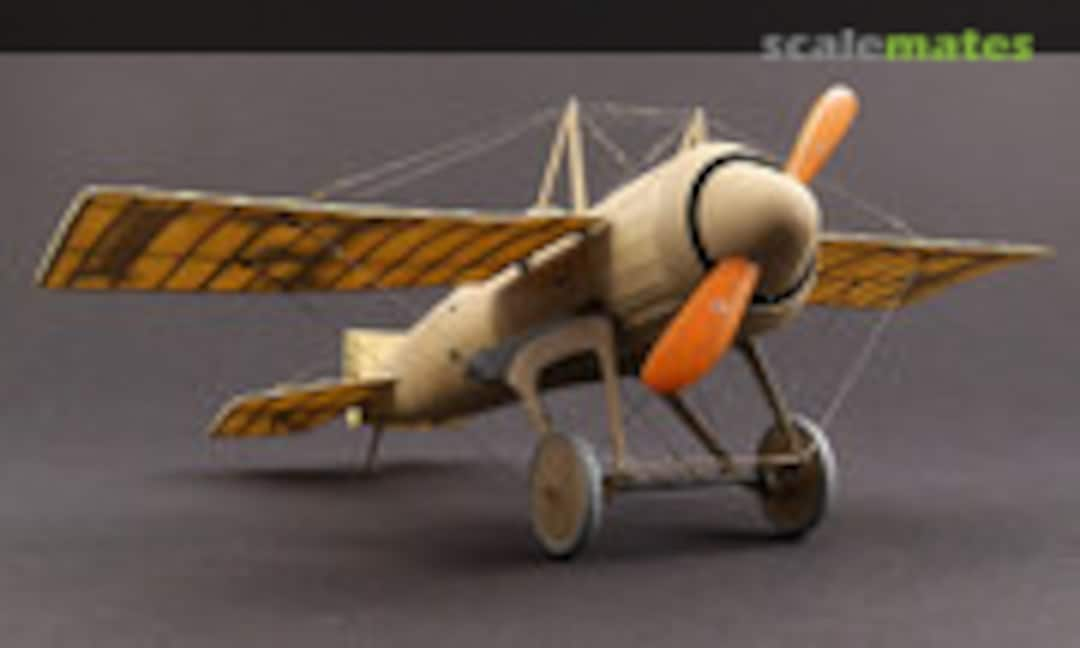
WIP Deperdussin Monocoque (museums machine)

A AJP kit that contains everything - but no plastic!

A thin, translucent covering paper.

White metal parts, the quality was worse on the other kit. Probably won't use much of it anyway.

Further in the material mix, aluminium foil, windscreen foil, "Piano-wire" (great material, stable, but can be soldered) and a nail?

Cowling made of resin. Not a great cast, irregular, not round at the back. Hole in front not centered. I will probably have to make a new one.

The highlight: a relatively large PE sheet 0.2mm thick. Unlike the Demoiselle kit normal alloy, which can be soldered 🙂

Cleanly etched on both sides.

A manual as 8 pages A5 booklet, french/english, black/white, but with red tension ropes.
An extra page about the history is unfortunately only available in french.
An extra page about the history is unfortunately only available in french.

A small printed picture in color, how the plane could look like.

A "turned" piece of beech wood - not really turned, because the tail is not round. The slot for the tailplane and the many mounting holes are already made, although a bit larger than necessary.
The small part is an optional headrest.
The small part is an optional headrest.

From the front the fuselage is drilled out for the interior and the cockpit opening is also milled out. As the wall is very thin, the area around the holes has been reinforced with epoxy or similar, but only from the inside!


Two 7 cyl Lambda together

On this kit only casing and manual are new.

Rotary and small parts painted

4 Alclad paints, + brass

Not a easy one ...


Finally two dalight pictures

71 parts!

My solution idea: thin wooden strips.
On the circular saw, it only worked with such thin slats after I had inserted a new saw blade.
I glued strips of different widths on both sides of the wings with CA, here the upper side, on the right already a little bit sanded.
On the circular saw, it only worked with such thin slats after I had inserted a new saw blade.
I glued strips of different widths on both sides of the wings with CA, here the upper side, on the right already a little bit sanded.

And the lower surface:

Finally sanded. To prevent the light yellow brass from shining through, I painted the free areas with wood brown.

View in profile:

As a "bag" it didn't work at all, in the third try I glued the bottom side first using diluted wood glue alone.

And then the top side.

The look with translucent light is fantastic!

And an impression with the wings attached to the fuselage. Already very smooth, although not yet really dry.

From the top it works, better than without stain.

But on the side, the rings are much more visible 🙁

I soldered the Landing gear parts together. Since the PE looks a bit flat to me I thickened them with solder. This brings the parts also into a shape away from the flat appearance.

The wings are painted with clear nitro based wood primer. The upper struts get also solder and are soldered to the wing spars.

All parts plugged together.

The kit wheels are not that bad. But see up right there is a recess, and I have big spare plastic wheels, so I will use them.

The kit has a nice piano wire axle, here with the wheels.

So I painted it with Gunze H85, also the wings.

Even with the additional paint the shadow effect is still there.

I made a new tail skid from brass. The kit one was a flat PE part. A wooden one is not necessary because it will be painted.

With help of a drawing I created the mask layout in Inkscape, and with help of the electronic cutter I was able to apply the chars to the wings. There are a lot of different layout and position on different drawings and pictures. Sometimes the same was also applied on lower wing, but I decided to stick to the museums aircraft.

Tail skid and wings plugged on to get some impression.

Sometimes we try to paint shadows of markings on the opposite side. Here I do not spend effort for it and get most realistic shadows for free 🙂

The next task was the cowling. Here is a example that I sometimes fail to create parts.
I tried to turn the front of the cowling (turned from back), but it gets to thin and breaks on the chisel.
I tried to turn the front of the cowling (turned from back), but it gets to thin and breaks on the chisel.

The next try works and I was even faster because I learned before how to do it. I'm still a newbie on the lathe.
The front is 0.3mm thin.
The front is 0.3mm thin.

On the back there is a recess for a metal sheet.

For the rear sheet metal (brass 0.05mm) I made myself a tool and embossed depressions into the very thin sheet metal. Sorry, forgot to take pictures. Formed it to a ring and soldered the connection. On the backside there is also a small ring soldered in.
Here the turned front part is plugged in.
Here the turned front part is plugged in.

The front part is soldered on. Here also for comparison the kit cowling which is to small.
Which cowling should I use? 😉
Which cowling should I use? 😉

Long time ago I soldered a ring to the kit PE back plate. But I think now that this is wrong, because there should be a gap to the fuselage. Now I added the bearing for engine and airscrew. The embossed ring can be plugged on until the PE touched the inner ring. This has to be glued on later after mounting of the engine.

I like the result, very close to the original in Paris.

And the front view. The axle for the engine made from piano wire and the small ring in front of the PE backplate can be noticed.

The spinner of the kit is white metal, but to small for my variant.

So I turned one from brass.

The airscrew is primed and I made a back plate from 0.2mm nickel silver. The spinner had a crack (turned to thin), so I soldered it. The cutouts The for the blades were tricky.

The backplate fits deeply into the spinner ...

... so that the spinner protrudes into the cowling.

I removed the embossed brass partly and added a maintenance panel on top. At first I wanted to made a cutout into the cowling, but I left it to keep the cowling more rigid. The panel is 0.1mm brass glued in place.

The cowling is painted inside with alu, and then also outside.

After painting the airscrew I glued it to the backplate. To align the airscrew correctly I hold it in my box column drill on a 1mm drill shaft. Without power of course 😉

The I put the painted spinner over the airscrew and glued it from back.
Here all components plugged together for test fitting. The cowling is empty.
Here all components plugged together for test fitting. The cowling is empty.

This racer starts to look nice!


With using the same technology of the wings I tried to do the tail surfaces.
At first I have soldered on the control horns provided by the kit followed by the wood. Here the wooden strips are smaller but more, so I did this rather annoying job bit by bit. Applied for test fitting.
At first I have soldered on the control horns provided by the kit followed by the wood. Here the wooden strips are smaller but more, so I did this rather annoying job bit by bit. Applied for test fitting.

The remaining brass is hidden by wood color paint. Here also the first surface paper piece is applied.

The covering is finished!

After primer and the usual sand colored paint I tried to add another detail.
Since a decal would not work on this matt surface (and I don't have a decal for this) I tried to draw very small masks in Inkscape and let the cutting plotter do its job.
At first I added a white layer, followed by a thin layer H34 Cream Yellow.
Since a decal would not work on this matt surface (and I don't have a decal for this) I tried to draw very small masks in Inkscape and let the cutting plotter do its job.
At first I added a white layer, followed by a thin layer H34 Cream Yellow.

The masks are very small, see it on the globe of the Cent. After painting Blue (I applied to much, because it was green at first. I should have used the middle part of the mask to paint blue on white and not on yellow!) I have now a fluttering flag.

And the bird with tail and wings.

Some parts was prepared at the very beginning, e.g. seat and fuel tank are soldered. Now I primed the parts.

To save time I painted then wood base and grain with acrylic paints followed by Clear Yellow and Clear Orange.
For the level gauge of the tank I used the etched part of the kit, but added stretched clear sprue.
For the level gauge of the tank I used the etched part of the kit, but added stretched clear sprue.

A bigger amount of small PE parts are prepared:

Some parts are mounted into the frame.

But I indulged in a little luxury in the cockpit - a wooden steering wheel! The kit wheel was a flat PE part.

The cockpit is finished! On the left side the "Kristal Klear" on the amperemeter is not yet dry, and behind that I scratched a pulsometer and replaced the flat kit PE part.

The complete cockpit can be plugged into the fuselage and fits perfectly without rattling. The amperemeter (Eduard) is now visible.

Perfect flat on the front ...

... causes a new problem. My part of a ring on the engine wall was to thick and do not fit between tank and fuselage. But with the help of the mill this could be fixed easily.

The kit contain a piece of 0.1mm aluminum and a drawing in the manual for a maintenance cover. I would use the alu on the wooden fuselage variant, but for my painted over machine I used brass (later tinned).

Then I turned a fuel and an oil cap from 2mm brass rod.

But I dropped both on the floor and found only one. The parquet monster has eaten a cap! I have to turn a new one.

And now what you have all been waiting for!
I got a tip to use a fine marker to draw the black lines. I had no one, only a dried up CD marker. But I asked my wife, and she has some markers, the thinnest is 0.05mm. I tried it on the middle of the tailplane, which is hidden in the fuselage cut later, and it works!
So I added the lines on the tail. Not perfect, but acceptable.

Today I made a new longer rotary axis. Then I checked the kit engines under my cowling - no way! I checked also my spare parts for Eduard engines, but found only two 9-cylinder rotaries.
To convert them to a 14 cylinder Lamda-Lamda needs also effort, in that time I could do a new Small Stuff rotary. => I finally go with the Small Stuff here.
I drilled from the front of the engine to meet the hole done from the back side.
To convert them to a 14 cylinder Lamda-Lamda needs also effort, in that time I could do a new Small Stuff rotary. => I finally go with the Small Stuff here.
I drilled from the front of the engine to meet the hole done from the back side.

Now all fits together and runs smoothly.

The maintenance cover is in place and the paint is corrected on some places of the fuselage.

The upper part of the landing gear is painted black. I started already to paint the wheels.

I tried to start the engine, but it did not fire up! Then I thought about the reason ... of course, the ignition wires are missing! 😉
So I added an isolation plate and 14 copper wires.
So I added an isolation plate and 14 copper wires.

A final view of the engine in daylight. On the back (between engine and wall) I added a brass piece for securing the axle. It runs now very smooth, without too much allowance.

I glued all engine related parts together and mounted that unit to the fuselage. After that I added a PE strut in the middle.

With the long cowling it looks more elegant now, like a racing machine!


I don't liked the view into the cockpit because I made the wood color a bit to uniform regarding seat and framing. So I made a cushion and added this before mounting the cockpit.

I made washers the same way as on my Albatros Dr.I and added them to the axle. Those washers are the limiters for the springs of the suspension, which I made from stretched sprue.

At first I was out of brass sleeves and had to cut new ones to be able to start the rigging.
I noticed some conflict between the wires and my bigger wheels, so I sanded down the tires a lot and have to repaint the tires (here the wheels are not yet modified).
I noticed some conflict between the wires and my bigger wheels, so I sanded down the tires a lot and have to repaint the tires (here the wheels are not yet modified).

On the pictures of the real bird I found two maintenance panels, so I decided to add them. Made from brass and I soldered a fake hinge to the lower end.

Tinned and painted. On the Cent there are some fasteners squeezed from 0,3mm brass.

Opened the wood behind and in place. Should have done this in earlier state, would be much easier.

Added control wire outlets and stripes of aluminium foil to the tail, to close the cutout.

The rigging is finished, as far as I'm aware of wires.

Also the control wires. Very hard to get them straight with this fishing line.

Tried to modify the kit levers. The position according to the manual does not make sense, but they are to big and cannot be mount as it should be.
I lost already glued wire outlets on the side, so I had to remove them on lower surface to replace missing ones and use now another type below.
I lost already glued wire outlets on the side, so I had to remove them on lower surface to replace missing ones and use now another type below.

On the control horns I no idea how to mount the turnbuckle to the huge control horns. At the end I used flat PE turnbuckles form a Parts set. Drilled a hole in the middle, bent them and mount with a micro rivet.
Commenti
27 20 February 2020, 22:07
What a gorgeous airplane! Looks like a real multimedia project. This will be good, taking a seat 👍
20 February 2020, 22:52
Der letzte Flieger ist noch warm und der neue ist schon in Arbeit. Respekt.😉 Der Holzrumpf ist ja genial. Oo
21 February 2020, 08:08
Welcome Alec and Erik! The rotary engine Gnome Lambda-Lambda is finished. The name comes from the 7-cylinder 80hp Lambda, which is used to create a 14 cylinder 160hp double rotary.
21 February 2020, 18:45
Thank you mates! The kits are amazing! These are the best resin kits you can imagine 👍 Great details, not a single bubble and well engineered.
22 February 2020, 14:54
New game - next level!
For the wings, the kit only foresees the covering of the etched wings with paper and a subsequent bending - no, not for me.
I have already made this experience with my Demoiselle, this has several problems:
- The wings are thin, but not that thin!
- You should glue the paper as a "pocket". If the upper and lower side touch each other, which is easily possible, because the paper is curled wet and has only an etch part thickness as distance, you never get it apart again and it looks like sh..
- In the original the bottom side was rather flat and not curved.
My solution idea: thin wooden strips.
On the circular saw, it only worked with such thin slats after I had inserted a new saw blade.
29 August 2020, 10:59
er ok, wow, wow and wow !!!
What a kit !!
and what a build !!
That wooden fuselage is something else altogether, this kit really is aimed at the craftsman.
Love the way you're handling the flying surfaces and having looked through a couple of reviews of the kit I can see why you upgraded the engine,
the detail is so real, lovely work thus far, this really is next level work ! 🙂
Bughunter, you do choose some very unusual kits and subjects, this is one fascinating project ! 🙂
29 August 2020, 11:39
A Deperdussin, obviously... Missed the early warm up, happy to make it to the unique bits! The translucent wing looks magnificent. 👍
One knows it's a challenging project when the 1€-cent coin need help from Zötler Bierdeckel & company as early as on pic 5😉
Looking forward to all things coming together & the full early aviation materials encyclopedia fireworks!
29 August 2020, 13:36
Clever solution for those wings. My dad was an RC sailplane builder and I remember him applying tissue paper to balsawood using lacquer. I always wondered if this technique could be used in scale modeling, and there you did it 👍
29 August 2020, 17:59
Heiliger BimBam... Pic 20... Der Hammer... Immer wieder findest Du Lösungen, die sonst nirgends zu sehen sind.
29 August 2020, 18:31
Thank you all mates!
Yes, it is a very special kit. The aircraft exits in some variants with different wings, engine covers ... The 1913 one was the first aircraft which reached 200km/h 👍 I find it much more modern compared to some WWI biplanes some years later.
@Bart - The wooden hull was part of the kit. I saw also reviews, where it was made from resin. Both possible in same box.
I decided to overpaint it with building the museums machine. The hull is made of beech, but the structure is much too rough/big to be in scale.
@Christoph - at the moment I try to find and work on a solution for a specific problem. If it will work (not sure yet), you may need seat belts for the next update 🙂
29 August 2020, 19:27
I added pictures of the kit content and moved them to the beginning (1-11 now).
I ruined the hull by trying to stain it. It became totally uneven, so I sanded it down again.
29 August 2020, 19:52
I was wondering about the wood fibers being in scale. Looking forward to seeing the final Hull.
What do you think of AJP Maquettes kits? Cheap they are not!
29 August 2020, 20:05
Nice to see the kit contents in this unusual build thread.
The engine in the kit looks horrible, especially compared to the upgrade !! 🙂
One assumes this version of the plane will no longer have a huge spinner any more ?😉
Would be a shame to hide that gorgeous engine ....
29 August 2020, 20:11
@Bilbo Hmm, the AJP kits are totally different, without a single piece of plastic. As result you need a different way to build them. The quality is different from part to part. Some very nice parts and some parts, which I would not use. On the other hand you can find nice aircraft types in the AJP range which are not available somewhere else. So the only alternative would be scratch building.
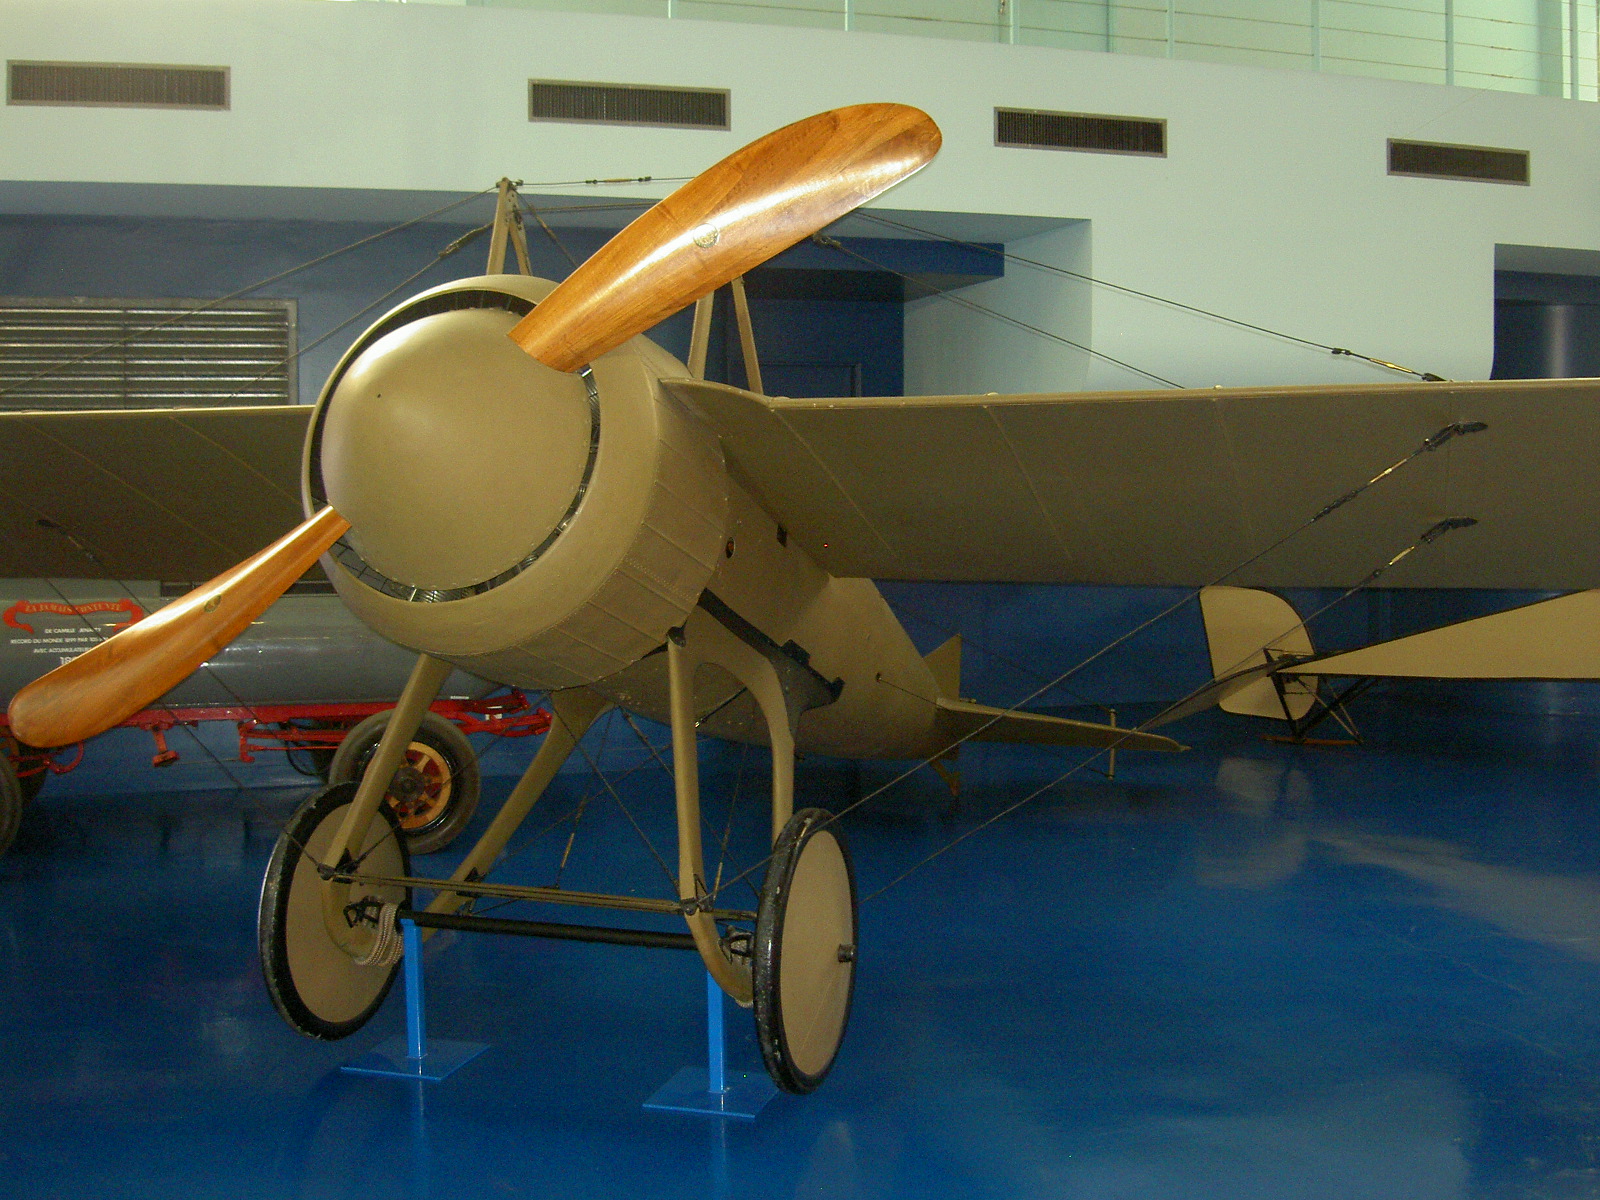
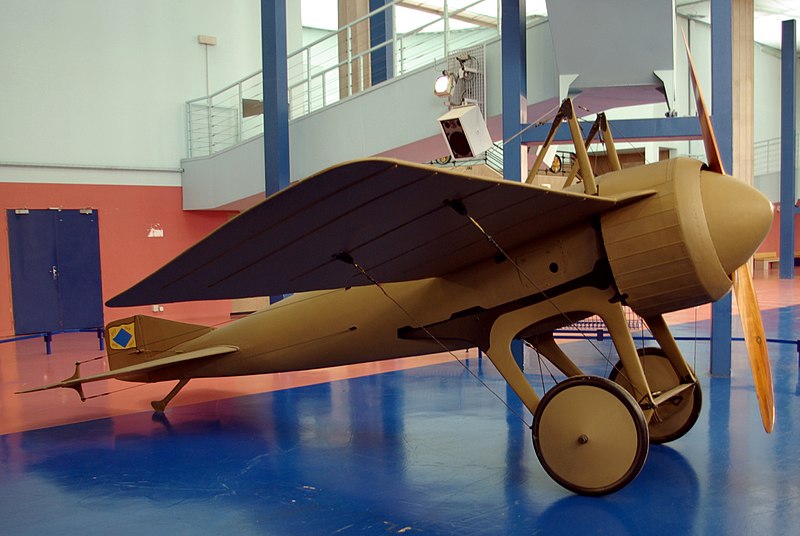
@Choppa Nutta I'm afraid that there won't be much of the engine visible.
This wikipedia pictures are my template:
[img1]
[img2]

30 August 2020, 10:50
That is a great shame to have put all that lovely work into something you won't be able to see ...
perhaps put the engine onto a scale test stand to be displayed next to the model and insert the kit engine instead ? 🙂
30 August 2020, 11:35
@Bughunter Thanks for the answer! I was wondering about whether or not to buy one ("Voisin Farman ' N°1 ' 1908" that I'd like to modify into one of the very first planes build in Belgium, the "Voisin de Caters IV" as shown in the Royal Army Museum here in Brussels);
The pictures of the Deperdussin Monocoque look indeed like a much more "modern" aircraft...
30 August 2020, 13:22
A lot of those very old aircrafts in the program of AJP are to big for my glass cabinet, so I own only some of the kits.
30 August 2020, 13:31
Definitely the right choice with the full paint - the wooden fuselage maybe would make an interesting effect on a "naked" build, but as you posted - the pattern is way out of scale (and frankly - I have seen nicer ones from you on propellers and wood-parts😉 ) - painted it looks much more like the actual airplane 👍
30 August 2020, 17:27
Thank you Slavo!
There is another replica in America, which has a tulip wood fuselage and a different cowling. I have thought about wrapping cherry wood veneer in strips around the fuselage. But this would need to thin the fuselage, but it is already very thin in the front area and my cherry veneer has also some water channels etc.
So yes, to build the Paris aircraft is much more straightforward to success.
30 August 2020, 18:32
Love the latest pics! And the shadow effect is just perfect... 👍
4 September 2020, 19:50
The promised solution for the specific problem 'cowling' is now online!
@Christoph - I think this solution was never done in this scale too😉
It might make sense to fasten your seatbelts now before you look at the pictures!
4 September 2020, 19:50
I agree with Spanjaard. Excellent work on the cowling, and those wings look amazing! 👍
5 September 2020, 06:23
As I said before, better to watch your reports in a lying position. Pic 45 is a real hit. And the Pics of your cowling would knock me right out of my armchair...
Good I was lying on my sofa.
5 September 2020, 08:25
It is truly generous to discard the old vs new cowling with the justification of the old one being too small... Because otherwise, they are practically the same thing, don't they...? 🙂 I guess the only remaining reason you still bother to buy a kit to start with is the box-art... 😄
It's really great to watch these little miracles of yours take shape! 👍
5 September 2020, 08:43
translucent wing covering + airbrushed race markings = extrasuperprimagood result🙂
6 September 2020, 16:22
Thank you mates for such amount of nice comments!
Added the next batch of pictures with airscrew and spinner.
6 September 2020, 18:55
Great job on the lathe work. I am particularly impressed by the spinner 👍
7 September 2020, 15:23
Thank you mates! I'm working now on the tail, again with PE wood and paper.
8 September 2020, 20:47
The tail is done. May be I should try to paint a black frame and those lines around the blue on the flag with a small brush as on this Wikipedia picture?
[img1]
Does anyone know what this flag means? From the colors it reminds me of Brazil, but the pilot Maurice Prévost was French.
10 September 2020, 19:27
This is what it looks like when zoomed in:
drive.google.com/fil..ag/view?usp=drivesdk
It represents an actual flag, with ropes.
Hope it helps...
10 September 2020, 19:49
On Wikipedia there is a high resolution picture, is very detailed if I zoom in.
I have no access to your link. Is this a flag of a country?
10 September 2020, 20:01
usually you just need to add a link to an image, for it to work. the one you did, need to log in to see it, that is why it does not appear.
for example the one from bughunter [img1] (just right click-copy image location)
here removing h ttp://www. (added one space in between, or it does not appear)
scalemates.com/newsfeed/img/8/815c1f3e3cc6f7a63319029a343ae51a120efb91.jpg

10 September 2020, 20:12
this would have worked (added spaces so you can see the link) h t tps://www.scalemates.com/albums/img/4/1/5/841415-41848-41-pristine.jpg
[img1]

10 September 2020, 20:47
Ok, and what does it stand for? Found also pictures of the Deperdussin B with a comparable flag. Also the inverted picture search (with the picture as input) does not found a useful result.
May be the flag of the company Deperdussin or SPAD, or a city? It is not the one of Reims, where the race was.
10 September 2020, 20:53
I took the liberty of contacting the Musée de l'air et de l'espace to get more info about this. Not sure if I'll ever get an answer but hey...
(Und ich hoffe dass ich meine "Kompetenzen" nicht überschritten habe, dachte nur zu helfen.)
11 September 2020, 09:10
I received the standard acknowledgement mail back, but nothing else yet. My guess is that well have something early next week... Hopefully!😉
11 September 2020, 11:07
During this project I collected around 100 different pictures and drawings of this aircraft from the internet. This was the base the scratched details and paintings.
The flag has now it's black frame😉 Pictures later ...
12 September 2020, 11:51
I didn't dare point that out...😉
And I guess the strange blocks of 4 black lines in the yellow corners would be just too fine to reproduce in 1:48.
12 September 2020, 12:09
Is the nail intended to be used to nail the box closed so you can't get to the kit! 😄
I say 'kit' but the contents of the box looks more like a handful of stuff from my shed than a kit – are you sure that 1912 isn't the date this model was produced?😉
This could have been a disaster, but in Bughunter's hands it looks like it's going to be another masterpiece.
12 September 2020, 15:28
Gorby 👍 The nail is to be used as engine axis 🙂 No, 1912 is not the date this kit was produced.
Today I found a picture of a Breguet biplane in a book, and on the photo was a model, with little wheels and rigging in front of the real plane 👍
The AJP kits are not for beginners, but the PE parts are nice and the kits contain other nice material, eg. piano wires. This is a more rigid material as brass and can be soldered. The fuselage of the Demoiselle is made of piano wires and PE. So AJP is not cheap, not easy, but a nice range of old struts are available.
Santos-Dumont Demoiselle 1908 | Album by bughunter (1:48)
12 September 2020, 17:42
The whole project thus far is rather impressive but the thing that gets me is the turning of the brass spinner !
Once you have cut out the inside of it how do you hold onto it to do the outside ?
12 September 2020, 18:51
Choppa, on pic55 you can see the outside on the left. I turned at first the outside. Then I parted off the spinner, but let a small part of the rod. Flipped it to be able to work on the back side. At first with a drill, and then thinned it with chisel as shown. Finally parted off with this bore iron rod.
May be this was not the perfect way since I was never taught to use a lathe, but it works.
12 September 2020, 20:13
In all our plastic kits we have to build the cockpit at first, to be able to close the fuselage. This one is a bit different, the fuselage is painted, but the cockpit not yet done - this is now the next task. Added the next batch of pictures.
12 September 2020, 20:14
Yeah I'm having difficulty interpreting the image,
...... it's not clear to me exactly what's going on there ...
even so I admire the result 🙂
12 September 2020, 21:13
Thank you Rui! After this bird without any plastic part I think I will need a normal kit for relaxing😉
13 September 2020, 19:43
The engine is covered by the cowling, and this unit make this racing machine much more elegant!
19 September 2020, 19:48
Can't wait to see the final result!
By the way, no news yet from the museum... Meh!?
19 September 2020, 21:22
Incredible. So precise and clean. In another time you would have been a watch maker!
19 September 2020, 21:29
Thank you Bilbo and John!
Been away for some days so have not touched a model for some time. I hope to find some time (and mood) the next days to continue on this one.
2 October 2020, 15:53
It started to look better than the museum-piece some time ago, now the question remains how much better it will get... 👍😉
4 October 2020, 13:05
Very impressive. If modeling were an olympic sport you would earn a huge number of points for degree of difficulty.
4 October 2020, 20:39
Thank you mates! Daniel, I am very grateful that I have the opportunity to buy and build such great rotary engine kits! I hope that one day the Gnome-N and the Bentley BR.2 are added to the product line, because both are important types (and I have kits for them😉
5 October 2020, 19:56
My mood is not back completely. Made some silly mistakes, which need time to repair and need in general lot of time for easy things ... But I continued!
Some detail painting is needed and the front window is also missing, but then this bird is finished.
I think I will not add a weathering to this flat/matt paint and let it as clean object on display.
10 October 2020, 19:38
Top! 103: when I should as plane designer solve such a problem I would use exactly the same way...🙂
10 October 2020, 19:44
Outcome is amazing ... I would also leave out the weathering and present it that way..
Wonderful Frank once agin...👍
And this is a real Multimediakit
10 October 2020, 21:22
Thank you David! Just painted the last details, I think I'm done with it😉
Final pictures soon.
11 October 2020, 12:22
The Monocoque is finished! Don't miss the final pictures here:
Deperdussin Monocoque | Album by bughunter (1:48)
Thanks for watching!
11 October 2020, 18:36