
ニュースフィード
新しいフォトアルバムを追加しました。
87 画像
SAAB Viggen - "Thor's Hammers" - Special Hobby - Quadruple Build
1:72
It's time to cover up everything again, this time except the surfaces to be painted black. Unfortunately I had to buy a ...


 14+
14+ 72 15 January, 18:11
Me too. Already learned to better open up the RAT turbine at my Viggen. A step I lazily omitted.
2 16 January, 08:33
Main assermbly done on all four models, but now I have a few days to spend sanding and filling unwanted seams and crude areas. A bit tedious, but that's what you get when you choose to build four nearly identical models at the same time.
17 January, 14:23
Oh my... Good luck, Thomas! 🙂
I own two of them and was thinking of a double build but rejected the idea. Thanks for the encouragement!
1 17 January, 18:26
Wow! That's a quick build! 😳 I can only dream to build ONE kit that fast, let alone four at once!
1 17 January, 19:29
Mr D, no, they are pretty much the same. Most of the parts for all versions are provided in every kit. But there are some subtle differences that need attention, like the extension of the fuselage for the fighter version.
1 17 January, 22:05
Patrick, haha, I am a pretty fast builder, but I am extremely slow when it comes to painting. That's where my projects usually come to a crawl.
3 17 January, 22:07
watching with interest - I love SAAB aircraft anyhow, but 4 of them in one project --great!!
1 18 January, 10:31
This is more interesting than I thought it would be. The subtle difference between them are pretty cool.
2 20 January, 10:53
With only a few minutes of modeling here and there this week, it's quite a slow progress, but I am still inching closer to the finished assembly.
30 January, 20:16
Primer coat applied, a few filling errors need to be fixed. Time is unfortunately very difficult to find because of work, so the project moves very slowly for a while.
12 February, 08:46
Undersides sprayed blue-gray with Mr Paint. Now let's wait a day for the paint to dry and then it's time to start working on the splinter camo. With my current speed, I expect to be finished by midsummer.
14 February, 14:15
Oh yes, once you get used to MRP, you'll never want another paint brand anymore! I love their colors, pigmentation and general ease of use. And, as a bonus, their sheen is perfect for adding decals directly on top.
2 14 February, 15:36
I am trying to find a way to avoid tiny gaps between the splinter camo color zones. I think I have figured it out - before spraying a color zone, also remove the masks for all adjacent surfaces not yet painted. Thereby a slight spray overlap is created, so even if the mask is then replaced with a tiny bit of offset, it should not be visible. Special Hobby writes something like that in the mask description, but it's written in a very obscure way.
17 February, 12:11
Looks great just give the corporal in charge of painting a reprimand on his record and send the plane to the flight line......do you know how much it cost to paint aircraft, lol.
1 17 February, 13:55
macro is a bitch for this kind of details... if you place the model in the display cabinet, can you see that microline with wrong color? i think you can not 😉
1 17 February, 14:01
I have now started to add the masks to the models. It's quite a tricky task because I need to be extremely precise with the application - even the tiniest errors will be magnified as more mask segments are added, until things no longer add up. So it's a matter of constantly realigning the segments, which makes it all rather time consuming. BTW, I noticed that the pattern has a few minor errors, but I definitely won't lose any sleep over it.
1 19 February, 20:26
Thanks for your explain, Thomas. I thinked to would be more easy to apply 👍
1 19 February, 20:33
this camo is one of the most complicated to achieve and the fact that you are doing it 4 models at once... my deepest respect!
2 19 February, 21:20
Cuajete, Spanjaard and Łukasz, thank you for your interest! I am certainly not doing any cliffhanging on purpose - I am actually this glacially slow in reality. I also try to avoid aggravating the wifey by disappearing in my modeling man-cave for hours.
2 19 February, 21:45
Good and fully understood strategy 😄
As our common colleague (the one, you share initials with 😛) used to say: "Happy wife? Happy life!"
1 19 February, 22:05
Watching with interest. You will master the splinter camo for sure 👍
1 20 February, 17:10
I am still struggling with the masks, trying to making sure that they are applied exactly identical on all three models, which slows down the process a bit. Not that anybody except me would notice.
3 21 February, 10:59
Nice progress, I'm looking forward to the splinter camouflage. On my AJ-37 I used vinyl masks from DM Models, it looks like the masks you are using are a bit easier to handle.
1 22 February, 12:12
I have always had the conspirational theory that the Danish air force had a secret department dedicated to making life miserable for modellers, with their odd fonts, colours and aircraft modifications. The splinter camouflage is clear evidence of a similar department in the Swedish air force.
4 22 February, 12:19
Daniel, thank you! I am right now hoping that my end result will be at least in the general vicinity of your beautiful Viggen in flight!
22 February, 22:31
Phew, the second color is finally on. Now it's time to cover also the dark green areas and proceed with the black.
16 March, 20:06
Was anxious to see how you handle the masking but see that you struggle with the three tone camo too. Cross my fingers for a satisfactory end result.
1 17 March, 08:57
Michael, it is really not that difficult, only extremely time-consuming and require a very good eye-sight (or magnifying glasses). Too bad that the masks only partially reflect the actual camo pattern, I was hoping that they would be near perfect.
17 March, 09:52
I was wrecking my brain for a simple elegant technique to apply 3-tone camos without the need for re-covering extensively. So - yes the concept is easy, but the work is plenty. 😉. Keep it up. Looking good.
17 March, 10:52
Actually, the best method is to have two mask sets. I find that it is very difficult to do it all with just one mask set, as the masks will be slightly stretched and distorted when removed and reapplied and will no longer fit perfectly.
1. Spray the model light green.
2. Place all the masks from the first mask set.
3. Remove all masks segments except the light green ones and throw them away.
4. Spray the model dark green.
5. Add the dark green masks from the second mask set.
6. Spray the model black.
7. Add the black masks from the second mask set.
8. Spray the remaining exposed areas tan.
Also, when spraying a color, do not mask areas that you will be painting with a different color later, or you will end up with tiny strips of areas where the previous color shines through.
17 March, 11:41


")
新しいフォトアルバムを追加しました。


11 17 February, 07:58
Well done. I built CVL-23 with WEM photo-etch but I think I left out these pipes. You can compare with my album: Princeton | Album by StevenVD (1:350) .
17 February, 17:18
hi, Steven! I've seen your Princeton before I started my project, which is a great work and valuable reference for me. Hope I can finish this jumbo by the end of 2025. @Steven Van Dyck
18 February, 02:44
新しいフォトアルバムを追加しました。


41 29 December 2023, 11:57
I did some weathering of the Phantom with oils. Those Phantoms were dirty planes..
31 December 2023, 08:20
I have the same kit and am planning a Hawaii Air National Guard. How was the fit? Anything I aneed to watch for?
14 March 2024, 23:42
Hi Walaroo, you have the Academy kit? I really like this kit. I had no major issues during construction. A little bit of putty/CA was required to make the intakes "fit in". To me the fit is as good as of the 1/48 Hasegawa kits. I added some of the "in progress pics" to the gallery so that you can see the areas which needed more attention.
15 March 2024, 07:22
Great build 👏 can I ask what percentage mix do you use for your gloss coat always seem i have problems mixing tamiya varnish cheers
1 16 March, 12:23
@ Major Oak: for a clear gloss coat I use Tamiya X-22 thinned with Mr Leveling Thinner, in a ratio of approx. 20/80. Sprayed in several thin layers.
1 16 March, 18:51
nice. I wanna do some Spangdahlem bird too. But rather a low vis F-15 in 72. Appreciating your fine work in the mean time.
17 March, 10:49
新しいフォトアルバムを追加しました。
42 画像
ESCI | No. 4030 | 1:48 | IAF Mirage IIIE DELTA Fighter
1:48
2021/24: OOB build of the '80s ESCI 1/48 kit.


プロジェクト: Mirage IIIE DELTA Fighter

34 30 November 2021, 10:02
Hi Arif 🙂 HNY! Thanks for the like. Very kind. 👍 Kit is currently 'cooking' next to boiler, as the basis/pre-shade for my metallic painting style is having a hard time curing in my cold garage! 😅
6 January 2022, 18:39
Hi Pierre 🙂 Thanks for your comment and interest. I used mainly Vallejo paints for this build. The NMF image (14) shows early passes at creating some colour depth within the metallic. I used the same technique on both my Mig-21 and F-5 builds, both on here also. Have uploaded some further NMF imagery and early shading passes today 👍
17 January 2022, 12:12
that is a siper intersting effect. I think I am going to go for a serie of Mig 15 and 19 build this year to improve my metallic, can you please let me know what primer and metallic paint did you use ? look amazing
17 January 2022, 15:48
Hi Pierre - thanks! The build you're looking at here is still in very early stages, so it's a bit garish and heavy on shading. Better examples from me can be found here:
Revell | H-237 | 1:48 | MiG-21PF Fishbed | Album by djferrisbueller (1:48)
Italeri | 802 | 1:48 | Northrop F-5A | Album by djferrisbueller (1:48)
The builders on here achieve a neater, more measured and more realistic NMF finish than I do. This is only metallic build number 3 for me and I too am learning how to paint with Vallejo metal color... I would say that is an art itself! It's a thinner liquid and you need to adjust your PSI differently in my limited experience.
I'll add some further notes within the imagery of this album detailing as you request. No problem 👍 🙂
18 January 2022, 13:13
Hi David, that's such a kind thing for you to say - I'm chuffed. Cheers mate 🙂 We're still in the early stages of this one, so of course there's lots I could stuff up! However, let's hope I do your comment justice 👍
21 January 2022, 11:53
Looking like its going to be a butiful model after some hard work
Love the colours
30 January 2022, 11:27
Hi, I wish to start with a cheeky disclaimer: This kit is not my best work!
I started this build over four years ago. then left it alone for approximately three years. In the interim, I built many other kits, and lost some smaller pieces for this one too, or they were never in the box to begin with. Oh dear!
The reason I left it alone in solitude on a shelf... It was very hard work as the fit was terrible (and I'm used to building some poor fitting stuff). I think the kit had been warped from being stored in someone's garage or loft - as it was another cheap car boot find. In the end I used it as an opportunity to practice my metallic finish, weathering ability, work with and subsequently apply very old decals. I thought I'd go for the South African version, rather than build the Israeli version. I totally acknowledge it's not great. I will build a better Mirage III in the future. But at least it's finished, and I can now close off this album. Better builds to view are on my profile and more to follow very soon 👍 🙂
17 March, 10:09
新しいフォトアルバムを追加しました。
91 画像
Mountain Home F-15E Commission build
1:48
Still adding details to the backside of the CFT and the scratch-built CFT dolly, and the tow bar is taking shape!


26 3 April 2024, 13:24
Hi Sergej! How come everything is empty here with such fine modelling going on? Ok, first row center for me. That will be fun to watch.
11 April 2024, 16:00
新しいフォトアルバムを追加しました。


17 March, 10:31
新しいフォトアルバムを追加しました。
10 画像
Porsche 918 - Revell - slow work in progress
1:24
Ref image.


プロジェクト: Porsche 918 - Revell

8 10 March, 09:48
新しいフォトアルバムを追加しました。
5 画像
The Jugs - WIP
1:48
50 plus years do make a difference. On the left - the cockpit for the Monogram kit, original molds from 1967. On the rig...


プロジェクト: Pacific Jugs


 1+
1+ 9 18 February, 06:04
Nice weathering on both cockpits. What is your impression of the mini-art kit against the Tamiya kit?
15 March, 18:23
John, I haven't gotten my hands on Tamiya's P-47, but I've done other Tamiya aircraft in 1:48 scale and I would say that their engineering is still unbeaten. The detail on the MiniArt kits is I think the pinnacle of what is possible with injection molding, but in some aspects the kit is over engineered and unnecessarily complex.
17 March, 00:51
Thanks Dmitriy. Your thoughts are tracking with several other reports I have been reading lately.
17 March, 10:16
新しいフォトアルバムを追加しました。


10 1 March, 02:20
It was a rowdy start with the left part of the frame warped. I removed the warp with a thread tended between the wheelbays. Some changes were done to the interior to place the PE parts. A lot of parts are still dry-fit until after painting everything black. A strange thing is the gauge decal that has to be reversed from the sheet.
8 March, 22:59
Bienvenuti everybody, today some PE is fixed to the body after it was cleaned of sprue parts with a saw, to save the window styles. I wanted to open up the deaeration ducts before placing the PE gills. I also felt the need to sand the orange monobloc clearparts, they have visible sinkmarks.
1 16 March, 14:51
Great work so far, Steven, and a nice reference book. What colour have you painted the bodywork?
17 March, 01:48
Thanks, George. At this moment no paint has been applied yet. Instructions for the entire frame are a mix semi gloss/ matt black, but my reference for the interior seems to be leather brown. This will be done with Tamiya and Gunze paints. The outside will be the emerald green paint I showed on the pictures. I think this is solvent based, it's ten years ago I used that in an airbrush.
17 March, 09:02


新しいフォトアルバムを追加しました。
39 画像
Italeri | No. 2703 | 1:48 | Republic F-84F Thunderstreak "i Diavoli Rossi" (WIP)
1:48
WORK IN PROGRESS. UPDATED: 8/10/24...


プロジェクト: Republic F-84F Thunderstreak

66 1 February 2023, 11:58
I'll take a close look at your model. I have the same one in my stash and would like to build it myself in the near future. Have fun Neil!
5 December 2023, 16:09
Parked the 360, watching. You should have prolific as your middle name, the amount of builds dude. It would make me more confused than I am. Hurrichurchspitwell anyone. 🤟😵💫🤘😵💫🖖😵💫👍🤣🥸
12 December 2023, 08:01
Wow! Welcome all. Really great to have interest from such a talented bunch of fellow modellers. @stephan, looking forward to your version very much also 👍👍 @mark, I know, I'm a bit nuts! I love having lots of the go, takes a while to complete and I'm useless at doing reveal photos. But it keeps it all fresh for me! My job is all about multiple projects, so similar state of mind! 😂
6 January 2024, 11:14
I do NOT envy you your masking job but it should look amazing when you finish (or run out of tape). 👍
9 February 2024, 16:31
Hi John, thanks for your interest mate. I should be ok tbh as the kit comes with a superdecal (cheat) sheet! So although there's some stressful masking on a metallic finish, it's hopefully all doable 👍 I've added some more images today. Thanks for your likes also to all who've dropped by too 🙂
14 February 2024, 20:54
I did this one as well. Those decals are actually pretty good.
I tried acrylic metallics for the first and last time on this one. When I removed the masking for the red, it pulled EVERYTHING, primer included, right up. The finish was awesome until then. Alclad and Metalizer for me from there out.
Diavoli Rossi F-84 | Album by smokeriderdon (1:48)
8 July 2024, 15:14
Hi J35J - thanks very much 👍 🙂
Hi Donald, Yes, I agree, the kit decals are nice - though they are on the thicker side. On application they hide a lot of the kits surface detail in my opinion. However subsequent passes with more (and more!) softening and setting solution is doing them justice - more pictures to follow. Sorry to hear of your paint issues when building. Yes. My version is painted solely with Vallejo acrylics: Vallejo primer, Vallejo colour and Metal Colour 👍 You rescued your version well, looks good 🙂
8 July 2024, 15:45
Thank you. In person you can see the areas that pulled fairly clearly.
I used Solvaset on the decals. That managed to get them to settle down fairly well. But yeah, it did hide a bit. BUT, i liked the thickness as those large ones required a good bit of fiddling to get where they needed to be and they stood up to the handling perfectly.
8 July 2024, 17:28
Metalisers require a certain sense of masochism 🙂 I always try to paint the metaliser last, although mskign the red in this case is challenging, I admit. In general, the sequence of paints is very important in all cases and is certainly important with pesky colors such as yellow
16 July 2024, 16:19
I completely ignored the directions on the wing tip thing. LOL I figured the decals went all the way, thats what they were gonna do, right or wrong. There are pics suggesting both would be correct. Look here. aerobaticteams.net/e..html#google_vignette I chose not to mess with red for the top though.
1 9 March, 21:57


新しいフォトアルバムを追加しました。


25 6 August 2023, 16:53
nicely done. Nice paintjob on the D-Day stripes and camouflage pattern
16 March, 19:12
Thanks Arnold, not so bad for my first time doing D-Day stripes on a build.
17 March, 10:09


新しいフォトアルバムを追加しました。
39 画像
Swedish Kite (SAAB J 35F 'Draken')
1:72
Bottom surfaces that will be light blue-grey are pre-shaded. There is no point shading the rear fuselage underside, whic...


プロジェクト: Saab J 35F 'Draken' - Hasegawa


 3+
3+ 33 12 March, 17:23
Hi Thomas, Very nice project. I'm sorry to see the resin conversion for the two-seat version turned out to be a disaster. Can't the ventral hump behind the cockpit be salvaged by trimming it to try to fit it onto the Hasegawa part?
Maybe you can build this two-seater in the future:
Saab TF-35 Draken (Skale Wings SS-72001, 1:72)
")
Very nice cockpit 👍
Following!
1 12 March, 20:07
Cuajete, yes, I tried to salvage the "hump" and for a while it seemed to be working. However the two-seater also has a different, shorter tail part, but the resin molding is terrible and it doesn't fit to the fuselage at all. Hm, that Skale Wings TF-35 looks very interesting, I would be very tempted to try to splice it together with the Hasegawa kit to build a Swedish SK 35! I will see if I can get hold of it from somewhere! Thanks for the tip!
1 12 March, 20:34
You're welcome, Thomas.
Wow, I didn't realize the glue is different. I bought the TF-35 here, but it seems to be out of stock now:
modelsua.com/saab-ft..-scale-wings-ss72001
I have a friend who knows the shop owner. I can ask if he'll restock it.
1 12 March, 21:01
Sorry to see that the conversion kit had a really poor fit, or more to the point no fit at all…
I know that Top Gun models did a Sk 35 C conversion kit with quite nice resin parts. But even that one has it flaws.
Taking a seat, always great inspiration watching your builds👍🏻
1 12 March, 22:29
I am happy that I have the same kit in my stash 😉 I have the impression that it is a very modeller-friendly kit.
1 13 March, 16:59
Robert, yes, it is actually a very nice and easy kit to build. It only takes a couple of hours to get most of it together (minus the painting), and still make you feel good about yourself. I would say it is one of the most relaxing builds I have done in a long while - no traps or pitfalls whatsoever.
1 13 March, 18:38
Fantastic quick progress, Thomas 👍
Thomas, Skale Wings may no longer be available. I'm sorry. You'll have to get this kit through other means. Perhaps other stores that still have it available, or perhaps on the secondhand market.
1 13 March, 19:27
Cuajete, thanks a lot for looking into this! Łukasz, haha, yep, it's about time.
1 13 March, 21:12
Only now I saw the resin part of the story. Maybe you could cut out the hump after all? Even for another, future kit?
1 13 March, 21:29
I am still trying to make up my mind - standard green-blue camo or grey livery with large red dayglo numbers? They both look awesome!
14 March, 10:55
Some thought on your question🙂
A sun faded green-blue Foxtrot or even a green-blue Juliet with the mix of fresh paint in front of the fuselage until approx the ventral hump and then the old sun faded paint for the rest of the plane. When upgraded from F to J version this part was repainted.
In addition to create further interest you can also paint the gun cover panel in white or day-glow orange, often used in various exercises on squadron or wing level.
1 14 March, 11:48
J35J, that sounds like a very interesting color scheme. I can imagine a faded/freshly painted aircraft in my mind already.
1 14 March, 12:53
Hm, interesting, I am however thinking that it might look like I am rubbish at painting... which is actually not far from the truth.
14 March, 14:24
Dear friends, you are too kind .... Blue-green camo it shall be, just kind of reasonably sun-bleached, nothing too fancy. I am still experimenting with the MRP range, so I will need to be a bit careful not to mess up.
14 March, 17:23
Following late! Shame to see the C-conversion set is wrong-sized. Was it one-time bad luck or could it apply to all sets? One reason could be mold and resin shrinking that is normally very small but with that large and long part the shrinking became significant factor.
1 14 March, 17:54


 (Tamiya 35388)")
新しいフォトアルバムを追加しました。


103 20 January, 15:01
I started another quick OOB build. After a super small Spitfire, it's a small Bf-109
20 January, 15:09
In Police Service? Are you kidding me? What did they want to do with it?
Anyway, nice start. Peeking at this one for a nice OOB build too.
21 January, 18:51
Michael, they used them to keep deluded citizens from leaving the warm embrace of the homeland. And to interdict spies and other Western miscreans. Mostly flown by military pilots, so it was really a part of the Air Force. Czechoslovakia had a similar institution before 1939, primarily to keep Luftwaffe spy planes from infiltrating, and this continued this tradition, just against different enemies.
3 21 January, 19:28
Thank you, gents!
Michael, Alec's explanation is very accurate. There is nothing to add.
Thank you, Alec
1 22 January, 09:12

Thank you, mates!
I completed the main build. The fit of parts is absolutely excellent 👍
2 3 February, 12:29
interesting topic and very promising progress Jakub! Taking a seat 🙂
10 February, 09:54
Watching! I think I should send you my kits to have them built. I can't come close to this one!
10 February, 21:55
A quick OOB build @jakub?😉 The construction and paintwork is so well done that you would almost forget that this model is only a few cm tall. The pictures are a feast for the eyes.
17 February, 09:47
Thanks mates, for your comments!
Lukasz, i´m curious too 😄 I wiil try to mix it to match the red color used on decals.
Bohrmann, i thought i would be faster 😄
1 17 February, 13:59
It looks excellent. Love the subtlety of the shading, but you can still definitely see it on the photos. May I ask how you use that Wauchop mix on pic 18?
18 February, 07:44
Thank you, mates!
Alberto, i use ,,wauchop mix´´ and insignia white both the same way. First i spray camouflge color. Then i mix this color with wauchop mix and spray darker patterns (over panel lines and some random rivet lines) Then i do the same with the mix of camo color and white. Finaly, i respray the whole surface with diluted camouflage color to achieve the desired contrast. this procedure can be repeated until you are satisfied.
1 18 February, 12:28
So, Wauchop mix is a murky brown to use as a contrasting warm mixing color to the camouflage color? Whereas the white is the color for the bleached variant of that same camouflage color?
18 February, 17:28
Yes Patrick. I am using it this way. And during weathering steps, you may use this black-brown mix to create some dirt using an airbrush gun.
18 February, 18:10
Looking at your results, this might be a very interesting way to obtain some differentiating shading. Do you have a mixing ratio at hand, so I can give it a try myself? Thanks in advance! 🙂
18 February, 18:44
I'm sorry Patrick, i'm not able to tell you a mixing ratio. I just mixed some amount of black and brown to create some ,,dirty color". But i think, that it is not very important. For this purpose you just need some dark color. Maybe dark grey will work the same way.
This is how Chris Wauchop use his mix for postshading: chriswauchop.com/201..s-a-kittyhawk-mk-1a/
19 February, 09:54
No worries! I'll just mix a dirty brown concoction and experiment a bit. 😉 Thanks for that Kittyhawk link btw!
1 19 February, 14:06
Thank you Alec and Lukasz!
In the end i changed a mix ratio a little bit. So, the final ratio was app: 55% C81 russet
35% H17 cocoa brown
10% LP35 insignia white
25 February, 14:30
I agree with Alec and Łukasz. Very nice painting job.
@Jakub, thanks for the red color mix information 👍
2 25 February, 20:18
Thanks mates!
I finished the airbrush gun work and applied a layer of glossy varnish. Now, i´m ready for decals.
2 2 March, 18:45
Really great work, Jakube! Fantastic job with the painting and tonal layers of each shade.
2 March, 21:06
Great work so far. I like the paint job, but the decals bring her realy to life. I can't wait to see her finished. 👍
4 March, 07:00
A nice looking bird (that is not a euphemism or a double entendre) Jakub. 🤘🥸🤟
4 March, 21:47
Thank you, Mr D! Riveting is not my work. This kit is comletely riveted by the producer
1 5 March, 09:38
It's really fascinating to see how this model is developing, step by step. What strikes me is that you just can't tell that this is a 1/72 scale model, even when you zoom in with the camera., also considering that the ME-109 is a small aircraft in real life. It is just flawless and made with very great care. Should I be told that this is a 1/32 I would have no doubt that it is. Great work!
1 10 March, 14:43
Thank you very much, mates, for your kind comments!
Lukasz, i was definitely more drunk then brave when i was overspraying decals 😄 Of course, i screw it up, so it took two evenings to fix it 😄
1 11 March, 19:57
Jakube, it looks really great!
And if I didn't know it is in 1/72, I'd bet it's in 1/48.
1 12 March, 04:39

That is what I call beautiful painting! And a very clean and neat build too.
1 15 March, 14:17


新しいフォトアルバムを追加しました。


23 16 March, 09:46
I love the early abrams with the 105mm gun reminds me of exercise reforger in the 80s great work 👍
1 16 March, 16:37
Thanks everyone! The early Abrams has a dictinctive olive drab color, which is darker and more bluish than WW2 era, and special color for it is available from Modelkasten. I tried to use it with color modulation tech.
1 17 March, 04:32
新しいフォトアルバムを追加しました。


8 3 January 2024, 13:20
I like to build them, the whole family. The biggest trucks of my childbood... buy they are pretty expensive and very difficult to buy.
1 12 April 2024, 17:54
miloss, I bought it from us for 39 euros. Relative to other models, it can be expensive, but I think it's worth it. Don't they bring them to you?((((
16 March, 10:16
Well, 39€ is reasonable price. But it is nearly impossible to buy any AVD models here. Because of STUPID "reasons".
17 March, 09:26
新しいフォトアルバムを追加しました。


22 28 February, 21:34
Looks nice so far 👍
Are you planning to put in some floors and ceilings, perhaps made of cardboard? This would prevent identical lighting conditions behind all the windows and perhaps make it look even more realistic.
1 2 March, 21:01
Welcome to all. @bughunter: for this pilot project (it's my first building) I won't be using any interior fittings (ceilings and walls) or lighting. It's mainly about testing whether the construction works without any problems and how something like this could look when finished. For my colleague, who drew and printed it in 3D, it's also the first time he's tried something like this and he needs feedback.
Let's see if and how I can create curtains. Because that's all you can see on a bright day when you look into a building from the outside.
2 3 March, 09:33
Oh wow, impressive project 👍
So now, with the 3D printing we could have any building actually me thinks
1 4 March, 12:37
Very good news of the new possibilities together with superb craftsmanship 👍
1 15 March, 19:34
Thank you guys. @Łukasz: Unfortunately, the building no longer exists as it was destroyed in an air raid when the Americans actually wanted to hit the Arado aircraft factory. There are only 2-3 photos left, one of them see picture 1 in the album.
2 17 March, 08:30
新しいフォトアルバムを追加しました。


15 4 January, 10:31
Thank you, comrades. I must say right away that among the additions there will be FAB bombs with the UMPK module printed by me
4 January, 12:42
Thank you, Sharp
This is a well-detailed set, but with an extremely terrible connection. The only thing that stuck in normally was the halves of the fuselage (thanks to Italeri on this) and the cockpit. The rest had to be adjusted, cut, puttyed, sanded. Part of the parachute compartment with the tail radar in general with a mismatch in the spacer.
For 1995, a good model, which used to be only the Su-32FN, but in our time it is extremely strange that Zvezda decided to continue repackaging the old stuff from Italeri, although it has vast experience in the design of Russian aviation.
Alas, there is no alternative(Trumpeter does not count, he is bad in aviation, and the price is unreasonably high) , I took it, because I really like this "duck"
1 4 January, 13:00
Alas, yes. The only plus is a large sheet of decals for 3 Syrian options. And even the inscriptions "За наших" and "За Париж"
1 4 January, 14:55
Duck ahead! 👀
Looking good, you even printed some bombs. 👍
Did you print them because they were not included in the kit or were you not happy with the details of the ordnance?
17 March, 08:23
新しいフォトアルバムを追加しました。
5 画像
Saudi Falcons
1:32
On this large scale, every detail is appreciated. A little scratching for cables and some springs are easy to make, addi...


プロジェクト: Tornado GR. Mk1 RAF


 15+
15+ 1 17 March, 08:20
新しいフォトアルバムを追加しました。


27 29 January, 13:24
It has been painted mani body color with AK Real Color RC914 Have Glass Grey FS36170.
28 February, 12:31

新しいフォトアルバムを追加しました。


55 15 December 2024, 17:39
Welcome my friends, I'm doing my best, the kit is very complex and so far things worked well.
1 12 January, 19:12
Nice project 👍 your doing a good job, there an impressive model when built....lve watched few videos on the ....as l have the 1/72 version to build soon.
Good luck with it 😃👍
1 17 January, 19:36
Thank you, everyone, for the kind words and encouragement! 🙂
@Michael Kohl – Appreciate the support! 😊
@Mr D – Thanks a lot! The 1/72 version sounds like a great build; I'm sure it'll look fantastic when you get started, best of luck with yours as well! Please share updates, would love to see how it turns out. 👍
2 17 January, 23:23
Thanks Starfish, I'm adding magnets to them as well so I can play around with the loadout 🙂 Welcome Guy and Gerald!
2 20 January, 20:07
Great project, coming along nicely.... Now don't spray out your pre-shading like l did on my SU-30 🙄🤣.
Nice work 👍👍
1 18 February, 18:55
Thanks gents!
Mr D's comment really made me pay attention to the pre-shading on the second layer, kudos to him. That made me think of a solution to keep the pre-shading so I ended up with this solution. Will keep the build updated, my target is to finish it by Sunday 🙂
3 27 February, 18:04
That worked out 👍👍 Great, Nice build....it's really going to benefit from the shading you pulled off here.
Enjoying following as it will help when l start my 1:72 version.
😃👍
2 27 February, 19:31
I really like this phase of painting! Seeing the seams disappear and the strength of the kit being revealed!
3 27 February, 22:33
Wanted to finish the Mi-8 by today, but there are always plenty of details that pop-up and require attention. Anyway since it's close to completion, I decided to spend more time and do it in a relaxed fashion. Thanks Mr.D and Marlin. @Mr. D I want to build another Mi-8 on the Russian Blue-Gray camouflage, I think it looks awesome with the simple scheme as well: MRP-398 Gray Blue - Russian ..4,26,28,35 & Ka-52, MR.Paint Satin, Acrylic Lacquer, 30ml
2 2 March, 21:37
The double pre-shading did help indeed - looks really good already! 👍
Waiting for the wash and weathering!
3 2 March, 22:33
It's always a good idea to take a little more time and see what it can become! Cheers!
3 3 March, 04:24
Top job on the paint, Zvezda do a nice Mi8 kit, Enjoy following this build 👍👍
The blue/Grey be nice 👍 build
2 3 March, 15:57
Thanks a ton for the incredible support! I'm absolutely captivated by this model, very complex but amazing fun to build ! 😃✨
1 16 March, 09:00
nice build. How is the Zvesda kit? Had some poor experience with an ISU-122 body all warped.
17 March, 07:54


新しいフォトアルバムを追加しました。
18 画像
F-16I "Sufa" - Israeli Air Force
1:72


プロジェクト: F-16I "Sufa" - Israeli Air Force

11 16 November 2024, 15:42
新しいフォトアルバムを追加しました。
163 画像
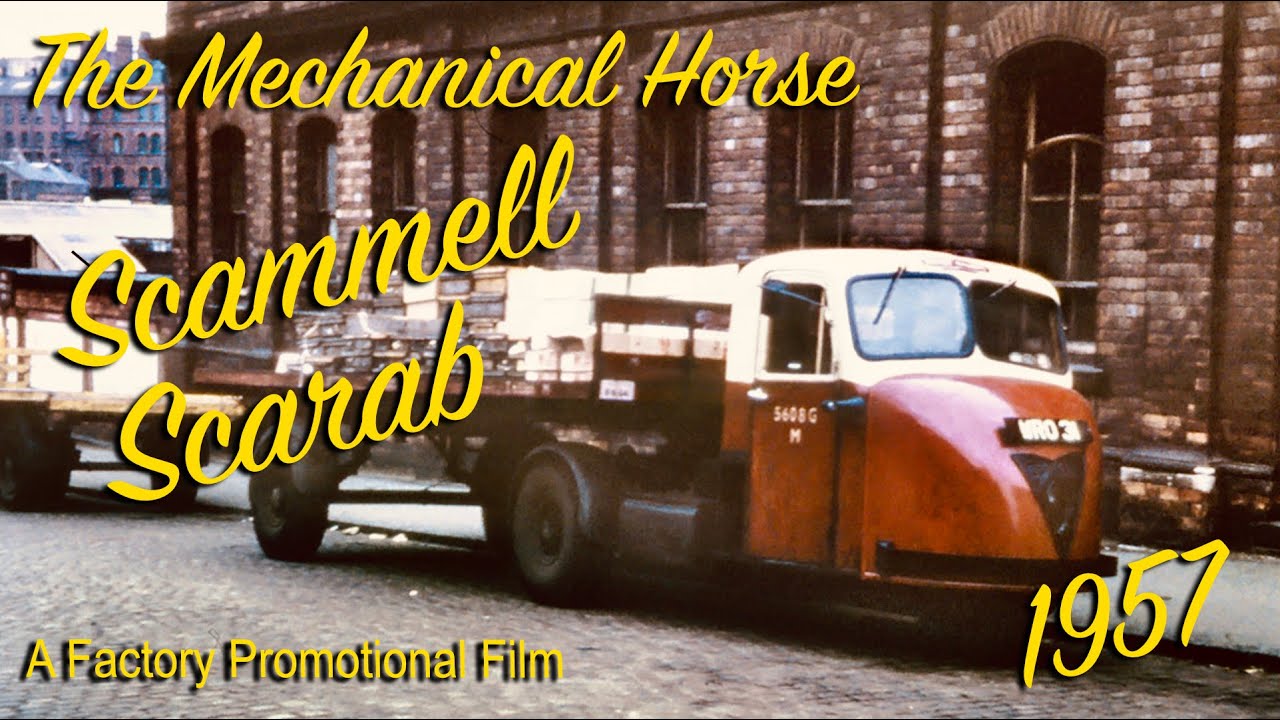
The less charismatic Scammell brothers. Scarab & Mechanical horse.
1:76
I made this tool roll out of a washing up bottle and sticky-back plastic.
Ooooonly joking (Mrs Gorby has said she’s goin...


プロジェクト: Scammell Scarab

69 1 December 2024, 15:42
Looks like a tuk tuk, anyways its really nice to see you on another project. Im excited to see the fuck ups and final result. Hope your misses doesn't mind you being in love with another woman 😄
1 December 2024, 18:21
Welcome Kesa & Robert. 🙂
Kesa Mrs Gorby is used to my plastic passion obsessions. 😄
And yes it does look a bit like a tuk tuk. Incidentally there have been a couple of screw up so far but obviously I won't be telling everyone as I want to make it look like I know what I'm doing. 🙂
2 December 2024, 07:48
Hi Gorby 👋
Another interesting one 😃👍
Nice project, they used 3wheel trucks like these at Cadburys factory as they need tighter turning circles round the plant.
2 December 2024, 22:40
Glad you're tagging along Mr D.
Their turning circle was one of the reasons they where so successful. Do you have any association with Cadburys - other than eating their products of course. 🙂
3 December 2024, 06:46
Remember these trundling down Zetland Road and Linthorpe Road from the train station. BR and their parcel/freight division use to operate them.
3 December 2024, 08:05
That will be another session of scratch modeling of famous (with 30,000 it must be famous) British cars 👍 So ugly that they begin to be beautiful.
3 December 2024, 08:10
Hi Frank, they certainly are famous in Britland...although probably only with men of a certain age. 😄
3 December 2024, 08:36
Hi Gorby...No just eating 😂 l live not far from factory n seen documentary on it too.
Like the project 😁👍
3 December 2024, 09:30
Thanks Mr D.
Been on their factory tour, as a chocoholic it was wonderful. 🙂
3 December 2024, 09:39
One interesting thing to have in mind is that Gorby set to build the ancient 1962 tool of the Scarab and scratch the Mechanical Horse precisely when there appeared recent (and immeasurably better, as for the Scarab - I guess) 3d-printed 1:72 kits of both the Scarab and the French relatives of the MH (i.e. FAR tractors)... But that's Gorby (much to our delight!) 👍
3 December 2024, 11:32
THERE'S 3D PRINTED KITS!!!??? 😄 😄
I'd be too tight to buy them anyway.
I'm about a month into the build so far and quite enjoying it....mostly.
3 December 2024, 11:44
We know you would enjoy this - and we enjoy too... Plus: if you are going to turn the Scarab into a wrecker / recovery vehicle (!!!)... extra joy. Very Gorby-esque work! 👍 👍
3 December 2024, 11:52
"Would you like some parts with that Flash sir" 😂
I know you will pull a great job out of it Gorby 😀👍
3 December 2024, 19:09
Following this masochistic exercise 😄
The tow truck you fell in love with, was it used to tow Reliant Robins?
3 December 2024, 19:19
Good grief, I appear to have attracted a crowd. 😳
I didn't realise the Robin was globally infamous. That would be a great idea Jan if I can find a cheapish 1/76 one. 😄
Thanks all for taking an interest. 🙂
4 December 2024, 08:05
Taking a seat. The nasties the kit, the more Gorby likes it… I'll forgo spelling out the logical conclusion from this. 😄 😄 😄
4 December 2024, 15:22
😄 😄 😄
Welcome to the show Alec. I have some nice kits in my mini stash, for some reason they keep being overlooked. Maybe I choose kits which make scratch-building feel like an easier option. 😄
4 December 2024, 15:29
Thanks mates....as usual I'm playing catch-up with the build report.
(I'll let you into a secret. I don't start the report until I have a very good idea that things might work out. If I'd completely screwed up - you'd never know about it.) 😳
4 December 2024, 18:45
🤣🤣 prevention better than cure 😜
Where about in the UK were they produced ?
I vaguely remember the 3 wheel electric milk floats as a kid.
4 December 2024, 19:36
I think they were built at Scammell Lorries Ltd in Watford.
In fact there is now a road in the area called Scammell Way.
Typical of Britain, close the factory and name a new road after it to remind us that we used to actually make stuff. 🙁
4 December 2024, 19:44
Your 'secret' is a good idea: start a build report lately not only shows a success, but also makes the build look quick! Must copy this idea 😉
5 December 2024, 09:30
😄
The one down side is that as I only do one project at a time it looks like I'm doing bugger all for about a month. 😄
5 December 2024, 09:35
Gorby, I follow the same strategy with build reports. Trouble is, I eventually catch up and then snail-pace it to the finish…
5 December 2024, 13:57
Nice to see this kit. Build the Scammel Scarab as a youngster from Airfix. And looking at the sprues I would say these are from the the former Airfix kit.
Have fun building it 😉
13 December 2024, 12:28
Great progress and entertaining narrative 🙂. The trailer wheels turned out nice, I can't imagine making something like that. Just curious: why not make one and cast a copy (I think you have done that in the past)? Or does this have to do with that logical thing…
13 December 2024, 13:59
Thanks for the comment mates. 🙂
Lex: Yes this is from the old Airfix kit. Quite enjoying the build so far - although that's probably because most of the build is scratch work. 😄
Alec: Typically the trailer wheels look like a different size to the other wheels in the kit which is why I had to cobble something together rather than cast them. I've been meaning to try and scratch wheels for a while so it was also a bit of an experiment. Hopefully future ones will be better.
1 13 December 2024, 15:28
Love the subject and the build. Not really knowing what I'm talking about I'd say it's as british as british can be
13 December 2024, 15:50
Thanks Michael. You're quite right, they are as quirkily British as it's possible to be and unlike most quirky British vehicles these were a actually successful. 🙂
13 December 2024, 16:00
Like what you have done so far, good thinking on utilising items , l always look at a item before l throw it away to see if it could be useful.
My fire extinguisher handle was just offcuts laying in my scrap tub., ps it finished now will photo tomorrow.
Your right...a MC Donald's or frozen pizza box would be bit out of place 🤣 Fire ash, tin cans, spud peel n bit of dog poo most likely 😄.
Quite rewarding the scratch build l imagine.
Looking good 👍👍
13 December 2024, 20:01
Looks like I'm a bit late to the party, but pulling up a chair way in the back to follow along 🤣 looks like a fun little project
13 December 2024, 21:09
Thanks mates. 🙂
I have to fight against an inherited hoarding gene, so it's a bit of a fine line I have to walk with saving odd and sods for scratching.
At the moment it's very enjoyable project. It's helping to keep my grey matter from seizing up completely, working out how to make something from a pile of bits.
1 14 December 2024, 07:43
I am pulling up a seat. I can't wait to see what you do with the scratch building of an I beam.
15 December 2024, 05:33
Really creative way to make rubbish. Im honestly surprised at how well you can DIY and scratch stuff, top notch stuff. Either way the progress is nice.
Also if you don't mind me asking, what operation did your missus go through? Having to administer blood thinners sounds pretty serious.
22 December 2024, 16:00
Thanks Kesa. 🙂
Mrs Gorby had a hip replacement op. Normally she'd just need medication for the blood thinning but fortunately for my scratch-building junk pile, they thought injections would be better.
Okay, that makes me sound like a bad person. 😄
1 22 December 2024, 16:19
Gotta agree with shadowlight. Your not a bad person 🙂. This reminds me of a quote from one of my favourite games: "I'm not an angel, but when you see Trevor your gonna swear I am one." Except It's "I'm not an angel, but when you see Kesa your gonna swear I am one." 😄
2 22 December 2024, 16:58
@ Kesa
GTA-5 by any chance Kesa ??
Interesting build this one ... good to follow.
Did you have any 3wheel vehicles in your part of the world ?
👍😄
2 23 December 2024, 00:36
I like the exhaust (yeah i know, a half assed comment) but good god I have never seen a more perfect card... ever.... Truly a masterpiece gifted to us from the scratch building god 😄
1 26 December 2024, 14:43
Progress has been slow. I have a problem with Seasonal Affective Disorder (SAD) so everything slows down including brain and enthusiasm. Particularly enthusiasm. It's the part of the year I have more difficulty working out how to make parts and usually the first or second attempts end in disaster before something passable emerges.
Perhaps I should drum into myself "Must do KITS in the winter…. Must do KITS in the winter..."
1 3 January, 15:33
Thanks Jennifer. 👍
It almost certainly isn't accurate but I won't be loosing any sleep over it. 🙂
4 January, 12:04
Luckily this dusty work in between didn't kill you (even if the mask looks like it tried hard), so now we see new marvellous scratch work 👍
15 January, 16:16
Thanks Robert and Frank. 🙂
It was quite a good mask Frank, it's now black on the outside but completely white inside. Mind you my entire workshop* is completely covered in a fine black dust which I haven't had the enthusiasm to clean up yet. Maybe tomorrow.....or the day after. 😄
* I call my workshop 'The Hutch'. I'm a veggie, which means I eat rabbit food, therefor.... 🙂
15 January, 16:28
Learning a tonne about scratch work, thanks for all the details. Everything looks amazing.
15 January, 23:05
Wow, impressive scratchbuilding. I love it. Nice to see you do something useful once in a while… 😂😂😂
1 16 January, 03:56
Thanks very much everyone for your nice comments.
I must admit that this part of the build was more irritating than enjoyable, although having said that it was certainly preferable to 'Useful work'. 🙂
1 16 January, 07:52
Thought I'd pop n see how Gorby is getting on with his scratch building 👀.
Very nice... Great job on the Jib 👏 very skillful to pull this build off the way you have.
Pleasure to follow 😀👍
1 24 January, 21:38
After the labour of love you did for your daughter, which of course isn't a chore being the loving dad you are, it's back to the salt mines to get some real hard work done 😀
That's some great scratch building on the jib, and the
Scammell is really looking the part.
1 24 January, 22:02
Thanks mates. 🙂
Hopefully there should be another update in the next couple of days.
25 January, 07:25
It's great what's being created again - the kit base seems to be a challenge.
Good succeed!
1 25 January, 09:13
Thanks Marko.
Of the two builds, I'm finding the kit conversion (the Scarab) to be more of a challenge than the full scratch-build (The Mechanical Horse & trailer) which isn't what I was expecting at all.
25 January, 09:29
Still progressing slooooowly. These tiny 1/76 bits seem to take longer to make than they do in larger scales. 1/48 feels huge in comparison and 1/35 would probably blow my mind.
This update means the Mechanical Horse is now complete, yaaaaaayyyy. 🙂
Eeeerm, except the tiresome colouring-in bit of course. 🙁
2 26 January, 11:49
I had a brush very similar to that one.Had it for twenty years,changed the head a few times and the handle thrice.LOL.
1 26 January, 13:05
gorby, your pic 73 reminds me an old joke:
A drunk man comes home and his wife is waiting for him with a broom. He asks her: "Do you want to clean or are you going to fly off again?"
Nice scratch work again 👍
1 26 January, 13:37
This is simply the master-class scratch work tutorial. Chapeau bas!
1 26 January, 13:53
True about the binmen, pick a metal bin off the floor to their back, everything was in it. No recycling back then. By the way that's a rather fetching brush ( Erm, Boom, Boom)
1 27 January, 11:52
Gets better every time 👏, the old bin wagon used to have a storage bucket on the side... remember they had brooms n couple shovels...for when the stuff fell everywhere,
I remember they used to come round the back of the house open the gate "which they never closed" and Cary the old black rubber type bin on there back, they used to hopp on the side of the wagon between streets " Before Health n safety 🤣" most bin-men were on the sick with bad backs before 50.
Remember the heavy rubber lids that said "No Hot Ashes"
No faffing getting it built 🤣 famous word's.
Great work so far 😀👍
27 January, 21:19
A funny thing happened to me the other day, this duck said. . . . . . . . . . . . .
28 January, 05:32
Thanks very much for your comments mates. 🙂
Mr D: I'm old enough to remember the predecessor to the black plastic bins, the galvanised steel ones – the ones which rusted and sometimes when they were picked up the bottom fell out. Thankfully they were replaced before I started to work nights because bin day used to be a very noisy business. 😄
Thanks to everyone again. 👍
2 28 January, 06:27
Such an interesting subject. I'm enjoying both your writing *and* watching the build. 🙂
1 28 January, 13:25
I was just about to write the same, love the humorous comments to the updates Gorby
1 28 January, 13:35
Aye aye, I think Gorby may have missed his true calling 😉
I love the garbage collection nostalgia. I got the feel for the British variety from Mr. Bean. 😄
28 January, 22:44
@Alec K. Try the Dustbinmen, you can get episode's on You Tube. A late sixties, early-ish seventies sit com. The cart was nicknamed Thunderbird 3. I think it was written by Jack Rosenthal , which I think he wrote London's Burning too.
1 29 January, 05:31
Hmmm... what iis this? Strange, unusual, I like it. Will have to check it out.
29 January, 05:36
Thanks for the nice comments mates.
Alec: When I left school in the late 70's there wasn't much call for someone who talked rubbish in Coventry. The politicians were mostly in London. 😄
Mark: I've never head of that programme.
Bas: welcome to the oddness. 🙂
1 29 January, 06:16
Gorby: Based in Manchester cast of characters included Heavy Breathing, Cheese and Egg, Winston and Eric. Cheese and egg was the gaffer of No.3 Gang, Heavy Breathing the lothario, Winston fervent Man City fan and Eric who was Welsh.
1 29 January, 08:52
😄 😄 😄
Oh, dear I'm not sure I can keep up the same standard of utter drivel. 😄
1 29 January, 16:53
Two buttons and a milk token , surely a man of affluence. Very nice scratch building Gorby.
1 2 February, 19:24
Apart from the amazing scratch building going on, i think the commentary near takes the cake, i check in every day for further updates and have a really good chuckle after work..really brightens my day, thanks @gorby!
1 3 February, 06:03
😄 😄 😄
Thanks all. I think my button business might struggle with two buttons per hour. Mind you, they're hand-made….Etsy here I come. 🙂
Michael: I can't guarantee the quality of my prattling but it's nice to hear my own flavour of odd is appreciated. Also, I like your little furry friend (No that ISN'T a euphemism 😄 ).
Although progress has been slow there was a bit of a boost yesterday and I'm hoping that something (hopefully not the kitchen) will get painted by next weekend. 😮
Now that's jinxed it hasn't it.
2 3 February, 08:07
A Wheely good job 🫣 , They would say it was a visual obstruction now days.
Keeping to the photos nicely 👍
2 3 February, 15:24
I'm slowly getting the the finish line. Someone pointed out this nice video about the Scarab which shows what a game changer it was (why does everything on YouTube have to claim it's a 'GAME CHANGER!!!!!' and when you watch it seems they've only found the cure for insomnia.).
Youtube Video
1 6 February, 16:28
These details you've made from scratch are simply unbelievably awesome... I suppose I should buy the same glasses (photo #99 😉
1 6 February, 17:25
Nice magnifiers! I have been using an optivisior in conjunction with 3+ magnification readers for years. The trick is not to let anyone see you wearing that. What magnification is that Amazon find you are sporting?
1 6 February, 17:58
Watching in awe, yet again. Really enjoying the ride Gorby 😀
Oh, and warm beer is an awful nightmare to us savage continentals 🍻
1 6 February, 18:14
It isn't the first time I've used magnifying glasses but these are a GAME CHANGER!!! 😄
Alec: I usually use the 3X magnification although these do go up to 5X – which may take some getting used to as it's like being drunk without any of the pleasure. 🙂
Jan: Obviously non Brits have to chill their beer to hide the flavour. 😉
Thanks all for taking the time to comment mates. 👍
3 6 February, 18:46
I went to Zenni optical website and got on the online chat. Told the person I wanted glasses with my short distance correction for doing close up intricate work with +2 magnification. He helped me adjust my prescription to this and they made me a set for $35 that are an amazing help.
2 6 February, 19:15
that seems a great idea Ben. gorby, those details are truly stunning.....
1 6 February, 22:52
Thanks mates. 🙂
Ben: The new eyes cost me £35. The built in LED light is a revelation as much as the better vision. The old mag glasses had a light but the extra batteries made it too heavy and very uncomfortable to wear so I didn't put batteries in it. The new one has a rechargeable battery built in which make it much more comfortable. Which is just as well as I need it for about 90% of my modelling now.
7 February, 07:48
Sorry about my tardiness in updating this album, blame my daughter. I keep telling her I've retired and should be leading a life of leisure but that apparently means nothing to daughters. I can't hold her entirely to account as I've been pruning a tree this morning. I can be a bit, errm, lets say "vigorous" when it comes to pruning. The trees probably think of it more as a near-death experience 😳 . Is attempted arborecide a thing?
Aaaannnnyyyway, the fun is over. Now it's time to suffer. Yes I've arrived at the colouring-in bit where I traditionally snatch defeat from the jaws of victory. 🙁
3 22 February, 16:24
Great job on the colouring and marking Gorby.
The captions to the pictures make it an even more enjoyable experience 😄
1 22 February, 16:42
No need to apologize, dear Gorby, the Feb 22 update was something worthy for us in the gallery to wait for... 👍 👍
22 February, 16:56
I think Mrs Gorby wouldn't be impressed if I sent our daughter to a different continent so I could spend more time playing with plastic. Might be worth considering though. 😄
Thanks very much for taking the time to comment Alex and Mark. 🙂
1 22 February, 18:04
Great scratch-conversions with this old Scammell Sacrab kit. Impressive work.👍
22 February, 22:33
You're welcome, she did it under her own volition (I think the smell of lacquer thinners drove her) a nice outcome on your Scammels too, brought back some memories of when I were a lad.
1 23 February, 10:23
Looks great.... should be very proud 👍 you put a lot of work in and created something very unique... Great model work 😁👍
1 23 February, 21:17
Fun to follow, fun to read, fun to watch. I dare say: the jaws of victory are still open...
5 24 February, 12:27
That level of MICROSCOPIC scratch building is OBSCENE! I'm always at awe of your projects (including the roller of death)!
1 26 February, 21:31

A couple of months ago Jan said something and it's taken me this long to think it though. Thinking isn't a natural state for me, when it happens the neighbours complain about the noise. The idea for the perfect extra vehicle jumped into my head in the early hours of the morning. This project is invading my dreams! 😮
I'll let you try and work out what it is as I take you though the build. A clue: Most people in Britland would have seen these on the roads, but not one of us wanted one.
1 2 March, 16:13
Great job on the car of your dreams Gorby, love the Robin, the car only the British would build.
You keep amazing me with your scratch building marvels, and I thoroughly enjoyed the comments 😄
2 March, 16:23
Thanks Jan, and thanks for the idea which I sort of took and twisted a little ( incidentally, it isn't a Robin 😉 ).
1 2 March, 16:34
Now, after reading your funny captions for a long time, I'm up to date again. For a non-native English speaker it was sometimes difficult to understand, but thanks to the great help from DeepL I was able to giggle a few times 🙂
At first I thought, and you would definitely be able to do this, that you were folding a Trabant (that iconic East German vehicle) out of cardboard true to the original!
2 March, 16:45
Ah, I just found out it is an AC invacar, never heard of outside of the British isles I think? 🤔 Still, great scratch building!!
2 March, 16:48
That Invacar of yours is a masterpiece of scratchbuilding, Gorby! I am astonished!
2 March, 17:12
Thanks all for your nice comments.
Jan: These monstrosities were very common and infamous on the roads here in Britain particularly in the 1970's.
Sorry Frank, I am prone to quite a lot of antiquated Britishisms. I like to keep them alive well beyond their expiry date. 😉 I think the Trabant would sue if it knew you were likening it to the Invacar. 😄
Thanks again mates. 🙂
1 2 March, 17:26
Unbelievable... You turn for just a bit your attention away from the Scammel brothers... and Gorby appears out of the blue with a finished scratched 1:72/1:76 Invacar...!!! You are on fire, mate! 👍 👍
1 2 March, 17:42
Thanks very much Alex.
Maybe it's just that I have difficulty focusing on one subject. 😄
2 2 March, 18:06
I can't believe you scratch built everything in this album. I have never heard of an Invacar before today, but now I feel like I know them.
2 March, 22:04
Thanks Jennifer I'm glad you like it/them. Don't forget I can't claim credit for the Scarab cab as that was the basic kit which started all this nonsense. 🙂
Incidentally there were quite a few different types of Invacar based on a similar design. This is the one I was mostly aware of in the 1970's 80's.
3 March, 08:03
Hi Gorby the Invacar looks 👍 great .....l remember them parked outside the P.O on a Monday morning.... Motorcycle handlebar,s , they did a great job holding up the traffic 🤣.
Like the gorilla glue headlights ..... good little technique 👍
Nice your keeping the memories alive 😃👍
1 3 March, 16:11
Thanks Mr D. Now it's difficult to believe these death traps were allowed on the roads.
I was chatting to the heating engineer today while he was servicing our boiler. He was saying he needs a hobby which isn't too expensive. When I mentioned modelling he asked to see my models and was blown away that it's possible to build things like the tiny Invacar from scratch. He ended up late for his next appointment as he wanted to see my whole collection. 😄
4 3 March, 16:44
@Jennifer it was a part of Socialism..... a dirty word in north America 🤣
The french Invacar made these look like a Bentley 😂 l think in the 80's the french would restrict you down to an Invacar licence for Drink driving.... Definitely a punishment 😮
2 3 March, 19:05
The one in East Germany was also for sure an attack against the health of the driver!
commons.wikimedia.org/wiki/Category: Simson_Duo
Please remove the blank in between - otherwise a smiley is generated and destroys the link 🙁
2 3 March, 19:08
You should definitely consider building a bubble car in future then Gorby..... keep an eye out for right blister packaging or make that vacform, you can get a small dental on for about £90 I've seen a few Mates use.
Time, money,time, money.... never enough to fulfill the modeling dreams 🤣
3 March, 20:06
I just found this on AliExpress:
£97.19 | Dental Vacuum Forming Molding Machine 1000W Former Thermoforming Tool Mouthguard Forming Machine with Steel Balls
a.aliexpress.com/_EzfnBIo
3 March, 20:07
That is hilarious! I had no idea about VSP's. It's a good idea, though.
3 March, 20:08
£90!! Do you think I'm made of money. 😄
No, I want to have a go at making a vac forming machine myself….and if I screw that up maybe then I'll look for the key to unlock the padlock on my wallet. 😄
3 4 March, 06:57
I have to say, to whip out that little car from scratch over a WEEKEND is amazing to me. That's pro scratch-building skill in action 👍
4 March, 13:44
Thanks Alec....although it is significantly less amazing that it took just over a week rather than a weekend. 🙂
4 March, 14:41
Yes you can make them, make a box with a vacuum nozzle size hole, the top of box has lots of holes, add a hinge frame with wing nuts, so box n frame open like book,
You can use halogen heater or hot air gun to soften medium.
Be an interesting project.....and have plenty of good uses.
I wish l had one when l broke my mig-23 canopy!😬
You will have to give use a group display of you builds sometime 😃👍
1 4 March, 22:02
Mr D: I've already put all my scratch-builds in a collection you can view anytime you like. 🙂
4 5 March, 07:54
I never realised you had built so many from scratch .... You will need a panoramic camera 🤣
Very impressive work 👏😁
1 5 March, 11:12
BMW Driver's indicate through telepathy, fortunately my tin foil hat (milk bottle tops and scraps of old bacofoil) prevents this and allows me to ignore their ignorance/arrogance. But then again I find most people who drive German machines are prone to this. H'mmm, is this a leftover Teutonic plan from WW2, to annexe the B6325. Very, very impressive modelling there too. Whoa, a Wartburg just nosed down our road. Be seeing you.
10 March, 05:40
😄 😄 😄
Thanks for commenting mates.
I hope you enjoyed your Wartburg Mark (I assume it wasn't Wartburg castle? 🙂 ).
1 10 March, 07:35
If I remember rightly (This is were the tinfoil works t'other way) Wartburg's were a step up from a Trabant.
1 10 March, 10:41
Thanks very much Jennifer. I wasn't sure the shovel was good enough until I slapped some paint on. Quite please with it now. 🙂
1 10 March, 17:36
Thanks Mates. 🙂
The colour certainly brings back memories for me although I'm not sure 'Royal Cov' will catch on, particularity with ANYONE who has ever been here. 😄
2 12 March, 07:49
Gees, they've come together beautifully..I reckon you just may have done Coventry proud haha..as always love the commentary..build on!
1 12 March, 21:05
Thanks very much Michael. 🙂
I might have some way to go before I outdo Frank Whittle. 😉
13 March, 06:45
Remember to keep those old beer barrels? You may want to do a Donkey Kong Dio some days 🤣 just a dozen more scratch builds and a vacform to get out the way first 🙄🤣.
Glad you managed to create the decal you needed 😀👍👍
13 March, 19:57
😄 😄 😄
Yes I have kept the barrels from the kit although I'm not sure why as I'm 99% certain I'll never end up using them. Maybe they might make some sort of sense in that freaky 1/35 scale.
Thanks Mr D. 🙂
14 March, 07:11
This will be the last update in this build report thingy as it's DONE! I hope to get the final photos and some drivel written in the next few days as it looks like I've got the whole of next week free 🙂.
Daughter must think she's been working me too hard on my one day a week job, as next week she's given me the week (well, the day) off. Generously she said that it would be on double pay! I pointed out she didn't pay me anything and she said "Exactly. Your welcome".
Ummm, I think I might be one of the exploited, downtrodden masses. 🙁
Hope you've enjoyed the ride. I have. 🙂
2 16 March, 14:22
I am very happy to see something that is completely out of the frame. And also scratch build! The tools are incredible! 🙂
16 March, 14:34
The tool roll & those bases look fantastic, more over when you help the world by recycling the drawers fronts 😄 👍
16 March, 16:15
Those two bases look, as Rui says, fantastic. The tool roll is outright cool.
16 March, 16:52
Thanks Jennifer. 🙂
I forgot to say the tool roll already had the silver of the spanners - I painted the other colours, I reeeeaally needed my magnifying specs fort that.
16 March, 18:01
/ja/search.php?q=*&page=newsfeed&fkSECTION[]=Newsfeed
search-solr.php?lang=ja
35
35
/ja/search.php?q=*&page=newsfeed&fkSECTION[]=Newsfeed
35
todo