
News Feed
added a new photoalbum.
20 images
Zvezda Su-30SM "Flanker-H" Final Reveal
1:72
This plane “Blue 43” is based in Crimea and belongs to the Russian Naval Aviation. The eggplant gray on top is supposed ...


Project: Su-30SM Flanker-H


 7+
7+ 32 15 December 2024, 17:24
Many thanks @Lukasz!! I'm glad you like it and that I could take this over the finish line and not skip any of the ideas/details I could do for a 1/72 kit. Some might say I overdid the engines, but I like it. Will post a photo with their interior as well.
15 December 2024, 22:10
Simply BRAUTIFUL! The subtle tonal variation really draws the eyes onto the build. ❤️❤️❤️
1 18 February, 16:42
Hey CaptGPF, thanks for that, really glad somebody actually noticed as it was a lot of painting work 😄 cheers!
18 February, 21:19
added a new photoalbum.
36 images
NASA Ingenuity - Mars helicopter 
1:72
Framed and ready for my wall


Project: NASA Ingenuity
Scratchbuilt
37 8 January, 19:58
Sweet 👍
Reminds me of the real one, still trying to collect data. In the loneliness there, far out ...
9 January, 08:32
Oooohhhh... I am following. What are the rotor hubs for? Aren't they used in wind turbines?
11 January, 00:26
Welcome Jennifer, the propeller blades will be connected to the hubs once I get them finished.
1 11 January, 12:00
Incredible idea! This device is a first in many things. Starting with the fact that it is the first time something like this has flown to another planet. Who knows, this is a planet inhabited only by robots. The last interesting thing is that his disaster is the first one investigated on another planet. I look forward to seeing the finished model..
2 11 January, 13:11
Живко Джаков these are exactly the reasons why I decided to try and make this model.
2 11 January, 16:31
I'm not sure I can fit all the parts to make it accurate. It's very small.
18 January, 23:05
Yes, at 1:72 scale it is less than a centimeter tall and the propellers are about 2cm wide in total.
19 January, 02:19
I had a real scare when I was priming the model today and it flew out of my tweezers. I couldn't find it anywhere and it took a half an hour before I saw it stuck to my sock! Lucky nothing got broken.
2 19 January, 18:37
Nice progress on this little heli 👍 Do you find pictures for the coloring?
19 January, 18:49
Hi bughunter, yes there seems to be enough photos around but the drone went through several redesigns before it went to Mars. For example the foil was gold for a while. The rotor blades' nubs were both pointing up at one point. Little things like the feet changed and the size of the battery and solar panel. I always have to go back and check the Mars mission photos to make sure what I am doing is correct.
2 20 January, 00:06
I'm very close to having this done. Let's hope no catastrophes happen before it is mounted and framed.
1 9 February, 02:32
It won't be a precedent. As we've already commented, NASA crashed, so this won't be the end of the project 🙂. And one question. Where did you get your Martian soil from? Isn't the source of the survini too far away?
9 February, 10:07
Ok. After a few last minute repairs, of course I knocked off two propellers and the antenna while mounting it to the diorama, I 've finished this.
1 9 February, 12:43
I'd like to have better photos but it's so small the camera on my phone can't do it justice.
1 9 February, 12:51
Thanks gorby. This is by far the smallest model I have ever made. I'm pretty happy with the results considering it's a scratch build and I don't have any special tools to do micro surgery.
9 February, 13:07
I silently followed this right from the start - and now it's time for respects and congrats - for a number of reasons: for the choice of the inspirational topic, for sticking to 1:72 scale, for the implementation and the final result in scratch... Two thumbs up! 👍 👍
1 9 February, 14:16
Love the martian in orange. Beautiful result and astounding given the scale.
1 12 February, 15:21
Wow, what a tiny job. I might have lose it while trying the assembly 😄
13 February, 14:28
Thanks guys. Now I am considering doing an even smaller model: I might make the Sputnik satellite in 1:72 scale, it would only be 8 mm!
2 13 February, 22:42
After doing further research I realized that the Sputnik satellite in 1:72 scale, would be bigger than this. Only the ball is 8 mm but with the antennas it would be bigger.
1 14 February, 00:57
added a new photoalbum.
15 images
AMD Mirage IIIB-MATCHBOX-2-PMTG
1:72


Project: AMD Mirage IIIB-MATCHBOX-2-PMTG

6 10 February, 19:35
Looking really good 👍 nice job on paint, l would like to build a Matchbox in future.
Good luck on the next steps 👍
18 February, 21:55
added a new photoalbum.
12 images
Lamborghini Aventador LP700-4
1:24


Project: Lamborghini Aventador LP700-4


18 February, 21:54
added a new photoalbum.
20 images
Saunders Roe P.177 F.1 and FAW.2
1:72


Project: 1/72 Saunders Roe P.177R F.1


2 9 February, 18:16
added a new photoalbum.
42 images
Lockheed F-104G Starfighter "Ferrari"
1:72
Decals are almost done.
Too bad the Xtradecal set only covers the specific markings and not the service labels. I had ...


 5+
5+ 62 8 December 2024, 18:01
Taking a seat! It is the most appropriate paint scheme for this plane, imho 😉
1 8 December 2024, 18:39
Reskit engine nozzle fits now nicely after some trimming of the fuselage halves.
😊
10 December 2024, 23:17
take care of those main gear struts- they tend to tilt the plane in one direction once installed
2 11 December 2024, 08:21
Looking very good Guido! If I recall correctly, the Hasegawa afterburner can is narrower than the Reskit one. Did you need to shave off those supports to make it fit?
1 11 December 2024, 10:20
Thanks Patrick. I took a picture of it to explain what my intentions are. 😉
Hope that helps.
13 December 2024, 15:53
Thanks Markus, they seem indeed a bit fiddly…
Also, the instructions seem to suggest that they need to be installed during in subassembly of the complete rear fuselage.
I'm not quite there yet, but I think they can be mounted towards the end. I'm also thinking of glueing the front and rear fuselage halfs together on each side and close the whole thing, avoiding any misalignments between front and rear subassembly's that are suggested in the instructions.
Will need to do a lot of dry-fitting to check feasibility however, before committing to that approach. We'll see. 🙏🏻🙋🏼♂️
13 December 2024, 16:12
Thanks Guido! Now I see the indentations on the Reskit part. Those are meant for the air brake wells on both sides. That surely needs some trimming but by the looks of it, you got that covered! 👍
1 15 December 2024, 13:49
Good observation Patrick!
I had wondered why those indentations were there... But, in 1/72 there are no brakes in the kit and so no protusions for these on the inside of the fuselage halves. It means that the only contact point the Reskit exhaust has, is at the edge of the fuselage halves... which is probably not sufficient for a good "montage".
I took a quick look at the 1/48 instructions of the Hasegawa kit, and indeed there, you have the brakes and the areas on the inside of the fuselage - assuming here that Reskit designed the exhaust with the larger scales in mind, and simply resized that design for 1/72.
So, I think that the approach I'm taking, with recuperating the part kit and re-use it as the inside mounting point for the exhaust will be the good one. I'm even thinking of drilling a hole in the middle of the exhaust back-end to make sure that they align correctly by means of a small rod.
17 December 2024, 20:25
Nice Detailing work 👌👍 the exhaust is much better, alot more accurate.
Dry fit, dry fit ...... always pays 👍
1 17 December 2024, 21:10
really curious about the livery, it will certainly be an eye catcher. i am in 🙂
1 17 December 2024, 21:19
Last update of the year with more progress on both the front and rear sub assemblies.
31 December 2024, 14:34
Looks good though..the canopy 👍
I had X2 parts on my Harrier...l got them in place nice then taped them as x1 piece then it can be glued as if a one section.
Model is coming on nicely now 😀👍
1 3 January, 18:20
The fuselage is completed now without too much hassle.
Good preparation and with a bit of plastic card, it worked out nicely.
1 4 January, 21:05
Wow! That marriage of the forward to the rear fuselage really worked out well! Seamless!
1 4 January, 21:36
The aftermarket fuselage is stunning. All your scribing work should also pay off, it is going to look amazing.
4 January, 22:14
Yes MrD, see info in the project 😉 .
It's an Xtradecal set - which doesn't include the Ferrari logo on the intake. I would think these logos were only applied at the beginning, as more recent from Fiorano don't show these anymore.
Not in a hurry though as Monday it's back to working duties, so the building pace will slow down… or maybe not 😆
4 January, 22:27
Thanks Guido, l got my current project decals of these guys they have Ferrari
a.aliexpress.com/_EQ2MDgg
1 5 January, 15:13
I'll be getting them from here: spotmodel.com/produc..hp?products_id=20689
😉
1 5 January, 16:36
Nice smooth lay down of paint, you definitely needed a white base.
Looking good 👍👍
1 31 January, 15:57

Thanks everyone, and yes, a white base coat is always needed first red or any other bright colour. 😉
1 1 February, 21:48
That white base coat worked well for the red colour. It came out perfectly.
1 2 February, 07:01
Very impressed by your neat scribing job. Will need some more practice to reach that level. Nice progress.
1 7 February, 19:05
Looks beautiful already! (and I have purchased a set of decals for this plane too...)
2 10 February, 20:00
Nice shiny red as you would expect for this version, it's a real mean-machine 104 .
Great 👍👍
1 12 February, 15:55
added a new photoalbum.
23 images
Tornado F.3 - Operation Granby
1:72
Gloss(y) coat to seal in the decals, mounted the drop tanks and the pylons. Next step is weathering.


Project: Tornado F.3 - Operation Granby


25 2 February, 18:55
Another project on the bench. I had this kit as a kid and built and painted it with the smallest available brush and unthinned Revell enamel paint. Hope this one will look slightly better in the end 😉
3 February, 17:56
Thanks mates for the interest 🙂
The panel lines below the cockpit were just vertical ones, which is not correct as there are multiple access ports with lids. Also the fit was very poor here, had to putty and sand the area multiple times, as well as at the back around the horizontal stabilizers.
Airbrushed panel by panel and then sprayed some light coats to tone everything down.
9 February, 17:42
I like the weathering of individual panels. Coming along nicely!
1 12 February, 17:59
Danke @Christian
Decals are now complete and I also masked some smaller areas off and sprayed them. Next is clear coat to seal the decals in, then finishing the cokcpit and some weathering.
16 February, 20:07
added a new photoalbum.
34 images
English Electric P.8 1/72 3d print
1:72


Project: 1/72 English Electric P.8

5 9 February, 18:13
yes, many many hours of pain involving Fusion 360. Hopefully, I'll get it painted and assembled soon and be happy to start offering it for sale.
1 9 February, 18:30
added a new photoalbum.


7 31 January, 17:45
Don't be so modest - I've seen your galleries... It's a shame you haven't posted anything for so long... ☹️
3 February, 23:23
Not modest but interested.
Well, I had some rough time for the last couple months and to work a lot, but recently I've done some model work, but its not posted yet. I've build the trailer for my 10 ton Afrika korps halftrack; a dog and a figure, but they all need more paint work, and yes everybody knows I'm a slow modeller, I don't hide it, but I expect to return to the bench soon.
2 3 February, 23:45
added a new photoalbum.
34 images
RNLI Shannon Class Lifeboat
1:72
Needed to create my own port glass


Project: RNLI Shannon Class Lifeboat

28 19 January, 14:43
So far so good. Apart from the parts A9 A10 everything going together well the gaps you see in pic 4 are my fault I did check then promptly forgot to sand my bad gate removal fully but it wouldn't be modelling if there was nothing to fill then sand
20 January, 19:39
I used Ammo's Cobra acrylic paint - 'Gulf Orange' as I had it to hand and like the colour. The Cobra paints are good covering and tough. One caution do not use their "cleaner & lacquer thinner" to thin it as I did, by not reading label, before adding to the acrylic unless you want an airbrush full of a custard like substance 🫣🙄. When you use their Acrylic thinner it works a treat 👍
1 28 January, 20:06
Looks like a relatively straightforward built👍 I think I need one of this too in addition to the Severn Class kit.
29 January, 15:36
Welcome all those following
The decals are great and work well with micro sol/set. I was concerned I'd mess the long single colour stripe so cut it into smaller sections. The first went well but the second split into smaller pieces on the paper while soaking, not sure if I did this by forcing it flat? Apart from that they work great as can be seen in the hatch decal on front of boat. I still chickened out with the other side but only cut in half and didn't unfurl till transferring and it remained in complete sections 👍
#Roland I too have the Severn kit but have heard it trickier than this modern example
31 January, 23:34
If you are going to replace the solid mooring cleats with your own leave till near the end as I've now managed to knock most of them off at t once 🙄
1 1 February, 08:17
All was going well until I looked closer and realised I'd forgot the windows 🤪 I had added the ones I cut out at the rear but some how left the main one out 😳. I also used CA glue and do the cabin is now solid and the whole thing will be bin fodder if I attempt to remove it.
Do I'll try and add the glass pane by pane 🤞I don't make it worse
5 February, 10:57
Oops! But I'm confident that you can add them piece by piece. Will be tricky for the last one though. Keep my fingers crossed!
1 7 February, 07:57
Well the glass saga continues, while they went in one by one the last one (starboard front) leapt inside never to be seen again 🤪. Had to make my own 🤞it stays in place.
1 18 February, 13:24
Cheers #Finn
#Roland enjoy the kit just don't forget to add the windows before closing the cabin 😆
18 February, 20:02
added a new photoalbum.
14 images
AMD MIRAGE GROUP RE/BUILT
1:72
Mirage F-1C airfix/Heller construction locale
Mirage F-1CR Heller construction locale
Mirage 3C matchbox construction e...


Project: AMD MIRAGE GROUP RE/BUILT


 27+
27+ 9 11 February, 04:39


added a new photoalbum.
37 images
Black Pearl - Pirates Of The Caribbean
1:72
A little rehearsal with the first self-made utensils was a must.


29 18 January 2021, 14:16
I have no idea about ship modeling, but this looks really awesome 👍 Tempting to build one myself some time ..
18 January 2021, 16:30
Looks like fun! 🙂 Would you recommend this kit, or it is a little bit troublesome like a lot of kits?
I have a work-in-progress French Frigate Acheron in 1:200 scale on the side, and luckily I am mostly done cleaning up and correcting the numerous cannon openings on the sides.
18 January 2021, 16:55
Thank you mates. @Treehugger: I have edited the pictures with some comments. The kit is good so far I think, no bigger issues. But I must say that I have no comparison with other kits because it's my first ship.
20 January 2021, 09:04
A lot of ship kits are reboxing of much older kits, and the mold quality or the detailing or accuracy (symmetry) isn't good, or that was my experience with a paticular kit that was old. 🙂
20 January 2021, 09:21
I built the Black Pearl myself and I know how much work it takes. I'm excited about the way you build her and look forward to more pictures.
13 March 2021, 09:19
So, just a short update: there is no update. I will try to find the motivation some day to go on with this project. At the moment I have other interests. Maybe I will have to watch all the movies again to get some "Captain Jack Sparrow inspirations". O am really afraid of the rigging.
1 February 2023, 15:25
Chris, your model looks amazing. Some questions. I see hat the Black Pearl from Revell is very similar to another ship, the Pirate Ship, also from Revell..
Do you know if it is the same?
Did you paint it with black primer first?
What colors you used to give the sense of the wood?
21 January 2024, 11:22
Thank you Raul. To answer your questions:
Yes, the Revell pirate ship is identical in construction and differs only in the figurehead (it's a swan).
I didn't use any primer and painted directly onto the cleaned plastic. I was afraid that the primer would make too much of the wood grain disappear.
I have briefly described how I painted the pearl in pictures no. 10 and 11, please have another look.
22 January 2024, 10:44
added a new photoalbum.
18 images
EF-111A Raven 1:72 (Revell)
1:72


Project: EF-111A Raven - Revell 1:72


4 18 February, 20:22
added a new photoalbum.


12 5 February, 00:08
I am still not sure how I will tackle the green camo squiggly lines of green, paint method wise...
6 February, 00:16
Done... Normally I would take the aircraft outside and put it on a mirror, but there is SO MUCH SNOW - have to settle for a table in the basement...
18 February, 21:10
added a new photoalbum.


123 7 July 2024, 19:36
When I got a photo showing a Pz. I towing a Ju-87, possibly on an airfield in North Africa, I definetely want to build that scenery. The Pz. I is a mix of parts from S-Model Pz. I Ausf. A and B, the Ju-87 is Italeri. I bought some Quickboost add on parts which are designed to fit the Airfix kit, but with slightly modifications they although fit quite well the Italeri kit.
Happy Modelling, Christian
7 July 2024, 19:44
I saw (likely) the same photo and also thought it would make a great dio. Glad it will materialize in your capable hands Christian 👍
9 July 2024, 00:05
Still enough place in the first row, welcome aboard Łukasz and Christian 🙂
10 July 2024, 19:13
Nearly there, just a few bits and pieces to add before I can start the paintwork.
I got the SSMODEL Pz.I tracks. So far as can be see still in their printing frame they are looking quite nice.
Happy Modelling
Christian
21 July 2024, 11:32
Looking neat so far! Where did you order those 3D parts from? Been curious about those for a while now...
21 July 2024, 11:34
Thank you Tom and Alec. SSMODEL only has a shop at AliExpress. I was a bit hesitant to order there, because there is a lot of rumor about piracy products over there. But once I did not found something similar I want to order from them I registered and ordered at AliExpress. Payment was easy via PayPal and delivery absolutely in time. I also ordered one of the SSMODEL vehicles, Marder III Sd.Kfz.139 SSMODEL 1:72 72725. The details are top notch, but the printing quality in between excellent and poor. The chassis, tracks and single parts are excellent, but the gun mount and gun shield are not so nice. The gun mount is warped and the gun shield has a lot of steps on the inner and outer side. It also differs from the instructions where gun mount and shield are shown as separate parts but it was delivered as a single part. That makes it even more complicated to solve the issues. But I think I will give it a try for another scale 1/72 kit in the future.
Here the link to the shop:
de.aliexpress.com/st..ain.2.72a2xoWPxoWPcN
21 July 2024, 14:08
Thanks for the reply, Christian 👍 It seems that their shop is one of the reliable outlets, then...nice!
22 July 2024, 12:40
It turns out very well, Christian. 👌 Looking with interest for the final result.
25 July 2024, 07:07
Thank you all for your kind feedback 🙂
Meanwhile I have added a few more details like the steering gear and tilger for the flaps. I also painted and reworked the SSMODEL tracks. They need a slightly adjustment to fit well the the S-Model Pz.I. MOre photos sooon when I start the paintwork.
Happy Modelling, Christian
26 July 2024, 20:50
WIP painting the Ju-87. Underside in RLM65 Hellblau is done as well as RLM70 Schwarzgrün. Depicting the references I have, the paint seems to have a weathered look, which I took in consideration by highlighting the basic paint.
Next will be the camo with RLM71 Dunkelgrün and a white band on the rear of the fuselage.
Happy Modelling
Christian
14 August 2024, 18:25
Thank you Christian and Moreno🙂
WIP on my Ju-87 scenery. I rrplaced the First to Fight Pz.I by the one from S-Model but replaced the tracks by 3D printed ones from SSMODEL.
That will come together nicely with a nice contrast in between all of the colours, sand brown Pz.I and the Ju-87 with a standard camouflage in green.
Happy Modelling
Christian
15 August 2024, 18:23
Thank you Lukas 🙂
There is a lot of masking needed to paint the Ju's splinter camouflage.
I did not masked and sprayed it in one loop, but step by step. For me it works much better in that way.
Only the rear fuselage and tail end is missing. So I have a plan for tomorrow 😁
Happy Modelling
Christian
17 August 2024, 19:06
Nice progress Christian. I like your modulation and shading, looks great 👍
17 August 2024, 21:32
WIP on my Ju-87, white band and blackgray walkways are masked and painted. Next weathering, varnish and decals.
A wooden base is also on the way, so I hope to finish this one and several other ongoing projects until SMC🙂
Happy Modelling
Christian
25 August 2024, 11:26
Always impressed by your clean builds and painting skills in that scale!
25 August 2024, 15:34
This is very cool. I guess I need to find the photo that was evidently the inspiration for the towing depiction.
4 September 2024, 22:34
Thank you all for your kind comments 🙂
Monte, I have a copy of the photos. I'll share it later when the diorama is finished
5 September 2024, 19:06
Some crew figures are meanwhile painted.
Happy Modelling, Christian
17 September 2024, 13:27
And the final one I wanted to finish for SMC 2024. A Pz.I towing a Ju-87.
The diorama is based on an original photo taken in North Africa in spring 1941 by a member of Panzerregiment 5. Less is known about the incidence, but it seems the Ju-87 has to make an emergency landing and was now towed by the little Pz.I out of harms way. According to my research and the help of a modelling friend who has a main interrest in Junkers aircraft, the Ju-87 B2 seems to be a machine from II. Gruppe 8./SG2 with the marking T6 + BR.
The Pz.I was built out of the S-Model kit, the Ju-87 is Italeri. Figures are White Stork. Painting was done using acrylics and oils. The wooden base was made by Roland Dörrich.
Happy Modelling
Christian
11 October 2024, 18:09
Beautiful as always 👍 I think they should tie that Stuka before start moving 😄 😉
I've seen a similar scene photo but I think in eastern front and the mover was another Vehicle. I always thought I should use my revel Stuka to do that kind of Dio, maybee One day... 😄
11 October 2024, 19:01
it looks just perfect, amazing painting and modelling skills as usual.....
11 October 2024, 20:29
Thank you all for your kind words 🙂
@Rui, that was wgat the two guys in front are talking about 😉
11 October 2024, 21:10
Of course, the hardest part is already done. 😄
I've been checking my sources. It turns out it's not a Stuka, but a BF 109, with its rear end on top of a truck. 😎
11 October 2024, 21:59
Brilliant! It astounds me how well you have painted the figures, you can see the muscle tone! 😮
12 October 2024, 07:04
Outstanding. I really like these recovery scenes, and like Rui hoping to do one myself One day. Looking forward to your SMC 2024 photo report!
12 October 2024, 13:21
I somehow managed to delay browsing through the album till today - this is really outstanding! I especially like the figures 👍
12 October 2024, 21:19
Just seen this at SMC. Great topic and nicely done. Good luck for the competition!
19 October 2024, 16:46
Hi Christian.
I am confirm with all the mention above. It is a fantastic Interpretation of this theme. Very well done.
19 October 2024, 20:39
But honestly, you can't do that! Is this airplane or tank model building? Something like that can't be categorized and filtered properly here! Why don't you decide what you want to build?
.
.
.
Joking aside, nice 'crossover' diorama and I always impressed by your little figures 👍
PS: It's only visible in Group Aircraft->Propeller 🙂
30 October 2024, 08:41
I could see it at the SMC. A very unique style, I really liked it.
I took extra photos of the smooth sand. 😉
30 October 2024, 08:55
@bughunter, you're totaly wrong, this is a figure display 😄
But thank you for your thoughts and kind comment🙂
@Erik, thank you very much and glad you like it 🙂
30 October 2024, 09:44
I knew I had it in my sources. I manage to find it 😎
"MY NEW CAVE THE OLD ONE & SOME STASH" | Album by MIG (No)
1 18 February, 14:39
Rui S, so it took you 130 days from 11th October til today to find it 😄
18 February, 20:24
Nop, I just tripped on it last night 😄 😄 😄 when I was just looking in a diferent folder.
18 February, 21:12
added a new photoalbum.


7 9 February, 00:14
Built this little bugger lately - are you going OOB or planning to fix the Airfix' errors?
1 12 February, 13:57
There are lots of things you could correct, but I didn't do it either 🙂
britmodeller.com/for..oe-sr-n1-hovercraft/
Watch out for these side-ducts, their fit is very poor, I added them onto the deck after looooong session of filling and sanding.
However they fit the deck quite well once assembled and painted..
1 17 February, 13:12
PS. Watch the crew cabin holes too, in my case they looked randomly located 😄
1 17 February, 13:16
I can post some reference pics I found - let me know if you'd like to take a look
17 February, 16:27
Yes, sure, please. It is early enough to make those little changes. Yes, the cabin holes are strange and the angled instrument panel made me doubt 😄
17 February, 22:39
added a new photoalbum.


47 4 June 2019, 00:01
Hey Clifford! Welcome my friend.
I did this all today while waiting for washes to dry on the Vampire build. First helicopter I've done in very long time. May end up being a dual build if my other UH-1 kit arrives quick enough.
4 June 2019, 00:12
Cool. I have a whole Air Force of Helio"s to build. Maybe I will tackle a couple after the Viggen. The last one I built was the Sea Dragon.
4 June 2019, 00:16
Ahh welcome too Donald! You must have responded while I was typing 🙂
4 June 2019, 00:17
No problem sir. 🙂 Certainly add another in the mix! The more the better with Hueys! LOL
I am kind of itching to do my Kitty Hawk Little Bird. That is an incredible looking kit. Like Clifford, I have a LOT of helos to get to.
4 June 2019, 00:51
I have a 160th S.O.A.R. OH-58, and UH-60L D.A.P. Plus a couple of UH-60L's in 1/35 scale and a couple of 1/32 Hueys. One of which I plan on doing in the Canadian Fire Service scheme. So the fun will be trying to pick which one to do. Plus all the 1/48 scale ones.
4 June 2019, 01:55
Oooooo, that sounds like an idea! Perfect excuse to tear into that kit.
4 June 2019, 02:06
Man just got the newer boxing of this kit in the mail...seeing yours started makes me want to crack it open and start on it...lol!!!
4 June 2019, 02:14
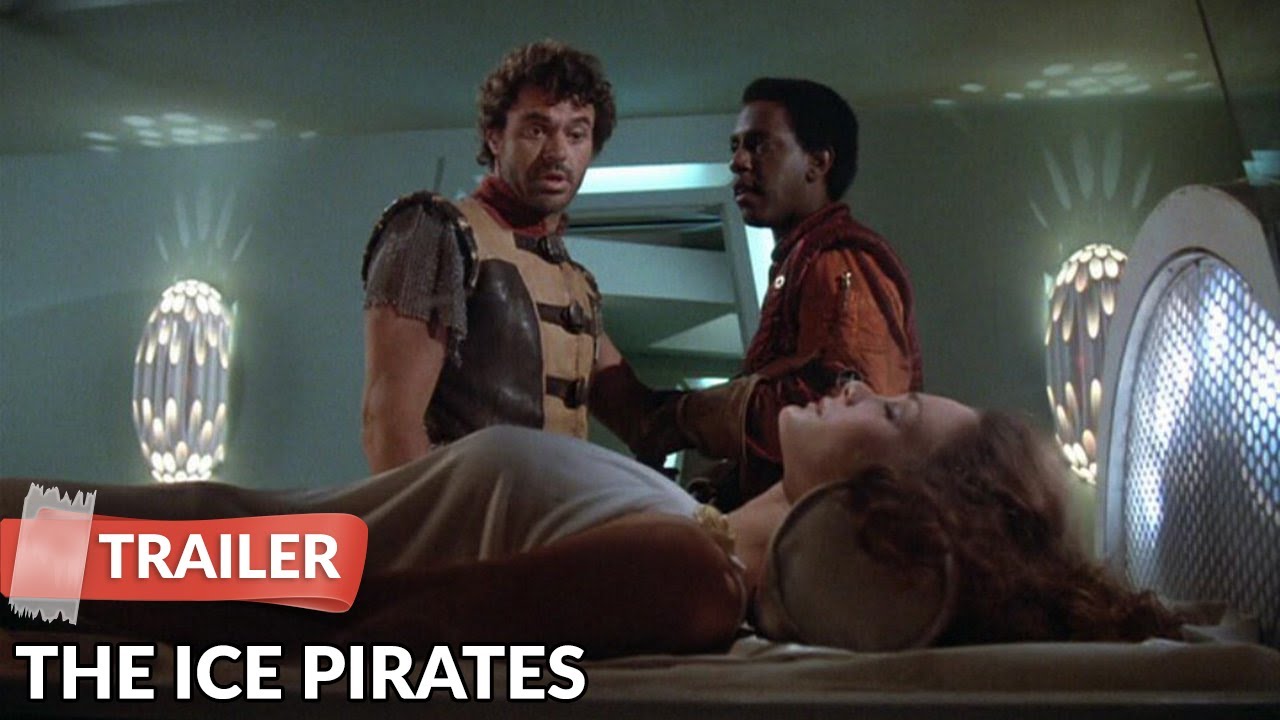
Yes Chris! I picked the decal for the Antarctic unit known as the Ice Pirates because I remember this:
Youtube Video
4 June 2019, 02:24
This needs a Mystery Science Theater 3000 remake!!! That would be killer!!
4 June 2019, 02:42
These are my choices...
[img1]

[img1]

Nathan, you need to do more work quickly so we dont keep hijacking the post. 😉
4 June 2019, 03:40
<thread jack> I vote the chinook DD2!! I hear those bad boys fly over our house... such an awesome unique bassy sound to them. </thread jack>
4 June 2019, 03:45
Chris: It is awesome, especially the jokes about Jesse the Body Ventura.
Donald: The little bird!! No worries about the hijack I have another photo to add tomorrow.
4 June 2019, 03:49
Added a pic of the engine housing. Had to remove the navigation light to smooth out the top join and then rescribed most of the panel lines as they were all very shallow.
4 June 2019, 12:32
Looking great. We can all try to come up with a date for the Heilo build. I am flexiable.
4 June 2019, 22:50
And I did say somewhere in there great start didnt I???😉 LOL
The Chinook is not a bad idea, but the Little Bird is calling me. And the figures that come with it are exquisite. So I think that is what i shall do. I also am fairly open as to when to do it. Just has to go a couple months at least. LOL
5 June 2019, 00:01
Thanks mates!
I think we're contemplating a helo group build. I'm ready anytime seeing as I'm already there LOL. I've still got the decals on order from Draw for this and my N.C. Forestry UH-1.
5 June 2019, 00:25
Off to a nice start Nathan!
Hmmm, group builds... Not just for Helos this time (too bad I just finished a Helo LOL), but that would be cool if we started doing some group or theme builds on scalemates. I wonder if it is possible to implement some kind of organized structure for this on the site... Paging Tim!
5 June 2019, 13:29
Thanks Michael! Hopefully I'll somehow pull off the application of gloss orange.
Group Build: I think we would accept an Osprey as a whirleybird...
5 June 2019, 16:27
But it still acts like a Heilo, so I would not have a problem with it. I have a 1/35 AH-1W Cobra with a resin cockpit, I could do that one. I need a good excuse to do it. LOL.
5 June 2019, 23:23
Added the rear seats and some dirt on the floor. Next is a bunch of etch seatbelts...
7 June 2019, 20:05
Thanks Clifford! These seatbelts are insane. I dunno if I'll make putting on the little clip for every set. My brain hurts from just 2... added an image to show if you can see it.
7 June 2019, 22:22
I HATE it when they do that. Just make it one piece for Gods sake. LOL
8 June 2019, 01:39
I mean they already painted them, they could have done that too. LOL
8 June 2019, 03:02
I hope so Chris!
Thanks Holger! I hope I can keep it up through the build.
8 June 2019, 13:48
Seatbelts installed for the pilots. Still working on the passenger (meat cargo) area.
9 June 2019, 02:08
Thanks Donald, James & Konrad! 🙂 Did more seat-belts today. About halfway there.
9 June 2019, 18:53
Nice interior work, yes seatbelts will fry your brain and make you go cross eyed. LOL.
10 June 2019, 02:39
Offtopic - I know it´s going to be a completely different finish, but looking through the pics, I had to think of this...:
Youtube Video

Now I can´t get the tune out of my head 😄 - maybe it will help you getting the seatbelts done. Interior starting to look great, looking forward to see the arctic scheme on the outside!
10 June 2019, 14:09
Ha! Arnold doesn't need seat-belts, he has an iron grip. I do have the tune in my head now too.
10 June 2019, 15:48
Oh no I may have to put a boom box in my choppa:
giant.gfycat.com/BrightAmpleBat.webm
10 June 2019, 20:36
Thanks Bryn! Seat-belts for the meat-cargo have been installed. To think I want to do this when I build a CH-47. Pure insanity!
11 June 2019, 01:27
Oh Thanks Chris! You beat me on the ol typin. I guess I should use more than one finger.
11 June 2019, 01:29
I type 60ish wpm with 1 hand... get yur act 2gether 😛 joking, much love! (but I do type 60)
11 June 2019, 01:42
If you build a Chinook, do it with the cabin seats up in the stowed position. I speak from experience with the real thing. LOL.
11 June 2019, 03:04
Thanks Donald!
Clifford: I was thinking of a stowed ATV in there, so at least some of the seats would be stowed. 🙂
11 June 2019, 03:25
Thanks Stephan! Doing some fuselage work today. There's some optional parts on the tail boom and the fit isn't exactly perfect.
11 June 2019, 14:18
More parts primed to prepare for the insertion of the interior and to start work on the rotor head.
11 June 2019, 23:35
It sure is looking good. If we weren't hauling troops we usually flew with only 3 seats down in the rear. One on the aft right side{for the Flight Engineer, me) one aft of the forward cabin door, (for the crew chief) and one next to the fwd left window. This was the standard setup when carrying cargo. Sorry to highjack your thread agin.
11 June 2019, 23:42
No worries Clifford. Its useful information for sure! The other fuselage you see is the N Carolina Forestry bird which is kinda on hold until I get another seat-belt set.
12 June 2019, 00:09
Cool, a double Huey whammy. When you get the other sealtbelts that is. I was looking at your album last night, and thought to myself, I need to get a Huey. I was digging in the closet today to put some PE in my SU-7BMK box, and lo and behold I found 5 Huey's 1 1/35, 1 1/32 and 3 1/48. DUUUUUHHHH! LOL.
12 June 2019, 00:19
Huey time! I've still got the UH-1Y too. Maybe I should do a triple build LOL!
12 June 2019, 00:35
You know you are getting old when you can't remember what you have. I think I will have to do a Heilo or two after I finish the Viggen.
12 June 2019, 15:13
I actually just found a Belcher 1:48 Lynx while digging for my UH-1Y. Had to add it to my Scalemates stash. I wonder how many other ones are hiding in there?
12 June 2019, 15:31
Great work so far Nathan. Always liked the Huey! One day I want to build a Dutch AB-412 in SAR livery.
12 June 2019, 16:21
Thanks Erik! I've always loved them. My great uncle flew them in Vietnam. My father told me one time he had a pair of them land in our back field to simulate downed aircraft and had his squadron search for them. Meanwhile he and his fellow pilots had a home cooked meal while awaiting "rescue". I think by the time they were found there were like 5 Hueys in the field. I've got to see if he has any pictures...
12 June 2019, 23:41
Looking forward to the SAR bird. I flew Huey's before going to the CH-47 Chinook. They used to say skids were for kids, so I graduated to training wheels. LOL.
13 June 2019, 02:00
We had Huey's at Fort Hood, The range Control had 2, on a huge base full of AH-64's And SHITHOOKS and Blackhawks, NOTHING sounds like a Huey ! Can't wait to see this one done ! *gitty*
13 June 2019, 02:28
Dad was a flight mech on Hueys along with the H-3 and 53. They are awesome indeed. 🙂
Looking great sir!
13 June 2019, 11:27
I really like it, my dream model will be the Kitty Hawk Venom, I hope I can finish it only half as well
13 June 2019, 11:44
Thank you very much for the kind words mates 🙂 The fuselage halves went together fairly well with only the front needing some help. The instrument panel also had some fit issues since the instructions show it fitting at an odd angle, so I decided to install it after putting the halves together instead of before.
13 June 2019, 16:12
Painted the upper windows clear green and after completely drying was dipped in Future. The weather has been extremely wet this week so any kind if painting is hit or miss. Also, the Future turned completely cloudy which was a big scare. Thankfully it transitioned to it's normal clear state after bringing inside to the air conditioned hobby room.
13 June 2019, 23:03
Thanks Clifford!
Upper windows installed even though I feel like they are a bit on the dark side. The AK Real Clear Green performed well again though!
Wow I almost stalled out on this build, but thanks to a little tap from Slavo on another build, I'm back in business! I slowed a bit due to 2 factors. I was awaiting another Eduard seat-belt set for the N Carolina Forestry Huey build. I was REALLY wanting to dual build these, but since the seat-belts appear lost in the mail this just isn't going to be possible. The second reason was just simple burnout from the frantic building and touch ups during the week leading up to the recent PAMSCON contest. I now have settled back down and am ready to continue.
Slavo, you'll probably get to see the Orange used as the main color on this one get laid down on the little Constellation build first so I can gauge how it will behave.
25 June 2019, 23:49
Thank you sir. Just a little work today. I blacked out the inside of the engine area before attaching it to the fuselage.
29 June 2019, 17:56
Looks great so far. The green really isn't too much. Brand new glass looked like that. They somehow faded a little with age.
1 July 2019, 01:47
Thanks Bryn & Slavo! Painted the instrument panel to get ready for install. I was test fitting the front glass and realized I hadn't installed it!
1 July 2019, 17:54
I am quite sure the Ice Pirates would manage without a dash, but I agree the model will look better having it IN😉
1 July 2019, 18:39
Thanks Chris!
Slavo & Clifford: Yes I would have been a bit unhappy having to pry the front windscreen off!
1 July 2019, 23:12
Instrument panel, front windscreen & engine cover installed. Still needs a small amount of filler around the seams...
3 July 2019, 00:19
Thanks Jim & Clifford! Now on to the side doors so I can seal this bird up and start on masking and priming...
3 July 2019, 11:58
Windscreen up nice & clear - take your time - the Orange finish has a lot of potential!
3 July 2019, 12:10
Orange Heilo's are cool. My HH-60 Jayhawk was a pain to paint, but boy did it look cool when done.
3 July 2019, 22:51
Thanks Slavo! To quote the Beastie Boys: Low & slow that is the tempo...
Clifford: Those Jayhawks are nearly impossible to find these days too.
3 July 2019, 23:31
Are they? I believe it was done by Skunk Workd models, was it not. I also have built Trumpeter's Dauphin U.S. Coast Guard, again it is all orange. And I have another in the stash. I soon will be doing a H-34 which will be done in the Navy Artic scheme. All orange also. So you go to town with that orange sir. My next Huey will be a yellow and Red Canadian Forrest service bird, in 1/32 scale.
4 July 2019, 18:02
Still working on smoothing out and rescribing the engine cover. This seems to be the only poor fitting part on the kit...
9 July 2019, 18:43
Thanks Clifford and Stephan!
Small update. Added more parts to the tail. The rescribe is complete on the engine cover too.
13 July 2019, 18:35
Thanks Carsten! I kinda slowed a bit due to rearranging the hobby area. Trying to get back on track!
13 July 2019, 18:50
Coming together so grandly, I can almost hear "Fortunate Son" playing in the back ground ! LOL !!!!!!
13 July 2019, 22:00
Thanks mates! Here's the pic of one side. I've gone back on the other side to do more work because I wasn't pleased with the result.
17 July 2019, 23:23
Well this one certainly looks good enough 👍 Eager to see the orange job😉
18 July 2019, 18:24
Thanks Stephan & Slavo! Some small progress. The rotor blades and skids are complete. The skids on my example had a large mold seam and took some care to get evened out.
25 July 2019, 12:30
Right now the weather down here is really slowing me down. I may have to resort to painting in the laundry room!
26 July 2019, 01:53
Nice & clean - hope the windows fit & quality will be good to get that even surface look on the outside!
29 July 2019, 13:13
Thanks Slavo & Clifford! Apologies for the slow response lol.
With my other project nearly complete I'm taking this one down from the shelf of doom to hopefully complete.
18 November 2024, 01:40
Looking forward to that. I finally got me a Hasegawa Sea King, I really do need to build some of my Heilo's.
19 November 2024, 01:51
Welcome Clifford & Tom
Yesterday I rebuilt the rotor. Apparently I took the completed one from this build and used it on my other Huey. You can see the OD plastic as seen in the other kit.
2 December 2024, 16:43
Yesterday I added the clear parts to all the doors. When cleanup is completed and the doors are attached I can begin the long masking process.
Added a shot if the Draw Decal instructions which have some great inspirational photos of the real aircraft.
4 December 2024, 15:09
Hats off to the regular helo builders. So many clear parts!
I punched one of the clear parts out trying to mask so had to go back and fix it.
5 December 2024, 15:32
Masking of clear parts complete and primer applied today. Now for the fun part 🙂
6 December 2024, 14:38
Yesterday's bench time was halted due to escaped cows in our field. I spent the day chasing large animals and mending fences. 😂
Early this morning I was able to apply the Chrome Yellow stripe and rotor blade tips. As soon as that dries I have another round of masking.
7 December 2024, 15:38
Main colors applied. Looks a little crazy after having seen so many of these in OD and grey color schemes.
7 December 2024, 19:30
Flat Black areas have been painted and the masking has been removed from the clear parts. I have nearly finished the decals and will soon begin the washes and other detail painting.
1 9 December 2024, 14:35
Looking forward to the final, sure is looking great. Which kit is that? I have forgotten.
10 December 2024, 22:43
This one is the old Italeri kit.
I just realized today I need to add that zig-zag antenna to the tail boom. Luckily I saved all the little mounts from the UH-1D build since they are not included in this kit.
10 December 2024, 22:54
Yes, lucky you saved them. They are a pain to install but look nice when done. Thanks for the info. Do you know if they are still around? I have never built a twin Huey.
10 December 2024, 23:00
Clifford: I've seen them on eBay but I'm not sure if any are currently in production.
I've added a pic of the completed antenna. Just need to add exhaust staining on the tail boom then attach the main rotor.
12 December 2024, 00:52
The antenna looks excellent, and I imagine that wasn't easy to do.
1 12 December 2024, 01:57
Thanks Clifford & Jennifer!
Although I'm still tweaking some of the oil paint I'm calling this project complete. I have added more poorly taken images 😂
12 December 2024, 14:50
Thanks Rui & Clifford!
Still not sure how this build got stuck on the shelf of doom. I'm very happy that I finally finished it.
13 December 2024, 14:55
I like those Antartica Helis. Got Draw Decals for two projects and like how yours turned out. Gott job
How about a little snow dio to make the heli shine even more?
13 December 2024, 15:32
Thanks Michael! Hmmm that's a good idea. I need to find a base.
14 December 2024, 19:37
Not sure how I missed this. Great livery, executed extremely well. I love this one.
14 December 2024, 19:41
I'm with Ban, almost missed this too! Love the paint job - getting that shade of orange to work without making it look cartoonish is a skill in it's own right!
18 February, 16:37
Thanks CaptGPF! This poor kit sat on the shelf for nearly 5 years awaiting that orange paint. I'm glad you like it!!
18 February, 17:12
I love the orange; I am very glad you found the time to finish it.
18 February, 21:05
added a new photoalbum.
6 images
de Havilland DH.88 Comet
1:72
Working on interior and checking fit of fuselage/wing joint.


Project: de Havilland DH.88 Comet

18 February, 20:07
added a new photoalbum.


27 31 January, 15:52
Looks very good. The idea with the masking tape for the wingbags is great!
1 15 February, 16:58
Thank you guys and welcome. Hope I live up to your expectations.
I have noticed that there is a completely missing part on the kit. But it is clearly visible on the real airplane. Have a look here: airliners.net/photo/..ornado-ECR/5002301/L
You can see an attachment on the underside at the front next to the nose gear doors, which is pointed at the front and has white dots/sensors. I will probably have to rebuild this. Does anyone know exactly what it is and what function it has?
18 February, 13:17
added a new photoalbum.
47 images
Avro CF-105 Arrow (Hobbycraft)
1:72
The characteristic nose high attitude of the Arrow (a bit exaggerated by the camera angle).


Project: Avro CF-105 Arrow


 1+
1+ 14 18 January, 15:15
This is the third generation tooling from Hobbycraft. The first two were pretty bad, but they improved a lot with this one. The size, shape, and profile of the fuselage matches drawings quite nicely. Still, there is room for improvement. Some tips if anyone is building this bad boy:
First, the part numbers in the instructions bear no resemblance to reality. Pretty much anything labelled sprue A is actually on D, and vice versa. The actual numbers are wrong as well, so you really have to pay attention and make sure you have the correct part. How does a company make such a mistake? Second, there is no front coaming. The real aircraft had one, and it's really skinny to fit inside that wedge-shaped windscreen.
Third, in David Winter's build review on ARC, he mentions that the decals for the front and rear instrument panels are backwards in the instructions and should be switched. This would make perfect sense based on the shape and location of the instrument panels as shown in Step #2 being placed into the cockpit. Those locations are, of course, where I glued them. However, the fuselage halves would not join together properly due to interference with these panels, and I resorted to some significant sanding, re-profiling, and modification. It was only after I finished that I realised it's not the decal placement that is backward, it's the location of the panels! What they showed as the front should really be the rear, and vice versa. When I finished re-shaping the rear panel (that I had glued in the front) it looked just like the front panel (that I had glued in the rear). Of course, I then had to modify the front panel glued in the rear to look like the back panel glued in the front prior to my mods. Did you follow that? Look at the panels at lower right in picture 5. Hobbycraft have you use the one on the left in the back, and the other in the front. Now look at my cockpit (after all those mods) in picture 13 - see what I mean?
More to come...Cheers, Bill
18 January, 15:46
Wow, the famous last edition by Hobbycraft, as often seen as the yeti - will follow
I'll have to stick to the 2nd edition and need still to source the decals
1 18 January, 18:34
@Łukasz Gliński - as rare as the Yeti, for sure. I bought the kit when it first came out back in 2012, hoping that it really was a new tooling as stated on the box. Lo and behold, it was! I've never seen it since in any hobby shop. I figured I would take a chance on it, because it's only money, right? Cheers, Bill
18 January, 20:23
Lucky you! I envy a lot 👍
I don't think it ever made it to Yurop via official channels
18 January, 22:02
I've added a few more photos. I cut out the inboard flaps as I wanted to have them drooped a bit. I noticed that the cut lines top to bottom didn't align and thought I'd made a big mistake - the bottom hinge line was at a different angle to the top. I taped everything back together to see how big of a fix I was looking at, but everything looks fine (see photos). 3D geometry flummoxes me again! Cheers, Bill
21 January, 14:11
Hi mates, I've uploaded some more photos that show how I've fixed the issue of the kit having no wing anhedral. Have a look and tell me if I'm crazy or not. Cheers, Bill
22 January, 22:05
Bill, great topic! Have you seen this one? As I understand he offers parts to improve the HC kit, too: britmodeller.com/for..ase/#comment-4787800
23 January, 12:00
@Bernd - Yes, I have been communicating with Zsolt regarding 1:72 versions of his amazing CAD design, specifically the open canopies. He is concentrating at present with the 1:48 scale version since he has many orders for that. He intends to produce a 1:72 version in due time. He is not able to provide the canopies for me at present, since these require more than just 3D printing in order to be perfectly clear. For the larger versions he used the 3D printed parts as masters, polished and clear-coated, and used them to pour clear resin copies.
Anyone with an interest in the Arrow should take a look at what Zsolt has accomplished by following the link in Bernd's post. Cheers, Bill
23 January, 14:45
I've added a few more photos. Lots of putty and reworking of parts - fun, fun, fun. Cheers, Bill
1 18 February, 15:02
added a new photoalbum.
5 images
Sherman M4
1:72
Today I added some light green to the exposed areas. Hope that it will be light enough after the washes.


Project: Sherman M4 - 774th TB maybe...

6 3 February, 21:28
Not sure if it matters to you, but this is an incorrect Sherman variant for North Africa 🙂 The model basically represents a tank produced in late 1943 or 1944 (large driver's hatches, trailing return rollers, loader's hatch, wide gun shield, stowage rack on the rear hull, gun travel lock, and more) when you would need one from 1942 to be correct for a British or American tank in North Africa.
1 4 February, 16:26
Jakko, thank you for your comment, I really appreciate it. I was searching a lot, but I missed these details. I think the hull's shape tricked me. The box also contains North Africa painting suggestions, maybe the assembly is different. (I got this kit in assembled state, so don't have the chance to change. Unfortunetly, I have limited time currently, but in this case I will change the model painting for an other, but historically correct one. Do you have any suggestion where to search for good references and pictures? Thank you again. These kind of comments are welcomed! 🙂)
1 4 February, 18:05
I think the instructions include North Africa paint schemes because the kit is old enough that it dates from when people didn't care that much about these things 🙂 The difference between early and late Shermans with a cast hull is more difficult to spot than for the welded-hull types, especially when the hatches are closed.
Your best option would be an American tank in France or Germany, in late 1944 or 1945. Only 100 of these exact tanks (cast hull with large hatches and a 75 mm gun) were actually produced, and to make it worse, most of them were converted to Duplex Drive (swimming) tanks. Some of those were then "unconverted" back to normal tanks … If you look at the third set of photos on the.shadock.free.fr/..a1_largehatches.html you can see two pictures of such a tank. But as this kit is pretty inaccurate anyway, I wouldn't care too much about that if I were you — paint it olive drab with American markings on it, and you'll basically be safe.
1 4 February, 18:29
Yes, this is an older kit. Thank you for the photos, looking similar. There are differences, but I can live with that I think. 🙂 I will spend some time to find a good looking one with markings, which looks like mine more or less, just to be as accurate as possible.
2 4 February, 20:07
Not sure what kit's plastic is depicted in the 'What's in the box?' image but it is certainly NOT a Phantom! LOL
")
25 June 2024, 07:14
added a new photoalbum.


26 26 January, 10:06
Cool!👍 Im also building one of these but as a PoAF gunship used in the Portuguese colonial wars in Africa.
27 January, 02:05
This cabin has sent two models to the trash so far. I can't handle it. I did the first one with classic glue. I tried the second one with Micro Kristal Klear first, it didn't work. Then I ruined it with MC-131 Mr. Cement SP. Now I've prepared Micro Weld. What did you glue it with?
7 February, 10:54
Живко Джаков: nothing special, I did it with Revell Contacta Professional glue.
7 February, 11:31
I can really recommend white glue (wood glue) for clear parts. It does the job, will dry clear and can be removed without any issues when you´re not happy with it.
1 7 February, 17:28
Hajo Lippke: yes, I've heard about that too, but I could produce decent results with acetone-based glues when I paid enough attention. I like challenges, anyway. 🙂
7 February, 19:13
Thank You all; to be honest, I still have to improve on the handling of the glue.
14 February, 19:30
I think you are doing a great job with this difficult kit! I find acrylic glue (like Gator's Grip Thin Blend) to be perfect for transparencies. It can even be wiped off with a moist cotton bud if it would go somewhere where it shouldn't without ruining the transparent part. But regular Tamiya Extra Thin cement is great too, you just shouldn't use the brush on the lid but some kind of applicator, like a sewing needle with the eye nipped off to form a tiny "prong".
14 February, 20:19
Thomas Kolb: thank You! The ugly thick "line" on the front left and top of the transparent part is not paint, it's glue and my clumsy hands. I paint transparent parts with my smallest brush, and if paint goes anywhere it shouldn't, I remove it immediately with a toothpick; this method usually works.
14 February, 20:32
Anyway, I don't find this kit too difficult, it's just old, with all its advantages (nice fit, simple construction) and disadvantages (poor on details, raised panel lines, but these mean no real problems for me). Just little free time and even less patience, and I don't want to ruin it either in a hurry or anger.
1 14 February, 20:39
I believe the Brands "Dragon" and "Shanghai Dragon" are the same company.
The following link shows the box of a model on the "Dragon Models" website (which the "Dragon" brand links to), which shows the "Shanghai Dragon" logo:
dragon-models.com/d-m-item.asp?pid=DRA7033
I suggest merging the two brands and either having it be named "😭Shanghai) Dragon Models" or use "Shanghai Dragon", "Dragon" and "Dragon Models" as aliases if possible.
18 February, 20:23
added a new photoalbum.


8 17 February, 21:09
Great job.
Another rare plane of Mister Dujin, a missing french artisan.
Thanks for sharing.
2 18 February, 09:55
An unusual model. I hope some manufacturer releases this and the rest of the family in plastic.
Great job 👍
Congrats!
1 18 February, 19:30
Thank you, well has i've got many resin kits of the Potez 560 familly in stock.... I hope that others manufacturer will take a long time before...
18 February, 20:21


added a new photoalbum.
50 images
Tugboat Jean Bart
1:200
View on the port bow


Project: Seagoing Tug Jean Bart


50 21 October 2023, 15:13
Hello Treehugger,
I bought them on the site of Naval Models itself, this set should still be available, although the stock is limited
navalmodels.com/
21 October 2023, 18:00
Q: Is there not supposed to be railings on top at the back in photo 3? Just below the mast structure.
22 October 2023, 17:29
@ treehugger, yes indeed, it is one of the few pieces of PE that I still have to add
Guy, welkom, take a seat,
23 October 2023, 05:58
I've been working on the details to make it all look a bit more realistic, I hope to get busy with the airbrush very soon.
11 November 2023, 16:35
I had hoped to be in the painting phase by now, but no, still adding detail to it. I didn't have the time to do much, as other things kept getting in the way.
9 January 2024, 09:41
Well doesn't time fly. It's been months since I gave you guy's an update on my Jean Bart. I have been working on her, but only in short sessions. This gave me the impression that I was getting nowhere with this one. Then came along the Plastic & Steel show where I had the opportunity to work on her for two full days, and lo and behold she is close to getting finished. Just adding the last details know, than some weathering, clear coat and windows and clear parts and done.
Hopefully next update very soon…
21 October 2024, 20:24
I think it was time well spent, seeing how impressive your rendering of this tug is at this stage!
2 November 2024, 18:23
Thanks, Mike, It is indeed a far cry from the original kit, of I may say so my self.
2 November 2024, 18:33
When you are finished, perhaps you can do a review on the PE set to correct or add to the instructions, in reference to photo #29. Great build so far ❤️️
2 November 2024, 19:59
Yes, I'm finaly back at this one, took me long enough. Painting and weathering are al done, next step will be a matt coat and than windows, rigging and final details.
I can almost see the finnish flag, well actualy the Frensh one in this case.
23 January, 09:33
Is it still possible to order this, with Shapeways gone?
")
Bell 412 conversion kit
3D Boats 1:32
WG3AW9FEP 18 February, 20:07


added a new photoalbum.


5 8 January, 07:50
Hi Uncle, is this 3D printing or sheet plastic? If printing, could you share the STL? I'm also a fan of Leclerc)
18 February, 20:04
added a new photoalbum.


10 18 February, 15:50
Great result! It would be nice if you rotated some of your photos.
1 18 February, 16:10
Nice work.
If you go to 'Manage' and the 'Advanced options' you can change the orientation of your photos.
1 18 February, 16:26
added a new photoalbum.
3 images
Airfix Curtiss Hawk 81-A-2 2011 tool 
1:72


Project: Airfix Curtiss Hawk 81-A-2 2011 tool

5 26 January, 19:34
This is the first of two Hawks that I will be building, this is the 81-A-2 as flown by the Flying Tigers by US volunteers in China. 🙂
26 January, 19:37
Made a start on this aircraft, the interior colour is Vallejo Model Air US Interior Yellow. 🙂
Welcome CaptGPF & Thomas, great to have you along. 👍
Many thanks mates for your interest and likes J35J, Jean, Duster_d & Jun Chung. 👍
16 February, 16:30
Main part of the fuselage put together and wing tops added to the bottom. 🙂
Many thanks mate for your interest and like Franck G. 👍
18 February, 15:58
added a new photoalbum.


42 1 October 2024, 18:06
A beauty! Not the best design in terms of pilot visibility though 😉
1 18 February, 18:37
I agree. I think this was a "test run" of the coaxial design.
18 February, 19:01
added a new photoalbum.


45 3 October 2024, 19:04
I love these builds and this is a really excellent scratchbuid construction of an interesting helicopter. Hats off! 👍👍👍
4 October 2024, 17:15
/search.php?q=*&page=newsfeed&fkSECTION[]=Newsfeed
search-solr.php?lang=en
35
35
/search.php?q=*&page=newsfeed&fkSECTION[]=Newsfeed
35
todo