
Newsfeed
")
")
heeft een nieuw fotoalbum toegevoegd.


49 25 August, 10:13
These four pictures begin a project that should result in one of the largest models I have ever attempted. Not the biggest - the 1:32 Liberator holds my record here - but close!
However, the impressively large box contains surprisingly little and, also surprisingly, large components such as the fuselage, wings and tailplane are already assembled. Incidentally, these are made of fibreglass and require their own treatment.
These parts are also stable and clean. A bit of filling was required, as the traces of glue and filler on the seams are very rough and show air pockets. This will now be sanded, the cockpit sawn out and the windows drilled - well, modelling a little differently than usual! 🙂
25 August, 10:20
The panel lines look ok I guess. I mean, I would be happy with those panel lines.
25 August, 11:26
Like it , nice project.
I'm working on the Beriev Be-6 Armoured Flying boat,
Revisiting a kit after 33yrs.
All the best with yours...😃👍👍
25 August, 11:52
A true behemoth it is. I will surely follow this build with utmost interest!
25 August, 13:15
Looking forward to seeing this take shape. 🙂
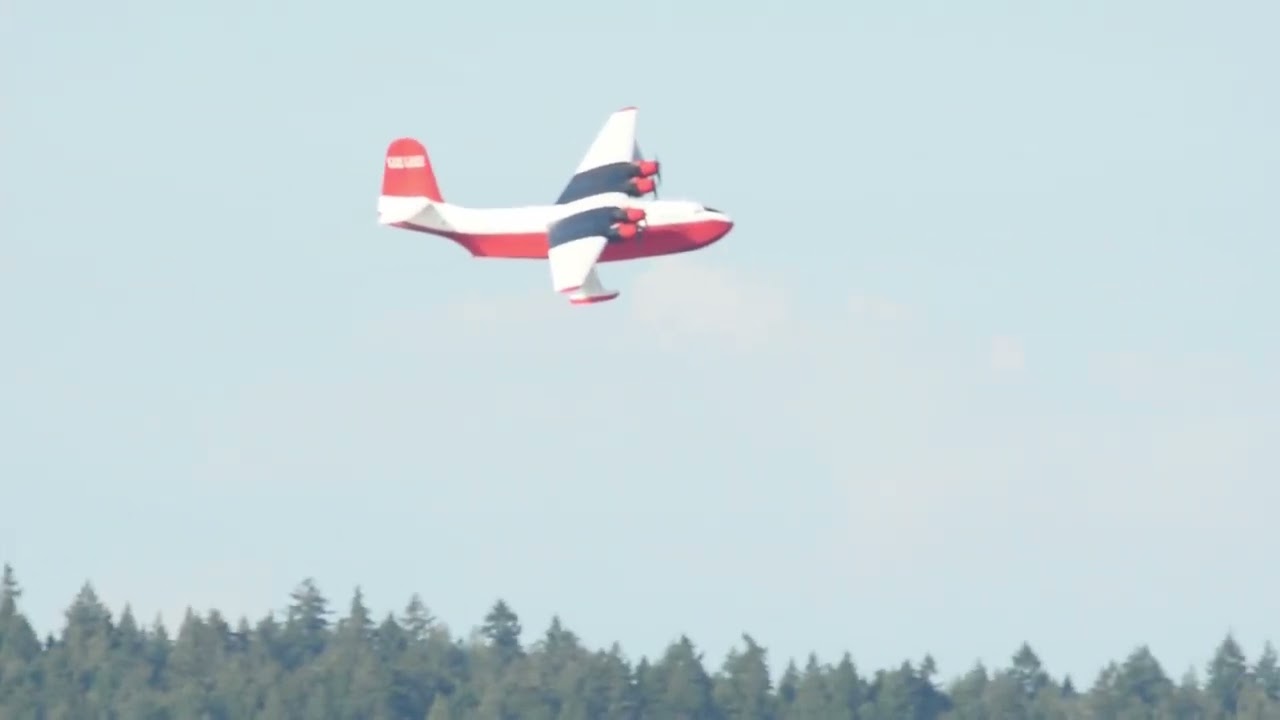
I believe the last Mars had it's final flight two weeks ago.
Youtube Video
Youtube Video
25 August, 13:22
I am very happy about all your interest! In fact, I also started this project because of its topicality; the pictures of the last flight of Hawai Mars are always a heart-warming pleasure; this one in particular, thanks Gorby for posting it!
Today I drilled the openings for the windows in the fuselage; I determined the diameter of the holes from kit glass parts. They seem a bit big to me, but we'll see. As I'm not going to use the clear parts from the kit, but want to make them with Klearfix, I could reduce the diameter quite a bit.
The next steps will be to finish sanding the fuselage seams - now only the top side has to be done - and then to glue the wings and stabilisers to the fuselage. To do this, I'm cutting solid steel rods to length, which I'll glue in place with a two-component adhesive.
The Mars should be ready by mid-October: I want to take it to the Euromodel in Ried, Upper Austria.
And yes, In fact, the more or less finished Fairchild F.91 had to serve as a scale model in the background! 🙂
25 August, 14:11
Du bist echt eine Bau-Maschine, Roland! Und immer kommt etwas sehr schönes raus! 👍
25 August, 14:26
The construction of Mars is progressing: I'll show you a few construction steps in a little 'time lapse'. Attaching the wings and tailplane with 2k glue worked well; the materials could be sanded smooth and fine afterwards. However, the brittleness of the fibreglass caused some difficulties; parts kept splintering off and had to be filled, sanded and re-engraved. As I always do the whole thing standing up, wearing a mask and under running water, this always turns into an almost athletic exercise 🙂 But now it seems to be over and the Mars is ready for its first encounter with colour... I took the two crew members under the cockpit canopy to make the proportions clear and to keep my options open for presenting the finished aircraft - who knows, maybe it will take off or fly?
29 August, 07:38
It's a bit of a monster! 😮
Doesn't look like an easy build but you seem to be beating it into shape. 🙂
29 August, 08:57
Wow... an unusual and gigant model... It seems like fiberglass is difficult to handle.
Great job so far, Roland!
29 August, 19:49
Thank you very much for your motivating feedback and your interest, mates!
30 August, 10:50
I have to follow that behemoth 👍 I don't think I'll ever find enough space to build one myself 😄
30 August, 11:00
My goodness, your models are just getting bigger and bigger! I cannot wait to see it finished!
30 August, 12:04
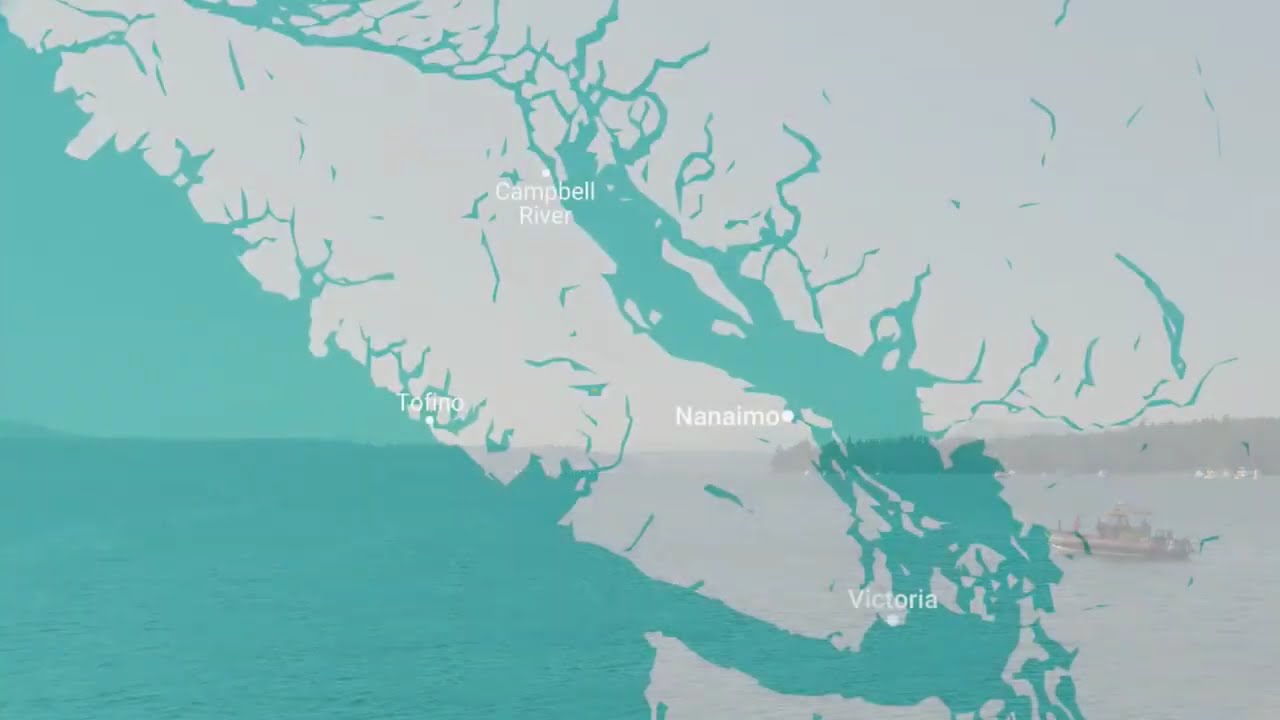
Following as well. Just saw its retirement flyby and landing in Pat Bay, Its Huge.
31 August, 13:19
Fortunately, the Martin Mars has reached the stage where the colouring and surface design will be the main thing; so far I've been 'plugging holes' again and again: the fibreglass surface proves to be quite brittle, damage is difficult to putty, and when re-engraving the lost panel lines it quickly happens that it cracks again under the carefully guided scalpel blade - and a new hole has already appeared. The new pictures show a few such construction sites, for example at the bow under the cockpit glazing or on the back of the fuselage between the wings.
But, all in all, in retrospect it's all half as bad, now I'm looking forward to the paintwork!
Thank you, mates, for your interest and feedback! Ray, I would have liked to have experienced that too!
15 September, 18:24
Roland, I was unaware of these problems with fiberglass and it is a shame that these kits are so expensive considering the quality of these materials. I think the worst is over. You can feel proud of the work done so far. The effort was worth it. Go on!
15 September, 18:31
Those are encouraging responses, yes, Cuajete, I think so too. Thank you both for your interest and comments!
15 September, 18:33
How big is the model??
Is it cast in fiberglass because it's to big for injection molding??
Nice to see the update 😁👍👍
The vent in behind the cockpit done now.
15 September, 18:50
Thank you friends! The Mars as a 72 model measures 84.5cm in wingspan and has a length of 48.5cm: huge, but not so huge that it couldn't have been made into an injection moulded model. The B-24 Liberator from Hobby Boss in 1:32 that I built this spring, for example, was significantly larger and yet still injection moulded.
What is now proving to be a challenging issue is that the acrylic paint I used does not seem to want to adhere properly to some parts of the resin fuselage and wing panels, even though I have meticulously and accurately cleaned the surfaces. And another thing: after I sprayed a first coat of white paint on the fuselage today, something became apparent that hadn't appeared before: the resin surfaces are covered with small air pockets, i.e. holes.... 'Much enemy, much honour' as they say in German! 🙂
17 September, 06:20
What are you using for primer? I almost always use tamiya spray primer as it usually adheres even to challenging surfaces. I have had trouble occasionally on some resin surfaces where I've resorted to krylon plastic compatible spray paint as a primer.
17 September, 11:59
That's a good question, thanks for the tips: I used glossy black acrylic paint here as usual - it actually looked quite good until yesterday, after a few days drying time, I started to mask off the black areas on the undersides of the wings....
I think I'll just carry on with Gunze and Tamiya acrylic paints - and touch up where necessary.
17 September, 17:07
Der aktuelle Zustand der Mars in Weiß hat noch nichts mit der finalen Oberseiten-Farbe zu tun, sondern bildet nur die Basis für das Rot der Unterseiten. Aktuell erstrahlt die Mars sogar in leuchtend Gelb: Dies sollte die Leucht- und Deckkraft des folgenden Rot noch weiter stärken. Der Aufwand wird allerdings dadaurch erhöht, dass immer wieder Spachtel- Schleif und Gravierbedarf auftaucht: die Resin Oberflächen sind äußerst uneben und voller kleiner Lufteinschlüsse, ein echter Jammer. Aber ich bin zuversichtlich, dass mit der steigenden Stärke der Lackschichten auch die raue Oberfläche etwas mehr Geschlossenheit zeigen wird!
21 September, 16:53
Sapperlot! I only wrote the text in German yesterday: here it is in English:
The current state of the Mars in white has nothing to do with the final upper side colour, but only forms the basis for the red of the undersides. At the moment, the Mars is even shining in bright yellow: this should further enhance the luminosity and opacity of the red colour to follow. However, the effort is increased by the fact that there is always a need for filling, sanding and engraving: the resin surfaces are extremely uneven and full of small air pockets, a real shame. But I'm confident that as the thickness of the paint layers increases, the rough surface will also show a little more unity!
Thank you very much for your encouragement and motivation! Yesterday I mentioned that Mars has now been coloured yellow as the last stage before the red - here are the pictures!
22 September, 09:55
Thank you Cuajete!
....and now in red! It's getting really exciting for me now. Not just the question of how I'll manage the masking for the white upper sides, but above all whether the colour under the adhesive strips will stay on them or - hopefully - on the model when I peel them off!
24 September, 06:26
I'm sure it does, Roland. That Mars looks great and the red color looks great.
Is the stand underneath included in the kit?
24 September, 18:59
Thank you! Yes, that's him. Doesn't necessarily look much, but is very useful when building
25 September, 13:15
Hi Roland 👋.
Is it heavy? Being fiberglass ?
I've read about the difficulty you had with Glass resin!
My dad used to make parts for race bikes ....and air bubbles very hard to avoid! Also cutting against the grain....tends to pull other strands.
Your getting to a better stage now and it's coming on nicely now...
I thought it was the Goose at first glance.. earlier in build.
Good luck with rest.👍👍
25 September, 13:43
Thank you both! Somehow it is really comforting and above all interesting that I am not alone with the problems with the fibreglass surfaces! Yes, the construction is fairly heavy, but above all it needs enough 'air space' above the workbenches when it is swivelled to get everywhere with the airbrush! 🙂
Well, the 'Spruce Goose' is still a dream - but one with a chance of realisation!
26 September, 05:28
The time has come! Now the layers of paint under the masking have to prove that they can adhere to the fibreglass surface and want.... prognoses say it will all be possible! In the meantime, the white has been applied to the surfaces, which definitely looks good on the Martin Mars.
4 October, 06:56
Thank you for encouragement!
I would like to show you the condition of the Martin Mars this morning: The red and white areas survived the masking quite well, only small areas had to be touched up with brush strokes, but the black areas on the undersides of the surfaces, on the other hand, remained generously on the adhesive tape. I masked them again straight away - I now trusted the red areas surrounding them - and sprayed over the black, applying a first coat of glossy clear varnish over everything in the same session. Now I have to break up the red and white edges on the fuselage with a cloth, well, the white always builds up beautifully... Maybe I can try out the decals tomorrow!
5 October, 09:35
It looks spectacular, Roland! Fingers crossed and looking forward to seeing the result. 👍
5 October, 17:03
Thank you very much for your encouragement and motivation - much appreciated! I'm all the more pleased to be able to show you the Martin Mars with decals! The decal material was anything but easy to apply and in some parts - with the red stripes - it broke into numerous stripes, but I'm all the more pleased to be able to show you the pictures of a reasonably well-marked Martin Mars! The engines and floats have been under construction for some time now and will soon complete the Martin Mars as it approaches the finish line.
6 October, 16:34
")
")
")
")
")
is eigenaar van dit item
")
Martin Baker Mk.2H Ejection Seats for Hunter
True Details 1:48
48423 6 October, 16:32
")
heeft een nieuw fotoalbum toegevoegd.


44 1 October, 22:43
Oh that looks amazing, so much variety in color and little details, great markings. Beautiful paintjob and subtle weathering as well👍👍
2 October, 06:17
")
")
heeft dit item voltooid
")
Minneapolis-Moline MT-40 Tow Tractor US Navy/US Army/Civilian
Aerobonus 1:32
320 123 6 October, 16:30
")
heeft een nieuw fotoalbum toegevoegd.


12 24 September, 12:55
Texas hurricane is underway let the fun begin!
Sorry for inverted pics cant get rotated🤠
28 September, 19:13
Rotation is well hidden. To rotate your photos, open your album. Click on "manage". Then turn on the "advanced options" toggle. You will now have the ability to rotate photos in the album.
29 September, 00:07
I reworked the main jib boom
I wasnt feeling the kit one
Its still a work in progress
2 October, 21:03
Thank yall
Im not a rivet counter or anything but.....
The more i looked at the kit boom i could not figure how it would work ..
Revell had their boom right im also going to support mine as they did and use poles instead of ratlines. Which tie down inside of the work area ?
Im not feeling that one either lol
Again thanks
2 October, 23:14
Oooohhh... so nice 🙂
A Lindberg kit? Seen them but never got one, yet. That looks amazing.
3 October, 12:21
Started out life as a Pyro Plastics kit which in turn was a reverse-engineered copy (pretty much a blatant rip-off) of the Model Shipways wooden kit of the M.T. (Motor Trawler) Hildina H-222 which was built by Cook, Welton & Gemmell Ltd. in 1951. If you look for photos, you will see it matches the Hildina except for some artistic license in the pilothouse windows mainly but an easy fix. The sloped rear pilothouse roof is also a distinctive feature of the Hildina. Apparently the front boom can face forward or aft (is it on a swivel?) according to need. I know the boom was used to hoist the cod end (heaviest part of the net) aboard. These kits are a great basis for conversion to R/C as the original plastic kits were motorized.
4 October, 14:31
The details on this kit are so crisp. Looking forward to seeing what you're doing to the rear section.
5 October, 04:18
@M0rce I thought you meant where the deckhouse meets the wrap-around stern section; there's a bad gap there where the aft doors are, port and starboard, but maybe you meant the rear mast. Some trawlers only had a foremast and added a simple derrick to handle the lifeboat.
5 October, 16:12

is eigenaar van dit item
")
Kenworth K-200
A&N Model Trucks 1:24
ANMT 63 5 October, 09:01
Preferably the stages of the build and completed model? I do like a K100, but seeing this, makes me drool
6 October, 16:27
")
")
")
 (DSPIAE SS-C01)")
")
")
is eigenaar van dit item
")
Self Adhesive Sandpaper Set 1 includes 20 each of MSP-180, MSP-280, MSP-400, MSP-600, MSP-800
DSPIAE
SP-S01 6 October, 16:24
")
heeft een nieuw fotoalbum toegevoegd.


4 11 August, 08:01
I'll get some more pictures up, later today, but basically this is something that I've always wanted and finally got the chance to have.
I printed this myself, after purchasing the files. I have to admit, these are bloody amazing files. I had a few hiccups during printing, and this was narrowed down to a corrupt flash drive. I can't wait to get this one done and on the shelf.
11 August, 08:07
I shall, Martin. Just need to get back in the cave and take some. I can tell you that the chassis is very good. It lines up almost flawless.
2 October, 07:45
@martin. I bought some ABS-like, transparent resin, so I could use it for clear parts. What you see is, 2mm thick clear. I've not tried it any thinner, but for my taste, it's not good enough to use as glass for cab windows, etc? However, I'll give it a try, soon, just for a sample. Even i can be wrong, sometimes?
5 October, 23:24
You're not wrong, you tried something new that didn't work out as hoped. No shame in that!
6 October, 07:16
How have I missed this?
Wow Bozzer that is awesome. I agree with Martin it does look strange in that colour. At first glance I thought it was bread dough!
6 October, 08:34
The original mistake was how I orientated the print. Also, I cured it in my machine. On the second attempt, I cured it slowly by sunlight and started assembly before it was fully cured. That turned out better, because I was able to get a better joint and the Super Glue held it better. Still a little filling, but a much better result. My plan is to light sand everywhere, then apply a filler/primer. I need to source this, but I will.
You boys will appreciate this....
The wife walked into the new cave, and stopped talking!
She's now aware of the stash that I've accumulated, during her absence. She said that I must have spent a lot, on kits?
I told her that they're cheaper than hookers!
When the swelling goes down, from my black eyes, I'll start modelling again!
6 October, 16:24
is eigenaar van dit item
")
includes 20 each of MSP-1000, MSP-1200, MSP-1500, MSP-2000, MSP-2500
Self Adhesive Sandpaper Set 2DSPIAE
SP-S02 6 October, 16:24
")
")
")
/nl/search.php?q=*&page=newsfeed&fkSECTION[]=Newsfeed
search-solr.php?lang=nl
35
35
/nl/search.php?q=*&page=newsfeed&fkSECTION[]=Newsfeed
35
todo