

Work in progress


Dry fitting of the instrument panel.

First drops of glue used 🙂

That's all I got for now. Need thinner brush or bigger scale 😉

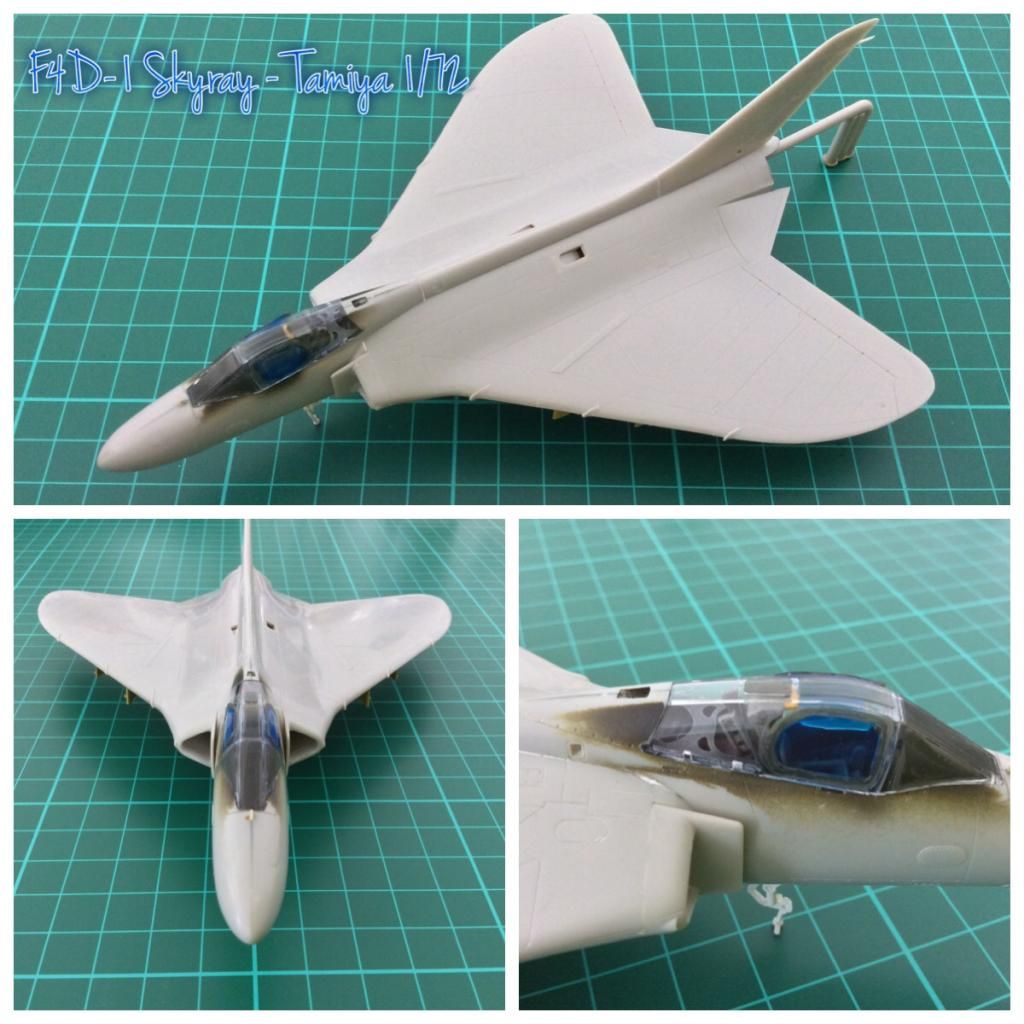
Time to seal the cockpit.

Time to seal the cockpit.

Time to seal the cockpit.

Time to seal the cockpit.

Time to seal the cockpit.

I would like to call this a repair. Next time I will be more careful with the clear coats.

I would like to call this a repair. Next time I will be more careful with the clear coats.

I would like to call this a repair. Next time I will be more careful with the clear coats.

Three Green for the rescue! I couldn't use lead pellets here so this sticky lead stuff came handy. Thanks to Uschi van der Rosten for this sweet product!

Front fuselage glued together.

Tiny PE part in the front gear well.

Nothing fancy here. F.O.D.s to the rescue! 🙂

I love this part. Real LEGO.

I love this part. Real LEGO.

Six hours of playing with these.

Surfacer

Surfacer

Surfacer

Surfacer

Surfacer

Here's my first preshading ever. Done with shaking hands.

Here's my first preshading ever. Done with shaking hands.

Here's my first preshading ever. Done with shaking hands.

Color preshading.

Color preshading.

USN White coat.

Playing around with the black.

Playing around with the black.

Playing around with the black.

Air intakes masking.

Result 🙂

Result 🙂

USN Light Gull Grey coat.

USN Light Gull Grey coat.

USN Light Gull Grey coat.

Corroguard and some post-shading.

Corroguard and some post-shading.

Gear wells and corroguard on the leading edge.

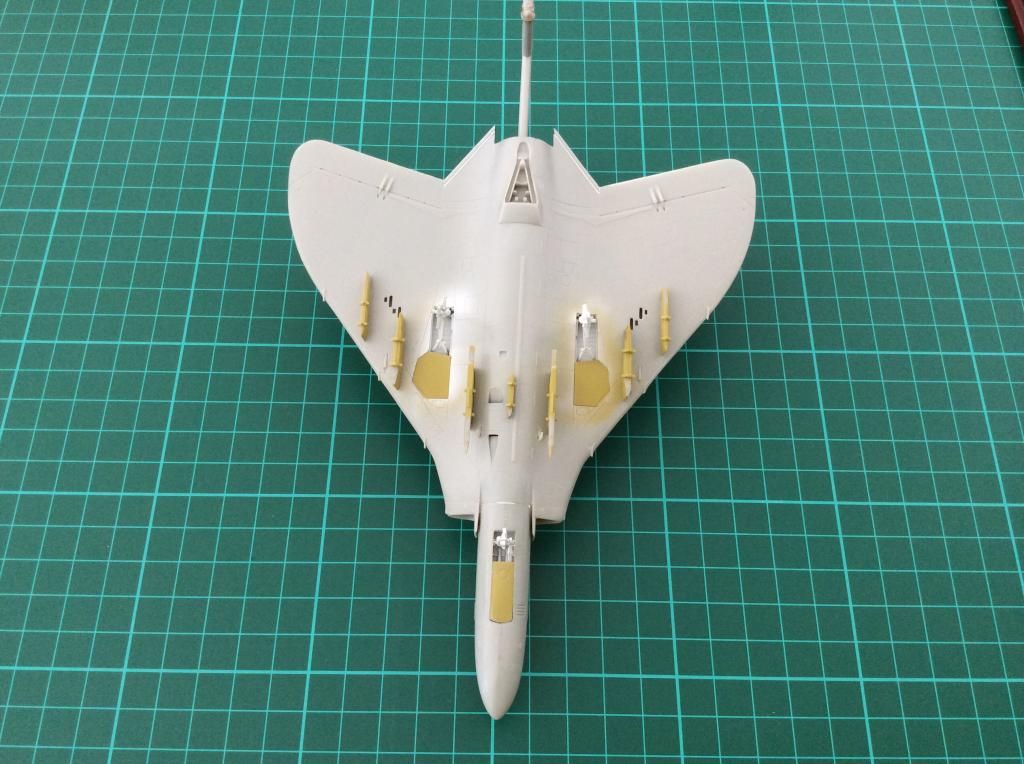
Ordnance WIP

Gear legs WIP.

The Walkways: Making of 🙂

The Walkways: Basic Black coat

The Walkways: Masking of the black outlines. Next time I will use 1 mm Tamiya tape or custom made die cut masks.

The Walkways: Hemp with a drop of white coat.

The Walkways: After a first batch of repairs - first attempt was horrible - thick outlines, bright color of the filling. I've masked outlines, preshaded the edges and panel lines and applied Light Gull Grey (same as the top camo color).

The Walkways: Second attempt was much better although I had to make the outline thinner on two spots. Then I've noticed that corroguard on the port side is ca 3 mm short, so another batch of repairs 🙂

The Walkways: Here's the result. I'm happy with the non-rigid filling, looks more natural. I also finished some details on the gears and ordnance.

Gloss coat before decals, right-of-way lights, tiny parts wash. Waiting for die-cut masks.

Gloss coat before decals, right-of-way lights, tiny parts wash. Waiting for die-cut masks.

Gloss coat before decals, right-of-way lights, tiny parts wash. Waiting for die-cut masks.

Die-cut masks applied, blue coat today 🙂 Hopefuly.

Coat of blue 🙂

I'm done with the masks. Now the gloss varnish and decals.

I'm done with the masks. Now the gloss varnish and decals.

I'm done with the masks. Now the gloss varnish and decals.

I'm done with the masks. Now the gloss varnish and decals.
Opmerkingen
3 July 2014, 17:09
good luck for the build, you will see, the pieces come together nicely.
actually i'm currently building this model and about to prime it.
4 July 2014, 22:23
@Vincent Thank you mate. Good luck for you too. Would you share some pictures? 🙂
5 July 2014, 05:55
I thought to post pictures after completing the kit, but here you have:
[img1]
[img2]
5 July 2014, 12:08
I'm watching. How is the kit? Have wanted to build that one forever.
6 July 2014, 02:53
@Vincent Wow, it takes a shape already. I'm not even remotely there. Looks great so far mate 🙂
@Clifford Tamyia has to be some branch of LEGO, that's what I am thinking about since the first dry fitting😉
6 July 2014, 05:31
@Clifford That's my 1st Tamiya kit and i'm really surprise to see how well the pieces fit together.
@David Nice detailed cockpit so far, what kind of glue did you used for the photoetched instrument panel?
I would like for the first time to "bleech" the paintjob but I don't know how to deal with the white underside. Should I start with a light white/gray coat and then paint the center of the panels with white or use a different technique for those white areas?
6 July 2014, 08:29
@Vincent I used small drops of super (cyano) glue. There's not enough room for every PE part in the Eduard's set tho. I suppose that the seat has wrong shape either. I'm 100% sure that this is my last 1/72 kit with such detailing 😄 I have no experience with the bleaching, still learning 🙂
6 July 2014, 08:59
Great work... and GREAT choice!!
One of my all time favorite: I already built 6 and started the 7th!!
Can't wait to see more.😉
6 July 2014, 10:28
Thank you mates! I'm not very pleased with the cockpit finish, but that's all I got at this moment.
6 July 2014, 19:52
I can't believe it's more than month that I posted last picture in this album. I've done some work since then - prepared all remaining parts for surfacer application which is now done and I am about to make some preshading. I wanted to mark some rivets but the test results were not satisfying as I expected so I'll leave it for the bigger scale 🙂
27 August 2014, 11:07
True colors 🙂 Now I'm about to mask and airbrush the walkways, gears and gear wells. There will be also some aluminium finish on the leading edges of the wings.
1 September 2014, 11:45
Tamiya's FORD is a sweet little kit, and you're doing a great job! The worst part of this kit are the decals. When I built mine, the decals needed gallons of solvent to settle down, and I mean the strongest solvents I could find, like Mr. Mark Softer undiluted. They eventually settled down, but it was not a pleasant experience. Plus, they tended to stick immediately when applied, and were hard to move around for final placement. If I were to do this again, I would get an aftermarket decal sheet.
1 September 2014, 13:02
Thanks for the heads up Bill. I've decided to airbrush as much as I can because my friend warned me. Unfortunately I've also decided to make this Skyray in the marking of VF(AW)-3 which means large decals. Luckily, I have two sets of the decals. Wish me luck 🙂 And thanks for your kind words.
1 September 2014, 13:06
Same markings that I chose! It's one of the nicest Skyray schemes, I think. Here's one thing you could try, if you want to airbrush as much as you can: Mix up a blue that matches the decal for the vertical tail, and then paint it on, including the spine. Cut the individual markings out of the decal sheet (even the stars) and place them on one at a time. Crazy! Believe it or not, that's what I ended up doing! Matching the blue was the hardest part.
1 September 2014, 13:29
Slowly getting there. Applied corroguard on the leading edge, paintjob done on the nozzle and the nozzle rim, gears and gear wells. Used Eduard's BRASSIN AIM-9B (WIP) and some stencil drybrush on the gear legs.
5 September 2014, 07:37
Awesome! Nothing more to say... Ok maybe that I'm a little bit jealous of you skill level as a "beginner" 😛
5 September 2014, 07:42
Can you tell me who the kit was so far? Is it "good" to built, because I saw this kit at Ebay yesterday and was seconds away of buying it!
5 September 2014, 07:47
It's Tamiya, which is japan word for LEGO😉 There's minimum to none filing and sanding, it goes together very well and the engineering of the kit is top notch. I don't recall anything you could worry about, well, apart the decals which are sturdy according to some. I didn't work with them so far, but there are 3 marking options, so you can go away with some decent scheme instead of the fancy VF(AW)-3 blue tail fin 🙂
5 September 2014, 11:48
Wow, this is going to become a masterpiece! Stunning work so far. 👍
10 September 2014, 10:02
I wouldn't even be near this, if I would do my best (in my current experience stage). But yeah it looks really great 🙂
10 September 2014, 11:17
Oh c'mon, it's not such stellar work 🙂 It's okay, not great. You know what I mean? Just go and do it 🙂
10 September 2014, 11:29
For me it is really great 🙂 But yeah my first airbrush work is getting started soon and then we will see 🙂
10 September 2014, 11:39
I'm impressed by what I've seen so far...count me in for the rest!
1 October 2014, 18:03
Thank you chaps. Coat of blue is done. I've added masks for stencils and painted black letters on the nose and the wing. Tomorrow I will paint white stencils and maybe insignias 🙂
1 October 2014, 23:50
Now marking is done with masks and airbrush only. I'm going to apply like a dozen of decals and put some wash on 🙂
5 October 2014, 06:29
Album info
I'll post a couple of pictures at the end of every session. All set. Go! 🙂


