Work in progress pics

Wanna hear a funny story? Here is one. After a period of modelling blues (who can say he is never affected?) I decided to pick it up again with the most easy kit I possesed. This Starter kit is not only very basic, it was even pre-painted!

So I thought: this is going to be easy! But it never is... Soon I found out that the kit has 2 versions in it, and the one I wanted to build did not correspondend with the pre-painted model. It had 2 light bulbs on the roof which shouldn't be there...

So I removed the light bulbs, I also removed the raised area at the back where the license plate would be, and while I was at it, I also removed all the cast-in detail which I didn't like.

Then I stripped the model completely, I accentuated the panel lines, and I put it in pink Tamiya primer. Finally I sprayed 2 coats of TS-08 from the rattle can. So now I am back where I started, only with a correct model...

Next I had to re-model the dashboard which was cast with a lot of flash. I used plastic strip for this job.

I have no clue why the Starter designers think that this 250 GTO has only 1 exhaust, but it only took me a piece of soldering tin and some rubber tubing to correct this error. Now all 12 cilinders can boost out their power through the proper exhausts...

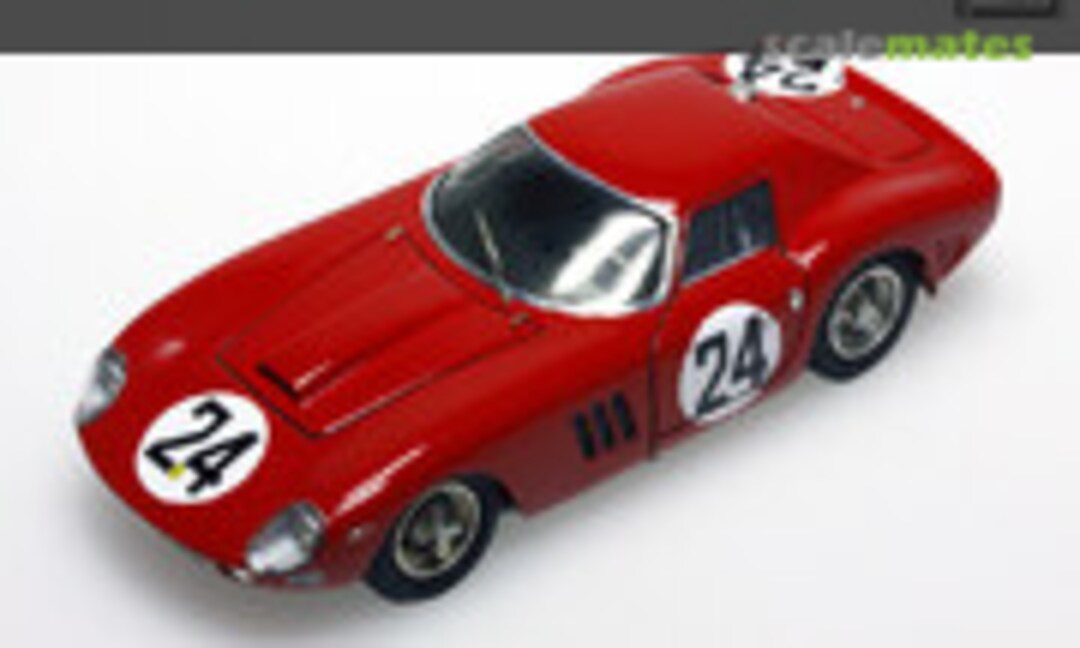
Next step: fixing the decals in place.

The white roundels are all the same size, which is not exactly how it should be: the front decal is ok, the 2 at the sides are a bit too small and the one at the rear is a bit too large.

But you would only notice this with reference pics next to the model. After fixing the decals I cut them at the panel lines.

Finally I apply 2 Gunze Sangyo gloss coats. Now the model can dry for a week and then I can polish it.

I let the clearcoats dry for about 10 days, and then I started to polish the whole body. This is hard to see on the pictures because I manipulated the body quite a lot afterwards resulting in some fingerprints...

Once the body will be fixed to a base plate I will polish it again. I also polished the clear resin haedlights because the surface was very rough.

Next I painted the interior black and I fitted the front window with chrome trim (BMF). I aslo started painting the dials and dashboard (not finished yet).

Because this kit has no head light covers, I purchased a little 'Remember' transkit including (amongst others) wonderful PE headlight covers.

Next I cut the window part in smaller pieces, because I only want to use the front and rear windows.

The side windows were not very good, so I replaced them by thin plexi, cut to size. I also simulated the slide window by engravings.

Next I painted the interior flat black.

The bottom interior was painted and assembled as well. The steering wheel, the gear lever and the decals are from the detail set.

Next I assembled the wire wheels and I dry fitted them into the chassis. The width and ride height were adjusted this way.

Now I have to remove the chassis from the body again to be able to fix the rearview mirror and some small deflectors at the rear of the wheel arches.

So once the rearview mirror and the small deflectors at the rear of the wheel arches were fixed, I closed the model again and attached it to a baseplate.

You can see the small deflector which I scratched from aluminium sheet just behind the rear wheel.

Here the deflector is clearly visible.

I also fixed the supports for the rear jack and I also filled the cooling vents with flat black paint.

At the front I added the front jack supports, I chromed the main radiator surroundings and I fixed the aftermarket fog lights.

I also decided not to use the kit headlight covers since they are solid resin parts which are not very realistic. Instead I searched in my scrapbox and found Porsche 917 covers which I adapted to fit the Ferrari lights.

A few pictures of the Ferrari with finished headlights and taillights...

A few pictures of the Ferrari with finished headlights and taillights...

A few pictures of the Ferrari with finished headlights and taillights...

Opmerkingen
1 6 August 2014, 11:41
I started this 1:43 kit a few days ago; now the body paintjob needs to dry for a while...
7 August 2014, 17:19
I made some progress before we drive off to the Garda Lake😉 See you in little over a week😉
12 August 2014, 15:49
Guy, I have a question...did you subtly shadow some recesses or are these the natural 3D shadows showing from your camera/lighting angle?
12 August 2014, 15:54
...
Well done progress Guy... Give my love to one of my favourite places Lake Garda8)
12 August 2014, 16:00
OK thanks...following with interest...still trying to transfer learning from planes and antique cars to post war styles.
12 August 2014, 20:13
...
43rd's are too small for my sausage fingers, and I can't cope with the bad language that omits my facial orifice when I have tried. But I do admire the builders who can work on these smaller scale models.
Guy, your builds continue to amaze and also inspire me, that is a wonderful little miniature Ferrari, excellent...
11 September 2014, 20:15