

WIP - ANMT Freightliner Coronado 122SD

The project inventory: surely I've lost my bananas this time, how are all of these kits going to be combined into one functioning truck?

This is the goal - a modern, no nonsense vocational tractor, specifically, a MY21 Freightliner Coronado 122SD. The main feature will be a Detroit Diesel integrated powertrain - engine, transmission, and final drive

I was able to scoop up one of the last of these discontinued transkits from A&N Model Trucks. It's highly detailed and contains everything needed for the cab and hood assemblies.

There's a lot of photoetch included in the kit - everything from seat belts to exhaust shields to covers for the battery box and aftertreatment

A vacuum formed windshield as well as precut flat pieces for the side and rear windows are included. Could probably benefit from the application of some Future

The interior of the cab is very detailed too. Nice decals for the instrument panel, and quilted leather textures for the walls and headliner

Here are the exhaust components. The stacks are usuable but will need some cleanup. The aftertreatment is more than detailed enough for a normal person, but my inability to leave well enough alone will likely lead me to remake the whole unit and match the MY21 production hardware. The DEF tank could also benefit from a more detailed header and mounting straps.

Many parts for under the hood are included in the part too, including the cowl, wire tray, power steering reservoir, and windshield washer bottle.

An accurate air box and intake pipe are provided too. The charge pipes are intended for the Cummins N14 included in the donor kit, but will have to be modified for my setup. The intercooler horns will do nicely though.

Some deformities in a few parts, but that's not uncommon for resin kits like this. The bumper will need to be flattened prior to painting and installation

The fins in the air intakes will need to be straightened

The hood flares out slightly towards the bottom, so that will need to be corrected as well.

Poor impulse control is essential to being a scale modeler. Picked up this set of super single tires from my LHS. Another unique feature to set this build apart.

"Super single" tires replace the dual wheel configuration with a lone, wider contact patch tire for improved fuel economy. Here's how they compare to the kit tires from the Actros and the FLD 120 donor kits

The Actros MP4 kit (same as the one I just completed) will donate it's power plant to the build. The OM471 is a globally shared engine platform and is built in Redford, MI for Freightliner as the Detroit Diesel DD13. With a few modifications, the Mercedes variant from the Actros kit can be converted into the American version. Mated to this engine is a G281 automated manual transmission, which is also built in Michigan as the Detroit DT12 transmission.

Long story short, the Actros engine parts on the left will be kept, and the ones on the right will not be used

The crankcase is largely the same between the two variants. One major difference, that I'm not sure how I'll handle yet, is the engine mounts. The Euro version is mounted by brackets on the sides of the crankcase, which are integrally molded in this kit. I will need to remove these mounts and replicate the contours of the crankcase underneath on both sides. A mounting cradle for the front of the engine will then need to be created

The resonator for the air compressor intake at the top of the cylinder head is not used for the NAFTA engine. I'll need to remove that and reconstruct the common fuel rail and camshaft carrier frame texture underneath.

The rocker cover will get a photoetch accent on the top, and the oil fill cap will be removed and sanded smooth

I'll be creating a new harmonic damper to match the US built version, and I may remake many of the other pulleys and sheaves. The belts will be replaced with a more appropriated scale material

Some modifications needed for the hot side components - I'd like to flesh out the turbine volutes a bit more, and just like with the last build, the exhaust manifold and associated heat shields will need to be scratchbuilt. US trucks typically have a straight downpipe bolted directly to the turbine outlet, so the Euro style pipe will not be used.

US air systems use a single cylinder compressor, so the two-cylinder Euro style compressor will be cut down to match

I may end up using the cooling package from the Actros kit, but I may need to make significant modifications, depending on where the intercooler horns need to be.

The DEF tank from the Actros kit has more detail, and may be used in place of the ANMT part.

Some of the modifications needed are... extensive... in some cases, so I've taken up the complimentary hobby of 3D printing for some of the more complicated shapes

Comes in handy for things like the oil sump. This particular model of engine uses a much simpler sump shape that the one provided with the Actros kit

The ducted Euro-style fan isn't a good fit here, so I made a more representative 9 blade fan to take its place

The cold boost pipe setup is also different for the NAFTA engine. Here I've printed up the ribbed plastic intake pipe to replace the smooth cast pipe from the Mercedes version. The EGR crossover pipe will need to be modified to match.

The photocured resin 3D printing process has a fairly low entry cost and can still provide the very fine detail I need for this work

Fortunately, I can still bumble my way through NX well enough to wind up with a workable 3D model

Orientation, supports, and printing parameters are then assigned in the slicing software

Set it and forget it. It takes at least an hour for most small parts

After printing, the excess resin is removed in an ultrasonic bath of IPA. A shiny stock pot and a cheap UV LED lamp do just fine to perform the final cure on each part.

They're not all winners on the first attempt

More supports, avoiding vacuums, and being careful about lift speeds and vat cleanliness usually improves the results

For the smallest parts, I might try a few orientations and support strategies at the same time and take the best one. Fortunately, working in this scale doesn't use much resin

The Freightliner FLD 120 kit will donate its chassis, suspension, final drive, and possibly front axle

The transkit is specifically designed to use Italeri's US chassis as donors. This frame is shared between the Freightliner FLC, FLD, and Western Star kits. The FLD I'm using has a set-back axle configuration, but this is achieved by using additional frame pieces (white, bottom left) to reposition the suspension and hood hinge, so I should be able to set up the set-forward axle configuration using the existing kit parts.

I'd like to shorten the frame a bit for this build. The 316" frame for the long haul sleeper FLD will be cut down to about 284" for a this line haul/vocational truck. About 35mm to remove from two places, as I try to reduce the center to center distance between the rear wheels as well as the gap between the fuel tank and rear fender.

I have two choices for a front axle here. Maybe leaning more towards the axle from the Actros kit, which sports more modern disk brakes for the front wheels (although either configuration would be valid)

I picked the FLD kit over the cheaper and easier to obtain FLC kit because of the rear suspension. The Airliner rear suspension from the 90's FLD truck is very close to the suspension setup used on modern Freightliner trucks. The older style suspension for the FLC is also included in this kit (some common tools used here)

The rear axles will be modified slightly so that they appear more like a dual drive Detroit Diesel setup, which will involve fleshing out the front differential covers with a bit more detail, and taking some scallops out of the rear axles rear diff cover. The outer drum brake halves are from the Moebius wheel kit

The drive shafts from the FLD are a bit anemic compared to more modern parts like that of the Actros kit. I may use some tube to beef those up a bit.

The air dryer and brake valve will come from the Actros kit, and I plan to use many of the air tanks from the FLD kit

The cooling package from the FLD might do fine for a 90's N14, but would struggle to keep up with a modern 505 hp motor. It likely won't be used.

The Cummins engine from the FLD was actually already used for testing out some paints for the previous build

Might use the alternator and turbine half of the turbocharger from the N14 kit to flesh out some parts on the DD13

I may also use some additional exterior parts from the FLD, namely the bug deflector and the convex mirrors from the hood

I have my choice of 3 fifth wheel types for this built, from the Actros and FLD kits, as well as some leftovers from an old AMT kit. I'll do some more research to see which is the best fit

The rear fenders are from eBay (another Italeri kit) and will be deplated and repainted. I'll substitute these Plastic Dreams Detroit branded mudlfaps

Gonna start with these old AMT round fuel tanks left over from my GMC build and see where it goes.

More body and chassis detailing from Czech Truck Model - simple industrial taillights, hood latches, and hose clamps

Another MP4 photoetch set, also from CTM, will provide some important touches. I'll use the rocker cover accent, fuel tank straps, weld beads, catwalk sections, and maybe some of the chassis crossmembers if I can make them work

Washing the transkit parts to remove any traces of mold release

Deplating the super single wheels and a handful of parts from the FLD kit

Bleach wasn't cutting it, so I tried some Awesome. Results so far are... well, awesome

The engine is undergoing major surgery to remove the mounts on the crankcase and the air compressor resonator

Cleaned up the incisions to prepare to receive a few printed parts.

3D modeling the crankcase texture to plug the holes I made.

I'll print the 3 pieces together, directly onto the build plate

And through the magic of stereolithography, the parts have become reality

I'm happy with how the crankcase inserts look

Cam frame insert could've been a better match. Oh well, it'll be obscured by high pressure fuel lines anyway

Added this recess with a flat bottom to the back of the flywheel/geartrain housing. On the real casting, it's an unused and unmachined receiver for additional accessories.

And with that I can close up the two halves of the engine

Adding detail to the transmission to more closely resemble the DT12. The hole patterns for the transmission support are 3D printed, and the rest of the ribs are a mix of styrene rod and music wire


Part of the surge bottle from the Actros donor kit made a nice pan for the bottom of the transmission

Rib added to the top of the EGR cooler/water manifold, as on OM471 from the last build

Added in the rest of the fuel rail from where the resonator came off

The Awesome bath removed the plating easily, but the conductive lacquer was mostly untouched. Possibly a different lacquer from what the Italeri parts had on them, because nothing was left behind on those. Back to the drawing board with these parts.

Quality Control department is rejecting the result on the transmission detailing

The scale of the mounting bolt pattern didn't seem right, so I reprinted it larger, and made some changes to the support ribbing

Primer is back on. Like before, I sprayed Tamiya gray primer from the bottom up, then Tamiya white primer from the top down. The hope is that the shadow effect still shows through subtly once the color goes on, making the scale more convincing. Maybe it helps, maybe it does nothing

Also starting to post process the 3D printed parts - sanding the layers out and removing them from the supports

Cutting the belt drives up - some of the pulleys will be detailed further, and the belts will be replaced with 1/16" gridding tape

Fairly happy with my results post processing these 3D printed parts. I used an Alclad microfilling primer in to fill in the striations from printing that I couldn't reach with sandpaper or sanding sticks

The primer covers the layer marks well, but still preserves the details that were the reason for 3D printing in the first place


I kinda had a feeling this one would need more

This part came out particularly thin off the printer, and there were a couple holes (besides the two intentional ones in the middle) to patch. I was able to salvage it using some "window making" glue that's particularly good for webbing across holes of that size

The belt drive parts are starting to take shape - the tensioner (which tensions both layers) was particularly chanllenging

I took a slice out of the air compressor to shorten it to a single cylinder

I think I'm also finally done with detailing and touching up the main block assembly

Having access to a reference engine whenever I want means that decals are a snap! Here's the emissions label from the rocker cover.

On my phone, I can correct the tilt of the image to make it square, and turn up the contrast to produce a good print

Trying out a new image software for making waterslide decals. I'm hoping some of the finer details come out a little clearer this way.

At least this kind of work is "portable"

Cold side of the engine - 3D printed thermostat, intake pipe, and fuel pump; scratchbuilt oil filler, MCM, power steering pump, and TCM, and the air compressor, oil module, and fuel module have all been modified.

Hot side - 3D printed turbine outlet, EGR actuator, and EGR pipe; scratchbuilt exhaust manifold, heat shields, accessory bracket; heavily modified turbine, compressor, and crankcase breather.

Front dress - 3D printed fan, fan hub, and crankshaft damper; and the rest of the belt system was separated into individual tensioners and sheaves.

And the rest - added the PE to the rocker cover and filled in the hole for the Euro oil filler, 3D printed sump and front mount, scratchbuilt rear mounts, EGR mixer, and air cleaner mounts.

All Parts primed and ready to go!

Some Bare Metal Foil added to the heat shields, deliberately not-so-carefully in order to mimic the crinkly patter on the factory parts.

Fan and fan hub complete

Oil module with US filler neck complete

Exhaust parts with heat oxide complete

Turbocharger assembly with outlet pipe and hydrocarbon doser complete

Added an impeller in the compressor. It's a slippery slope with 3D printers

Intake pipe and EGR mixer complete

The done pile is growing at a nice pace!

Four different shades of black!

Airbrushed seven different colors onto the block alone


A test print was done on plain paper first to check the layout, sizing, etc. I inspected the final print under magnification and everything is looking good!

One print on clear decal paper, and another on white.

I considered having these printed at a professional shop, but I'm quite happy with how they turned out on my home printer

Picked the best ones from each group and applied some Liquid Decal Film. First time working with this stuff, so we'll see how it goes.

Made a lot of progress applying the decals and assembling some of the major components

Liquid Decal Film is proving to be a much more robust solution than rattle can sealers

Some decals are downright microscopic. I'm glad I made spares!


Finally! Engine done! ...For now! ...I think!

Belt drive, fan, and accessories attached

Wiring loom and lifting eyes too

And sensors and fuel lines and coolant lines

Now I can finally put these paints away for a while

Note to self: don't run large prints when the power company is replacing equipment

3rd time's the charm!

Microfiller primer, then flat brown for the base color.

Chipping media, top color, and sandpaper for a worn effect

Told you I'd go overboard with the stand.

Ready for the shipping dock! The stand is meant to be a production-style rack, although the engine and transmission are obviously shipped separately to the truck plant. The fan and accessory drive are also typically installed later at the truck plant.

More photos will be uploaded to the "Completed" album later on

Compare to the Mercedes-Benz version I completed early this year

Up next: 3D printing the exhaust aftertreatment


The first attempt to print the whole filter resulted in some distortion on the top side, perhaps from the supports stretching each time the build plate lifted. I divided the main body into 3 sections and attached the supports to the interior faces, which could be sanded flat after printing. Much happier with the part now.

Major components of the aftertreatment (all 3D printed) are primed with more Alclad microfiller

Core assembly is together

Sensor brackets and wiring harness still to come

Liking my version more than the part from the kit so far

Some pics with the full scale version

Apologies for the poor lighting on the shipping dock

*Transmissions shipped separately in 1:1 scale

Aftertreatment complete!

Much of this will be hidden under the passenger side steps, but I couldn't live with myself if just called the kit part good enough


Comparison to the Benz's Euro V ATS from the last build

Engine and aftertreatment, ready for the truck plant


Heavy modifications to the rear axles underway.

I decided that the kit's carrier housings for each of the rear axles weren't going to cut it. Here's the new-style carrier/gearbox for the forward rear axle.

Made brake pads for the rear drum brakes. Someone please stop me!!

This printer has also been great for replacing lost parts, like this steering arm from the Actros front axle

Of course I'm gonna do a photoshoot for the axles

Much of this is just for the photos. The hubs and the studs on the brake drums are temporary, and everything will be painted over again once installed on the chassis.

This is a critically important step - this layout will determine where everything mounts to the finished chassis and where the rails will be cut!

Two cuts for a 25 mm (24" in scale) shorter frame

Spliced, sanded, and ready for cross members!

Satisfied with the progress of the chassis so far!

Crossmembers are a combination of parts from the FLD and Actros kits, the ANMT transkit, scratchbuilt parts, and 3D printed parts

Getting good vibes from the position of the engine in the frame


I'm gonna call that ready for paint.

Tamiya primer.

Back in Black!

Engine mounted.

Alclad!! <3

On its wheels for the first time!

Cutting the new drive shaft to length.

Downpipe was modified from the original transkit part to fit the new turbo and ATS locations

Taillights and chassis decals are on!

These fuel tanks are still very distantly related to the ones from the spare parts bin I started with.

Added some stack-o-dimes and 3D printed filler caps.

Ugh. Soldering is hard.

Assembled the hood components and fleshed out the ducting on the inside for the air intakes

So this is the space I have to work with for the cooling package dimensions

Everything seems to lining up where I expected

.stl files are ready for the slicer! Many of these parts will be printed separately to make painting easier.

Parts in multiple stages of painting and assembly

Very happy with how the radiator fits

I love having this printer!

More tiny decals!

Mudflaps attached

Fenders and fuel tanks too!

Frame fuel filter and power steering bottle in place

Modified the intake boot, installed the downpipe, and added the cable for the starter and alternator

Cooling package installed!

Everything is (amazingly) behind the center axis of the front hinge, right where I wanted it.


I promise this is a good transkit.... but I did end up making my own air cleaner too. The cast part is intended for the donor kit's N14 engine, which has the turbocharger sitting higher relative to the rocker cover. This means it didn't reach the inlet boot on the DD13, so 3D printer it was! The factory air cleaner housing is also a bit wider in proportion, so the new part reflects that.


The work platform will position the uprights for the grill in the 4 narrow slots (about 0.2mm~0.008") that run the length of the jig. The carriage will slide along the way cut into the center of the platform to position each slat of the grill at a 30 degree angle. A bolt through the carriage and a captive nut on the bottom of the platform will lock in place to solder each slat.

I should be able to make all of this from 1" square stock and 1/4" plate. #10-24 fasteners are easy enough to find at the hardware store.

Attached the mirror mounts and the hangy-down bits (apologies for the technical jargon), and also made some repairs in areas where "somebody" wasn't careful enough when cutting out the windows.

Added some bolt heads to the photoetch fairing on the rear, as well as a scratchbuilt bracket for the trailer electrical cable. After many (many many) test fits, I think I'm now happy with the fit between the cab, hood, and floor assemblies. Just about ready to set aside for paint while I work on the rest of the parts for the interior.

Reference photo from a for sale listing

Reference photo from a for sale listing

Reference photo from a for sale listing

Reference photo from a for sale listing

Reference photo from one of our test trucks at work (this engine is a 16 L as opposed to the 13 L I'm using)

Reference photo from a for sale listing

Fitting the vacu-formed windshield to the cab

Once everything was fitted to the cab, each piece got a dunk in some Future

I cut out the the flat outlines meant to serve as vents in the dashboard, and printed some more detailed parts to install instead

The windshield ended up with a bit of a drip after drying... luckily it's easy to remove the Pledge and try again

Testing colors for the interior (as well as some paint schemes for future builds)

Cutting masks for the windshield and rear window

Borders painted. Haven't decided if I'm happy with the result yet

Ladies and gentlemen, we have seats!

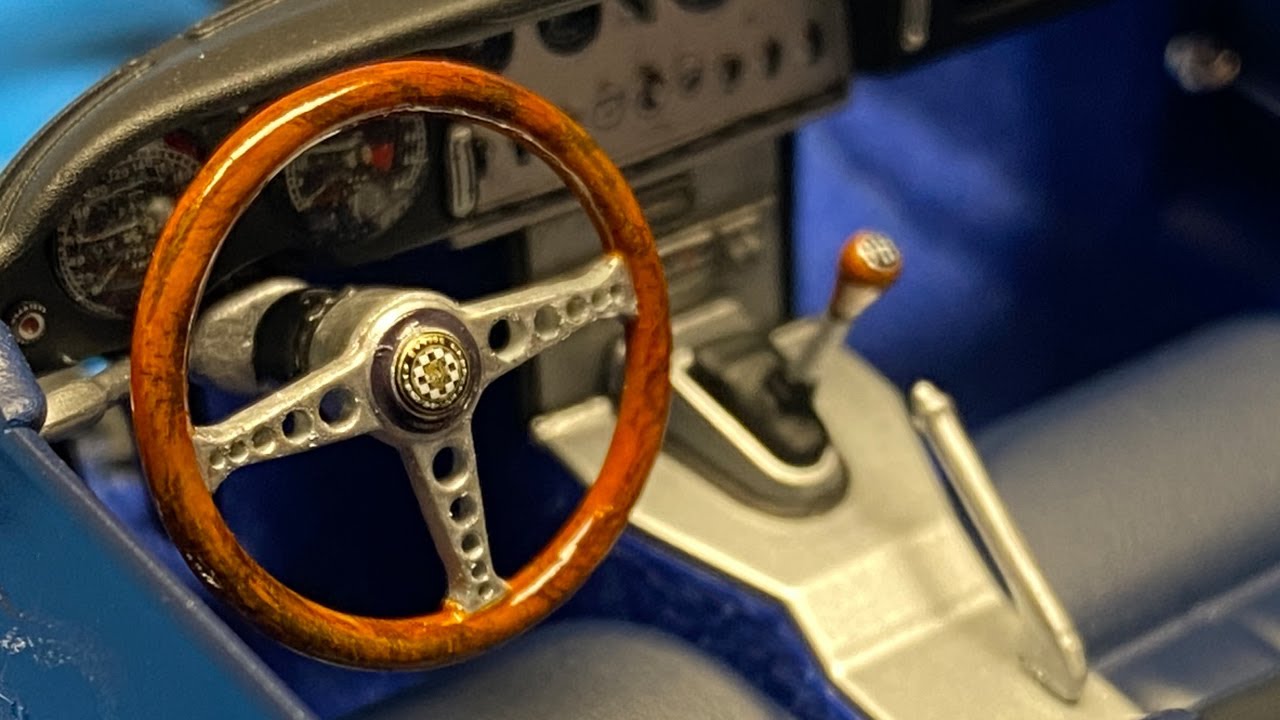
Laid down the first color for the Oregon Burl upgrade

Dry brushed on some lighter and darker accents

Finished it off with clear orange to pull it all together

Fairly happy with the result, for about 10 minutes of work

Interior done! Mocked it up as well as I could, but it won't be fully assembled until the cab exterior is painted.


Applying the decals for the badges and fuel permit

Time to flatten some of the warped resin parts. Held in place by some steel blocks in a bath of nearly-boiling water, then the bath was allowed to cool to room temperature.

I'll be damned, it actually worked!

That'll work for me!

Too cold to swim, so I'll find something else do at the beach!

The slats on the cast part originally went all the way to the back, and warped a bit after extraction. I've corrected that with some styrene, and I'll place some black mesh behind it to mimic the air intakes on the full size version.

Mirrors ready for paint. The aerials will clipped to length later on, left them a bit long for now to have something to hold on to while painting.

0.945" dead nuts... I've still got it!

I've gotten most of the non-Alclad parts done for the exterior

Ugh.

Well, back to it I guess

Good from afar but far from good 🙂
Vast improvement though, I'll take it! Time to start working on assembling the rest of the cab components.
Vast improvement though, I'll take it! Time to start working on assembling the rest of the cab components.

Stacks done!

Cab assembly is underway!


Filling in the firewall

There-ish looks about right.

Box of shiny!

Starting to really come together now!

Far from final, identifying areas of misalignment and making a plan to correct them

Feels good to see it mocked up like this


Photoetch headlights were a good idea

A sewing machine case will make a good transport system for the finished model

Cutting up some foam on the bandsaw for the bottom layer of the case

The top layer, discarded from a knock-off Pelican case, is broken up into ~1cm squares that can be pulled apart to fit the desired shape

Exhaust has me feeling icky, but I'm doing what I can with the space I have

The basal platten assembly is complete, just the carriage remains to be machined now.

And here's the jig, completed

Ok, soldering jig became and gluing jig. I hate soldering

Last minute emergency touch ups on the chrome trim 😳

Cabin heat and A/C lines added

Installed the trailer air and electrical line

Grille came out... acceptable I guess

Attaching the hood for good


Ready to ride!

Work it baby!

Won the category at the Autorama show!
Opmerkingen
85 5 July 2021, 13:53
I've been prepping for this one in the background for many months now, and kickoff time is nearly here. I'll starting digging into all the parts when I get back from vacation
5 July 2021, 14:00
All kidding aside, my goal is to build as accurate as possible a replica of a 2021 Freightliner Coronado 122SD. The FLD 120 kit will donate a chassis, suspension, and axles, and the motor will come from the Actros kit. I'll be building a showcase of Detroit Diesel products, which will require a lot of modifications across all parts of the build. There will be scratchbuilding, 3D printing, and maybe even some brass and aluminum machining. Wish me luck, because I'll need it sooner or later!
11 July 2021, 04:19
Ha, thanks Jonn, but it's all just talk so far!
I did learn a lot from the Actros build, so hopefully the powertrain build goes smoothly!
11 July 2021, 21:57
Looks like you are going 'all in' on this truck. Cant wait to see the final result.
17 July 2021, 22:41
I've got brain ache just going through your pictures! The attention to detail is incredible. Ever thought of writing a modelling book?
18 July 2021, 12:54
Haha thanks Nigel, but let's not get carried away... I'm no Jan Rosecky!
The attention to detail is inevitable, I'm surronded by trucks and engines every day! All the reference photos I could ever want, on my lunch break.
19 July 2021, 23:40
Ah, that would help. How do you find the 3D modelling ? It's something I'm interested in though I need an idiot proof system !
20 July 2021, 02:57
The CAD work doesn't intimidate me much, but I learned it as a CNC machinist and again as an engineering student, so I've had a lot of exposure. Some platforms are easier to learn than others; I found Solidworks to be the most intuitive, but different aspects of different programs "click" for different people. Autodesk Fusion is free to hobbyists and although it's not the easiest to pick up, it still comes more naturally than some bigger production platforms like NX or Inventor (IMO). The nice thing about learning any of the major CAD software systems is that there's no shortage of walkthroughs and forums and channels across a wide range of hobby communities, so you can almost always find the tutorials that best fit your learning style.
20 July 2021, 13:43
Lots of progress on the engine this weekend. The main block/transmission group is almost ready for paint.
26 July 2021, 14:58
Started over with the transmission and I'm happier with the result this time. Lots of other side tasks happening concurrently.
1 August 2021, 22:21
Maybe I'd get more done if I could focus on one task at a time.. oh well, I'm having fun. More progress on post processing the 3D printed parts, as well as a start on the decal sheets I'll need
7 August 2021, 14:03
I promise I haven't just been messing around with decals this whole time... all of the engine parts are now ready for paint! Nearly every one got some sort of modification, which makes me wonder why I bought the donor kit to begin with...
22 August 2021, 03:56
I am not into Trucks but this - aftermarket-kitbash-scratchbuild-overkill is exactly my taste. Really nice work so far. Count me in
22 August 2021, 05:37
Blimey Brandon and you haven't started on the rivet counting for the chassis yet !
23 August 2021, 20:46
Ha, thanks guys! Inching ever closer with the engine. Touch ups and much of the detail painting is done, next will be the dozens of decals!
12 September 2021, 03:08
Brandon! Have you gone troppo? So much detail and prep work! I'm here, but mate, really? What's the rear suspension set up? 8 or 4 bag?
12 September 2021, 04:05
Thanks Peter! Things have indeed gotten a little out of hand 🙂 The rear suspension will be a 4 bag AirLiner setup from my FLD donor kit
12 September 2021, 16:24
looking forward to seeing this come together! (PS, I saw those license plate decals and was like "hey, he's from MI too!") 🙂
13 September 2021, 13:38
Making progress! But still so far to go! Miles of wiring, belts, fuel lines, and coolant lines yet to install...
23 September 2021, 20:24
Motor's done, finally! Just need to make a stand for it while the rest of the truck is being built. I'll probably go overboard on that too 😄
5 October 2021, 22:32
Beyond next level Brandon! Jaw on floor and may never be able to lift it again!
6 October 2021, 00:58
Many thanks, everyone!! I promise I'll get around to building the rest of the truck at some point haha...
6 October 2021, 11:18
Ok, I think I can finally set the engine aside for a while. Exhaust and axles will be next!
17 October 2021, 18:21
Exhaust is starting to materialize; ready to receive color this weekend
28 October 2021, 15:40
Thanks Nigel! Actually, this has all been Tamiya acrylics up to this point. Colors for the exhaust were mixed on the fly for a subtle heat effect. And there will be plenty of Alclad when I get around to all of that exterior chrome!
2 November 2021, 19:15
Interesting. How do you find mixing paints and do you use paint shaker/mixer?
3 November 2021, 14:47
The Tamiya colors mix together really well; usually stirring with a toothpick is enough to blend them pretty thoroughly, or drawing it in and out of a pipette a few times. It's very useful for those weird one-off colors like natural plastic or specific shades of mud.
3 November 2021, 23:41
The pictures with the original engine and transmission are so cool!
4 November 2021, 05:11
My mother
How good are they, they have made an engine just like yours but big ...
Just kidding, great work
4 November 2021, 06:01
Haha thanks Christian and Pepe! I'm quite fortunate to have access to these engines whenever I want!
4 November 2021, 11:24
Another major assembly done! Exhaust aftertreatment is ready to ship.
11 November 2021, 18:56
Just build another few hundred engines and you can replicate the warehouse photo !!
12 November 2021, 18:18
not much into these huuugh trucks but like your approach. Great build. Following.
15 November 2021, 16:41
And now for some less glamorous work (but just as critical!) Starting on the modifications and assembly of the axles, frame, and suspension.
1 December 2021, 14:54
You know Brandon, I kind of expected you to drill out the diff casings and make axles to fit into the hand made crownwheel and pinions! This level of detail is just mind blowing! Loving it!
2 December 2021, 22:35
What type of technology are you using? I was thinking about 3D printing some parts... Thank you for the time and effort you put in to post so others can get inspired!
3 December 2021, 16:02
Thanks logos! I'm using SLA printing here. I've found that I can achieve an adequate amount of detail and accuracy for this scale, even on the relatively inexpensive machine I purchased (Voxelab Polaris). There's a bit of a learning curve as to how some parts should be designed, oriented, and supported, but at the same time, I haven't had to tune my machine settings very much beyond the manufacturer recommended values, so in some ways it's been easier. I definitely would recommend trying out 3D printing - it's been a game changer, especially for this particular project.
Beware though! I've learned that your scratchbuilding skills can quickly fall out of practice when you turn to the printer for every little part!!
3 December 2021, 18:54
I wouldn't be concerned Brandon, your skills are not going to get lost or even hide!
4 December 2021, 10:56
Thank you again for the info. I'm going to take a look. This would enhance those kits sometimes I get that the models are old or to do custom work.
4 December 2021, 12:13
Turns out the front housings on each of the rear axles need an update too. Should have both rears and the front axle finished up shortly!
8 December 2021, 13:05
Chassis rails are cut to length... fingers crossed everything ends up in the right place when it's all said and done!
20 December 2021, 18:24
You cannot rush excellence but it does need a break lol I wish I had more time to build. Looks great so far and cannot wait to see it all come together!
23 December 2021, 15:51
Haha, you and me both! Thanks Jarrett!
Making some good progress on the frame this week with a few days off work.
23 December 2021, 19:36
I am late to the party but I am following now. BTW the engine detail is insane.
26 December 2021, 05:35
Axles are attached, now comes the long process of running air and electrical...
8 January 2022, 21:59
Thanks Kathleena! Painting has got to be my favorite part - all of the hard work leading up to it finally pops out in the right color!
16 January 2022, 14:47
Thanks Nigel. No frills for this one, just doing semi-gloss black. Tamiya X18 in this case (my personal favorite), which should be a bit cheaper than the DuPont high solids polyurethane coating from the big version!
16 January 2022, 21:00
Wowie! That is some detail. I don't even no where to begin. Stunning work, Brandon. I'm simply speechless!
20 January 2022, 00:45
Slowly making my way through the long checklist of chassis components... one scratchbuilt and/or heavily modified part at a time!
5 February 2022, 01:23
Looking good. Those rear lights look strange to my European eyes
5 February 2022, 16:20
Thanks Nigel. Most stock American tractors have bare bones taillights just mounted to the rear crossmember, including the two reference trucks at work that I've been using.
5 February 2022, 20:01
Amazing work brandon love it
But here down under we don't use super singles
To save fuel
We use them to get more load
We use them on steeres
Not on drives
11-22,5 will allow you 6 tones
295 will allow you 6,5 tones
Super singles will allow 7 tone
So we do it the allow the extra tone on
Steeres
13 February 2022, 11:34
Good to know, thanks for the info Jv! Could come in handy for a future build... I've got a very interesting kit on its way to me in the mail right now...
14 February 2022, 01:26
And most American trucks down under have to use super singles
Cos most waigh 7 tone on the steerers empty
Whed twin steerers you can dobbel the waight
Then we have a permit system
You have to pay and can achieve 3 tone more total
That is for a semi whed 1 trailer
Total waight allows 46,5 tone
Any more and other specal permits is needed
Like escorts
And only allowed to drive from sun up to sun down
The biggest road train is 6 trailers
There is only 6 of them in the world
All in Australia
Thay drive in the mining industry
3 or more trailers are only allowed in Northern Territory
And western Australia
On any heavy hauling truck you will only find super singles
On steering axels
14 February 2022, 11:14
Your level of detail just blows me away. As I perused the your album the little decals stopped me in my tracks. THEN seeing all the hoses and lines showing up on the chassis, INSANE. THEN seeing BRAKE SHOES... I am at a loss for words. It would take me 3-4 years to build at that level with my current rate of progress.
22 February 2022, 05:53
Yes its impressive
Love your attention to detail
It will be a longtime before I can even think about attempting
Anyting like that
But its first time I have ever seen supers on the drives
Interesting will look into why anyone would do that
For now I think it would lower your payload
22 February 2022, 12:32
Thanks everyone!
And don't worry Bill, sometimes it feels like this project IS taking 3 or 4 years haha! Still a lot of work ahead of me here.
Jv, it isn't unusual to see super singles on drive axles here in the US, or trailers for that matter. They're mostly used in applications where total payload isn't the primary concern, such as less-than-truckload logistics or some vocational applications. I've also seen them on tractors hauling low gravity tankers or other lightweight trailers. Most Coronados/122s would be built with more traditional dual tires, but it's all just up to what the customer needs 🙂
22 February 2022, 13:53
Looks like I'll be making the cooling package from scratch, so I had to go ahead and assemble the hood in order to get some dimensions. Now it's time to start drawing up the 3D models for the radiator, intercooler, and AC heat exchanger.
27 February 2022, 19:13
Ended up modelling the entire cooling package from scratch. Time to fire up the printer again!
8 March 2022, 15:10
Blown away! Cannot wait to see the finish and hope is not delayed because the head QA is tough on you lol.
9 March 2022, 04:10
Thanks guys! About mile ~16 of this marathon...
Not to worry about the quality department, he's easily distracted by string or socks 🙂
9 March 2022, 13:01
Lots more progress on the remaining chassis components... basking in that Alclad shine!
17 March 2022, 16:42
Loving this Brandon. I have about fifty bottles of Alclad metal paint but hate the stuff as it wears off and dulls everytime it is touched with skin!
17 March 2022, 23:16
On another level, just insane detail on that engine and thank you for posting your progress for the newbies lol
18 March 2022, 03:28
You always blow me away whed your details
Can't wait to see what it ends up like
18 March 2022, 10:20
Thank you everyone, glad to know you're all enjoying the ride!
I think it'll be cotton gloves only for handling the Alclad parts from here on out... I still haven't found a method for clear coating Alclad that I'm impressed with. Even their own clear seems to dull the shine too much.
18 March 2022, 12:31
That's a good question... I think the intent is that you shouldn't have to. I'd be curious to see if anyone's had any luck creating a more durable finish by polishing
20 March 2022, 00:36
Wet, wet, wet, wet, wet! Sorry, I've just wee'd!
That's some amazing details and the skill and implementation, just makes me want to swear with excitement! I'm off for another wee, before I look at the pictures again! Fantastic progress mate!
21 March 2022, 20:48
Bozzer get ahold of yourself man!!
Thanks everyone! I'm on track to have the rest of the chassis components done by the end of the month. Hopefully I can keep up the same pace on the cab and hood after that... but I have some 1:1 projects that will be ramping up around that time too!
22 March 2022, 12:32
Haha thanks Nigel. It would mean that I could finally be done with this project and start on all those Jeeps I've been looking at longingly the whole time...
But don't worry, the initial test fits of the hood have me thinking that it should quite easy to keep the hinge functioning.
28 March 2022, 15:07
This is probably a bit much, but I've decided to make a jig to solder the PE parts for the front grill (since I just *love* soldering). I want to get all of the individual slats as straight as possible, since this will be a very visible part of the finished model. Leaning towards soldering because I'm worried about needing a noticeable glob of glue at each joint to hold them all in place given the small surface area of the notch joint. So soldering jig it is! We'll see how it goes. I'll start machining these parts in the background while I work on the interior of the cab.
1 April 2022, 15:33
Brandon, very curious as to what you call a "work platform" over there. Everything seems to have a different name everywhere!
2 April 2022, 00:00
Aaaaaah! In my ignorance, I'm gonna sit back and just watch what happens. I understand what a jig is, from my short past in engineering, and the construction industry, but I'm buggered if I can figure out, what this does? However, I totally agree with the soldering part, on such a prominent part. I soldered my roll cage, on my Funny Car, it definitely looked more realistic. So, my mate, I'll grab a beer and watch in amazement, at what comes next?
@peter... It's a new one on me too, buddy. Grab a beer and see what happens? Knowing Brandon, it's going to be awesome.
2 April 2022, 17:57
Thanks Bozzer! The idea is that the carriage will slide along that slot, positioning one slat at a time... I'll be sure to get some pics of the tool in action. (If it ends up working the way I'm hoping it will anyway!) Not a clue when I'll get around to machining it. My 1:1 is going to be occupying the majority of my time over the next few weekends.
Peter, in this case, I felt that "work platform" was more appropriate for a technical drawing than "the flat part". "Basal platten" was also considered.
4 April 2022, 11:04
Slowly making progress on the cab and hood assemblies. I'll probably paint these with the interior parts once those are ready.
9 April 2022, 15:29
Coming along nicely. Do you have any pictures of the real truck to compare with your build?
9 April 2022, 17:29
I just added a handful of the 400+ reference photos I'm using. Many are from for sale listings on line, and many more are from two of our test vehicles at work.
9 April 2022, 21:53
Thanks Brandon. If it wasn't for the studio setting, you could not tell the real thing from your model!
10 April 2022, 09:38
Thanks Nigel! So what I'm hearing is that I should also be working on a diorama?
10 April 2022, 13:28
I was thinking of a photo background scaled/ angled to match your model.
10 April 2022, 13:41
Haha I'll see what I can make happen.
More progress on the interior parts and cab... ready for primer now!
17 April 2022, 01:18
Interior is coming together well. Four good painting sessions in, with a few more remaining.
27 April 2022, 00:31
I'm gonna be so sad when this is finished, I've really enjoyed following its progress. Checking in on the updates has become a habit. 🙂
27 April 2022, 15:37
Haha thanks guys!
At least someone will miss this build, I think it's gone on long enough lol! Itching to break in to the next project in the pipeline...
28 April 2022, 15:51
More interior parts done. Just a few details and decals left, then it's time to start masking off in preparation for the body paintwork!
28 April 2022, 15:53
Get a move on will ya Brandon! It's like watching your first born and only child graduate valedictorian in super slo-mo!
28 April 2022, 22:09
Why do we put ourselves through all this pain, when it comes to painting? Masking off, for the smallest detail, has to be the worse? However, the final outcome is very much worth it! I would've never had thought of using clear orange in that way. Very impressive Brandon, I like what you did there 👍
29 April 2022, 06:47
Bozzer, I don't mind all the masking for a decent paint job. It's the scraping, filling and sanding of seam lines that makes me question my sanity. If only I could care less… no one notices missing seam lines, but I notice them when they are there… Bah humbug
29 April 2022, 07:30
I'm right there with ya Tom! It's the most tedious part and seems to take up the most time! But I gotta say, pulling those masks off makes all the rest worth it.
The woodgrain technique is not my invention, of course - learned it from TSMC: Youtube Video
29 April 2022, 11:24
This is looking excellent. Going to have to try out that wood grain tactic too! Thanks for sharing that
29 April 2022, 14:54
Just missing a Tim Hortons cup, in the cup holder! Fantastic work Brandon, keep going 100%
30 April 2022, 18:50
Brandon, I just hope you are thrilled with the look of the upholstery as I am just plain dumbfounded! Super detailing is one thing, paint is another but finding a way to replicate the look of velour is something else again. You are the "real deal" my friend!
30 April 2022, 23:06
How in the heck did you get the seats upholstered?!? The sheen is spot on.
1 May 2022, 02:30
Thanks everyone! Haha the seats didn't get that much thought at all! Just masked off the all but center part and dry brushed some light gray, then shot some semi gloss clear over them. Glad to hear they made such an impression though, I'd encourage to add drybrushing to their bag of tricks for interior detailing!
2 May 2022, 00:16
Work has started on the exterior! Paint followed by more tiny decals, with a clear coat to come later.
10 May 2022, 11:22
Wasn't sure it work at first, but submerging the warped parts in hot water and allowing the bath to cool naturally did a pretty good job of straightening them out.
19 May 2022, 14:04
Big holiday weekend, here in the UK, so after all the festivities, I'm hoping to get some pictures up myself. You got things going on yourself here, so I'll look forward to seeing what you make of it?
1 June 2022, 21:24
Thanks Bozzer! I'm actually working the big race in Detroit this weekend, so this is about as far as I'll get this week.
2 June 2022, 10:55
Awesome work on them mirrors mate. I have a modelling friend in Florida, who uses small diodes as antennas. They actually look pretty effective with a lick of paint. I like your idea though, very clever
2 June 2022, 11:35
A ver good an easy way of getting antennas, is acupuncture needles, If you can get them
2 June 2022, 11:57
I'm also lucky enough to be gifted the odd cat whisker, from time to time. Although I've never tried to chrome one, I suspect they would? But they never break off, that's for sure. Worked excellent, when I did 1/35 scale.
2 June 2022, 19:10
Thanks Bozzer!
Back at it again; now making progress on the jig for the front grille.
7 June 2022, 15:03
It's been a slow go on the workbench lately, mostly due to some other priority projects taking up a lot of my time. Bouncing around between a few different areas on this one. Clear coat did not go well. A lot of the parts for the cowl and exterior are painted or ready for paint though.
12 July 2022, 10:51
Oh I know, Peter! Haha had just hoped that my to do list for this build would be shrinking, not growing!
13 July 2022, 16:56
Sanded and recoated and things are looking better now. Back to procrastinating on the grille and exhaust stacks 🙂
22 July 2022, 20:57
Thanks Peter!
Turns out I was just kidding about procrastinating on the exhaust - stacks are ready for paint now too!
24 July 2022, 18:24
I've gotta agree with Martin. This one, is outta the ballpark! Brandon, your sanity is questionable, at this point 😉
16 August 2022, 15:59
Let's be honest, Bozzer, my sanity was questionable before I started this build lol
Thanks everyone! I'm grateful to be a part of such a positive and encouraging community. It keeps me going as I inch closer to the finish line!
17 August 2022, 18:46
Thanks Steve!
Moving on to the exterior trim now. Here I'm marking out the positions for the hood latches. The brackets that hold the rubber strap will be soldered in place before painting.
19 August 2022, 12:46
I'm just waiting for the airhorns to work next, and then I'll eat my hat! 🙂
20 August 2022, 17:03
Quit giving me those ideas Bozzer!
Majority of the trim is now painted with Alclad... getting closer to final assembly!
26 August 2022, 12:02
Felt like I was running in place finishing up all these tedious tasks... until today! Close to final mock up has me feelin' good!
31 August 2022, 00:56
wow. it is a truck! 😉
(forgive me Brandon, I am just at a loss of words in the light of your detailomania.)
31 August 2022, 07:42
It's always a good feeling, when you get the cab and hood mounted. Things start moving, in leaps and bounds then. Keep at her mate, you're just a few lengths from the winning post now 🙂
31 August 2022, 12:23
Thanks everyone!! I'm just excited to be almost done! So many cool projects in the queue....
31 August 2022, 19:05
Getting very close! Only a few things remaining before the final shoot, namely the grille, exhaust piping, and air lines.
4 September 2022, 15:06
Taking the easy way out on the exhaust piping :/
Factory piping configurations for these vocational trucks can be pretty bad, but not this bad! Unfortunately it's the best I can do given where the aftertreatment, transmission, and cab ended up relative to each other.
4 September 2022, 15:10
You thought I forgot about that soldering fixture, didn't you? Been working on it in the background, just one more part to mill, then it'll be ready for use.
8 September 2022, 11:21
Brandon you have done wonders
I think most of us can only dream about the tools and skill you have got
I have followed your build
Amazing
Thanks for sharing
I will keep an eye on what you do
Its always been Amazing
Even if I don't comment on it all the time
There is builds that are above most others
This is one
8 September 2022, 12:56
I have to agree with JV.
This is the build, that just keeps giving! Just when you expect the final product, another rabbit, comes out of the hat!
8 September 2022, 19:26
What a wonderful work and model 👍
My main focus is different, but I have done some old cars in this scale. But what you are doing here is impressive, especially the integration of CAD work and printing into this build. Great careful work in all areas, from research to build and paint.
8 September 2022, 20:38
Take some credit yourselves, mates; your kind words have kept me going through the whole build!
9 September 2022, 00:42
Looking fabulous
Now you just have to put some dents in it rust and dirt lol
13 September 2022, 08:27
This ain't no model. This is a miniature original. I am anxious about the final pics. I am sure - with the right background you won't be able to tell whether it is scale or template.
PS: looking at the jig I envy your workshop. 🙂
14 September 2022, 11:05
Thank you everyone, glad it lived up to the hype!
Tonight's photoshoot will just be a plain white backdrop, but maybe I'll get some pics around the factory when I bring it in to work (after the show this weekend), where it's gonna live for the next few months.
14 September 2022, 16:53
Thanks again to everyone who followed along and provided encouragement all the way!
Final photos posted here: Completed - ANMT Freightliner Coronado 122SD | Album by brahoff (1:24)
15 September 2022, 01:08
Michael is so right, you should put it next to the real truck since it looks like you had access to as I seen in the pictures and take a side-by-side pic. No joke it would be hard to tell the difference.
15 September 2022, 13:02
Haha I'll see what I can do! Unfortunately we don't have the day cab on site here anymore, but the 58" sleeper cab is still around...
15 September 2022, 13:11
Well Done brother! And rightly deserved! You should be very proud mate. And, you keep Big Rig modelling alive! It got my vote, on here 🙂
1 March 2023, 19:54
Congratulations if you don't vin first place in anything you put this model into
I would be surprised
Amazing build you deserve it
2 March 2023, 01:41
Congratulations!!! Love it! I agree with all, well deserved!!! What is the next Freighliner? FLD-120, FLB, or Cascadia?
4 December 2023, 21:01
Thanks Jarrett! I wish I had the math for a Cascadia... maybe someday...
But in the meantime, stay tuned for another Freightliner starting up in the next few months!
4 December 2023, 23:35


