

[Tamiya] Peugeot 206 WRC 2000 (Job Log)

1st. Check what to remove.

I plan to cut and drill the marked ones.

The rivets are cut out and I plan to use a metal steel ball.

Same plan.

Before we get rid of it, we'll make a simple clone of what we need to parts.

make a hole and cut off.

The marked part was scraped off from the inside.

The step difference was so large that I had to scrape it a lot.

I drilled a tiny hole in the rivet position and corrected the step difference.

Trimming done.

The all wheel bolts were remove with the plan to use detail-up parts, but I realized late that I didn't have that.
So, I had to cut the hexagonal plastic rod and make it again.
Stupid...
So, I had to cut the hexagonal plastic rod and make it again.
Stupid...

will be painted silver

Gray surfacer.

where it needs to be fixed.

where it needs to be fixed. (and dust)

The edge needs to be fix too.

I trimmed all surface and painted them silver, but there were still some not trimmed spots, so I sanded them again.

I also found and trimmed spot that I hadn't noticed before.

Gloss Aluminium + Clear Blue(thimbleful).

White surfacer.

Masking...

Base color painting...

After painting the plated parts black, only the necessary parts were wiped off.

Mask removed.

Masking again...

It was designated as 'Light Sea Gray' in the manual, but there was no corresponding paint, so I guessed a similar color just by looking at the name, and painted it by mixing.
It was designated as x in the manual, but there was no corresponding paint, so I guessed a similar color just by looking at the name, and painted it by mixing.
I found it later and found it to be a completely different color, but since I have two more '206 WRC', I took this opportunity to order 'Tamiya Ghost Gray'.

The decal is old, but fortunately there was no yellowing.

But hardening was in progress.
When I tried to attach some decal parts, the decal was broken as in the picture.
When I tried to attach some decal parts, the decal was broken as in the picture.

I removed all and used the 'Hasegawa Finish Sheet'.

Recovery done.

All decal work completed.

I used GSI's Clear Red, but I don't like the color at all.
So I bought 'Clear Red of Gaianotes' and 'GSI's Deep Clear Red'.
So I bought 'Clear Red of Gaianotes' and 'GSI's Deep Clear Red'.

L: GSI clear red
R: Gaianotes clear red (I like this)
But, I will not use it this time and plan to use it next time.
R: Gaianotes clear red (I like this)
But, I will not use it this time and plan to use it next time.

1st clear coated.
That is my cat's furrrrrrrr. 🙁
That is my cat's furrrrrrrr. 🙁

And there are also unknown stains.

Same.

I masked the stained area and lightly painted the body color in the super ultra dry airbrush way.

Fixed it.
Arrow: remained compound.
Arrow: remained compound.

A huge crater can be seen where the cat's hair has been removed.
Catsssssss !!!
Catsssssss !!!

GD.....
The decal stuck to the masking tape and fell off together.
The decal stuck to the masking tape and fell off together.

I just decided to remove it.

However, there is a step difference in the place where the decal was.
Come to think of it, since silver was paint on the clear layer, the level difference could not resolve by simply covering the more clear layer.
So only this area has to be retrimmed and repainted from scratch.
Come to think of it, since silver was paint on the clear layer, the level difference could not resolve by simply covering the more clear layer.
So only this area has to be retrimmed and repainted from scratch.

I'm going to repaint it anyway, so I checked to see if I could get the decals that fell off. There is!!

After the surface was thickly painted, it was sanded.
Then I silvered it and re-coated it until it became transparent.
Then I silvered it and re-coated it until it became transparent.

After the surface was thickly painted, it was sanded.
Then I silvered it and re-coated it until it became transparent.
Then I silvered it and re-coated it until it became transparent.

Done

The decals I ordered arrived within a month.

However, it shattered when immersed in water.
Perhaps, it is guessed that the product was stored for a long time in the warehouse.
Perhaps, it is guessed that the product was stored for a long time in the warehouse.

Anyway, I attached the torn decals together as much as possible.
It was a very difficult work as the as the decals were gradually broken while aligning the positions.
It was a very difficult work as the as the decals were gradually broken while aligning the positions.

Polishing work finished.

This is the bubble trapped inside.
This is one of the causes of the decal sticking to the masking tape and peeling off.
There is no way to fix it now.
This is one of the causes of the decal sticking to the masking tape and peeling off.
There is no way to fix it now.

Since it is clear that the decal will come off if I mask it, I painted the window frames and the like with a brush.

I also painted small areas with a brush.

All painting work has been completed.

Assembling the lower body parts.

Since the tire decal is glossy, I coated it with Vallejo matte varnish.
Because matte lacquer clear has hardness, it can crumble when painted on rubber, whereas varnish responds well to slight softness, so I use varnish whenever possible.
Because matte lacquer clear has hardness, it can crumble when painted on rubber, whereas varnish responds well to slight softness, so I use varnish whenever possible.

Since the interior of the 206 I made in the past was almost invisible, this time I decided to just treat the seat belt as a decal.

Interior done.

I used the mesh included in the kit.

Glue all the parts inside the shell.

The side mirrors were used by cutting out the metal sticker that came with the Tamiya case.

After drilling a small rivet, a metal steel ball was used.

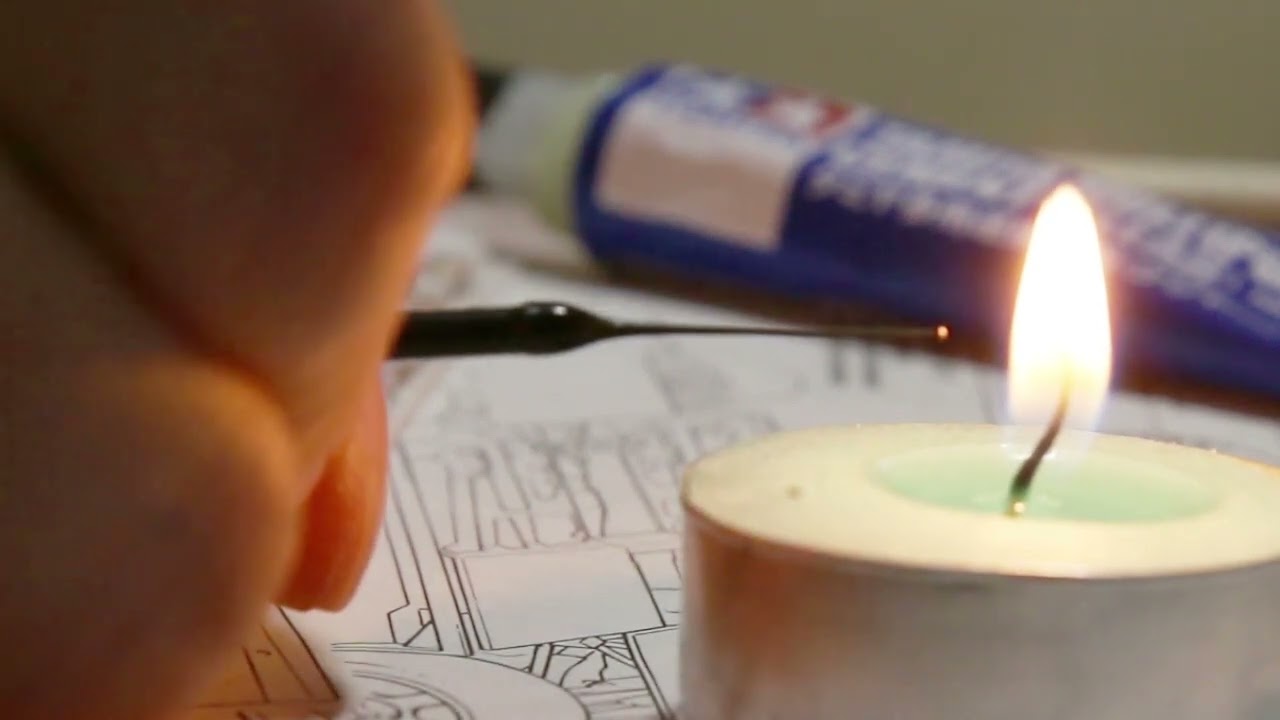

The wash fluid nozzle was cut and pasted after stretching the runner with fire.

Finally, combine the upper and lower plates, and attach all the remaining parts to complete.

Finish.
Opmerkingen
16 7 March 2022, 07:57
Watching. 👀
You have a fun way of documenting/logging your project. 👍
7 March 2022, 08:28
Thanks. WhiteGlint.
Since my English level is very low, it is more difficult to explain in English than to modelling. Viva! google translate~
7 March 2022, 09:16
You still have time to work on the wheels. Its easy.Watch the photos 4 until 13
Peugeot 206 WRC 2001/2002 | Album by jorgefk (1:24)
22 March 2022, 22:41
I always paint the trim then decal. But I don't clear coat, so..... But if I did, I think I would paint the trim, decal, then mask off the trim and clearcoat. Masking tape is not a decals friend, no matter how much clear is on top.
23 March 2022, 00:53
@Jorge Rerreira : Thanks for the advice. But I've already finished it.
@bossy122 : Yes, that's right. A glossy surface is a good condition for decals to stick well.
However, in general, even if it is only semi-gloss, the decal can stick well.
In this case, I think the problem was caused by the decal being over 20 years old.
23 March 2022, 04:23
Some great building on display here. Amazing to see you solve all the problems.
23 March 2022, 08:37
great. i have this kit in my stash, so will certainly keep this for future use! 🙂 looking great
23 March 2022, 08:46
bruh, this is great, thanks a lot for sharing so many details of your work progression. It's absolutely useful for noobs like me. Much respect for the hard work you're putting into this models 🙂 congrats.
23 March 2022, 10:09
great build and congratulations for getting through all those difficulties... 🙂
23 March 2022, 12:47
like WhiteGlint said:
You have a fun way of documenting/logging your project. 👍
aweseome work and breath, to finish the model with all the fails while painting and decaling. congratulations!
23 March 2022, 15:46
Thanks Dominik Weitzer.
I'm not good at English, so I'm not sure if my think are being conveyed properly. (80% dependence on Google Translator 😛)
23 March 2022, 17:37
This is a very enjoyable build log, loved the way you tackled the paint and decal setbacks. The finished model looks terrific.
Congrats!
23 March 2022, 17:42
I like the way you tackled all the problems one by one and achieved a very good result. Chapeau!
23 March 2022, 18:45
You had a lot of pacient for the paint and decals job. Respect. It turned out very nice. Great work!
24 March 2022, 05:37
Thanks David R. Meizoso, Michael Kohl, Christian W.
I make mistakes often. and 'Murphy's Law' was always followed me.
So I got used to it because I was always working with mistakes and accidents.
but I like 'Sally' 😄
24 March 2022, 06:51
Album info
motorart.tistory.com/375
motorart.tistory.com/429


