Dry fitting not required! - Porsche 992 GT3 RS build report - FINISHED


Photo 1 of 257
Kommentarer
89 5 December 2024, 08:10
I'm definitely following this! The idea of using drilling holes in small parts and inserting the needles is brilliant. Wish I saw this 2 weeks ago 😳
1 6 December 2024, 09:27
Welcome guys, yes holding spoilers is sometimes a real pain in the a**, I've learned this the hard way
6 December 2024, 11:40
Weirdly the X series acrylic paint is compatible with Tamiya's Lacquer Thinner, and it then acts a lot like lacquer. I have switched to buying lacquers only but still have some X series acrylics that I will ONLY put through an airbrush once thinned with their lacquer thinner.
1 17 December 2024, 17:49
I understand that the LP's are basically the rattle can lacquers in a jar. For 5 times the price.
17 December 2024, 21:01
Top idea to use the official Porsche config on the website! Tank you i'll configure one to better see all the details for the model. Double fun!
1 18 December 2024, 12:56
I can also recommend walkaround videos like these
Youtube Video
Youtube Video
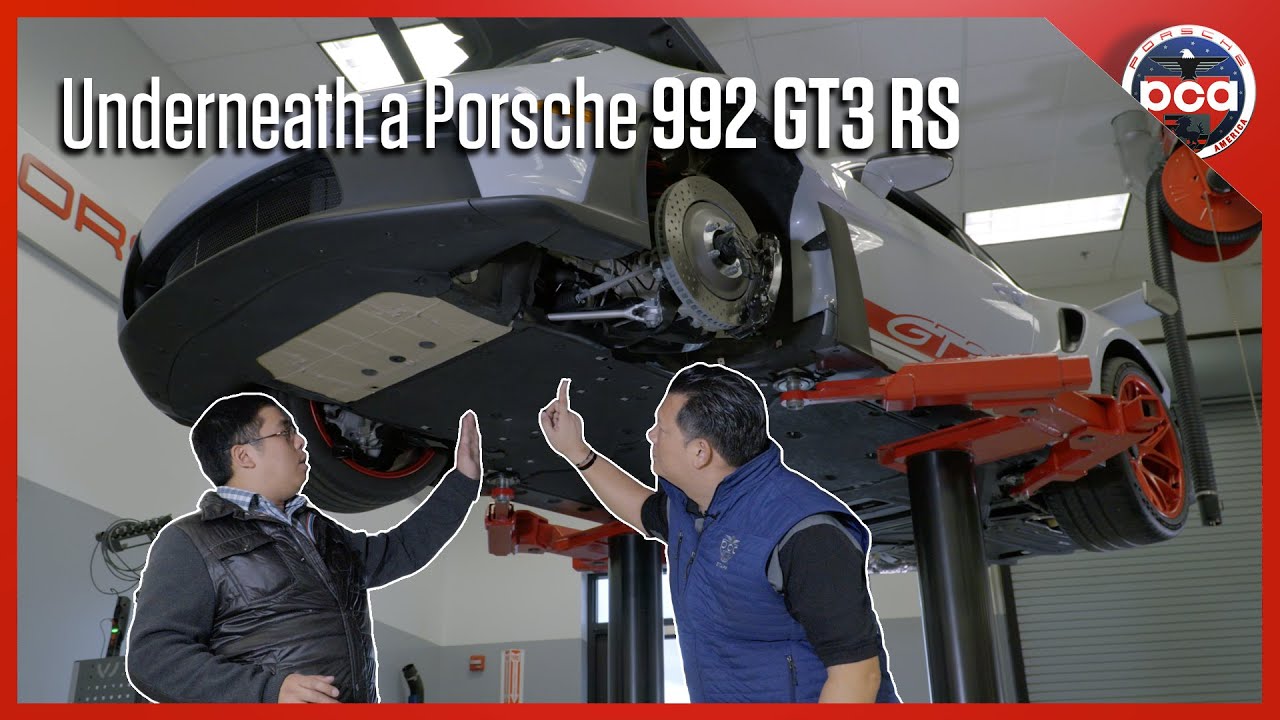
great source for all kinds of detail inside, outside and from below
2 18 December 2024, 14:38
@Alexander I'm still new to polishing paint, especially metallics, but my 1st gen Civic build was sprayed with X-34 thinned with Tamiya Lacquer Thinner. Main reason I've switched to this is using acrylic thinner constantly clogged my AB tip with the weather here.
Honda Civic GL (SB-1) | Album by Marktastrophe (1:24)
@Martin it's wild how prices change per locale, a jar of LP is a little less than half the price of a rattle can here and covers 3-5 times as much sprayed through an airbrush. (The low end of coverage is yellows and reds, of course.)
18 December 2024, 15:49
I really like your careful work and painting 👍
@Martin Tamiya follow simply the trend to lacquer paints, after Mr. Paint and and other started this trend. Ok, there is a smell but I really like the fast drying times and they are much more forgiving for airbrushing. When the Mr.Paint colors were new and people asked about them, my answer was always "It's like Alclad in color" 😉
19 December 2024, 15:06
The use of pins is a great idea. I've used this technique when I planned to pin the parts later, like on a resin kit, but hadn't considered it in other contexts before.
1 19 December 2024, 15:17
Lacquer or organic solvent paints are superior almost in every way to waterbased colors, some people might even prefer the smell 😄 I am just bewildered there is a trend towards something clearly not "environmentally friendly" in our supposedly eco friendly, green and polar bear loving world. Not that I am complaining...
19 December 2024, 17:08
I decant the Tamiya rattle cans and get +/- 75ml out of them. For approximately €8. The 10ml LP's are €5 each. If the paint indeed is the same , that's a huge difference.
And I mostly airbrush with lacquers. Much more forgiving in my hands than acrylics. I donated most of my acrylics to Spanjaard. The only ones I kept are for detail brush painting.
19 December 2024, 21:00
5€ for 10ml LP?? I sourced them for 2,69 a jar. I have to admit, I have never used decanted paint. Tried decanting once but was repelled by the messiness and did not end up using the paint. I think I still would prefer getting the jars. And if you consider you add up to 2/3 of thinner to the jar to make it airbrush ready the price difference isn't that great anymore...
19 December 2024, 21:16
@Martin To avoid to confuse people: the new lacquers are still acrylics! They are in solvent based thinner, in opposite to the water based acrylics. See for example a MrPaint label: "Acrylic lacquer based paint".
For completeness, enamels are another (oil based) paint class.
Sorry Alexander for hijacking your thread!
1 19 December 2024, 21:42
@Martin that could be the difference, I have never decanted a rattle can either. A 10ml jar is less than €5 here where a rattle can is around €12.50. I also average a 1:1 paint to thinner ratio so the thinner goes quite far.
(Currency conversions courtesy of Google)
20 December 2024, 02:57
@bughunter: I did not want to open the pandora's box either because it is an insanely broad topic but hey who does not like a healthy discussion! I get the feeling the word "acrylic" has become somewhat of a marketing term because it sounds cool and modern. So the consumer will think, "hey I have heard this before, this must be good".
It is basically the umbrella term for the "sticky stuff" in your paint. Paint consists in very broad terms from 3 parts: 1."colored stuff", the pigment 2."sticky stuff", the binder which binds the pigments 3. "runny stuff", the solvent which makes the paint more liquidy for easier application.
The "sticky stuff" is the aforementioned acryl, again a broad term for a myriad of different compounds. There are other categories of sticky stuff: oils, resins like polyurethane and many many more. In the earlier days the painters used compounds found in nature like shellac, tree resin or even eggs. When you paint an object, the solvent evaporates and the sticky stuff with the bound pigments inside remains on the object becoming hard and dry leaving you with an object in your desired color.
Depending on the chemical properties of the "sticky stuff" it can be soluble by different solvents like organic solvents or waterbased ones. Again in very broad terms the organic solvents are the "smelly" ones. But there are also overlappings like alcohol based paints which also can be diluted with water (Tamiya X and XF and alike)
3 20 December 2024, 08:50
It is an insanely broad topic, I would say just stick to what you are most comfortable with and enjoy the process!
20 December 2024, 08:51
Or learn something new by following Mr Shiny 😉
And I thin my decanted cans with 20-30 Mr SLT as well. To each his own, like Alexander says.
1 20 December 2024, 11:12
I am making progress guys, just the uploading is lagging behind. More pictures in the following days 👍
3 26 December 2024, 20:16
Looking forward to the pictures! Santa was good to me and I'm now the proud owner of this kit!
1 26 December 2024, 22:22
Just to throw my English spanner in the works, if you guys can get hold of some Winsor and Newton Galleria retarder, you should find that works too? Obviously testing, before you commit to the model, but it's an artists go-to, and you just need a tiny drop. Lasts for years, and for the money, it'll probably outlive each of us? Give it a Google and see if it's available in your area?
26 December 2024, 23:20
Joining the crowd and start with two cents of mine: I never got along with Tamiya paints. Exasperated I switched to Mr. Hobbcolor then. Improved my results further since using Mr. Color Levelling Thinner and closed the circle with Tamiya and Mr. Hobbycolor paints using the same thinner and about 10% retarder. Now I can use up my paints.
27 December 2024, 13:03
Apparently, all retarder contains glycerine. I'm no scientist, so don't hang me if I'm wrong! However, I did manage to dig this out, from years ago, and if anyone would like to look at the following link, then please do so.
My belief is, that sharing information, expands the knowledge of the hive?
Obviously, it's not my thread, so please feel free to PM/DM me with your experiences?
Alexander, thank you for your patience 🙂
1 27 December 2024, 20:01
Guys, thanks for your input and feel free to share your thoughts 👍
When using a brush for paint application I personally almost exclusively use Vallejo Model Color nowadays (similar paints from other brand as well, in the 17ml droplet flask). You apply a couple of droplets of your desired paints onto a wet palette an off you go, you can mix the paint on the go while you are working, it dries really fast, the droplet flask is very convenient. Great stuff. Almost never used Tamiya Acrylics with a brush with the seldom exception here and there. The glossy ones for example for springs, used a couple of times already.
Vice versa I for the love of me cannot stand airbrushing the Vallejo/MiG waterbased acrylics. I tried, i did not like the result. Something about airbrushing these paints just rubs me the wrong way...The way they clog the airbrush and the way they can be treated afterwards goes against my moideling habits. I know some modelers swear by them, I am not one of them.
So where were we? Paint retarder, so far I am d'accord with the Tamiya branded one and since I use it very seldomly it will be probably enough for a lifetime. So I am not seeing myself purchasing a bottle of Winsor and Newton anytime soon, but hey who knows, never say never!
1 27 December 2024, 23:14
Awesome work as always, taking a seat for the remainder of the project! 👍
1 29 December 2024, 22:27
Agreed, very much like the creativity of trying stuff like this. Definitely an interesting pattern. 👍
Would it be possible to try sewing yourself a fabric for the desired effect?
1 2 January, 22:48
With thin parts it is may be possible to wound a thread or wire around it as mask.
1 2 January, 23:01
I once saw a guy stretch a fishnet stocking over a motorcycle petrol tank and spray over it. The result was a perfect, snakeskin effect. Man, that was the coolest thing I ever saw! I think it was on Orange County Choppers, but I can't swear to it. I definitely admire your attempt to deliver the right impression. Creativity is what makes us stand out 100%
1 2 January, 23:37
Haha just sneak in while she's not home. You definitely proved the concept just need to fiddle with the medium
1 2 January, 23:50
Hey gents, Happy New Year!
Here is the video in question btw
Youtube Video
2 3 January, 00:09
Amazing 😳 This could make me having a go at building car kits instead of only aircraft.
1 5 January, 17:43
Is dry fitting necessary after all?
The bad fit of the mask and the missing B-pillar looks like they pressed this project out of the door for Xmas business? May be also Tamiya needs money in this though times, but it is bad if that kills quality.
5 January, 17:58
once again I'm blown away by your level of detail and ideas to create stuff out of thin air... honestly mindblowing. Thanks so much, I'm always learning something new when looking at your posts
6 January, 07:49
Not to rain on this parade, but according to the instructions, mask C goes on part D5, not D6. Could it be that even Alexander the Great is capable of a mistake? Now my entire universe shall collapse!
3 6 January, 16:48
Martin, you are absolutely correct and I have made an embarrassing mistake🙂
1 6 January, 18:02
Tamiya, I take everything back! Okay not everything, the missing B pillar is still not cool...
2 6 January, 18:03
I only knew where to look, as I have made the same mistake more than once!
2 7 January, 09:22
Martin, that is the "experience of an engineer": you recognise that you have made the same mistake before. 🙂
2 7 January, 09:27
So that's what my engineer degree is for!
Still another masterpiece in the making Alexander
1 7 January, 17:04
Yeah, that's cool.
Forgive me, I've just drooled all over my phone screen?
I'll be back, when the trauma team have evaluated me!
WOW!!!
1 10 January, 23:37
#141-146 adding details to the details. The level of skills makes this project really fun to follow
17 January, 08:50
The carpet texture process was fascinating Alex. CF has got the better of me but think I will have another try! Thanks mate! When will you start a You Tube channel???
1 17 January, 09:54
Thx guys, you are too kind. Peter, CF is not that scary, really. Once you`ve got the hang of it it is actually a really relaxing and enjoyable process, you should give it a try 👍
Concerning Youtube, I have thought about it and calculated it through. It will require an insane amount of dedication and time. Time which I will have to chop off from modeling and invest in filming, editing, uploading etc etc. Besides by now there are tons of modeling channels with maybe a couple of hundreds or few thousands of subs. It is very difficult to stick out and those who do have started their channels 10+years ago. Honestly, I think the golden days of Youtube are over anyway.
4 17 January, 20:05
Yes Alexander, and it is not only a big effort for you - it steals a lot of time from all the viewers! I prefer a build report with good pictures over the tons of videos.
2 17 January, 20:48
George, I understand your point and yes watching an 'unboxing' would I think be a little pointless but there are those out there that like them. In my case, when I took up the hobby I lived in a small mining town in Central Queensland Australia. No mentors, no clubs and the only modellers I met were on Scalemates. I now count quite a few as good friends, sometimes advisors and full time cheer squad members when I learn something new or build something they recognise as a step up for me. The camaraderie on Scalemates is wonderful and I will be eternally grateful to Tim for this site. All that said, a large part of my learning comes from You Tube. As I said I lived in a small, dusty little town 3 hours from the closest hobby shop, any other modeller or club. You Tube was a life saver for me. Yesterday I learned that a Tamiya Extra Thin cement bottle brush can be extended (and designed to do so) to reach the bottom of the bottle. The sort of stuff you learn from a bloke in the club in London, Berlin, New York or Pretoria. A lot of us don't have access to that wealth of experience for a question we didn't know to ask. It may not be applicable to you in your situation but it has a purpose for me.
6 19 January, 03:39
I don't watch "unboxing" videos either but Youtube is an incredible useful tool if you use it wisely and purposefully. It is a gold mine of useful information and I've learned an incredible amount from it and am very thankful to the content creators. Personally I wouldn's start a channel though because of the mentioned reasons
1 21 January, 06:48
I live in a "small" city in north east China, I say small but it has a population of approx one million. You Tube, along with most western social media, is not available in China. There is a web site called bilibili.com that seems to get some You Tube material, a lot of it is Japanese. However, modelling is very much a minority interest here, so the internet is my only companion. I like this site and iModeler.com.
21 January, 12:38

The polished result looks fantastic, the mirror too! I'm sure this little bubble will not be visible at the end ...
1 22 January, 22:43
Nah, Stuttgart will be fine but Shizuoka might need a few tips😄
1 23 January, 19:03
Whatever you did with the armrest on the door panel (the gray stuff that looks like fabric) looks amazing!
23 January, 22:09
Hey yngvenett, the same I did with the center console (pic 90) and dashboard underside (pic 175). Underneath it is the same dark grey paint like the rest of the part. Additionally I applied a mixture of XF-86 and X-21 (10:3 ratio) If you spray it fairly dry you get this fuzzy effect
1 24 January, 05:14
My dear mates, the build is progressing rathier quickly since I have a few days off right now. Looks like I might finish until the end of the week 👍
1 24 January, 05:45
This level of detail, is worthy of an award.
You've removed the bar, and created a whole new game!
Excellent work on the whole project, Alexander 👍
1 24 January, 07:25
hard to get anything better than this.... but I am sure Alexander will just exactly do that in the next build 😉
1 24 January, 10:01
Unbelievable stuff, Alexander! I was confused for a minute when I clicked on pics of the real car vs pics of your model, especially the interior. Great work, sir!
1 24 January, 13:23
That interior looks fantastic. Perhaps you can chop the roof off and turn it into a convertible so it stays visible. 😉
1 24 January, 13:41
@Marcel. If he chops anything off this, I'll personally fly to his part of the world, and apply a high voltage, to his genitals! This is where we're all lucky, because Alexander knows that it's there, and we've seen it being created. Once the lid is on, it'll all be hidden, like a great king's tomb 😉
1 25 January, 07:12
That's excellent work Alexander! Since such a knowledgeable bunch of modellers hung out here right now, can someone explain to me why my clear coating results have a satin finish at best? I usually airbrush on top of Vallejo air colors, and only with the alclad's clear could I achieve some shining results but that has been discontinued as far I know.
25 January, 08:20
Marcel, I thought about your offer but Mr. Bozzer's strenuous appeal made me reconsider
3 25 January, 08:55
Hey Evan, it is a broad topic but you can roughly boil it down to three things: 1. Surface preparation 2. Clear coat used 3. Thickness of the layer/ number of layers
I will use the terms paint/clear/clear coat/varnish interchangeably
1. If your surface is smooth, the applied varnish will also appear smooth and glossy, no brainer. This also applies to the paint you apply the gloss coat OVER, if it is flat (matte) or rough in texture etc the gloss coat will appear similar.
2. You can roughly divide clear in two categories: one component (1K) and two component (2K). Without going too deep into the chemistry the layer of 1K clears shrinks down considerably while it is drying, the solvent which is the bulk of the paint evaporates, leaving you with a thin layer of dry clear coat. 2K clears cure/dry by chemical reaction between the two components, while just a small portion of solvent evaporates leaving you with a thicker (glossier) layer. 2K paints are still a niche in scale modeling but if you want to achieve a nice car body finish there is almost no way around it
3. The more layers you apply, the better the result becomes. Also a no brainer. If you use 1K paints you need many more layers than with 2K paints. If I am saying more layers I mean the following: you apply 1-2 layers in one go, let it dry, carefully sand the surface with very fine paper (2000 or finer, just to get rid of the dust particles), apply 1-2 coats, let it dry.....repeat until you are satisfied. With 2K you will need less layers and less repeats.
2 25 January, 13:31
This is the gist of it from my personal experience, everyone welcome to add their two cents.
25 January, 13:33

Thanks Alexander, I had a feeling that there is no lazy way around it, so lots of (smooth) layers is the answer to a shiny result. I will commit and put the effort on my next project.
1 26 January, 10:48
What also helps with solvent based clears, is using Mr Self Levelling Thinner instead of regular thinners. That stuff is worth its weight in gold.
It slows the drying time a bit, so the clear can level off a bit more. Flip side, if applied too thick a coat, runners are a possibility.
2 26 January, 15:47
What a tease! Looking forward to seeing those "many parts" go together!
1 27 January, 21:24
Thanks a lot at all dear mates, at those who have followed this report and gave a thumbs up or two. I hope I did not bore you too much with my long winded explanations. Maybe you could even pick up some inspiration here and there. Another nice project, another lovely result, tried new techniques, learned something new. Stay healthy, stay positive, see you at the next project!
2 28 January, 20:40
Congratulations, this was an incredibly enjoyable build to follow and the end result is fantastic!
1 28 January, 21:08
Congratulations! It was a fantastic journey and I am very glad that you added lots of information during this building process. I took screenshots and actually bookmarked it because of some of your teaching skills. The finished car looks great, both on the inside and outside.
1 28 January, 21:42
Congrats! As said by many others, inspiring build and the result does not disappoint! A very good job also for the nice presentation with the mirror, looks like something actual marketing of the real car would do too! 👍👍👍
1 28 January, 22:24
She's a beauty mate! Your tutorial was informative and very professional. I particularly liked the chopstick sander. Definitely something worth remembering! The outcome certainly paid off!
I'm also glad to see, that you kept the roof? Your soprano skills are saved for another time!
Well done mate, put her in a case, and grab yourself a beer, you earned it 👍
1 28 January, 22:27
The daylight shots wonderfully add to the overall impression of a superb build.
1 28 January, 23:31

"I may even pick up an inspiration here and there". Understatement of the year! Alex G, you just drawing breath I use as an inspiration!!! Again, Peter Hardy is dumbfounded by your level!
2 29 January, 07:19
It's almost like you photographed the real thing. Outstanding work. And don't let Bozzer intimidate you. I'm sure he means well, but a convertible definitely would be an interesting option given your highly detailed interior work. 🙂 For this kit it would even save you the hassle with that b-pillar. Maybe Tamiya is working on that version and is that why they didn't bother with that pillar!
1 29 January, 11:52
Wow. Just wow. Fantastic result as always mate. Thanks for sharing the Mr. Shiny full experience 👍🏿👍🏿👍🏿🥳🥳🥳
Also reminds me that I miss my beloved hobby really bad. But in the moment there is no chance because there is no bench nor mancave 😞
1 29 January, 20:15
Hey Dennis, kitchen table, basic set of tools, off you go! I was in a similar situation 5 years ago while moving places and had no bench for like half a year, everything was stashed away in a storage facility. That did not stop me from realizing a few projects including a BMW Z3 and the green Opel GT. All fun and relaxing OOB builds. Unless you are homeless of course 😄
30 January, 08:15
@Dennis. I know some guys, who model from the back of their semi? (Obviously not while driving)
It's possible to do it anywhere, as long as you have the time. Don't dishearten buddy, you don't need all the fancy stuff, to have a good time? Please remember, it's a hobby, and it's fun! Just glue and paint, are enough to make a convincing model? You could always paint it white and hide it in the snow? 😉
1 30 January, 19:35
Note to self:
Don't spray grey primer on a truck, in a cardboard box, in the kitchen, because it's warmer than any other room in the house!
Two days later and I was still cleaning up the residue of the overspray and whatever else hit the fan!
I'd rather clean up the mould lines on an old Italeri kit, than do that crap again!!!
1 30 January, 19:41
Note to self. If I am as silly as Bozzer do not admit it publicly. Keep it to yourself.
5 30 January, 21:42
The teacher in Bozzer is helping new hobbyists to avoid some divorce inducing painting methods.
I can appreciate that.
😂
3 1 February, 08:19
Lol, I'm just trying to protect you guys and your kahonies? Believe me, it's eye watering, when your Mrs see's a dusting of grey, all over her kitchen! Now you all know why I built the mancaves? She's much happier now that I've taken my hobby to my palace of plastic. I can only imagine the pain, if she smells three resin printers, banging away, on the kitchen worktops?
Stay safe out there, fellas 100% 😉
4 1 February, 09:09
Glorious work!! Makes me want to start mine right now! I better finish what's on the bench first though
1 5 February, 02:09
Thx again mates 👍 btw there are a ton of nice aftermarket parts out by now, PE parts, detail sets. CF decals for everything including the seats. Curiously wondering if someone would provide the B pillar cover since it is the biggest drawback of the kit in my view. Still puzzled why Tamiya ignored it perfectly knowing that fitting seatbelts to your 1:24 dream car is one of the most common modifications these days....anyway
3 5 February, 19:14
Album info
So I got infected by the hype around this kit. Pre-ordered mine as well and got down to work the same day as it was delivered...