

Tamiya Bell X-1

Contents of bag 1. Sprue A and a stand.

Sprue A. Fuselage parts.

Contents of bag 2. Sprue B and decals.

Decals are nice, crisp.

Sprue B in grey. Hardly any flash (and parts this will be a quicky)

Bag 3. Sprue B in clear plastic for a see through model. And a weight to prevent tail sitting.

Glued some tanks and bits to the fuselage. As I won't do a see through, no painting is required.

Highlighted some details in the pit with a wash and some brushwork.

Closed the fuselage. There is already a small step too be seen along the seam. 🙁

Some sanding to be done. There clearly is a step on the top and bottom of the fuselage

Sanding, sanding and more sanding. In the end I just filled the gap with CA glue and started sanding with 250 grit paper.

And it worked. Tidied everything up with 600 paper, 3600/6000/8000/12000 cloth

I think it worked out well. Glued the wings with CA as well, in an attempt to prevent the need for filler.

Glued the piece above the canopy. Needs sanding of course. Comenced masking of said canopy. 1 row done, 3 to go

Past the halfway mark

Canopy masker. Not exactly Eduard standard, but its good enough with my skill level

One 5 ml cup in my airbrush: started too dry, finished too weet on the tai.

This is the primer used.

Scribbles on a bit of plastic look okay

Actual paint on plane doesn't

Orange it is

Orange it is

Orange it is

Orange it is

Orange it is

Painted the pitot tubes gun metal

Painted the brakes gun metal grey

Port side decalling done.

Starboard as well.

Glued the right canopy. Masking was a *****, result quite satisfactory

Tail is a bit lopsided

Looks okay though

Added a wash.

Added a wash.

Cleaned the wash.

Cleaned the wash.

Cleaned the wash.

Undercarriage & wheels glued. Unpainted spot on front wheel will be glued to base.
Kommentarer
2 13 June 2017, 18:30
Thanks Lukasz & John.
Lode, that would be edition 10 Testpilots.Had to check in my collection8)
22 June 2017, 21:09
I. Dont. Get. It.
I used one 5 ml cup of primer in my airbrush. It started out reasonable, turned too dry and finished too thin. It almost seems as if the paint is sinking from the carrier fluid. After a couple of minutes I het a whitish film on top of the paint in my cup. And this is during spraying. I'm sure I shook the bottle long enough.
25 June 2017, 14:15
I still don't get it. Sanded the black primer smooth. Wanted to add white scribbles as a form of preshading. Used Mig's One shot primer white. Dilluted it with some acryllic thinner, also from Mig.
Test scribbles on a bit of plastic went fine. Then the airbrush clogged up, threw grainy bits of paint. I already lowered the recommended airpressure, dilluted the paint. AAAAAAAAAAAAAAGH!
I now guess that primers don't agree with my 0.2 nozzle.
This project looks jinxed 🙁
25 July 2017, 14:46
Hi Lode, I hope you're wrong. My airbrush is less than a year old and not much used, I bought it new. The problems I have are with Mig's primers. I'll do some testing with my 0.4 needle and with other paints.
Thanks for thinking along!
Martin
25 July 2017, 20:06
Painted the orange with my 0.4 needle. Went well.
For this bright colours, I'm not so sure Michael Phillips' blackbasing works. If you look at the canopy, you'll see its way more bright than the rest of the plane. I had to use much paint to get this bird orange. On the other hand, the blackbasing kept it from being too Orange.
What do you guys think?
13 August 2017, 15:14
I must admit that its a little bit to dark in my opinion.
Here a pic of the Glamorous Glennis
airandspace.si.edu/collection-objects/bell-x-1
Black basing is a nice technique - no question ask - but I think it doesnt work so well with "bright" colors like the orange of the X-1.
You can see this in Matts videos. It looks great, but it gets really dark.
Youtube Video
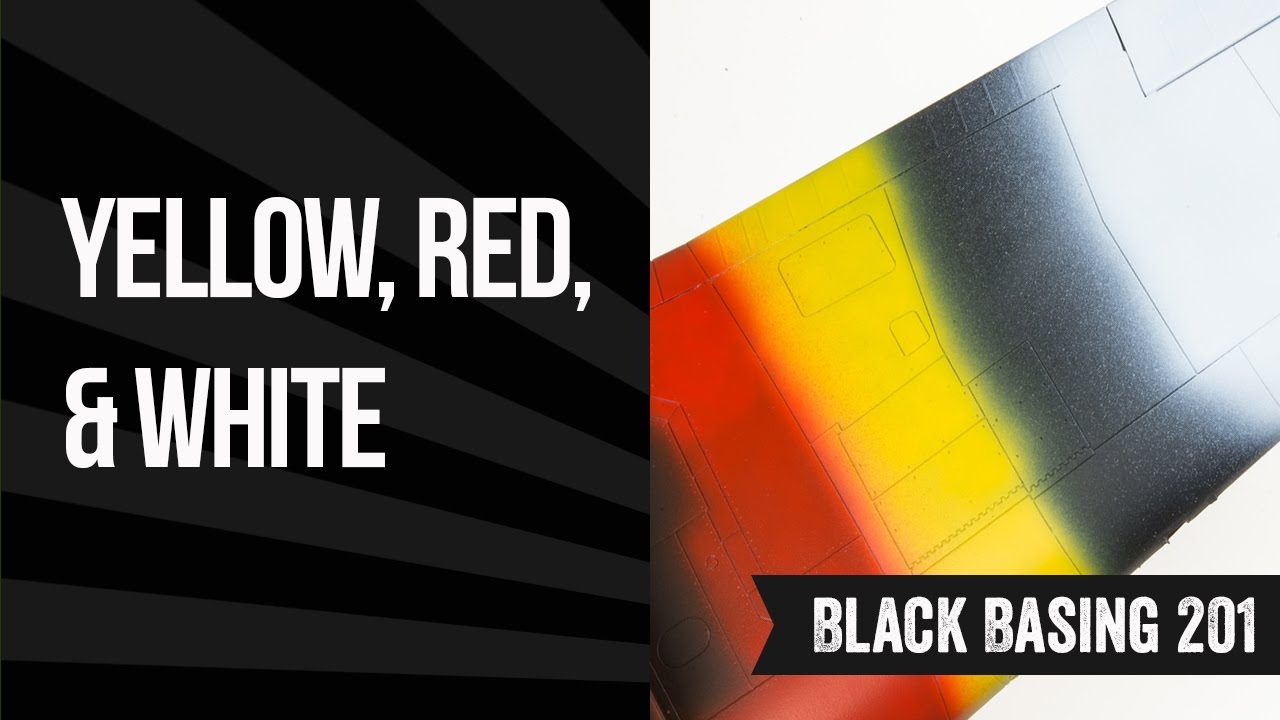
Mine will be white primer, yellow "base" coat, pre shading with a red brown and then the orange.
13 August 2017, 15:38
Sören, I'd love to say you're wrong, but you're absolutely right. I guess I'll have to pretend mine is seen at night 😉
13 August 2017, 15:46
Btw are you gonna to repaint the canopy,
because the struts of the canopy are painted in black😉
13 August 2017, 15:50
No I won't. This is one of grey styrene. I've got the clear one separately. That bit I did think through.
But thabks for the advice. Appreciate it 👍
13 August 2017, 16:06
Blackbasing didn't work as planned. Had to use so much orange paint, some panel lines seem flooded. Will have to see what a wash will do.
15 August 2017, 16:01
Decals on. Unmasked the canopy. To do: add undercarriage.
I'm doubting whether to give it a wash. Some panellines near the front are alnost flooded with orange. I don't feel like I could get a decent result. She Could look better, now its a whole lot of orange.
Need to sleep on it.
22 August 2017, 19:09
looking nice
question, you use the aluminium foil to get the lines to be masked and use that to cut the mask? seems a good idea!
23 August 2017, 06:46
Thanks Lode & Spanjaard.
The aluminum is used to 'lift' the lines. Then I taped some masking tape over the foil (beware of mirror images!). The I cut the masks. It's a bit fiddly with so many small windows on this scale, but this actually worked quite well.
It's a variation of Don's method: Youtube Video

23 August 2017, 07:09
Added a brownish wash. The wings picked up decently, the fuselage did some.
27 August 2017, 14:34
She's ready. Only the base is left. But that needs a bit of drying time.
27 August 2017, 17:32
Finished! For the final result, check here Bell X-1 in loading pit | Album by Mahoo76 (1:72)
27 August 2017, 19:08
Album info
Totally frustrated with my WIP Revell Supermarine Stranraer | Album by Mahoo76 (1:72) Stranraer build, I decided I wanted to do a quick build. This is it!


