
Wiadomości
i didn't finish the kit, probably is the third time in 30 years of modeling...very bad fit, a large use of putty, plastic fragile and very bad decals...the decals' instruction are incomplete.
very very bad experience!!!
")
3 29 April 2019, 08:31
Too bad. I did a couple of sword kits, and they were not so bad in terms of fit. And the plastic was actually good quality with fine details.
They are still short run kits though, maybe you got one at the end of the mould lifespan...
2 25 April, 08:32
dodał nowy album.


26 28 October 2024, 11:09
Thank you all. This build was an emotional rollercoaster. I was impressed by the details of this kit, but annoyed by the complicated engineering. Building the landing gear was no fun at all, to be honest. The raw paint job was really good in my eyes, but I completely ruined it with the gloss coat. I was about to throw it away. After a lot of touch ups and a matte coat my confidence came back, and in the end I am really quite happy with the result.
The weathering was pretty simple, just black and brown oil paint. Less was more in this case, I guess.
7 November 2024, 19:19
It is good that you persisted, the result proves you right. I would have guessed at least 1/48!
7 November 2024, 19:27
Reporting: NO, this is definitely not a spammer
NO, this is definitely not a spammer
Member since: February 20, 2025
SPAM ALERT
Please help usVerify this user and jego posts and agree or disagree with this user being a spammer: Go to vote page
25 April, 11:15
dodał nowy album.


14 19 April, 23:03
Excellent work Vassilis. Please share some more information about the marker you used to get such a great result.
24 April, 15:45
Thank you John for your kind words.
Actually I found this technique on Youtube here is the link: Youtube Video
So, as you can see in the video, the marker is the Montana ACRYLIC EMPTY Marker with the 0.7mm tip. It's an empty marker which in my case I mixed the paint, used the AK 3Gen Air series 11830 RLM78, and the thinner in a 60/40 thinner to paint ratio (ratio depends on the paint and the thinner). You will not need much, a total of 5-6ml paint+thinner were enough for me to do the whole model. Shake well and then try some blotches as described also in the video to adjust the mixture if needed and get used to how it works. As you press the marker down it releases the paint through the tip, I would NOT suggest to don't do that directly on the model. Take a piece of cardboard like I did as you can see in one of my photos, push the marker down on the cardboard and then work on the model. It's easier to control the flow this way and avoid any leaks on the model.
Now about the camo blotches, it's up to you, you will see that after you do a couple the hand will just go on it's own. I first did the shape and then painted the inside
TBH I should have done mine a bit more hard edged, they look a bit more round to me on a second look.
Hope that I was of help. 🙂
1 24 April, 21:33
Excellent technique. Thank you for sharing. I will have to give that a try.
25 April, 11:05
dodał nowy album.


82 7 September 2022, 09:00
...because they don't like challenges *lol*
kidding. ofcourse.
7 September 2022, 11:15
I wish Tamiya used their toolings more. As an exaple: they have debatably the best F-16 in 1/48, and easily the best one in 1/72, but they only come in one or two variants. I feel like if they released many more variants, like Hasegawa do, they would take over the market when it comes to some subjects.
31 May 2023, 14:51
I need to know who has recorded and used here an argument I had with my wife! 😄
1 31 May 2023, 15:36
And I really start there to build my first Tamiya kit. Instead of like a man the usual biplanes including rigging!
1 31 May 2023, 19:34
Alesandro, I agree, it would be great to see Tamiya doing that.
Robert, We've all been there 🤣
Bughunter, no-one is questioning your manly builds 👍🏻 they are superb!
31 May 2023, 20:04
Last night was seen a good German female cabaret artist, who described life:
The man is at work - good, the woman has time for herself.
The man dies early - good, the woman has time for herself.
But in between it is problematic, the man is retired. Best she sends him to the hobby cellar. What kind of hobby doesn't matter, the main thing is the cellar - the woman has time for herself.
🤣🤣🤣
2 18 June 2023, 16:35
Love the Toyota poster. I had a tour guide back in Argentine who argued that he bought a Hilux because Bin Laden had one. So it should be reliable, shouldn't it?
1 31 January 2024, 19:17
I would not use reliable and Bin Laden in one sentence normally, but Toyota's are reliable for sure 🙂
31 January 2024, 21:14

Felt like i just went through a modeling fever dream. Need more of these 😄
1 9 November 2024, 10:05
Just had another chuckle at this album. Pic No. 1 & 11 are my faves. 🙂
Thanks Jan. 🙂
1 6 March, 07:24
Reporting: YES, this is a spammer
SPAM ALERT
According to me, this user is NOT a Scale Modeler and his profile should be DELETED.
Member since: February 20, 2025
SPAM ALERT
Please help usVerify this user and jego posts and agree or disagree with this user being a spammer: Go to vote page
25 April, 10:54
dodał nowy album.
53 zdjęć/zdjęcia
Volkswagen Type2 Micro Bus (1963) '23-window' (Hasegawa 1-24)
1:24
Finished.


Projekt: Volkswagen Micro Bus (1963)


52 22 October 2024, 18:50
This may be no consolation, but it is the same issue with the Revell Samba bus.
23 October 2024, 03:59
Oh, that are a lot of ejection marks!
For raised ones I use a scalpel nr 15, if there is enough space around. In the middle of pic 1 are some with tight structures around. Here I would use a model chisel like this one (example, there are different sizes): Chisel F2 (Master Tools 09924, No)
Deepened ones can be closed with round pieces of styrene (made with punch and die, in the matching diameter.
")
1 26 October 2024, 19:19
The X-Acto #17 chisel blade is also excellent for removing ejector pin marks. It can be used in the normal chisel angle as well as perpendicular to the surface as a scraper. #17 Lightweight Chiseling Blades - 5 Pcs (X-ACTO X217, No)
")
26 October 2024, 19:44
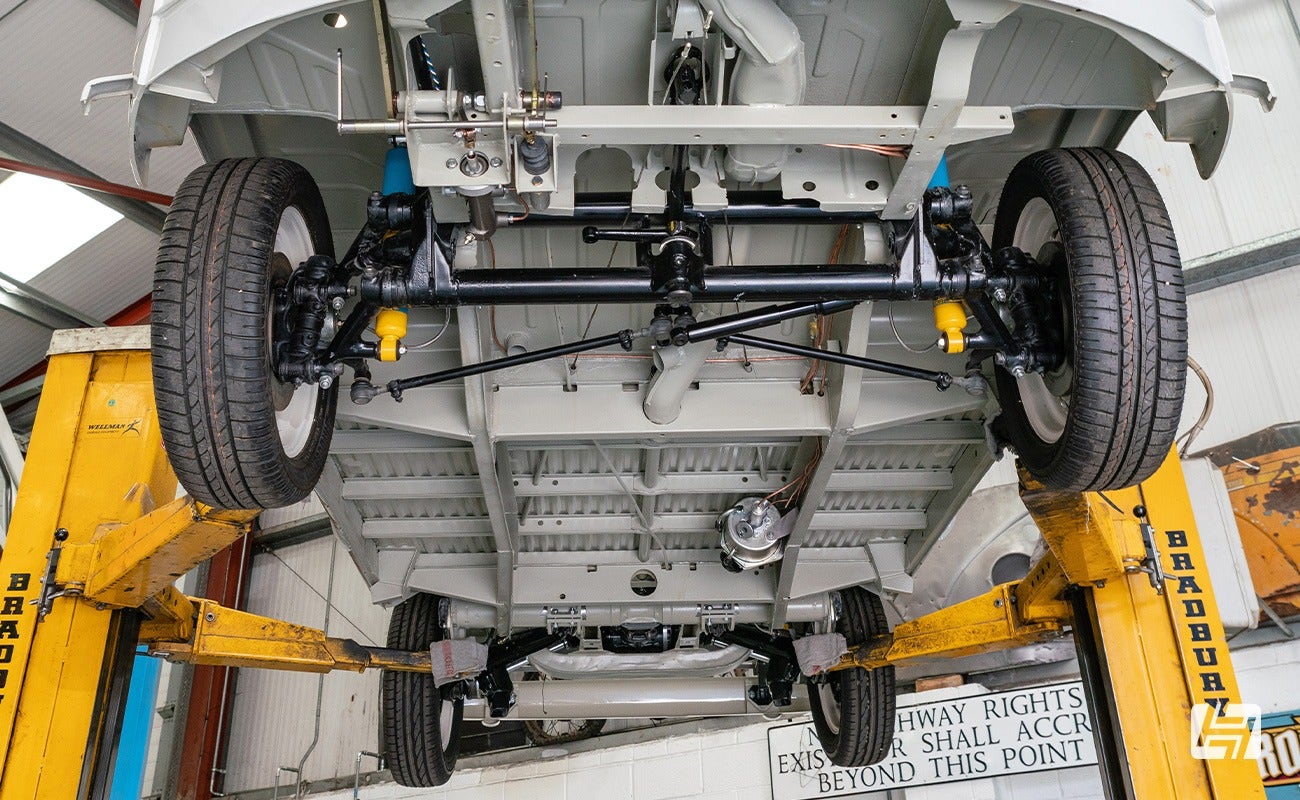
The metal floor should be corrugated on a type 2, so another approach would be to hide them under corrugated panels.
[img1]
26 October 2024, 19:56
Thank you so much for the comments. I'm in the middle of removing them. Some of them are really high. I use everything I have on the hand (Saw, chisel, scalpel, sandpaper). For some I even used a dremel (really cautious) Even if i would hide the behind corrugated panels (God idea by the way) I still have to remove them before.
You can see in the next picture how high there are. Ione was almost 1mm
27 October 2024, 05:24
I'm liking those plates. I applaud anyone, who tries to advance their skills. And you did it right, by trying this on the bottom first.
10 November 2024, 12:21
Personally, I think that a bit more, would work. Anyone who's owned or worked on an old VW, knows that they're covered in rust. However, you've mastered that technique and it's worked beautifully!
Keep at it, and good luck 👍
22 December 2024, 11:36
Yeah air cooled vws tend to be very rusty - you nailed it! Mine literally had holes in the footwell area in front. I used an air chisel to cut the skin off an old hot water tank found by the side of the road and used the sheet metal to patch my floo
22 December 2024, 11:50
That body looks too good to spoil. Excellent work so far. You have me captivated.
9 February, 15:16
Working on the Concept of my Diorama. I never build one before, The Barrels and Jerry Cans are 3D printed. The rims are from an old kit I build, but didn't survive one of my moves. The bumber was in the Hasegawa Kit. The wooden Fence is not finished.
1 4 April, 17:08
Absolutely fantastic! And thanks for adding comments, really enjoyable to spin through the album. Congrats.
4 April, 17:12
Very happy to see this moving forward. I'm liking what I see! You don't have to spend millions on special parts, for a diorama, most of the time, you've got the stuff, laying around the house? You just need to think outside the box?
Excited to see the outcome of this, now it's nearing completion 🙂
6 April, 06:19
Finally finished. I'm proud that I pulled that one off. Last dumb question should I glue the Bus on the diorama?
1 24 April, 16:32
Excellent result. The weathering looks very good. I guess I wouldn't glue the bus to the diorama. That way you can use the diorama to photograph other cars or put the bus on a different diorama if you'd want that.
25 April, 10:26
There's just so much detail to take in!
You're weathering & corrosion skills are excellent 👌👌
25 April, 10:53
dodał nowy album.
100 zdjęć/zdjęcia
SAAB Viggen - "Thor's Hammers" - Special Hobby - Quadruple Build
1:72
Undercarriage being added, making sure to get the alignment correct so all six wheels are simultanoulsy touching the gro...


 14+
14+ 114 15 January, 18:11
Me too. Already learned to better open up the RAT turbine at my Viggen. A step I lazily omitted.
2 16 January, 08:33
Main assermbly done on all four models, but now I have a few days to spend sanding and filling unwanted seams and crude areas. A bit tedious, but that's what you get when you choose to build four nearly identical models at the same time.
17 January, 14:23
Oh my... Good luck, Thomas! 🙂
I own two of them and was thinking of a double build but rejected the idea. Thanks for the encouragement!
1 17 January, 18:26
Wow! That's a quick build! 😳 I can only dream to build ONE kit that fast, let alone four at once!
1 17 January, 19:29
Mr D, no, they are pretty much the same. Most of the parts for all versions are provided in every kit. But there are some subtle differences that need attention, like the extension of the fuselage for the fighter version.
1 17 January, 22:05
Patrick, haha, I am a pretty fast builder, but I am extremely slow when it comes to painting. That's where my projects usually come to a crawl.
3 17 January, 22:07
watching with interest - I love SAAB aircraft anyhow, but 4 of them in one project --great!!
1 18 January, 10:31
This is more interesting than I thought it would be. The subtle difference between them are pretty cool.
2 20 January, 10:53
With only a few minutes of modeling here and there this week, it's quite a slow progress, but I am still inching closer to the finished assembly.
30 January, 20:16
Primer coat applied, a few filling errors need to be fixed. Time is unfortunately very difficult to find because of work, so the project moves very slowly for a while.
12 February, 08:46
Undersides sprayed blue-gray with Mr Paint. Now let's wait a day for the paint to dry and then it's time to start working on the splinter camo. With my current speed, I expect to be finished by midsummer.
14 February, 14:15
Oh yes, once you get used to MRP, you'll never want another paint brand anymore! I love their colors, pigmentation and general ease of use. And, as a bonus, their sheen is perfect for adding decals directly on top.
2 14 February, 15:36
I am trying to find a way to avoid tiny gaps between the splinter camo color zones. I think I have figured it out - before spraying a color zone, also remove the masks for all adjacent surfaces not yet painted. Thereby a slight spray overlap is created, so even if the mask is then replaced with a tiny bit of offset, it should not be visible. Special Hobby writes something like that in the mask description, but it's written in a very obscure way.
17 February, 12:11
Looks great just give the corporal in charge of painting a reprimand on his record and send the plane to the flight line......do you know how much it cost to paint aircraft, lol.
1 17 February, 13:55
macro is a bitch for this kind of details... if you place the model in the display cabinet, can you see that microline with wrong color? i think you can not 😉
1 17 February, 14:01
I have now started to add the masks to the models. It's quite a tricky task because I need to be extremely precise with the application - even the tiniest errors will be magnified as more mask segments are added, until things no longer add up. So it's a matter of constantly realigning the segments, which makes it all rather time consuming. BTW, I noticed that the pattern has a few minor errors, but I definitely won't lose any sleep over it.
1 19 February, 20:26
Thanks for your explain, Thomas. I thinked to would be more easy to apply 👍
1 19 February, 20:33
this camo is one of the most complicated to achieve and the fact that you are doing it 4 models at once... my deepest respect!
2 19 February, 21:20
Cuajete, Spanjaard and Łukasz, thank you for your interest! I am certainly not doing any cliffhanging on purpose - I am actually this glacially slow in reality. I also try to avoid aggravating the wifey by disappearing in my modeling man-cave for hours.
2 19 February, 21:45
Good and fully understood strategy 😄
As our common colleague (the one, you share initials with 😛) used to say: "Happy wife? Happy life!"
1 19 February, 22:05
Watching with interest. You will master the splinter camo for sure 👍
1 20 February, 17:10
I am still struggling with the masks, trying to making sure that they are applied exactly identical on all three models, which slows down the process a bit. Not that anybody except me would notice.
3 21 February, 10:59
Nice progress, I'm looking forward to the splinter camouflage. On my AJ-37 I used vinyl masks from DM Models, it looks like the masks you are using are a bit easier to handle.
1 22 February, 12:12
I have always had the conspirational theory that the Danish air force had a secret department dedicated to making life miserable for modellers, with their odd fonts, colours and aircraft modifications. The splinter camouflage is clear evidence of a similar department in the Swedish air force.
4 22 February, 12:19
Daniel, thank you! I am right now hoping that my end result will be at least in the general vicinity of your beautiful Viggen in flight!
22 February, 22:31
Phew, the second color is finally on. Now it's time to cover also the dark green areas and proceed with the black.
16 March, 20:06
Was anxious to see how you handle the masking but see that you struggle with the three tone camo too. Cross my fingers for a satisfactory end result.
1 17 March, 08:57
Michael, it is really not that difficult, only extremely time-consuming and require a very good eye-sight (or magnifying glasses). Too bad that the masks only partially reflect the actual camo pattern, I was hoping that they would be near perfect.
17 March, 09:52
I was wrecking my brain for a simple elegant technique to apply 3-tone camos without the need for re-covering extensively. So - yes the concept is easy, but the work is plenty. 😉. Keep it up. Looking good.
1 17 March, 10:52
Actually, the best method is to have two mask sets. I find that it is very difficult to do it all with just one mask set, as the masks will be slightly stretched and distorted when removed and reapplied and will no longer fit perfectly.
1. Spray the model light green.
2. Place all the masks from the first mask set.
3. Remove all masks segments except the light green ones and throw them away.
4. Spray the model dark green.
5. Add the dark green masks from the second mask set.
6. Spray the model black.
7. Add the black masks from the second mask set.
8. Spray the remaining exposed areas tan.
Also, when spraying a color, do not mask areas that you will be painting with a different color later, or you will end up with tiny strips of areas where the previous color shines through.
3 17 March, 11:41
Maybe to add that such a camo be best postshaded or oil rendered as the various colors have different amounts of paint layers and so preshading gives an inconsistent result.
2 17 March, 14:12
Great job with the painting masks, Thomas!
Thank you for the explain and the steps for apply 👍
1 17 March, 19:01
Thanks for the detailed explanation Thomas. Is there a particular reason for the order of the colors? I would probably have worked from light to dark.
1 17 March, 19:44
Admirable stamina, looking forward to the inevitably great result 👍 I have Fujimi 1/72 Boeing Vertol/Hkp 4 in my stash and Swedish decals for it… even the rotor blades have splinter camouflage.. 😳🙄
1 17 March, 20:20
Thank you all for your interest and encouragement! Nicolas, the tan areas are relatively few and with difficult shapes that are squeezed in between the other colors, so I figured that they would be easiest to leave for last. And for the three other colors, I indeed went from lightest to darkest as you suggested. Kenneth, yes, I would love to do the Hkp 4, it looks awesome in the splinter paintwork! I am however not sure if the Fujimi is available any more.
17 March, 20:39
Łukasz, thank you! Kenneth actually provided me with a link to a German web shop (Modellbau Huber) where the Fujimi was still available, so I placed an order for it. I also ordered the Swedish decal set, so I might as well check if I have some MRP splinter camo paint left. And Valium for the nerves.
2 18 March, 08:44
Wow, Thomas... It will be great to see that Fujimi with splinter camo in your hands 👍. I wanted to do the same too, but unfortunately I got another version instead.
1 18 March, 19:08
Lukasz, I initially bought the 1/72 Hobby Boss CH-46 by mistake and it's useless for a Swedish Hkp 4. You basically need to make completely new rear sponsons yourself, and their shape is relatively complex.
2 18 March, 21:32
OMG. A lot of work in this camo scheme - I sure at the very end all the efforts definitively will pay off. I'm really curios for next pictures....
1 22 March, 12:16
@pic92: ok?! That looks freakin perfect! I cross my fingers for a similar result on all surfaces on all planes.
1 24 March, 20:43
Those colors look awesome already! Very tight demarcations as well! 👌🏼
1 25 March, 18:31
Great! Fantastic result.
The great (and hard) masking effort is paying off, Thomas 👍
1 25 March, 18:44
A little late, but watching with interest - especially if you go insane over FOUR viggen camo jobs!
1 27 March, 00:02
I take my hat off! I just would not have the patience to do every step 4 times - especially the masking (ok, 3 times here…). Great job on the masking Thomas!
1 31 March, 14:17
Thank you all, dear mates for your kind words. They mean a lot to me! But to be fair, at least half the cred goes to MRP for its paints - they are simply incredible to work with. For airbrush work, I cannot see myself going back to anything else again.
2 31 March, 17:53
Wow... Thomas, the patience and work you put in to achieve such a magnificent result is admirable.
1 31 March, 19:20
Congratulations on conversion to the lacquer paints 😄 Welcome to the club 😄
Hint: the other lacquers are great too, but might need thinning.
I'm very sorry to state that the grey one looks so incredibly dull now 😉
1 31 March, 19:53
Łukasz, haha, yes, the grey JA certainly does look boring in comparison, but well, that's what they looked like in real life. Perhaps the large red day-glo numbers on the wings might spruce it up a bit.
2 1 April, 04:53
Wow, my friend, what an incredible job! How can you do something so complicated?
3 1 April, 05:35
Little time for modeling these days, but some progress is done on the details. Next is that fiddly undercarriage and then the part I am dreading a bit, the decals.
2 13 April, 11:36
dodał nowy album.
1 zdjęć/zdjęcia
RA-5C Vigilante SK Model 1/72
1:72
Projekt: RA-5C Vigilante SK Model 1:72

25 April, 10:37
Reporting: YES, this is a spammer
SPAM ALERT
According to me, this user is NOT a Scale Modeler and his profile should be DELETED.
Member since: February 20, 2025
SPAM ALERT
Please help usVerify this user and jego posts and agree or disagree with this user being a spammer: Go to vote page
25 April, 10:34


Reporting: YES, this is a spammer
SPAM ALERT
According to me, this user is NOT a Scale Modeler and his profile should be DELETED.
Member since: February 20, 2025
SPAM ALERT
Please help usVerify this user and jego posts and agree or disagree with this user being a spammer: Go to vote page
25 April, 10:30
Reporting: YES, this is a spammer
SPAM ALERT
According to me, this user is NOT a Scale Modeler and his profile should be DELETED.
Member since: February 20, 2025
SPAM ALERT
Please help usVerify this user and jego posts and agree or disagree with this user being a spammer: Go to vote page
25 April, 10:29
dodał nowy album.


6 20 April, 16:25
Out of the box built of a great kit. Pretty cheap, not too many parts, but great details. Only minor flash and very few issues with parts fit. The small price point makes it a great kit to test some techniques without too much worries of messing it up. In this case: I used chipping fluid (hairspray) for the first time. I'm satisfied with the results, looks like I'll work further on that skill.
25 April, 10:20
dodał nowy album.


40 17 March, 20:51
Ha! There come the memories of my childhood! Please a seat in the front row and a bottle of Oranżada! 🙂🙂
3 20 March, 09:54
Nice! Seeing this Eastern European military workhorse done justice in 1/72 definetly has my attention 👍
1 21 March, 11:33
Although it looks like a rolling coffin, Zsolt started a great party with it! The modulation looks very convincing.
1 30 March, 14:50
After enamel pinwash I played with oilbrushers from Amm: I faded blended and highlighted the green base color
1 4 April, 21:18
dodał nowy album.


46 25 June 2023, 15:18
Thanks Joachim P.I tried to build a little studio at home .It's worth it
26 June 2023, 07:19
Awesome looking Intruder and the photo work is striking! Congratulations. I flew the A-6E TRAM and my last cruise the SWIP version. Only a true Intruder geek would probably know this, but the A-6 version you've chosen did not have the capability to carry HARM missiles. That didn't come until the SWIP version in about 1989. We didn't get SWIP birds till 1992 (VA-155). But the model and photo are first class.
25 April, 10:09
Reporting: YES, this is a spammer
SPAM ALERT
According to me, this user is NOT a Scale Modeler and his profile should be DELETED.
Member since: February 20, 2025
SPAM ALERT
Please help usVerify this user and jego posts and agree or disagree with this user being a spammer: Go to vote page
25 April, 10:08
dodał nowy album.
26 zdjęć/zdjęcia
Nissan GT-R32 Race Cars - WIP
1:24
I painted it black (Ballejo Mecha Primer) to prevent light from penetrating.


Projekt: Nissan GT-R32 Race Cars.
![1:24 Unisia JECS Skyline (Skyline GT-R [BNR32 Gr.A] 1993 JTC) (Hasegawa 20705)](/products/img/8/3/1/1545831-27767-26-t180.jpg)


12 21 April, 16:01
I'm here too. "It is expected to be a pure assembly with little modification" 🤔 whatever it means when you're building 😉
25 April, 10:06
dodał nowy album.


35 20 April, 16:48
Paintwork, weathering, accessories, position of figures: everything just fine!
1 21 April, 10:01
Wow!! God, I'm so jealous! Still I'm but a baby in modelling terms. I be a toddler soon hopefully. Then a child. Then I might even make teenager! lol
Great work Robert
Ps you bought the figures separately?
25 April, 06:02
Do you do YouTube videos? I've got so many questions. What's the part hanging in the back of the turret for example?
25 April, 06:08
dodał nowy album.


42 13 January, 15:52
I'm watching! Front row seat please. I'm warning you that I'm stealing ideas 😉 I'm planning to start the same one very soon. I doubt I'll achieve such results, but dreams are free. 🙂
1 18 January, 16:21

Thanks for your kind comments. Probably most of the effort will not be visible in the end. 🤷🏼♂️
Especially since the quality of the clear parts is very bad. They are really thick and blurry.
@Живко Джаков: could you please check your kit if the quality of the clear parts is also bad? I was considering to buy a replacement sprue from Revell, but I read in some other reviews as well about this issue. So I am not sure if a replacement will be any better...
1 19 January, 12:41

Mine are at a satisfactory level and are definitely better than what you have. He 177 | Album by JivkoDjakov (1:72) [img1]

19 January, 13:51
Thanks for your feedback. I guess in this case, I will reach out to Revell for a replacement first. Maybe they will grant it for free because it is clearly a quality issue.
@Jivko: which release of the kit do you have? A newer one or also the 2000 version?
20 January, 10:11
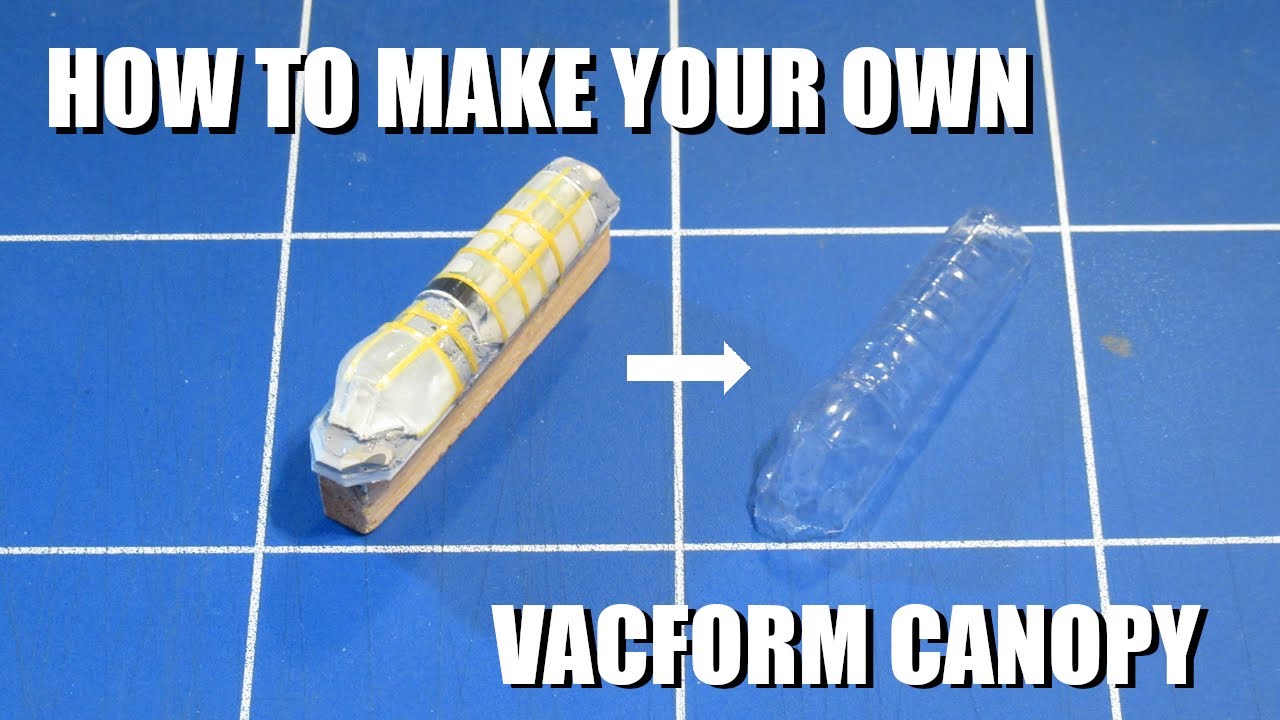
AndreasK, you should try vacuforming a new canopy using the kit parts as a form to wrap a clear styrene sheet around. Just look in your garbage for a clear food container such a salad box. You can use your household appliances to do vacuforming. A sweeper and a toaster is all you need.
20 January, 10:26
I have a package from 2018. As far as I understand, I'm lucky. It's common for the clear parts to go bad. Call Revel for a replacement. It would be helpful to know what they will do. Heinkel He-177 A-5 "Greif" (Revell 03913, 1:72)
")
20 January, 10:33
Make sure to dry fit your canopies. Revell is notorious for making canopies that don't fit. I have the same kit as Живко Джаков but I haven't opened it yet.
1 20 January, 10:39
Skyhiker, can you share a link to a good tutorial video for vacuforning?
20 January, 17:40
Those interiors look fantastic. It would be a shame if you couldn't see them properly through a poor quality canopy. I think I have the same problem, because I have the 2000 box.
20 January, 19:56
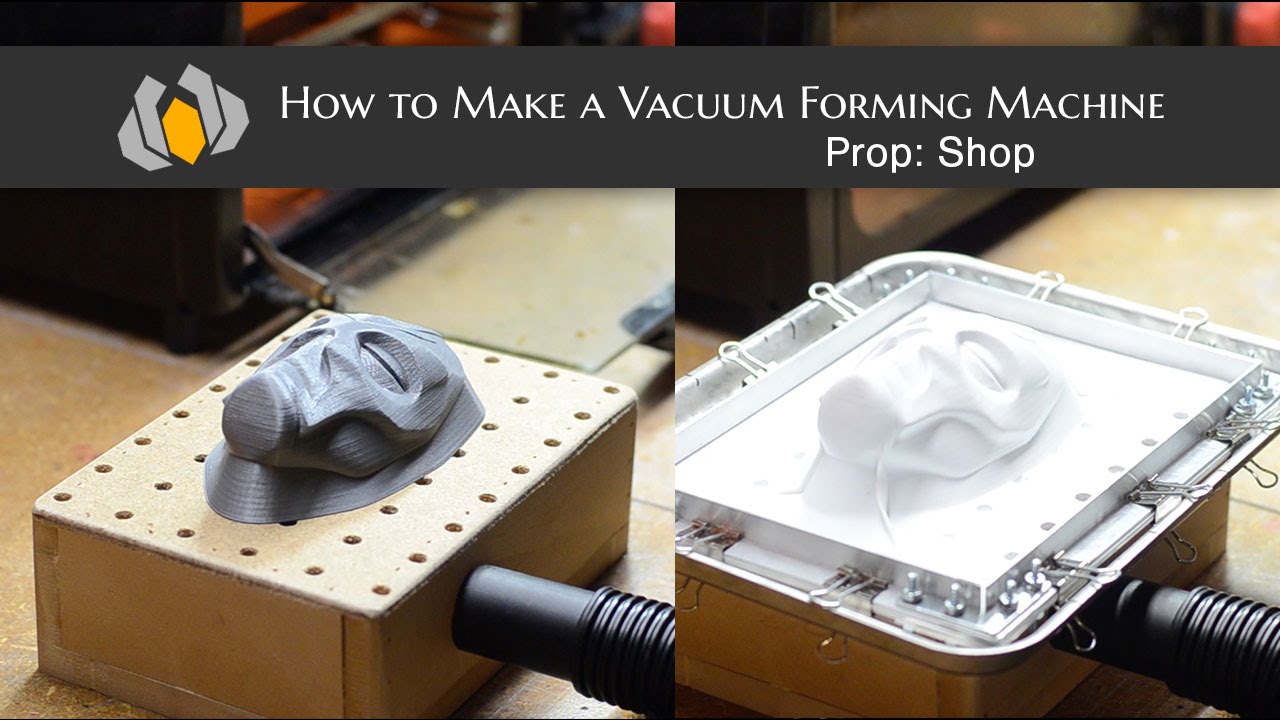
I would recommend a few things. First, use a powerful vacuum cleaner. A good vacuum is very important. Second, test with something else. A metal cart or even just a large nut is a good place to start. Third, wait for the mold to cool down before trying again. Polystyrene is a very good molding material, but it is not a good mold. I have never done this before. I have only done large commercials with vacuum molding. This video explains well how to make a molding press. Youtube Video
1 20 January, 19:56
Amazing work. might inspire me to restart my paused build of same Kit (on pause since 2020)
20 January, 20:38
Finally, I received a replacement clear sprue from Revell. The front section looks way better than my old one:
[img1]

But I am glad that I now have two sets to choose from. Because most of the other parts of the new sprue are really bad. Check this out:
[img1]

1 24 February, 12:11
Good news, AndreasK! 👍
What did you tell to Revell to get the replacement?
24 February, 18:47
I used the spare parts service on their website. Uploaded photos, pointed out that it is clearly a production quality issue and asked for a free replacement sprue.
1 25 February, 15:06
Latest pictures show the scratch building of a landing light reflector and bulb
1 25 February, 15:21
Good job with the scratch building of a landing light reflector and bulb 👍
1 25 February, 20:24
Fuselage is finally closed, sanded and ready for a first coat of primer
2 5 March, 10:00
Finished the Preshading. I used Gunze H-56 Intermediate Blue for the undersides and RLM66 for the upper.
25 April, 07:37
That pre-shading looks very detailed and neat - I just cannot get the lines so straight ever.
25 April, 08:53
dodał nowy album.
41 zdjęć/zdjęcia
BTR-4E w/ GROM Turret - Ukrainian APC
1:72
Kinda ok with the result. not perfect, but now the whole vehicle sits with a little bit of 'weight' on the wheels.


Projekt: BTR-4E Ukrainian APC w/ GROM Turret


26 8 August 2024, 14:34
I got a different variant of this kit in the stash and I won't be able to get to it for a while, looking forward to seeing you build yours!
8 August 2024, 15:27
Looking great! I started the version with slat armor, but got pretty frustrated with the seats so it will be finished "buttoned up." You definitely are not having any trouble! As I was doing some research, it looks like the IBG kits aren't really the current BTR-4E, the layout seems more like some of the BTR-4s in Nigerian service.
15 August 2024, 22:25
Hi hiveloc,
I think the version with the slat armor is going to look pretty impressive even being "buttoned up".
Hardly anything of the interior will be seen later, anyway, it's more of a practice for me, I'm afraid 😉
It may be possible that the IBG kit doesn't look like the current Ukrainian BTR-4E (I've seen only very few with the GROM turret), but I also think there are a lot of variants out there atm.
16 August 2024, 07:38


dodał nowy album.

13 24 April, 19:26
Great job! (Where did you get the proper canopy from? As far as I remember the one in the kit is inadequately shaped, am I right?) And we would like to see more photos of this jewel 🙂
1 24 April, 19:33
The canopy was the kit part. It seems to be in proportion to the rest of the model.
1 24 April, 21:51
Thanks for your reply. Good to know! 🙂 (in other Trumpeter small scale kits it is sometimes the main issue...)
25 April, 06:20
dodał nowy album.


1 25 March 2016, 12:51
How do you handle chrome parts that are snipped off from the sprue, as there would be no chrome paint on the exposed area. Having said that, I don't currently do car kits, so I guess there is always the chance that kit manufacturers managed to hide the location of the stubs.
15 March 2019, 14:19
I think black was a nice choice, as it contrasts nicely with the chrome metal paint. 🙂
15 March 2019, 14:20
Hi. Treehugger, and thanks for Words.
By the time i've build this truck, i've used a Chrome Marker and sometimes strips of Bare Metal Foil Ultra Bright Chrome for touchups. The stubs are all but not hidden. There is always a part where the Chrome is damaged. On my next Truck i will use the new Molotow Chrome Pens. All the tests with them i've made so far gave me absolutley great results.
15 March 2019, 19:33
dodał nowy album.
20 zdjęć/zdjęcia
LVT-4 Water Buffalo & SAS Jeep
1:35


Projekt: LVT-4 Water Buffalo (ETO)


3 25 April, 07:47
Hi
The same product is registered twice. One as Painting (pigments) and another as Weathering. Could they be merged please?
AK 044 Pigments Light Rust, AK Interactive Matt, Pigments, 35ml
Light Rust (AK Interactive AK 044, No)
")
The same product is registered twice. One as Painting (pigments) and another as Weathering. Could they be merged please?
AK 044 Pigments Light Rust, AK Interactive Matt, Pigments, 35ml
Light Rust (AK Interactive AK 044, No)
Wdrożone
1 25 April, 08:14
dodał nowy album.
34 zdjęć/zdjęcia
Sukhoi Su-12
1:72
The canopy is so oversized that I can't make it flush to the fuselage.


Projekt: Su-12

33 5 April, 17:33
Starting a very rare bird. (I am getting bored with the other 9 builds I have still in progress).
2 5 April, 17:42
Nice project Skyhiker 👍👍 you build alot of Soviet stuff, don't see to many of these... nice choice 😃👍
14 April, 12:40
Thanks Dave. It took me a while to get the riveting done. Hopefully after priming I won't have to do it again.
17 April, 17:41
dodał nowy album.
209 zdjęć/zdjęcia
Eaglemoss BTTF De Lorean
1:8
and installed


Projekt: BTTF De Lorean


 6+
6+ 31 2 August 2024, 02:50
the window are manually lifted, sorry - you lift up the gull-wing door, and that reveals the bottom cog which you can wind with your finger
9 September 2024, 09:23
Does that window also roll up and down?! That's truly sick! Watching!
11 September 2024, 06:20

Wow! That's huge! Does it have all the functionalities of the original? 😄
25 April, 06:24
Yeah, everything except the 88mph & time travel bits!!! 🙂
it certainly has the weight, around 7kg at the moment!
25 April, 08:31
dodał nowy album.
25 zdjęć/zdjęcia
2022 Corvette Coupe C8 - wip
1:25


Projekt: 2022 Corvette Coupe C8

21 23 August 2024, 05:55
One question I'm asking myself: do I want to build the RHD option? That would be pretty cool but it won't fit into my project of the Silver Corvette Collection. Good, that I have this kit twice. So I can build one silver and the other one in another color with RHD and fitting license plate.
Take a look (if you want) into my review - kitreviewsonline.de/..25-von-revell-07714/ - sorry, only available in German.
23 August 2024, 05:59
Curious that both RHD & LHD are available.
I've only seen one LHD C8 in the UK
23 August 2024, 08:56
Don't forget that other countries are also RHD including Japan, Hong Kong, and Singapore.
23 August 2024, 10:06
Yeah George, I was thinking that but would GM actually export Corvettes to those countries as well as India, Australia & New Zealand?
23 August 2024, 14:14
Christian, I read your review, and what did I see? The Revell now CAN make wheels, like the original ones- what a progression!
So, I'm curious for the build!
1 23 August 2024, 16:58
Thank you for your feedback and Information! While I wrote the review I was wondering that the Corvette never had RHD. I didn't do more research and believed my source.
I'd like tl see see some numbers how much Corvette were sold in RHD countries. Have to look that up. I think it should be a lot. Why else they gave this option to the costumer now? I think the japanese market could be the most interessting one.
23 August 2024, 17:58
4 months ago I started? Where did the time went? Nevertheless: yesterday I sat on this to check the status and sorted the parts for the planned color for painting. Not more.
5 February, 05:32
I painted the part the last days. I want to paint the interior with red accents. After painting the affected areas I see how small some of the spots are. How I'm supposed to cover it up is still a little mystery to me.
The body is fillered, wet sanded and ready to get painted 🙂
By the way: did you know, that the German instructions only offer some black on another black on a different shade of black *lol* collored interior? The instructions for the US issue offers you that blue interior. Strange.... I added two picture for you guys (and girls) 😉
6 March, 06:24
Who knows :/
On the weekend I finished the chassis. The wheel arches are mounted too. But befor that, I wanted toshow this exquisite engine. There are a lot of details and parts. Sadly, the engine will be hidden in the rear and only the top will be visible. It should be worth it, to build the powerplant seperatly and put it near the model kit for display.
11 March, 06:28
Just to confirm, you have painted the interior accents. Were there no interior decals with the kit?
18 March, 11:29
Your suggestion is right. The German issue doesn't have any colored decals for the interior (except speakers and switches). I added a picture of the decal sheet. Number 18 and 19 are for the dashboard / bezel cover on top somehow. But nothing for the seat, sidepanels, dashboard or middle console.
18 March, 15:31
Three weeks ago, I finished the paintjob. I didn't count but I think there are four layers of clear cote on it. Satisfied 🙂
The curious thing is, that the small roof part above the b-pillar looks lighter than the rest. Like it was painted seperately. But it wasn't. I always paint my kits taped together in one piece to avoid differences in the color.
25 April, 05:26
I can't imagine more boring color than the silver, but she will look good with the interior!
25 April, 06:48
Thank you Istvan! The first build is a kind of a "must be" silver because it will be in the row of my Silver Corvette Collection (which is widened up to more colors in the meantime to show my other Corvettes). I'm plannig another build in the future because the C8 has so many nice colors. But I think, It was the one and only time, I paint the interior this way.
If you are interessted, the link to the project -> christian-w
1 25 April, 06:57
Is it possible, that this kit is based on the kit by airfix (Formula Firebird (USAirfix 8054, 1:24) / first row, picture in the middle) but with the wheels of another kit by airfix (Fire Ball Firebird (USAirfix 8050, 1:24) / also on the first picture, second row on the left)
")
")
It could be Lindberg (Pontiac Firebird (Lindberg 6503, 1:24)) but they didn't offer any kit with those rims.
")
")
25 April, 08:28


Question for all of you:
You know Good Omens, the Amazon Prime Series?
Many men here knows more older cars than me, sooo:
Is there any (near/similar) model kit to that one and only one unique Bentley on this world?
1934 Derby Bentley Thrupp & Maberley Bodied Coupe
Source:
classicrollsroyce-be..aberley-bodied-coupe
You know Good Omens, the Amazon Prime Series?
Many men here knows more older cars than me, sooo:
Is there any (near/similar) model kit to that one and only one unique Bentley on this world?
1934 Derby Bentley Thrupp & Maberley Bodied Coupe
Source:
classicrollsroyce-be..aberley-bodied-coupe
24 April, 23:32
That type of bodywork looks reasonably similar to the RR Phantom II.
The 1/8 Pocher kit looks the closest, but good luck finding it for a reasonable price: Rolls-Royce (Pocher K/72, 1:8)
Next would be the 1/16 Revell kit which would be much more affordable: Phantom II Continental (1934) (Revell 07459, 1:16)
SCM Search: Rolls Royce Phantom II
")
 (Revell 07459)")
25 April, 07:23
Question of the day:
Some model builders say especially about Oshkosh and M911 and similar Military Trucks/Cars: "I Love Kit" seems over engineered and "Hobby Boss" looks better, but sometimes "I Love Kit" looks better.
But both of them has pro and cons.
Personally I like over engineered kits and since I was a girl I wish there were more kits like these.
What do you think about?
Do you prefer "Nah, I just built easy and relative quick" or do you say "I want it the hard way - gimme details en masse"?
I am very curious! ^_~
Love you all! ♥
24 April, 18:58
personal choice, no doubt. whatever makes you happy 🙂
some would think that doing a detailed PE cockpit in a 1/144 airplane that will never be seen again is totally nuts....and maybe it is, but I like it so I do it 😛
others prefer to go other way? respect and enjoy the ride!
1 24 April, 19:17
I buy tanks with full interior, which others think is pointless, but I enjoy them. Then again, sometimes you might just want to do a build in order to test out a new paint range or something, in which case a quick build is ideal. Horses for courses, I guess.
24 April, 19:36
As with many things, I'm a bit odd (it's been pointed out many times so why deny it? 😄 ). I like simple kits which I then make as complicated as I possibly can. A kit that most modellers would complete in a weekend would keep me occupied for months.
And yet, over-engineered kits I'm not so keen on if there is nothing for me to add to it. Increasingly for me it's all about the scratch-building. 🙂
25 April, 06:58
/pl/search.php?q=*&page=newsfeed&fkSECTION[]=Newsfeed
search-solr.php?lang=pl
35
35
/pl/search.php?q=*&page=newsfeed&fkSECTION[]=Newsfeed
35
todo