F.K.8 Work In Progess

The premium edition offers a wonderful big PE sheet made of nickel silver. The top right part is a thicker 0.2mm copper sheet.
But STOP: What about the brass sheet? It states "Spare parts"!?! That sounds dangerous!
But STOP: What about the brass sheet? It states "Spare parts"!?! That sounds dangerous!

There are reports about trouble on the front, so I started to use a brass spare as training part to find a way which works. Works with soldering ok so far, so I stopped working on it ...

... and tried to build the "real" part, using the nickel silver part. Not easy, because it is harder, but it can be soldered and I'm happy with the result.
This is the view from below.
This is the view from below.

That is the top side.

Here you can see, how the next cowling panel connects later to the front.

That panel has holes on the other side ...

... which are fit perfectly to the next panel.

I built also a drum storage from that PE parts-

And another storage box of different type.

Both in front view.

I hope they look like plywood now after a bit of wood paint.

I tried to close the ejector pin marks with pieces of thin sheet.

After a white primer I painted linen inside, masked it and primed again with flat sand as base for the wood simulation painting.

After a light wood grain simulation (used acrylic instead of oils to save time) I sprayed clear paints like 'Clear red/brown' and 'Clear orange'.

Prepared also a lot of other parts for the fuselage.

A PE part from the thicker copper plate has nice mounting hints on the back side.

The other side is covered with 'wood'.

That's why I hate those tiny plastic parts: I managed to break a connection at the sprue gate while trying to clean it.
Cut away, drilled a hole and added a piece of brass. That is round by default without cleaning. That is much faster and easier.
Cut away, drilled a hole and added a piece of brass. That is round by default without cleaning. That is much faster and easier.

The fuel tank is made of two halves. I don't want to clean up the ugly seam so I added a this sheet of plastic and after that the PE part.

The manual shows a grey tank, but on a reference picture it looks spotty metallic. So I painted it in darker alu with airbrush followed by brighter blobs with brush. I hope the brighter metallic will be better visible in the darkness of the closed fuselage.
Filler caps and fittings painted too and some fuel lines added.
Filler caps and fittings painted too and some fuel lines added.

Here all the parts together. The PE foot in the back, the fuel tank is mounted too.

The control stick with the brass connection is mounted and covered by a PE frame, then the pedal.
I do not know the function of the horizontal cylindrical part in the lower engine compartment.
I do not know the function of the horizontal cylindrical part in the lower engine compartment.

The target sight is a grey kit part. I fully understand CSM, as that would the only clear part. The windows are foil with PE, which is much more scale.
So I scratched a new sight, as done already for some other projects.
So I scratched a new sight, as done already for some other projects.

The holes was a bit wide, so I closed them with stretched sprue and drilled new ones.

Now it fits, next to it the kit part.

With a bit of paint it looks nicer, after the picture I added more black.

Outside is a grey dark winter day but can confirm, that light is going through.

The wings are huge, not only spanwise also in depth. Here in comparison to a Nieuport.
Here is also a little step back on the kit as the Sopwith Dolphin had individual ailerons in the kit, here not.
It is not a big deal with sharp etched saw, but again due to the size it takes its time.
Here is also a little step back on the kit as the Sopwith Dolphin had individual ailerons in the kit, here not.
It is not a big deal with sharp etched saw, but again due to the size it takes its time.

I reconnect the ailerons with brass pins.

12 pins and 24 holes later all ailerons are back.
Please not the inner sides of the lower wings.
Please not the inner sides of the lower wings.

The lower wings fits perfectly into the fuselage.

Inside the fuselage the wings are hold in place with special shaped parts, so it do not depend on glue only. Clever kit engineering!

Wings are primed white.

Rip tapes masked (it eats a huge amount of masking tapes for breakfast) and light shading applied.

After removing of tapes the wings are prepared for the painting.

Linen color applied. Looks like I stopped early enough this time.

Hmm, the kit struts are thin, but the mount pins are more fragile and smaller then the holes in the wing. I read in a build report about a breakage during mounting process. My F.K.8 needs to be robust for safe journeys!

So I made eight new robust struts from real wood and brass.

But how to mount the struts?
I cut small pieces from a brass tube with thick wall and chemical browned them.
I cut small pieces from a brass tube with thick wall and chemical browned them.

The little black pipe pieces are then applied to the wings and secured by filling the corners of the holes with CA.

The struts fits now.

A closer view shows that I need the cut the brass wires a little bit shorter.

All struts are primed and painted with clear paints to darken them a bit.

I hope I can mount the struts later in a clean way. I only need to take care to not scratch the paint from the wings.

The two plastic parts of the kit engine.

But as I do the Premium Edition there is another little box inside with resin parts, which was also offered as individual kit.

Cleaned, dryfitted, modified, primed, painted the parts with Alclads. After a painting of details with a brush I mounted the cylinders.

The exhaust side.

Below the kit airscrew a raw shaped new wooden one. Below the wood is a soldered bearing to allow a free rotation of the airscrew.

Plugged together for test fit.

Another beautiful addition of the Premium is an exhaust, which seems to made by Rexx. I have not painted it, that is the look as it was provided. I opened only one outlet as it was a bit damaged by transport (the metal walls are very thin!).

Test fit of the exhaust, wonderful look.

The valve rockers are provided as PE and have to be bend back to back. I soldered them from below and chemical blacked them.

The kit mentioned only "wire" for the push rods. I wanted to use 0.2mm but after checking ref pics I used 0.33mm blacked nickel silver.

The upper view with push rods and valve rockers.

The resin and metal engine looks much better compared to the kit engine, especially around the cylinder heads.

From the lubricant pump at the rear, I pulled a few more lines to the cylinders.

One grease nipple on each cylinder. On the original were even more with couplers, but this was enough filigree work.

I added 12 spark plugs on the cylinder heads. The were resin ones, but conflicted with the neighbor cylinders, so I removed them before mounting.

All plugs are cabled, after some detail painting on the ignition coils.
I should have annealed the brass pipes.
I should have annealed the brass pipes.

Between every two cylinders vents are added. That 3 little beasts are resin parts, painted in brass.

On the other side I added a water pipe from the added cooling water pump to the cylinders.
I will add the outflow pipes on top of the cylinders later after mounting.
I will add the outflow pipes on top of the cylinders later after mounting.

Many resin parts are well cast, but the carburetor did not turn out so nicely. The plastic part on the right looks better.

With paint, PE and some pipes added it looks nice.

And carburetor added to the engine. With a washing it looks even nicer.
So the engine can be put aside for later.
So the engine can be put aside for later.

The plastic cushion of the kit seat is nicely shaped and PE is provided for the back, but the Eduard 3D printed seat is nicer so I will use this. As it is printed in black resin it is already primed and painted with acrylic paints here.

Then I painted the seat with oil paints. After some days of hardening I finalized it with a darker wash.

The seat is glued to the kit frame and HGW fabric seat belts are applied.

The kit provides two identical sprues with struts, bombs, and 6 Lewis MG drum magazines, so I have 12. That would be enough for the early F.K.8 with one storage shelfs, but ...

... here we have space for 15 drums! As far as I found out the normal pan with 47 cartridges has a weight of 2.2kg, the 97 cartridges drums used on air 3.6kg. That means 54kg alone for the spare drums! Usual in other two seaters were 4 spares, so that is really impressive. This was a huge bird with big wings so it can carry a heavy load, also 8 bombs.
The fit was very tight so I need to made a cut into the drums to "rotate them into its place" on the storage with the linen bands.
The fit was very tight so I need to made a cut into the drums to "rotate them into its place" on the storage with the linen bands.

For the forward firing Vickers MG I used kit part with added PE, as this will be hidden anyway by a metal pipe. There is also a small ammunition belt stripe as PE. I foldet the belt storage from kit PE and soldered it - a nicely shaped part!

The Vickers MG is mounted for the pilot.

All the prepared parts are added to the fuselage, also the seat for the back seater.

After marriage of the halves I added some prepared parts on top.

The back cover is also applied. That is a very clever part split and avoids a seam in the middle.

Some of all the nice parts in the cockpit are still visible.

Very closely to the seam of the back cover is a very nice fine stitching. So one need to glue carefully to avoid destroying those nice details.

That picture is a teaser with more parts plugged on for test fitting. To dry fit a lot is really recommended here as the fit is very very tight. Sometime a layer of paint is enough to create trouble later.

The instrument panel of this kit is another highlight! On top my reference picture, below the kit manual and right of it the real panel on the Cent.

The panel alone. The steps:
Primer; wood paint; detail painting with brass, black ..; decals; PE; glass with Kristal Klear
The Cartograf printed decals are great, please see the turn-and-bank indicator!
Primer; wood paint; detail painting with brass, black ..; decals; PE; glass with Kristal Klear
The Cartograf printed decals are great, please see the turn-and-bank indicator!

IP glued into the cockpit cover.

The cover is mounted on the fuselage.

There is a thinner etched PE stripe that has to be bent into a tube. This is also provided as brass part on the Spares sheet (see pic 1), but I used the nickel silver plate.
On the pic to see two vices pressing a drill shaft into wood to shape the metal.
On the pic to see two vices pressing a drill shaft into wood to shape the metal.

After soldering the gap I have a pipe. A use of a piece of micro brass tube would be easier but that big diameter is not available.

That pipe will be used as blast channel for the Vickers MG.

That is the outlet on the front panel.
I had to work on the front panel again. It was to much under strain os that it bends too much in the middle. Luckily I soldered it, so modify it was not a big thing.
I had to work on the front panel again. It was to much under strain os that it bends too much in the middle. Luckily I soldered it, so modify it was not a big thing.

A view from the other side with more panels.

A strut form the thick copper PE sheet is added here. And an aged plate closes the engine room to the cockpit.

I aged some panels the chemical way.

The wonderful "Armstrong-Whitworth" sign is glued into the panel recess.

I painted the panels with Tamiya XF-82 as recommended by Wingnut Wings for brit aircraft but I find it to dark.
The CSM manual says only "Battleship grey".
The CSM manual says only "Battleship grey".

I cut the control surfaces from the tail plane with a etched saw and pinned them back.

For the rudder is a thin plastic stripe which I cut too.
The fix part has 0.5mm thin mounting pins which I replaced already with 0.45 nickel silver.
The fix part has 0.5mm thin mounting pins which I replaced already with 0.45 nickel silver.

Here the rudder got 3 pins.

After painting of the tailplane I masked all linen undersurfaces.

Then I applied the PC 10 wrap around. Masks are removed again.

Here you can see the 1-2 inch wrap around (so 0.5 - 1.0mm in 1:48) in closer view.

On lower surface of the fuselage I came across two unneeded openings. Those are for the late variant. The F.K.8 had trouble with the complicated undercarriage, so it was replaced by the V-style one of the Bristol Fighter (so they run out of Bristol spares 😉 ). So for the early and mid builds this can be closed with sprue.

That is the only picture I have for the masking and painting session.
For the white I started with Drooling Bulldog white, followed by MRP Insignia White, as this is a light Off White, but do not cover well.
For the white I started with Drooling Bulldog white, followed by MRP Insignia White, as this is a light Off White, but do not cover well.

The lower wings are perfect, but that was the easiest part.

The upper wing is acceptable, at least after some touches with a brush.

In closer view.

Here the reason why I masked, to dark blue on the decals and more. See comment section.
The rudder is ok, the fuselage not.
The rudder is ok, the fuselage not.

I had the problem, that the masks pulled little points of the PC 10 paint. I don't know why. Maybe I didn't reduce the tackiness enough.
After some touch ups, the left side.
After some touch ups, the left side.

The right side.

The tail skid parts of the kit. The axle is only 0.47mm thick!
I have seen a construction report where the skid broke off during construction 🙁
I have seen a construction report where the skid broke off during construction 🙁

So I made some new parts from brass, nickel silver and wood. Used the Datafile drawing.

Tinned, plugged together and then to the model - it fits!

After some paint it is prepared for later mounting.

Due to the glueing process, the crash from the bench and the handling the uncomplete wood painting on the engine compartment was not ok.
So masked and again: primer - wood base - wood grain - clear red/brown and clear orange.
So masked and again: primer - wood base - wood grain - clear red/brown and clear orange.

After unmask it looks great and it is prepared now for next steps.
During mounting of the metal panels I will removed the wood paint partially.
During mounting of the metal panels I will removed the wood paint partially.

All the red rigging lines are added in the engine compartment. There are two damn little PE rigging holders - no spares. Lost one nearly - found it on the floor below the bench after a good while.

Now the first metal panels are added to the engine compartment.
At first one long one, on the left carrying the target cross hair. The smaller after panels are next.
Then the engine was inserted, the panel upper right are hold in place to allow a exact positioning of the engine. Fixed with glue.
At first one long one, on the left carrying the target cross hair. The smaller after panels are next.
Then the engine was inserted, the panel upper right are hold in place to allow a exact positioning of the engine. Fixed with glue.

The long panel on the lower surface could mounted next. The air intakes of the carburetor are the position indicators.

On to a bow is put in place.

It will hold later two smaller panels.

The big panel on the left side is not yet painted because I need to bend it into exact angle before.

To show the nice engine I will not mount the top cover (on the foreground of the picture).
There are many photos of F.K.8 without that specific panel.
There are many photos of F.K.8 without that specific panel.

If you are doing all things right, after a lot of dry fitting you will get an impressive fit 👍
Now I can finalize the remaining panels.
Now I can finalize the remaining panels.

I decided to build the "Mid Type" also because of the look of this complicated undercarriage of Early and Mid. The Late uses a simple V undercarriage taken from Bristol Fighter.
The optical representation with the kit parts is great. The spring really looks like a spring.
The optical representation with the kit parts is great. The spring really looks like a spring.

Here in comparison with my references. But I have doubts that 4 little plastic pins can hold the heavy model (with all the metal, resin engine, big wings). And the load has to be hold by a little glue connections - I prefer form-fitting connections.
In front of these legs are additional struts, but these only prevent tilting and cannot carry any load.
In front of these legs are additional struts, but these only prevent tilting and cannot carry any load.

I haven't changed the legs yet, but which connection would you trust more?

The kit parts for the undercarriage. I forgot two V-struts on the picture. Please not: there is no connection between axle and the bar in front.
I see a problem: the pins for the wheels are only 0.8mm! That should hold the model?
I see a problem: the pins for the wheels are only 0.8mm! That should hold the model?

I want to set pins, but broke the axle. So I made it new in brass. I could not use bigger pins for the wheels if I want to use the kit legs.

Here I used a pillar drill with a 0.8mm drill bit (no power!) to solder a brass tube exactly vertically into a sheet of metal.

Why? The wheels are only glued with one side with thin plastic onto its pins, so it is not easy to get them correctly aligned.

I drilled a 1mm hole into the wheels and glued my connectors in place. Now simply plug the wheels on and they are straight 🙂

The two V-struts are glued to the bar. Very filigree - I broke the backward V while trying to clean the struts.
All for dry fitting here.
All for dry fitting here.

The undercarriage parts are painted and mounted.

The Vs andf the bar are do not carry the load of the model. They only make sure with the two slanted bars, that the undercarriage/the main legs does not tilt. CSM made the suspension in a good length - the axle is deflected. On the pic higher then the front bar.

The kit provides a clear foil for the windows and PE frames. The windshield one is already bend and provides a slot now.
Mistake: I cut them out and wanted to do the hole - fling. Away, don't found it.
Mistake: I cut them out and wanted to do the hole - fling. Away, don't found it.

I cut a new one from the sheet and made it a bit higher, according to this original photo.
I modified also the sight: smaller brass at the front, and made a new "rubber" eye piece for the back. The grey kit part has that too. That was also the reason for the big hole. I cut a smaller one.
I modified also the sight: smaller brass at the front, and made a new "rubber" eye piece for the back. The grey kit part has that too. That was also the reason for the big hole. I cut a smaller one.

Both parts needs to be put in place together, without the eye rubber.

Plugged that on after that and painted it.

Evidence image: Light goes through.

Then I could add the upper struts, painted together with the undercarriage.

The next two little cover page could be added now - tricky mount but perfect fit!

The two upper inverted V-struts can hold the upper wing.

The control horns are part of the thicker copper plate, which is great. I tinned them with a soldering iron to improve the shape and get rid of the copper color. If a bit of paint is chipped then metal and not copper looks through.

The control horns are glued in place.
It is not really visible on the photo, but I weathered the green PC10 with a bright oil paint. Later I applied also Clear Smoke with a mask.
It is not really visible on the photo, but I weathered the green PC10 with a bright oil paint. Later I applied also Clear Smoke with a mask.

The kit radiators are painted with copper and a oil wash added.
See left on the aircraft and on top as original detail.
See left on the aircraft and on top as original detail.

The original one seems to be made of 5 x 11 copper pipes.

There are control levers for the elevator at the front of the fuselage. That are plastic parts plus PE. But the axle is too thick for the the holes in the fuselage. I also hate to clean up such small parts.
There is a difference on the PE parts for each side!
There is a difference on the PE parts for each side!

I soldered the levers to 0.7mm nickel silver pipes.

Here are two pieces of 0.7mm brass are soldered together.
What is the usage?
What is the usage?

The F.K.8 has an emergency control of the elevator for the backseater, as on other British two seaters. As example the Bristol Fighter has it too.
In the middle an uncleaned kit part, but I used a 0.5mm nickel silver pipe instead. Additionally you see the soldered "T". On top the last part from the thick PE fret.
In the middle an uncleaned kit part, but I used a 0.5mm nickel silver pipe instead. Additionally you see the soldered "T". On top the last part from the thick PE fret.

All parts mounted. I like the open pipes. The emergency control axle has a bearing on the other fuselage side.
I have done this in this late state for a easier painting of the fuselage. The manual shows it some pages earlier 😉
I have done this in this late state for a easier painting of the fuselage. The manual shows it some pages earlier 😉

Here you see the T-socket in the cockpit of the gunner. In case of emergency he can put a stick into the socket and control the elevation. I guess that this is not plugged in normal operation to avoid interaction while moving in cockpit doing other tasks, same as in Bristol Fighter. The kit provides only the plastic axle, but a photo in the Datafile shows the socket.

The kit provides little PE parts to hold the rigging. Especially if you want to use functional rigging with fishing line those are useful. But ...
I will not use them. The plates do not fit over my metal sockets for my wooden struts and as this bird uses RAF wires I want to use the terminals made by Gaspatch models.
Note: there is a bug in the manual! The parts for the upper wing, inner backward struts are switched. But if you think along and pay attention to where the double flying wires and single landing wires run, you will notice the mistake.

So I should drill the wings prior mounting. An Eduard set for the SE.5a provides a very useful template!

Here the use of the template and drilled holes around a socket. The manual is helpful for the holes, beside the mentioned mistake.

The main mounting could start. I mounted the lower wings at first.

Then the upper wing with inner struts on one side. The inner struts on the other side stabilized and finally the outer ones.

It is a huge bird!

Tailplane and prepared tail skid are mounted too.

Installing the struts and rigging is easier with the ailerons removed.

I managed to thread an almost full plate of RAF Wire Terminals. Here on the left unpainted (as it comes out of the box), in the middle painted and on the right the emptied one.
The rigging is well prepared with this, but I have doubts whether the pack will be enough.
The rigging is well prepared with this, but I have doubts whether the pack will be enough.

The rigging of the wings and wing struts are done on both sides. Hard to see against the dark PC10.

So I put the bird on the back - much better visible.

Here in more detail on one strut. There are still empty holes because some rigging lines between wings and fuselage are missing. I will do them later because of better handling on the engine compartment without them.

On the fuselage I used only the outer frames of the provided PE rigging holders.

And one final view in another angle.

The kit provides a PE holder, but it is empty. According to the references that is the mounting frame for a Rotherham Air Pump to pressurize the fuel system. And Eduard has a wonderful little set of such a pump, with 3 pumps of 2 types, 3 different little props and a lot of different types of PE mounts (not needed here). A ref pic shows the wide blade so I used the middle one. See left of the Cent.

That is may be the smallest kit by Eduard! On pump/prop is on my Camel, one set is build here and one pump and prop still on the frame.

The pump is painted with Alclad and a brush (not airbrush), the prop got some wood simulation and for the pressured air I added a glowed 0.15mm copper wire (with also helps to hold the pump).

The Rotherham Air Pump on its working place. I wanted to add this after rigging to avoid touching it.

The remaining panels are prepared fro painting.

The exhaust: on top the plastic kit exhaust, below the metal one of the Premium edition. I have painted it a bit, because it looks too much like copper for me. Each one seems to be different, I have seen darker metal exhausts and also the one of my Dolphin kit was much darker.
But painted not as much dark as it looks here.
But painted not as much dark as it looks here.

Here you can see a lot new things.
I managed to break of the targeting cross, so I added one left over from an Eduard PE sheet.
Two rigging lines from top wing to the front spar was added.
The hot water pipe was inserted, but glued only into the wing hole.
Side panels added, then the exhaust. And finally the hot water pipe to the cylinder heads.

The exhaust pipes are nearly horizontal.

I will not add the top cover.

And the exhaust openings in a side view.

Decals: For the wheel markings there are red and blue decals as option. I used the red ones because of the more colorful look.
The serial number decals are applied to the tail.
The rudder is masked and painted, also the little white arrow between green and blue. The kit provides a decal for it, but I used 0.4mm masking tape.
The serial number decals are applied to the tail.
The rudder is masked and painted, also the little white arrow between green and blue. The kit provides a decal for it, but I used 0.4mm masking tape.

This picture is at the request of a single gentleman: with the top panel. 😉

The rudder assembly was finalized and mounted to the model.

In the side view you see an additional third pin into the fuselage and yes, the gap between fin and fuselage is correct.

Here the kit Lewis MG left of the Cent in comparison to a Gaspatch 48075. In background the Gaspatch manual.

In closer view. The Gaspatch one is already primed. The kit one is not bad for injection molding but the resin one has more correct details, e.g. the wooden handgrip on the back.

The Scarff Ring to mount the Lewis is made from kit parts, the yellow parts are PE. Only the green "rubber" is not provided. I used stretched sprue so I don't need to paint it.

The Scarff Ring alone in macro.

It fits on top of the gunners cockpit.
In order not to destroy the filigree part unintentionally, I put it aside and attach it only at the end.
I need to add a pin into the mounting hole ...
In order not to destroy the filigree part unintentionally, I put it aside and attach it only at the end.
I need to add a pin into the mounting hole ...

... where the bronze colored clamps are fixed to.

The aftermarket weapons by Gaspatch Models are very detailed.

The wheels also took a lot of time because of many work steps.
Primer, green PC10, masking, tyre grey, gloss coat, decals. Although printed by Cartograf, the carrier film was somewhat stubborn. Need strong softener.
Primer, green PC10, masking, tyre grey, gloss coat, decals. Although printed by Cartograf, the carrier film was somewhat stubborn. Need strong softener.

Same on the front side, the red is a decal too. As final step I masked again and added Steel paint to the middle cap.

The cover was glued onto the wheel, but I had to take care fro my brass insert.

The wheels looks nice on the model. Even I used Insignia white which is an off white it looks in the camera very bright.

Both radiators got also a decal and that very small one is readable!
I applied Daco Strong multiple times.
I applied Daco Strong multiple times.

I painted some details like the plates to hold the copper pipes in dark metal.
The radiators are prepared for mounting now.
The radiators are prepared for mounting now.

This huge bird fits in real in my wall cabinet.

A lot of control wires are added too. The control horns are connected by turnbuckles to the looong lines running to the front. The tailplan is also rigged.

The undercarriage should be more rigid so I rigged is with fishing line and Gaspatch Type-A metal turnbuckles. After that I mounted the wheels.

On top side you see also the rudder control wires. All control horns are additionally stabilized by shorter lines backwards, as often seen on British aircraft.

After all the control wires are done I added the rigging lines between the fuselage and the wing. Here you can see also the "star" of terminals on the strut socket.

As the lines to the back there are also four lines between inner struts and the fuselage front. There is a cut in the side panels for the terminals.

Luckily the Pitot tube was not on the plastic strut but two individual PE parts which needs to be folded. So I could use those also on my wooden struts.

Here in a view from below which also shows the little pipes to the pitot. I used 0.2mm lead wire here. Below the top wing there is the long control wire between both ailerons visible. It is part of an aileron loop.

The front cowling is glues in place. The fit is not perfect, but acceptable.

At least the gap is now the same on both sides. On the ailerons you can recognize the turnbuckles.

The engine and the Rotherham air pump are well visible.

The tank is glued from some kit parts, including the pipes, but it has only one filler pin.
The Datafile drawing and many pictures shows two caps, so it was a combined water and petrol header tank. That's why I turned two fillers with cap from brass and added a 0.3mm brass so that the steam can escape. On the back I added a copper wire as fuel line.
The Datafile drawing and many pictures shows two caps, so it was a combined water and petrol header tank. That's why I turned two fillers with cap from brass and added a 0.3mm brass so that the steam can escape. On the back I added a copper wire as fuel line.

The tank was then mounted together with the side radiators.
Now you can see how it works: the warm water from the cylinder heads is going up the copper pipe though the wing into the tank, from there into the radiators and is going down while getting cool. On the lower end the water goes into the black cold water tank in the engine compartment below the engine.
Now you can see how it works: the warm water from the cylinder heads is going up the copper pipe though the wing into the tank, from there into the radiators and is going down while getting cool. On the lower end the water goes into the black cold water tank in the engine compartment below the engine.

I let the fuel line from the header tank running across the strut into the fuselage.

For the armament bomb racks are needed. On the left the CSM parts, the bomb carrier looks clumsy.
The parts in the middle are from Eduard new Camel: much filigree rack, the bombs has thinner and a real little prop at the front. In the Profipack of the Camel Eduard recommends the PE frame at the right, on top the SE.5a PE.
A lot of options, I will add the racks, but not bombs.
The parts in the middle are from Eduard new Camel: much filigree rack, the bombs has thinner and a real little prop at the front. In the Profipack of the Camel Eduard recommends the PE frame at the right, on top the SE.5a PE.
A lot of options, I will add the racks, but not bombs.

Then I remembered my Camel build; there I had also an incredible Brassin 3D printed carrier. But I was not able to clean it with breakage and have only the broken one. But it shows me how it should look like! It is unpainted and not completely cleaned.

So I used two slightly modified carriers from my Camel builds.

Painted steel and gun metal.

Mounted.

At least in the front view it looks more real as the thin PE carriers which I wanted to use at first.

I added a pin between the Lewis and the Scarff Ring. Recently I learned about the function of the Lewis aiming device, which takes the wind into account. So I added the front part from this kit, the back cross was a Eduard left over.
Not yet painted so you see it better.
Not yet painted so you see it better.

And painted gun metal.
The ring will be added as final step after weathering.
The ring will be added as final step after weathering.

The prepared window below the camera rack is also glued in place.

The airscrew was sanded into the final shape, here the back side.

And the nice front.

Another highlight of the kit is an extra little decal sheet. That is not a correction as it carries decals with metal print!
Here in comparison to the reference book front cover with a Lang logo.
Here in comparison to the reference book front cover with a Lang logo.

A closer view: two decals for the airscrew and one metal decal for the front of the engine (I could not use it because I mounted the scratched pipes for the ignition cables in a wrong angle).
Luckily I tested a stripe of the decal sheet - it as a complete carrier film!
Luckily I tested a stripe of the decal sheet - it as a complete carrier film!

The airscrew is painted finally with clear paints, painted grey tips and the decals are applied.
Here on a F.K.8 reference pic: the dark and brighter wood nearly matches.
Here on a F.K.8 reference pic: the dark and brighter wood nearly matches.

As the Vickers MG fires though the propeller arc a sync gear is need. It is shown clearly on the ref pic of this aircraft I linked recently (see comments) and in Ronny Bar profiles of some F.K.8.
Luckily the SE.5a PE from my last projects provides a spare tooth wheel (on the pic I drilled it already). I found the left toothed wheel in an old wristwatch 😉
Luckily the SE.5a PE from my last projects provides a spare tooth wheel (on the pic I drilled it already). I found the left toothed wheel in an old wristwatch 😉

A scratched sync gear with some brass and a copper wire connection.

The side view shows the gear and the airscrew still very close to the fuselage.

The front view shows the nice little tooth wheel.
On the prop boss two little PE rings from a Part set covers the wood in the middle.
This spectacular pic is the last one of this build log!
On the prop boss two little PE rings from a Part set covers the wood in the middle.
This spectacular pic is the last one of this build log!
Komentarzy
91 24 January 2023, 20:21
Directly after this kit was released I ordered it as Mid type in the "Premium Edition". I contains not only a resin engine, but also more PE parts and are made of nickel silver. As far as I know the normal kit contains brass PE.
After the finished SE.5a project I tried to work on some shelf queens, but without big success.
So I decided to try another a nearly out-of-box build, as the kit provides fantastic features and details.
24 January 2023, 20:42
I've heard very good things about Copper State Models so I'm interested to see how you are going to improve it - because you're going to aren't you? 😉
Somehow I don't think of you having a shelf of doom. Do you have many builds in limbo?
25 January 2023, 09:53
"Nearly OOB" you say... I love when you're joking this way, Bughunter 😉 Watching (and learning) with pleasure and interest, of course!
25 January 2023, 10:36
Thank you very much and a warm welcome to the new show!
@Erik and Hans I like to work with metal and solder 😉
Regarding oob: I will try the same style as with my recent SE.5a with only a very small amount of replaced parts. I learned from another build log that the tail is not strong enough to hold the model so here we will see brass too.
@gorby I had a very nice experience with my Sopwith Dolphin Sopwith 5F.1 Dolphin | Project by bughunter (1:48) I got a very nice feedback from CSM 😉
That was the first injection moulded kit of CSM. This F.K.8 seems to be even better!
The resin engine is so nice so I think about a possibility to open the nice panels.
Since I own two KVISSLE Letter trays with cork, I have even more of these shelf queens in different states. This morning I count 9 (in words nice!) of them. I hope this F.K.8 will not enter this line .... I think every modeler has some, don't you?
25 January 2023, 13:13
Excellent. These are always fantastic and informative in every way. Sign me up
25 January 2023, 15:04
Actually no, I've never had a shelf of doom. Every model I start get finished.
It's a lot easier when your standards are lower. 😄
25 January 2023, 15:39
Gotta love the Big Ack. Nice to see one in 48. I built the Pegasus in 72 many years ago. Looking forward to watching this one.
25 January 2023, 15:55
Welcome Kyle and Chris!
@gorby, that is very exemplary to complete any project 👍 Sometimes I put a project aside if I can't find an immediate solution to a problem. And then sometimes it sits for a while and gets overtaken by other projects.
25 January 2023, 17:16
Welcome David, glad you don't miss a build!
I have added pictures of the insides of the fuselage. A lot of work has gone into it, but there are still parts missing before the fuselage can be closed.
25 January 2023, 20:27
Thank you Eric!
@Chris I forgot to mention that the F.K.8 is a huge bird in 1:48! That is the biggest biplane that fits in my cabinet (at least I hope so).
26 January 2023, 08:12
Here comes another gem from bughunter! It will be a great pleasure to watch 👀 and learn 😉
26 January 2023, 09:14
Ah, good to see you! I thought you were still sitting in front of the TV watching handball.
26 January 2023, 17:28
Always a pleasure to see what you are working on - excellent work so far 👍
26 January 2023, 18:32
Thank you so much for your kind words - a pleasure to read 👍
I uploaded pictures of the new target sight.
As I try this time a speed build, I started today to work on the wings. For me it is fast, for others may be slow. I do not understand the concept of a "Weekend kit" as I'm working here nearly a complete week and I'm far from finish. May be two weeks? But this depends also on drying time of oil paints fro example on the seat.
26 January 2023, 20:26
Wow, thank you Villiers!
I have the pleasure of working on an exceptionally good kit. Stay tuned, because more fantastic features will be shown.
27 January 2023, 13:08
Yesterday, I was blown away by the news that my good friend Roland passed away after a stroke in the age of 54. I was stunned and unable to continue here.
Now I have decided to dedicate this model to him.
I have not worked on the model but have not shown yet the painted wings.
28 January 2023, 17:28
I am very sorry to hear about your friend. Positive thoughts to you
28 January 2023, 17:35
I feel for you. Losing a friend is always sad. I wish you will soon come to terms with the pain and have fond memories of your friend.
Dedicating the building of this model to your friend is a great idea to honor his memory.
29 January 2023, 10:07
I am so sorry to hear that Frank, my sincerest condolences. I can't but echo Ludvik's words. Hang in there.
29 January 2023, 14:27
The painting guide of the manual shows green struts, but I like the impression of the box art of the kit with wooden struts more. If I carefully study the picture of this original aircraft (marking D) the struts _may_ be wooden. Some aircraft have a fabric wrap around the struts which have then been painted green, but in this case it doesn't look like it.
Instead of painting the very fragile kit struts like wood I made new ones from real wood and created safe mount points.
1 February 2023, 18:15
I started to work on the Beardmore with a power of 160 h.p. That is interesting from the history point of view, as it was developed from the 120 h.p. Beardmore, and that one starts as licensed-built version of the Austro-Daimler, now opponents of the WWI. I have built the Austro-Daimler in 1:16, see here: Aero-Daimler 120 PS | Project by bughunter (1:16)
The engine is not yet finished. May pipes, wires, carburettor, plugs, .... needs to be added.
3 February 2023, 19:43
Every element of your builds is a work of art in itself. The engine is beautiful!
4 February 2023, 07:00
gorby, I once read that in a signature of a model builder: "Treat each component as if it were its own model; in this way you will complete more models in one day than others do in a lifetime." So I try to follow that rule 🙂
4 February 2023, 12:35
That's very good advice. And your models are proof that it works. 👍
I really like that you replaced the plastic struts and propellers with wooden ones. What kind of wood are you using for the struts and propellers?
5 February 2023, 10:49
Thanks Ludvik!
For such fine grained wood I got the recommendation from model sail ship builders to use wood of fruit trees, and got some remains. I think that is mainly pear wood, but also cherry and others.
5 February 2023, 17:58
bughunter, thank you for your detailed response. I was intrigued by the fine texture of the wood. Some woods are not suitable for 1:48 scale because of their distinctive texture.
Also, I was wondering if you prepare the thin wood boards for gluing the propellers yourself or do you use thin veneers?
5 February 2023, 21:26
I prefer veneer, but typically this is not thin enough (you can buy veneer with 0.6 to 0.8mm) and have to be sanded down. The needed thickness depends on the size of airscrew and the number of layers. A good photo helps here.
I also cut my own "veneer" stripes on a circular saw with a thin blade from a 5-6mm wood block. Very tricky, that's why I prefer veneer.
5 February 2023, 22:14
Wow, that engine looks like it will crackle to life any minute, fantastic work !
6 February 2023, 20:26
Welcome to this show Guy and Hanno!
Thx, the engine looks nice but is not yet complete here, The carburetor alone is a nice thing, pics soon..
6 February 2023, 20:58
Thank you for your reply regarding the material for the wooden propellers.
The engine looks great, looking forward to the sequel. 👍
6 February 2023, 21:52
Ludvik, one additional comment: Please be aware that wood is a natural product. So even two pieces of the same kind of wood can be completely different - one perfect, the other possibly unusable for our purposes.
6 February 2023, 22:30
That engine is a delight and that wicker seat. "Chef's kiss" beautiful work!
7 February 2023, 20:46
Thank you Kyle!
While I try to bring the fuselage together it slipped away and crashed from the bench. Only some thin struts on the front breaks and some parts, e.g. the seat jumps out, but could be glued back. Good progress the fuselage is closed now.
Wikipedia states the 1650 built aircraft "proved to be effective and dependable". At least this mid type can carry 15 spare drums! As far as I found out the normal pan with 47 cartridges has a weight of 2.2kg, the 97 cartridges drums used on air 3.6kg. That means 54kg alone for the spare drums! Usual in other two seaters were 4 spares, so that is really impressive. This was a huge bird with big wings so it can carry a heavy load, also 8 bombs.
7 February 2023, 21:56
Another highlight of the kit is finished - the instrument panel. I'm happy with the outcome! ❤️️
8 February 2023, 18:37
Thank you very much mates! The kit provides a great details on plastic, PE and sharply printed decals for a nice result.
I'm working now on the front, which is very tricky with all the metal parts.
9 February 2023, 12:09
Hammer! Schade dass man später diese Detailfülle kaum sehen kann…
11 February 2023, 14:07
Truly beautiful instrument cluster and cockpits. Can't wait to see more.
11 February 2023, 18:14
Thank you very much mates! Your comments are highly appreciated!
Does anyone know a shade of Gunze for "Battleship grey"?
12 February 2023, 16:37
I don't know if this is it, Gunze offers this shade of grey as:
H82 - Battleship Dark Grey - Semi Gloss 10ml.
H83 - Battleship Dark Grey - Semi Gloss 10ml
12 February 2023, 19:42
Thank you Ludvik, I made a search here in SM paints for "Battleship", but both names are Dark Grey so I could not find them. But both are too dark.
But in meantime I was able the 'decode' the Windsock Datafile description. I was confused by the color code IBI. After looking into the Camel Datafile I realized that it should be 1B1 or 1C1, which are the codes of my color ref book. And both codes shows a light grey. I will try H335 or H324.
12 February 2023, 20:02
Just for the record. Regarding light grey for English aircraft, Gunze offers the following shades of grey:
Hobby (H)
H332 - light aviation grey BS381C/627
H334 - barley grey BS4800/18B21
H335 - medium sea grey BS381C/637
in the Mr. Color (C) range
Same shades only labelled as C332, C334 and C335.
The final choice is of course yours. 😉
13 February 2023, 10:30
After trying a few greys, including a pale grey from the Drooling Bulldog range, I will go for H335.
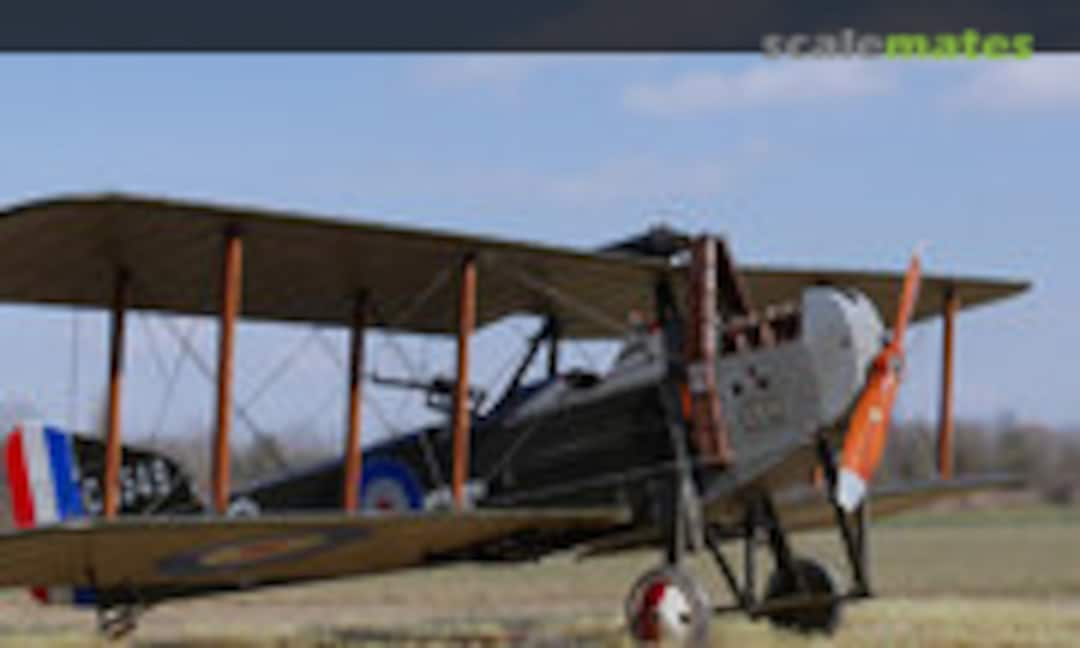
There seems to be only one picture of C.3549 which is also shown in the Datafile. The colour plate on the back cover also shows it with linen-wrapped struts painted green. I found this photo in the net and if I zoom in it confirms wooden struts as on CSM box.
[img1]

16 February 2023, 08:54
Hmm. Have I made a blunder? Maybe.
I decided to mask instead of the decals. To draw the masking that was a lot of work with measuring and checking! Needs hours, and cut by the plotter in 4min 20seconds.
In my stash are the beautiful RAF Red and Blue for the roundels and I found the blue on the decals to dark. With airbrush I can use MRP Insignia White which is a off white. And I hate decaling the rudder to cover the edges.
To use the decals I should have sanded the rib tapes a bit.
Conclusion: It can be done better, but fortunately I build these old struts and can claim that this is hand painted and the first step of a weathering.
16 February 2023, 16:35
Thank you Villiers, and welcome to the show Ben!
Every time I cut brass tubes, I think of you. Has it worked for you in the meantime?
16 February 2023, 16:42
I haven't cut brass tubes in a while, but I need to make a pitot for my XF-92A, so I will get another chance soon. However I'm currently distracted with my Chinese Spy Balloon 🙂
16 February 2023, 16:50
Kyle, I hope so! I need to think about the way to continue with all the painted parts.
17 February 2023, 08:21
The issue of the very fragile tail skid is fixed and the engine compartment is prepared for adding the engine and the first panels soon.
18 February 2023, 09:02
The spur looks great! The combination of metal and wood is awesome. 👍
18 February 2023, 20:43
Thanlks Ludvik! Since a broken landing gear on a Nieuport during a transport I have a little trauma and build landing gears and tail skids as robust as possible.
Spend hours with precise positioning of the metal front panels and mounted the engine.
Many greetings also to the anonymous followers who (as I learned today) check daily for new progress and pictures! 😉
18 February 2023, 22:48
There are no limits in the details you add to your wonderful models. Each of your WIP is more mind blowing.
Thx for sharing and hope to see you in Lingen next month 🙂
19 February 2023, 10:45
Thank you very much for such nice comments! Kudos go to CSM as the provides most of the wonderful details in this fantastic kit 👍
But sorry Christian - I will not be in Lingen this year.
19 February 2023, 19:03
At the moment I'm in experimental state as I do not trust 4 small pins. Ok, that is the limit of producing such kits in injection moulding. It may be enough to build the model and put it in the showcase - and not touch it again.
But I want to be able to transport my models to exhibitions in a safe way! Picture 122:Which connection would you trust more?
19 February 2023, 19:23
The undercarriage is done and sits in place, windshield and more on top too.
21 February 2023, 20:32
I keep going back to your original comment about an out of box build.... and chuckling
21 February 2023, 20:44
"Light goes through."
I know it's not the first time you did this, but still your AMS in perfection giving my always those WOW-moments.
OOB? Oh my...
21 February 2023, 22:32
Holy sh*t, you are exceeding yourself once more here, I'm running out of superlatives…..
22 February 2023, 16:36
What a great feedback - Thank you very much mates!
That is one of the best kits I have built so far 👍 The kit provides more then 90% of the details. I fully understand the economical reason, that CSM do not add a clear sprue for one single part. My other replacements affects robustness, as I need a robust model for exhibitions. As I wrote for home use the kit is good enough.
The filigree biplanes push injection moulding technology to its limits if it is to be true to the original. The Halberstadt from Mirage was extreme in this matter: less than 0.3mm plastic mounting pins for heavy parts simply do not work.
Pic 141/142: the radiators are oob. One could use 55 0.3mm copper wires on each side, but to drill all this plates (55 holes within 4x2mm) is a heavy task.
I think I have an idea ...
By the way, today in daylight: What's that glittering on the floor far away from the bench? That was the missing windscreen!
22 February 2023, 19:33
Krass! Ich habe den Eindruck, Du hast Dich sogar nochmal einen Tick gesteigert.
22 February 2023, 19:34
I'm also running out of superlatives... at least like this 👍 👍 👍
22 February 2023, 19:55
Thanks mates!
@Erik, schön daß es den Eindruck hat! Man gibt sich ja Mühe und versucht mit jedem Modell dazuzulernen.
@Christoph The trick is no carpet - parquet flooring. It's too smooth for the monster and it slips on it. 😉
22 February 2023, 20:53
After adding an emergency control for the gunner it was converted to a biplane. I like the look with the real wood struts 👍
It looks like good progress but it is far from finish. A huge amount of rigging lines as it is a two bay biplane and other details needs to be added.
23 February 2023, 19:34
Thank you mates!
The idea was to finish it this month, but I'm not sure if this is possible. At the moment I put a package of Gaspatch RAF wire terminals on EZl-Line as preparation for the rigging.
24 February 2023, 16:21
I'm continually amazed at your work, not only the level of detail, especially in such tiny proportions, but also the subtlety of making the plastic surface look like doped/painted fabric!
25 February 2023, 00:53
Thank you mates!
John, this started by accident! I have two nice PC10 shades of MRP, but a) I used them often on my other planes and b) the paints are not very robust and can be scratched easily. I had also a PC10 of "Drooling Bulldog" which I never used yet (but I like those paints in general). But this PC10 comes out very very dark. As this was too dark in my eyes so I used other green paints on top, then with artist translucent white oil paint, and with a mask some weathering with Gunze Clear Smoke. So as often more thin layers of paints make it more interesting.
In meantime more then half of the rigging is done 🙂
26 February 2023, 11:47
After the finished wing rigging I added more details like the Rotherham air pump, exhaust and more.
Good progress, but there are a still a bigger amount of ToDo's like all the control wires, hot water tank and radiators, more rigging, armament, wheels ....
27 February 2023, 18:00
Ich glaube ich gebe dir all meine Modelle und du baust sie für mich 😄. Unglaublich und wunderschön.
27 February 2023, 22:27
Thx!
I'm afraid I'll have to decline your offer. I would need the seven lives of a cat to convert my own stash into these scaled-down
originals.
28 February 2023, 06:40
Fabulous detail. That engine is a work of art. I had to go back and reread the comment about the top cover as misread it as saying now I'm covering all this up. 😄
28 February 2023, 07:29
Thank you very much mates! Your comments are highly appreciated.
@Juergen You will have a chance to see it live in Ried later this year.
@Gary The picture 174 is made especially for you 😉 But as you see the panel is not painted so I will not add it.
28 February 2023, 19:18
The project is not yet finished but there is good news and bad news:
The good news is that the big thing fits into my wall display cabinet in real life. Up to now I had only checked this theoretically, but today I also checked it practically.
The bad news is that you can see almost nothing of the pilot's seat and nothing at all of the fabric belts, no matter how you contort yourself. I could have saved myself the work!
1 March 2023, 20:25
Just as well you have thoroughly documented the build showing all that fantastic detail work that you have done so far 👍
1 March 2023, 21:59
Thank you very much James! I try to document the build in detail, but sometime I forgot to take pictures.
2 March 2023, 06:39
Thanks Villiers! Glad that you like it.
I guess later the day I will have more pics ...
2 March 2023, 15:26
Thanks Ludvík!
A big step forward - all rigging and control wires are inserted 👍 As I estimated the threaded terminals were not enough. All panels are applied and radiators are mounted with the tank.
I need to mention that I hate CA sometimes!
There are still some tasks on the ToDo list but there is a light at the end of the tunnel - or is this an oncoming train?
2 March 2023, 20:01
No doubt the light at the end of my tunnel is an oncoming train!! 😂 Yours, however is certainly just the end of the tunnel. This is just magnificent and has been a joy to follow along with, as usual.
2 March 2023, 20:14
Masterpiece of a model once more. My respect for such work and dedication!
2 March 2023, 20:29
It looks like we are approaching the final round, at the end of which your collection will be enriched by another great model.
There are days when I hate CA glue too. It almost instantly glues anything you don't want to glue, including my fingers... but the part I need to glue doesn't want to stick for mysterious reasons.
2 March 2023, 22:31
Such nice comments - Thank you very much mates!
Then I hope I don't lose focus in the last mile as we tend to think about the next project. And of course, that no devil comes around the corner for a mishap!
3 March 2023, 18:01
This build log comes to an end as the last details are done. That was a spectacular kit made by CSM! After metallising the bracing and a bit of weathering, I will take the final exterior shots, weather permitting.
Many thanks for accompanying me through the project and for the comments respectively likes 👍
6 March 2023, 22:53
I must confess I cannot find adequate words to praise your work - the model looks so realistic and the level of detail is just unbelievable... Chapeau bas!
7 March 2023, 06:43
Thank you Kyle and Robert!
With a little bit more weathering this ugly huge bird start to looks even better 🙂
And the weather today is better then expected 👍 Lets see ....
7 March 2023, 09:58
Don't miss the chance to view the album of the finished model here:
Armstrong-Whitworth F.K.8 C.3549 | Album by bughunter (1:48)
7 March 2023, 19:33
Robert said it perfectly and I have no choice but to join in his praise.
7 March 2023, 21:52
Thank you Alexander, I think that's meant nicely. But a magician cheats his audience, like the Unehrlich brothers, for example.
I would never do that with you - what I show here is all real! 🙂
8 March 2023, 08:39
Welcome! But yes, the show is over.
But you are right: The final pictures are nice, but to see all the details and the effort behind one should look into the build log album.
9 March 2023, 19:50
Album info
That is a great kit, so another try to build out-of-the-box. Plus wooden airscrew of course.