

Junkers F13 Miniart
 1February 23, 2025Let's start this journey by assembling the basis of the cockpit and the cabin.
Everything in this project will be brush painted using mostly Vallejo and AK interactive acrylic paints.
I will follow and try to emulate the great work of Plasmo as displayed here Youtube Video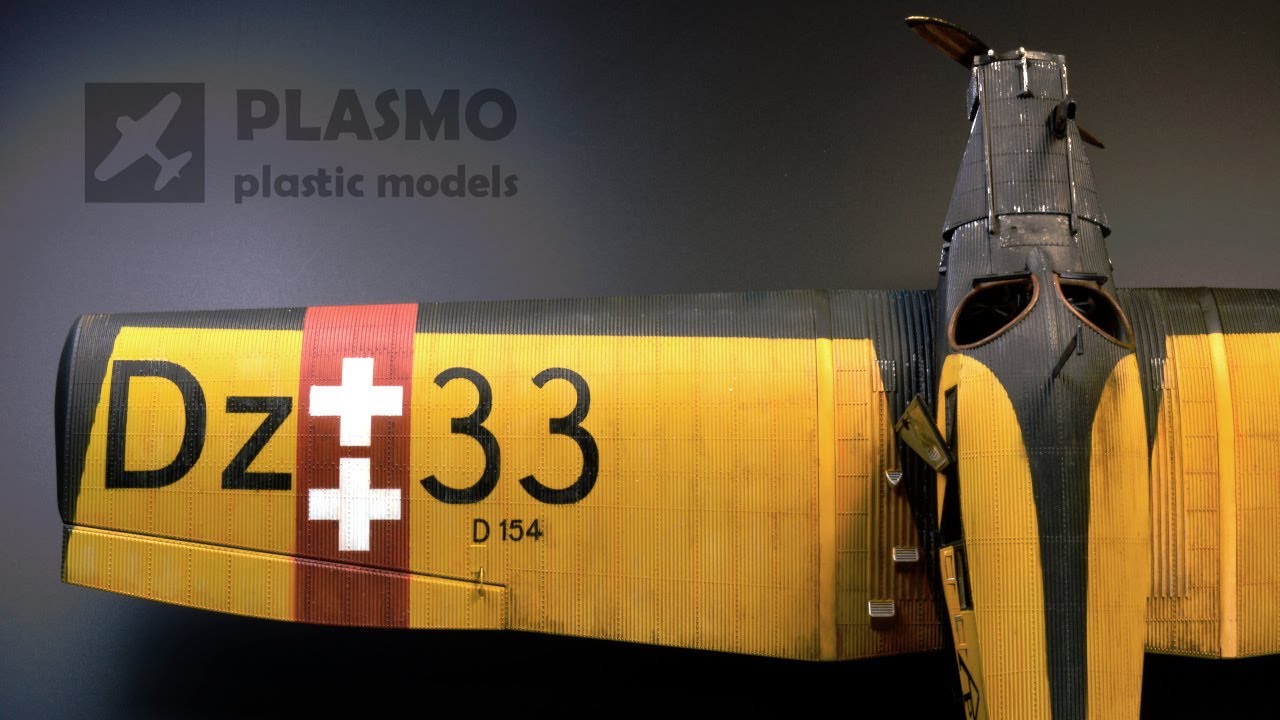
 2February 23, 2025
 3February 23, 2025Trying to paint realistic used leather. First layer is AK Vampiric Flesh as I don't have tan, then a highly diluted wash of Vallejo Leather Brown. I will later add AK Ivory Black oil paint to make a proper texture and shading.
 4February 23, 2025Trying to fit all the parts of the cockpit before commiting to gluing
 5February 23, 2025
 6February 23, 2025
 7February 23, 2025
 8February 23, 2025
 9February 23, 2025This time I will assemble the engine first before painting.
 10February 23, 2025Adding some decals and Tamiya black panel liner to the instruments panel
 11February 23, 2025
 12February 23, 2025
 13February 23, 2025
 14February 23, 2025Final leather seats look, after adding the oil paint shading
 15February 23, 2025
 16February 23, 2025
 17February 23, 2025Final engine look after adding some touches of Vallejo Dark Rust and a light wash of AK Ivory Black oil paint over the light grey parts
 18February 23, 2025
 19February 23, 2025
 20February 23, 2025
 21February 23, 2025
 22February 23, 2025Final cockpit and cabin look
 23February 23, 2025
 24February 23, 2025
 25February 23, 2025Assembly done, with PE elements. The engine hood has been hollowed to be able to open and close the hood in order to keep the ability to show the engine later if want to
 26February 23, 2025First try at painting a wooden propeller. The base is AK Sand Yellow, then after a coat of clear varnish, I used AK Burnt Umber oil paint
 27February 23, 2025Priming in white with Mr Hobby Finishing Surfacer 1500
 28February 23, 2025After three coats of Vallejo Flat Yellow
 29February 23, 2025Adding the red stripes with Vallejo Red (70.926)
 30February 23, 2025The masking is tricky and I did pull quite a few hair putting it properly and as symmetrical as I could.
I used AK Rubber Black (AK11027) for all the black parts. 31February 23, 2025I overdid it a bit with the black and got some leaks which I'll cover up later.
 32February 23, 2025
 33February 23, 2025Some leaks under as well, and some area that managed to get neither red nor black
 34February 23, 2025Covered the leaks as best as I could and painted the sides of the windows black
 35February 23, 2025
 36February 23, 2025
 37February 23, 2025
 38February 23, 2025
 39February 23, 2025
 40February 23, 2025Getting ready for a coat of gloss clear varnish
 41February 23, 2025Started putting decals after a few coats of gloss varnish
 42February 23, 2025All decals set
 43February 23, 2025After another coat of clear gloss, started some weathering with AK oil paints. First time doing this, trying not to overdo it.
 44February 26, 2025I took advantage of a nice bright sunlight to grab a few pics of the finalized version. The light is a bit harsh but that will do for now.
Overall very pleased with this kit, that was my fifth kit ever and I learned at lot with that one.
I'm not too happy with how the black sections look now, it was much better before the varnish. It was a nice bluish matte black, but the Vallejo acrylic gloss varnish kinda killed it, even though I sprayed a last coat of Tamyia flat clear at the end, it is still somewhat glossy. 45February 26, 2025
 46February 26, 2025
 47February 26, 2025
 48February 26, 2025
 49February 26, 2025
 50February 26, 2025
 51February 26, 2025
 52February 26, 2025


Comments
21 23 February, 23:29
Thanks Henry, glad you like it, that was my first ever try at adding some weathering to a model 😅
1 27 February, 23:02
Project info
52 images
1:48
Completed

Junkers F-13
DZ-33 / D-154 Reiher
1921
Yellow Black