

Notícias
")


")
adicionou um novo álbum de fotos.
28 imagens
Boeing 737-530 Smart Wings 1:144
1:144
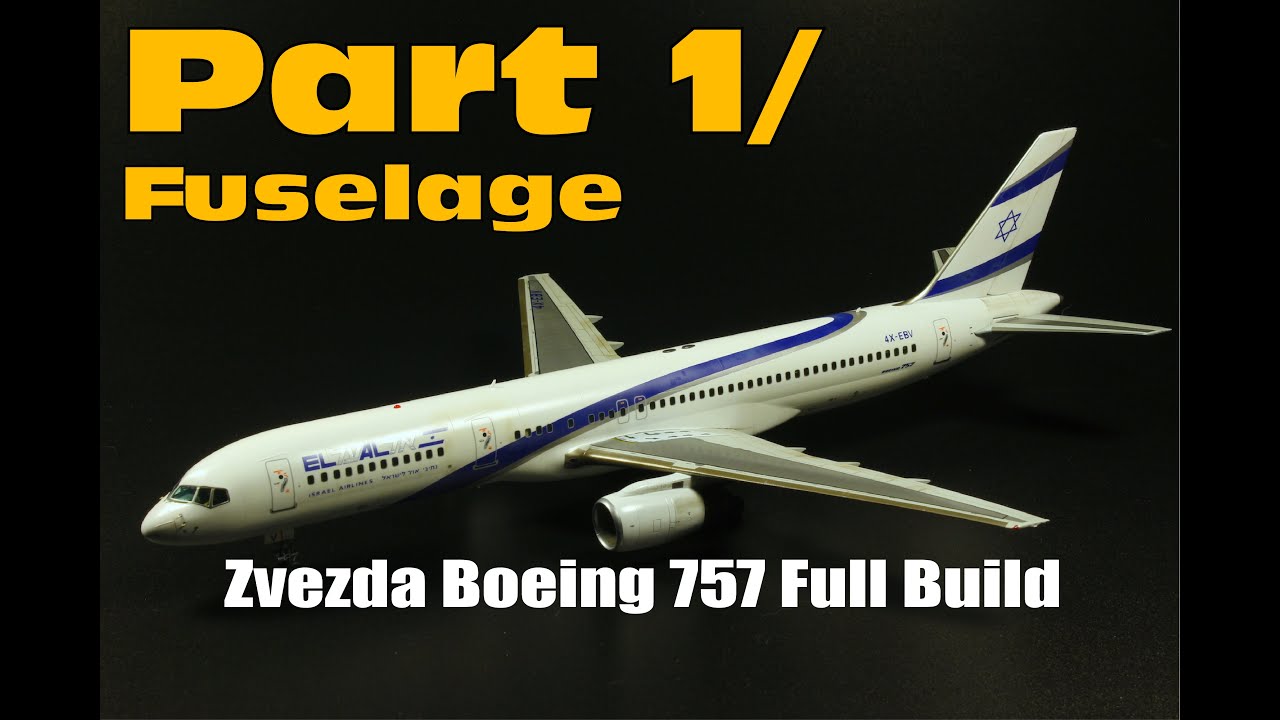
Pylon/engine transition painted, wash oil paint on top of wings done, airline name decal placed on fuselage.


 5+
5+ 31 10 December 2023, 18:22
After a long time I got into modelling and so managed to move a number of things forward. Now I have to let the putty cure properly on the transition between the pylon and the engine. And then the careful sanding and cleaning and final painting of the pylon and engine will begin.
30 June, 19:41
Great to see you back on this one, the livery looks v.cool indeed.
And don't even think that Zvezda nacelles are much better 🙂
30 June, 20:20
wow it it is looking really good. I really like the windows, and the shades you added
30 June, 20:45
Łukasz, I've got 373-800/700 waiting for me from Zvezda. And I'm looking forward to it. However, given my snail's pace, I don't know when their turn will come... 🐌🫣
30 June, 20:50
My both 800s are waiting as well 😄 Revell & Zvezda
Btw. How did you do such a nice pair of landing lights? I'm looking for ideas as decals are not available for all liners in 144th.
30 June, 21:11
I am impressed by how clean and evenly you cut out the windows. Which material did you use to cover the windows before pouring the resin. I use regular Cello tape but the resin dissolves the glue and this sticks to the windows.
30 June, 22:35
@Łukasz - I use either "little lenses" that I bought years ago at www.morellingtool.co.uk or nail glitter that I bought at a bead store.
I seal the headlight area first, then spray paint it matt black and glue the lights (glitter) in the appropriate places.
Then I sealed everything with transparent resin. After the resin hardened, I sanded everything to the shape of the leading edge of the wing and then polished.
1 July, 11:29
@ Michael - I use an electrical tape that I bought on e-bay. I got a reference for it on YouTube here: Youtube Video
It's High Temperature Resistant Kapton Tape. The packaging says it is "Advanced Polymer Tape" and is characterized as "Clean Removal". And the adhesive doesn't really stick to the resin.
1 July, 11:39
Thanks Zbynek. I will try this. The Cello tape glue can be quite easily removed with IPA, but lazy as I am, I like the idea to omit that step.
1 July, 17:31
So I moved forward a bit again and sanded and cleaned up the transition between the pylon and the engine.
4 July, 21:55
In between letting the putty cure in the transition between the pylon and the engine, I started speculating how to improve the cockpit window frame.
In the end, Authentic Airliner Decals were used. I really like the way the authentic metallic finish looks on the decal, plus they depict the rivets and the thin black line showing the insulation between the glass and the frame. I had to cut the decal because the dimensions are a little different on the model, but I really like it. So I ordered another set. The windshield is wider, so one set was not enough for me.
On the photo you can see where the original frame is sprayed with Alclad and where the decal is.
19 July, 17:20
So I found some time for modelling - Pylon/engine transition painted, wash oil paint on top of wings done, airline name decal placed on fuselage.
20 August, 07:16
See you like your Airlines 👍.
I may do a Soviet era TU in future.
You done some nice projects 😀👍👍
3 September, 13:15
")
")
 (Eduard EX807)")
")
")
")
")

")
")
quer este item
")
German
Panther Type G Late Version Panzerkampfwagen V Ausf G (Sd.Kfz.171) Späte Version Tamiya 1:35
35176 1994 Peças novas 3 September, 13:05
")
")
")
")
")
")
")
")
adicionou um novo álbum de fotos.


17 24 February 2023, 11:16
Really nice build Sören. Like the heavy mottles which was feature on late war 190's. Simple but effective little dio too. Great job Sir.
24 February 2023, 11:32
adicionou um novo álbum de fotos.
16 imagens
Supermarine Spitfire Mk.IIb
1:72


Projeto: Supermarine Spitfire Mk.IIB


 1+
1+ 7 10 July, 14:23
")
adicionou um novo álbum de fotos.


21 28 August, 15:50
Great job! (A little rigged with the paneling of the C/ A version around tail and so 😉, but you have a very high standard in scale modeling👍)
Did you use the black decals right behind the canopy or masked it and painted this?
1 September, 14:24
Thanks all! Mark, I felt that fixing the panel lines around the tail would only make things worse so I kept them as they were. Not that noticeable anyways. I masked and painted the black part behind the cockpit. I did a good enough job of the masking that I didn't need the decals to cheat. The black parts on the wings are decals.
2 September, 20:56
Thanks👍. I'm testing the Kasl fuselage and tailset, but they need both adjustment (panels in front of the tailbase and the antiradar teeth at the parachute housing). Its not the best for the cohesion of the fuselage and it feels like Hans Klok cutting straight to the nice Tamiya body…
3 September, 12:58
possui este item
")
A-36A Invaders 524th & 382nd FBS/ 27th FBG
SuperScale International 1:48
48-0612 (48-612) 1997 Produto novo 3 September, 12:57
")
Search aircraft non-ortodox project = Brazilian Air force and Brazilian Navy systems consultant ERP = logistic expert
3 September, 12:18
Hello modeller member! recently I buy the kit ARBA ARADO AR581-4 scale 1-48 but inside the little bags dont have a little metal piece...one piece of the cover the hold of the landing gear! in the kit are used two metal pieces! Can you to send this lost piece to me by Brazilian POST SERVICE directly to home address? I can buy by this service and I can send the pic of this piece by email to you to identify correctly the lost piece ok? standing your providences...hannah werlang becker!
3 September, 12:36
Maybe you should contact the seller? Here, you posted this on ScaleMates...
3 September, 12:38
/pt/search.php?q=*&page=newsfeed&fkSECTION[]=Newsfeed
search-solr.php?lang=pt
35
35
/pt/search.php?q=*&page=newsfeed&fkSECTION[]=Newsfeed
35
todo