Tyrrell 006 Ford - GP Italy 1973 - WIP

Starting to clean up the white metal parts prior to painting... Pics were made with my smartphone, please forgive me for the bad quality...

Cleaned up parts are polished for a cleaner result...

Air scoop has been drilled out to enhance realism... Now it is time to fix the photo-etched parts.

The color instructions are wrong! Tameo suggests an all-blue body, but in reality the body sides have to be black, as do the front spoiler sides (see reference pics)...

So the body was first completed with PE-parts and everything was primed. Next the body parts were sprayed inTamiya TS-15 blue.

Next the blue parts were masked and the sides were sprayed with Tamiya TS-14 black (as it should be). Now I can start applying the decals.

All the sponsor decals have been applied.

Once they have dried, I will add a gloss clear coat after which the parts will be polished.

The bodyparts have been sprayed with a clear coat. Also note the opening that I made in the front bulkhead to allow the driver to reach the pedals...

Airbox and rear wing have been clearcoated as well...

Once the clearcoat is dry, I started to paint the rear of the chassis.

I also fixed the seat belts to the seat, and I installed a bolt in the cockpit hub to allow the car to be screwed to a base plate.

Next I fixed the seat, dashboard, steering wheel and gear lever to the cockpit.

Another shot of the finished cockpit.

Next the cockpit was fixed into the cockpit hub.

Then the front suspension was built together and dry fitted.

Once the front suspension was complete I also built the engine and the rear suspension.

Close up of front suspension.

The model screwed to a base plate to allow me to work at the car without touching it.

The Ford Cosworth engine looks quite good even in 1:43 scale. Great work by Tameo.

Close up of the engine and gear box.

Another shot of the almost completed engine and rear suspension.

Still missing: the engine supports, some tubing and wiring, radiator and air intakes, and the rear wing supports.

Top view of the finished cockpit.

Top view of the finished front suspension.

From this angle the model looks almost like a real car.

Starting to look quite busy at the rear...

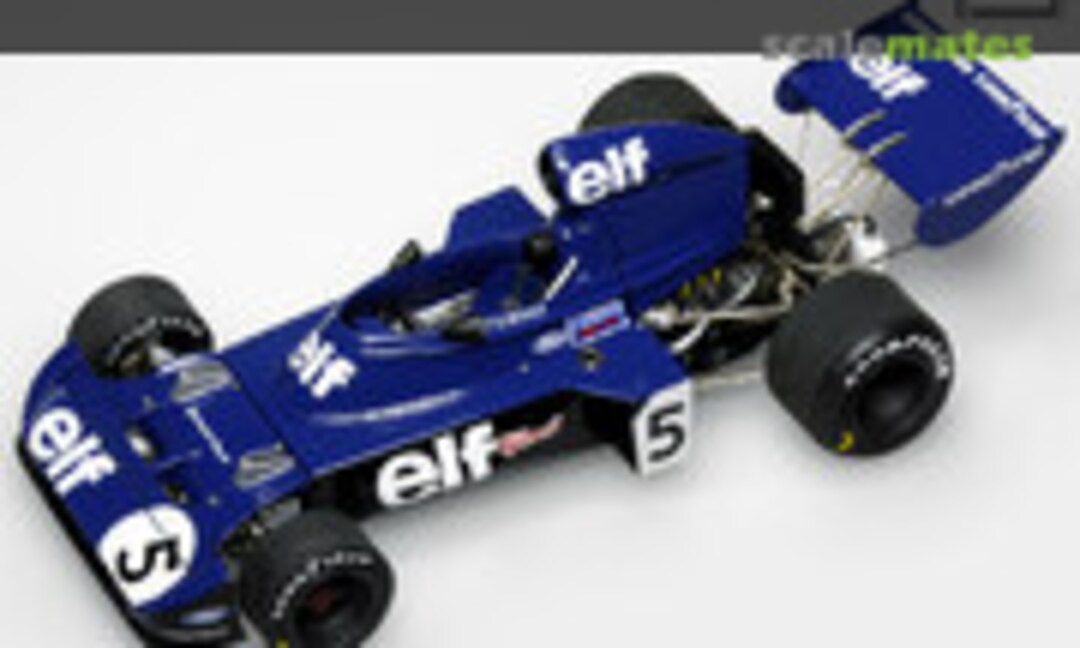
The Tyrrell model is ready; all what is left to do is fix the remaining bodyparts (front spoiler and air scoop).

The Tyrrell model is ready; all what is left to do is fix the remaining bodyparts (front spoiler and air scoop).

The Tyrrell model is ready; all what is left to do is fix the remaining bodyparts (front spoiler and air scoop).

The Tyrrell model is ready; all what is left to do is fix the remaining bodyparts (front spoiler and air scoop).

The Tyrrell model is ready; all what is left to do is fix the remaining bodyparts (front spoiler and air scoop).
Comentários
1 22 March 2014, 18:23
The Tyrrell is finally finished... Take a look at the finished pics in the 'Finished Pics' album 😉
17 April 2014, 20:44