
Новостная лента
добавил новый фотоальбом.
99 изображения
Mi-1M, model conversion by Special Hobby - WIP
1:48
At the end of the day, I sprayed surfacer to unify the hull color and show the areas that will need to be repaired.


Проект: Mil Mi-1M Czech Air Force

55 15 August 2024, 08:24
I still miss this small helicopter in my collection of flying machines used in Czechoslovakia. The time has come for me to rectify that. 😉
15 August 2024, 09:26
Oh. I built a 1/72 version of the Mi-1M... This should be interesting.
16 August 2024, 15:07
Hello, Greg. I know there's a Mi-1M kit in 1/72nd scale. Unfortunately, only this and a rather old kit from Special Hobby exists in 1/48 scale. In addition, this kit is an older version of the Mi-1A, which is different from the upgraded version of the Mi-1M. It has a different nose shape, different cockpit glazing and other minor changes. And since I decided to build the upgraded version of the Mi-1M, I will not avoid modifications to the kit.
To give you a better idea of the extent of the modifications to the kit, I've included a picture with the differences between the Mi-1A and Mi-1M versions color coded.
16 August 2024, 22:23
Oh, neat! I didn't realize there were so many changes between the versions. This is going to look great!
17 August 2024, 15:09
Greg, thank you for your support.
____________________
I started building the model by making new transparent parts.
17 August 2024, 22:31
Yeah. Nice work on the heat-n-smash moulding for the clear parts. That can be tricky to do.
18 August 2024, 16:15
@Alec K
I used to buy ABC magazine regularly as a kid and eagerly awaited each new issue 🙂. I assume your mention of ABC magazine refers to the occasional modeling tutorial section.
@gorby, @Greg Baker
It's not too difficult to make new transparent parts by stretching warmed transparent foil over a pre-made template. Preparing the template is the most work. Stretching the warmed foil onto the template is just a routine that anyone can do after a few attempts.
18 August 2024, 22:17
Hello, Robert! Good to see you here. You haven't missed much so far. Up to this point I've been more concerned with preparation than building the model.
28 August 2024, 20:59
I want to try to use the sandwich construction in the production of new glass parts for the coptics. So I made (using the same process as the transparent parts) parts out of white plastic sheeting. These parts will have holes cut out for the windows. The transparent part will then be inserted between these two parts. The white outer and inner parts will form the embossed framing of the transparent part.
28 August 2024, 21:18
Welcome, Jennifer, we're glad to have you on board and thank you for your goodwill. 🙂
30 August 2024, 09:46
I came back from vacation and it started to rain. Ideal conditions for modelling. 🙂
So I'm back and continuing to work on the model. I need to glue the finished nose to the glued fuselage so the cockpit overlay fits exactly. That determines the workflow. First I have to finish the nose and the inside of the fuselage and glue all the parts that need to be glued to the fuselage halves from the inside. After gluing the fuselage halves together, I would no longer be able to get to these parts (or only with great difficulty).
Photos of the work progress will be coming soon.
13 September 2024, 20:42
Oh some modeling for big boys, not glueing perfectly fitting parts together and throwing on some paint! Following 👍
13 September 2024, 22:53
I glued several parts to both halves of the fuselage. These parts are glued from the inside, so they have to be glued before the fuselage is closed.
I also started working on making new parts for the cockpit.
14 September 2024, 21:06
Wow, this is incredible work Ludvik! Thank you for sharing your steps - I've learned a lot from your pictures and descriptions!
14 September 2024, 21:15
@Landlubber Mike
Mike, thank you for your interest. Welcome aboard!
I've had the idea for this rebuild in my head for a few years now. Mainly because I've been waiting to see if anyone would start making 1:48 scale Mi-1M kits. Unfortunately, to this day, no manufacturer has this kit in their lineup. So I decided not to wait any longer and start building a model from what I have available.
My rebuild is just beginning. Most of the work on the model is yet to be done. I'd also like to try some new techniques that came to mind while planning to build this model.
@Villiers
Thank you for the compliment. I appreciate it very much.
15 September 2024, 09:15
I didn't have much time today, so I didn't make much progress on the build. But every little bit of progress counts. 😉
15 September 2024, 20:43
Wow! You don't shy away from challenges! Watchinh with admiration, and hoping to learn lots too. Hoping you are not amongst the floods? Stay safe!
16 September 2024, 12:29
J35J welcome! I hope you like it here.
Bruce, I like a challenge like that. I like to experiment and enjoy thinking of and then implementing ways to improve my model.
I appreciate your concern for my safety. I live in a town in the highlands that wasn't badly affected by the floods. Only the river that runs through our town has increased flow, but it hasn't spilled out of its bed. Moreover, our house is 80 metres above the river, so even if the river had spilled out of its bed, it would certainly not have reached our house.
17 September 2024, 07:08
It sounds an idyllic location.....Opravdu, česka příroda je krasná....
17 September 2024, 13:03
Bruce, thank you for the compliment. I'm sure the nature is beautiful in England too. 😉
18 September 2024, 10:23
Another big bunch of parts, not to mention some kit parts, come together to form one big model! Not to be missed!
I'm late, but I have an excuse. First I was on holiday, and then this stupid C-virus knocked me out.
18 September 2024, 20:29
Alec, thank you for your support and your kind words.
Welcome, Frank. I hope you're okay, and I'm really glad you're one of my guests.
It's definitely not too late. I still have most of my work ahead of me. In fact, you could say I'm just getting started.
18 September 2024, 21:20
Uhhhhhh … this is going to be another good one from you! I'm in 👍
23 September 2024, 04:58
Thomas, welcome. It's good to see you among my guests. 🙂
23 September 2024, 20:44
I'm struggling with time rather than the model at the moment. At least I managed to draw a new dashboard. After printing it in scale (1/48) on photo paper I will use it instead of the kit part.
23 September 2024, 23:41
Another Ludvik conversion build with all the accuracy and attention to detail.we've come to expect. It's looking good, can't wait to see the final result! 👍
23 September 2024, 23:42
Welcome, John. Please have a little patience. This project is quite demanding and I will need a lot of time to complete it.
23 September 2024, 23:50
Ok, I aimed that to "I can wait to see the final result" (but I'm still eager) 😉
24 September 2024, 02:03
Wow, the dashboard looks amazing. I can only imagine how much time that took. Really interested how it looks completed 👍
24 September 2024, 14:09
Alec, I drew the dashboard in the evenings for 5 days (about 3 to 4 hours each day). Add to that additional time (about 5 hours) for test printing and subsequent corrections.
I am attaching a photo of a test black and white print of the dashboard after all the modifications are complete. I will print the dashboard for the model in color later.
24 September 2024, 18:34
According to the photos I modified the fuselage where the main landing gear is attached to it.
24 September 2024, 20:00
Guy, Jakub and Robert thank you for your comments, it's a nice encouragement for further work.
After today, the hull is glued together. Now I'm adjusting the shape of the transparent cockpit cover.
25 September 2024, 21:13
I continue to enjoy seeing this one take shape. Quite the effort to convert it!
25 September 2024, 23:27
Villiers, the completion of the fuselage is only temporary at this time. It's only to modify the shape of the transparent cockpit cover.
Once the cockpit cover is the correct shape, I will take the fuselage nose down again to continue work on the cockpit interior.
26 September 2024, 10:36
Work on the model continues with the production of the cockpit.
1 October 2024, 17:32
Greg, thank you for the compliment.
A small shift in the work on the internal equipment of the helicopter's nose.
2 October 2024, 19:36
Ludvik, a modeling god. The detail and scratchbuilding is just otherworldly and I always learn so much from your build logs
4 October 2024, 01:58
Jennifer, thank you for your kind words.
Randa, thank you so much for your contribution. Although I don't consider myself a modeling god, your comment made me very happy. Thank you.
4 October 2024, 19:14
This afternoon I continued making details for the nose of the helicopter.
4 October 2024, 21:17
Little progress today. The cockpit got a floor, internal construction and a coat of grey paint. Now I can start to get the cockpit "settled in".
5 October 2024, 19:24
Thanks Alec! The dashboard isn't complete yet. I still need to add a few more details. But I'll add those after gluing the dashboard to the nose of the helicopter, because I would (very likely) break them off while gluing the dashboard to the nose.
8 October 2024, 22:38
Again, little progress. I'm prepping the seats for the helicopter crew.
8 October 2024, 22:39
The red on the seat and cushion pops, starting to look natural.
8 October 2024, 23:07
This build made me cautiously open the MPM 1/72 version of this chopper. I closed it back up very quickly… 🤣
10 October 2024, 18:11
Alec, I don't blame you for making that decision. The MPM kit isn't very good. To build a nice model out of this kit requires a really large amount of work on virtually all parts of the kit. Plus the plastic the kit is made of is quite hard and cracks easily.
11 October 2024, 13:00
Agreed. The original MPM kits are now almost in the same category as the original KP: collectors' items. To be sighed over, but not disturbed 😁
12 October 2024, 13:25
I'm continuing to work on the seats. I finished the backrest of the rear bench and glued the assembled bench into the cockpit.
13 October 2024, 20:50
The new cockpit cover is slowly starting to resemble its model. The inner frame inserted into the transparent part of the cockpit and attached to the fuselage already shows the future shape of the cockpit cover.
26 October 2024, 09:28
After a short break I continue building the model. I have finished the instruments and controls in the cockpit and am now working on the details located on the inside of the canopy.
6 November 2024, 22:56
Not much of this coarse kits are build. And among those is no model with details like yours! To scratch all little things needs time but is worth the effort. Your hard way to do the canopy frame is a good example.
I think the instrument panel will not very visible at the end but for more contrast individual decals for the instruments are an option. Tom Anyz offers greatly printed universal dials in black and white, e.g. Universal cockpit dials 1.00 mm - 1.80mm (ANYZ AN037, No)
")
12 November 2024, 22:52
Bughunter thank you for the recommendation. Looks like the ANYZ decals are a great idea for simplifying dashboard fabrication.
13 November 2024, 00:05
Yes! And Tom is a modeler too, so he provides things he need for his own models. So from modeler to modeler 🙂
The decals are well designed and printed by Cartograf.
13 November 2024, 09:42
It's always good to have someone who has experience from their own practice.
I had a look at Tom's site and apart from the cockpit decals, I liked the other nifty bits. Looks like I'll do myself a favor and buy some of Tom's accessories. 🙂
13 November 2024, 23:12
After a short break I am resuming work on the model. I finished the interior and glued the cockpit canopy. Now I have to finish the outer cabin window frames.
19 November 2024, 22:14
Really great bit of scratchbuilding, Ludvik! 👍 cockpit details are fantastic.
19 November 2024, 23:22
The canopy is an impressive masterpiece in itself, Ludviku. Chapeau bas!
20 November 2024, 08:03
Work on the cabin canopy is complete. The model has been sprayed with surfacer for the first time.
2 9 December 2024, 22:22
Starting to look like a helicopter. It's going to be a true work of art.
1 10 December 2024, 03:38
This sandwich framing of the windows seems to be a lot of work but gives an awesome result 👍
1 10 December 2024, 10:54
The method of layering multiple layers on top of each other was my first time.
When I was thinking how best to make the new bow and cockpit cover, I thought of making these new parts as a sandwich. It seemed like a good solution and I wanted to give it a try.
Truth be told, the fabrication was more challenging than I had originally imagined. But I'm glad I took the plunge. I'm happy with the result.
3 10 December 2024, 22:08
After a break caused by the Christmas and New Year holidays, I returned to work on MI-1 again. According to the drawing I started to engrave new panel lines on the fuselage.
It's slow going and there's nothing to photograph yet.
4 14 January, 00:09
I've finished the first round of engraving the panel lines. The lines will still need some aftercare to achieve the final look.
14 January, 21:25
Nice work with the rescribing. It couldn't have been easy with such an awkwardly shaped model.
15 January, 07:43
Gorby, you got it exactly right. The shape of the helicopter fuselage with its rounded surfaces and large number of panels and various covers makes it difficult to overwrite the lines.
I found Dymo tape very helpful in transcribing the lines. I use it instead of a ruler when transcribing lines on rounded and complex model shapes. The Dymo tape is flexible yet strong enough. When taped to the model, the tape conforms to the shape of the fuselage and holds well in place (unlike a flexible ruler). And once the line is engraved, the tape can be peeled off easily.
2 15 January, 09:46
I was thinking the same thing. Fine saw blade works for me on curved areas, in conjunction with a good scriber.
2 15 January, 14:56
After a short break I'm going back to work on the model. According to the drawing and photos I started to add details on the fuselage.
1 16 February, 22:34
Ludvik, how are you getting all the details for how the helicopter should look?
17 February, 02:11
Jennifer, in building this helicopter, I am drawing information from an article on the history of the development of the helicopter, descriptions of the various versions, technical data, a detailed drawing and photos of the actual machine.
Most of the information and photographs I tracked down on the internet, and detailed photos of the interior and various details were provided by a friend who took photos of the helicopter at an aviation museum.
2 17 February, 23:00
Another shift in the work on the model. I've added small covers to the fuselage.
19 February, 00:24
Jennifer, unfortunately I had very little free time lately. But I'm better with time now and can continue building the Mi-1. Look forward to an update soon.
4 9 March, 12:11
This afternoon I experimented with creating vents on the fuselage of the helicopter.
After a few trials and trying different materials, it turned out that the best method for making vents on the fuselage is to make a whole panel with vents out of thin aluminum sheet and create the vents in the panel.
3 9 March, 20:17
Hello, Merlin. 🙂
The helicopter is powered by a radial combustion engine that is cooled by airflow. The air for cooling the engine enters the fuselage through an opening above the cabin (the amount of air can be controlled by the air intake louvers). And openings on the bottom and sides of the fuselage serve as its outlets.
3 9 March, 21:20
The attention to detail you put into your projects is exceptional. Do you keep a notebook with all the planned changes and extra work you want done?
10 March, 02:54
Those vents panels are nicely done!
I also have a stalled Ansaldo project where I don't like the way the cooling vents are shown in the plastic. But there are so damn many vents ...
1 10 March, 08:12
@Jennifer
I'm not so consistent that I take notes on model building. Before building a model, I study the materials and photos of the machine I want to build, think about what I'm going to do and how I'm going to do it. I work out the minor details as I build the model.
My notebook is my head 😄
@Frank
Originally I was going to replace the air vent projections with plastic profiles. But I couldn't find any profile with the right shape and size. So I had to find another solution. I basically copied the panel making method for a real helicopter. Only instead of a press I used less sophisticated tools. 🙂
I know your Ansaldo project and I plan to build an Ansaldo too, only it will be a two-seater version. That's why I know that in terms of number of vents, Ansaldo can easily compete with MI-1.
3 10 March, 09:39
I finished adding details to the fuselage and sprayed the model with surfacer. Surfacer unified the fuselage color and as always pointed out areas that will need to be repaired.
Clearly, sandpaper and putty will keep me company for the next few days.
2 11 March, 23:00
Jennifer, you're basically right. Surfacer and primer are close. Both are used to prepare the surface of the model before applying the paint. But there is a difference between a surfacer and a primer.
SURFACER is a fine putty that is designed to be applied with a spray gun. It prepares the surface of the model for paint application and also covers minor surface damage. Once sprayed on the model surface, surfacer is matte and can be polished with fine sandpaper.
PRIMER is a base paint with high opacity. The primer unifies the colour of the model surface and prepares it for paint application. Unlike surfacer, primer is glossy and does not need to be polished.
12 March, 08:10
The production of the ventilation holes is incredible 😳
It goes on with the details, even when you think: More is not possible 👍
12 March, 09:41
добавил новый фотоальбом.


21 31 December 2024, 21:07
I was planning to have lots of figures in this diorama, but the guy who uploaded this kit to Scalemates had guessed the scale as 1/100 and it is rather 1/250. Therefore my HO scale Greeks are completely overscale and will not be used.
31 December 2024, 21:11
I started with changes to the access steps, I had to saw these flush with the base as can be seen on reference pictures. Also I had to remove a terrible warp, I did this without a base plank by connecting the corners with thick wire and bending that. I found out that Italeri reconstructed the inner naos columns like on old drawings with both colonnades equal in length. Most of the modern day reconstructions show the top row smaller, so I sawed of the first row and used this as a lengthening part. I also made the architraves thinner, these are really ugly from the box with a slanting side.
2 January, 02:40
Looks interesting. 🙂
If some bloke called Elgin turns up you may have to tell him to bugger off. 😉
1 2 January, 08:54
I bet you could get some z scale figures (1:220) and paint them however you like
2 January, 22:58
Thanks for the tip, Ben, but I will solve the problem with some 1/200modern figures I got yesterday. I'll slice them and add 1mm, then cover it with a stola. I also had to perform lots of changes to the interior structure of the temple, using a floor plan I rescaled to 1/250. It appears Italeri has moved the pronaos and opisthodomos colonnades to the inside, to make up for the walls they made much thinner. I sawed out these floor parts and moved the colonnades to the outside. I thickened or replaced these walls with styrene. That meant engraving the outside of the styrene walls with block patterns. I also reversed some entrance walls because only one side of the gate part got a stone texture. I made the textureless side to go inside the wall. I moved the first two Ionic columns to fill the new space. I don't understand why Italeri is messing with the proportions of this building, just to be able to minimize the sprue variety to two shapes and as little wall surface as they could, while wanting to show off the inside. They also added the arm support to the statue, though that existed only on marble copies.
2 4 January, 01:43
The increase in length of the sidewalls is compensated with the unused inner wall parts. The four cutouts are made but I changed the sizes by recutting each part. The inside of the walls is covered with the cutout parts, taking care to continue the masonry. Between the layers I will add another sheet of the same thickness to get to 4.5mm. I will have to use styrene for the plinths, all of these were used for the gates.
1 6 January, 00:59
The inner walls are now connected to the outside with spacers. The plinths are machined from styrene plate so the walls fit to them. Four antes are added to the front walls. The inner tympanons are connected to the colonnade, that will fit in newly drilled postholes. I will remove the triglyphs there, they should only go on the outside and not be inclined. This colonnade isn't lined up with the outside anymore, the architrave will have to be skewed. More than 40 columns are now prepared.
1 7 January, 18:02
The outside colonnads are completed with the different architrave lengths connected At first I tried to connect these in series but there is an inconsistency in the triglyph bases (guttae). This disappears when the parts are connected in parallel. I also removed th middle triglyph because this was split, I exchanged with a complete one. I cut the moved tympanons of the interior colonnades to make fit the roof parts. I also shifted the outside tympanons a few millimeter outward, so they would extend like on the pictures.
1 9 January, 13:31
I feel like I need a degree in classics and one in architecture to follow this build. The corrections you are doing are fantastic. This will be something special when you are done. How will you paint it? Seems hard to get in all the nooks and crannies.
9 January, 15:38
Thanks! I'll be using a Rustoleum Ivory spray can for primer. Then the usual modulating. It helps to have a degree in archaeology, there was even a small copy of that statue near my classroom.
9 January, 16:46
I leveled the front walls with the middle structure and joined the ceiling parts after removing a small strip, so the pattern would match. Then I compared the 2 kit figures with some Schulcz figures I had. The kit figures are larger than 1 cm, so these are over 2 m 50 long in reality. They can only be used as statues. My added 1/200 figures are about 9mm to 7mm, so these are more realistic. To make them look like ancient Greeks, they are dressed in alu foil.
1 12 January, 21:06
A small change was done to the front wall to improve symmetry. The base was filled in where I had changed components. One of the interior pillars was straightened and now the colonnade and the temple inner walls could be connected to the ceiling, that was only held up by the thin outside Italeri wall. For this a series of strips was cut out in thin styrene so all ceiling beams could get postholes in the outer walls. Then these strips were split in half so you get copies for each side. The same was done for the colonnades, but with a piece of sprue in between two strip halves. That creatded an architrave that could rest on the colonnade near the goddess statue. A smaller version was made for the rear room. Now the ceiling was completely closing up and I could create a link between the inner portals, that at this point were still two loose colonnades with a roof triangle on them. I closed up the ceiling on top of these with thicker styrene plate and then connected the portals with a 21 cm long sturdy strip. Like that, you can lift the two portals as a whole and dry-fit it on top of the inner walls. Now the only thing left was to finish the roof. I connected the four roof sections with a styrene plate and left some room for the distance that I had moved the outer tympanons. That gap was filled in with styrene and then the tile layers were sawn out of that, which took some time to do thoroughly. One last omission from Italeri are the imbrices on the roof, you only get the tegulae as continuous tile rows without the capping tiles between each of the two cover tiles. I currently have no solution for this IMO unnecessary omission; Italeri could simply have cast these vertical tile rows on the parts. I finished with adding the acroterions. Maybe I can look for an existing N-scale roof, because adding styrene tile profiles would be madness with about 10 meters needed.
22 January, 01:50
The ancient Greeks are primered grey and the building is primered in marble colour. For the roof I have found a solution in Redutex stickers. These have the approximate dimensions of the roof, but will have to be cut up to fit exactly. Then they will also be repainted.
1 24 January, 15:45
"Meden agan" is an ancient concept that doesn't apply to me... Today the painted figures have provided a sacrifice of animals, but the difference in scale means that they caught some aurochses in stead of regular oxen. I also covered the empty roof with Redutex tiles and painted these in marble color.
1 27 January, 21:10
Thanks, Ben. The stone parts are now shadowed with Tamiya Dark Yellow 2 and then highlighted with white. The ceiling, doors and portals are masked to paint with Gunze Wood H37 and Tamiya Fieldgrey for bronze. The goddess statue was painted white too, then masked with gum and sprayed gold with a small rattle can.
29 January, 17:28
I painted the stars on the ceiling in AK True Metal gold and started on the decorative elements with Vallejo paints.
31 January, 14:06
The statues in the tympanon are painted according to some websources. Light blue is added to the frieze. I also bought more Redutex products to embed the temple in its surroundings.
5 February, 16:16
A base is made from a picture frame, some foamboard, a cardboard wall and two Redutex 3D-floor decals. I used some topographical charts to get the right surroundings for this dio. The temple is anchored in the base with some tailored sprues and it will fit level with the foamboard. Some Joefix basic nuts will be used for some foliage.
19 February, 15:28
A dark wash is applied to the masonry and then a drybrushing with Vallejo Offwhite results in the desired effect. Where it is too heavy, it's scratched away with a knife.
22 February, 23:18
The temple is completely drybrushed and after adding the walls to the floor it's also sprayed with matt Vallejo varnish. The ceiling is washed with Tamiya so as not to touch the gold stars, that would dissolve in it. Then the statue, washed in brown acrylic wash, is placed in the naos, together with some adorating figures. The doors remain movable. The ceiling is then closed down, needing some tension. Rectifying that caused a small stress crack, it 's caused by the inner colonnade pushing up against the ceiling. Then the colonnades are built up. My added frieze parts are connected to the ceiling with sprue to catch some fitting problems without distorting them. The roof could now be attached.
26 February, 10:51
Thanks, SM. The project is now finished, though I still need to find one of the 17 trees I made for it. I planted these in the foamboard after adding the Redutex floor. I drybrushed the roof and fixed all figures and animals. It was a funny build and I have the Colosseum kit ready in my stash. Let's wait until it's a bit warmer for that.
28 February, 01:58
Awesome! Very lively scene and those pine cone trees are clever! 😄 👍👍👍 This could fit in a museum!
28 February, 16:45
Thanks for the likes and acclaim. The one missing tree is now added, the cows got copper thread leashes and the dio will feature in the IPMS Antwerp contest in a few weeks. I'lll make a picture there of the result.
12 March, 11:38
добавил новый фотоальбом.


25 19 January, 15:47
In addition to the two Macchis, I'm working on a project that uses a really great kit: I'm going to build a Hurricane IIb, incidentally in the colours of the USAAF, from this Arma-Hobbies kit, which is a perfect fit, rich in detail and highly recommended overall. Last year, I already built a Hurricane from this manufacturer and therefore know the qualities of the kit in advance. Here you can see photos from the day before yesterday; in the meantime the fuselage and the wings have been assembled and sanded - well, there wasn't much to do!
19 January, 15:52
Looking forward to this one. I haven't built an Arma kit yet but all reviews and builds I have seen look great. I stepped aside from building planes for a bit to recharge the batteries. I've been building 1:35 Armor kits from Italeri, Dragon and Tamiya that I have had in my stash since 1980!! Just finished a Puma 234/2 from a 45 year old Italeri kit. The figures are Dragon and Tamiya. The only thing left is a base.
19 January, 22:37
J'attend la suite avec impatience puisque je monte actuellement un Mk I au 72è j'en suis à la peinture. J'aime beaucoup le choix de tes avions, ils sont originaux. Félicitations !
13 February, 15:58
Bonjour mates- et bonjour à la France ! Je vous remercie pour vos mots et je suis heureux que le choix des modèles et le projet vous plaisent ! Je n'ai qu'un seul problème en ce moment : je suis à plat avec une fracture du pelvis et je ne pourrai pas me rendre à l'atelier de modélisme avant au moins quatre à cinq semaines 🙂 Mais le pire est passé, et je me réjouis vraiment de pouvoir continuer à construire... Le kit en lui-même est de toute première qualité et procure un grand plaisir !
Hello mates - and hello to France! Thank you for your words and I'm glad you like the model selection and the project! I only have one problem at the moment: I'm lying flat with a broken pelvis and won't be able to go to the modelling workshop for at least another four or five weeks 🙂 But the worst is over, and I'm really looking forward to continuing building... The kit itself is of the very highest quality and is a great pleasure to build!
14 February, 14:26
Hallo Roland!
Ich wünsche dir eine Gute und besonders schnelle Besserung!
1 14 February, 16:32
Wishes for an uncomplicated and rapid recovery. I am sorry to hear you are down and out.
14 February, 21:36
Thanks for your good wishes - that helps! The good news is: a smooth, uncomplicated fracture without surgery, but I have to sit and lie down for a full six weeks - and make sure my wife doesn't overcook me 🙂
2 15 February, 10:07
Ce n'est pas grave, on ne fait pas des maquettes avec ses pieds ... Bon rétablissement !!
15 February, 13:11
Hi Roland. Sorry to read that and wish you quick recovery and all the Best. But waht the f++ happened? Were yo skiing?
11 March, 19:11
Thank you very much for your wishes! No, nothing as nice as skiing: just a patch of ice between my front door and the car... Small cause, big effect! Everything is healing well, hope to be back in the modelling workshop in a month 🙂
12 March, 10:54
добавил новый фотоальбом.
20 изображения
The Goblin as it might look in a museum
1:48


Проект: McDonnell XF-85 Goblin

57 11 March, 09:32
WOW, WOW and a couple of extra WOW's!
Amazing result Frank. Without doubt the best Golblin model I've ever seen.
I bet Halberd Models would love to use your photos for their marketing.
1 11 March, 09:44
It looks so weird but very nicely done - superb craftmanship 😆
1 11 March, 10:21
Love the photography as well...please post a wide shot of your setup so the lights are shown etc....I am trying to get this look....very dramatic...
11 March, 10:45
Very well built and finished. I wonder how they ever thought this would be a viable fighter.
1 11 March, 11:42

Thank you very much mates!
I added two new pictures with the protection bow and securing fabric belt. I added also dust pigments to the wheels what I forgot before.
11 March, 18:26
Outstanding work in traditional Bughunter style! And done, in what I find, an unbelievable time frame 👍
2 11 March, 18:31
Alec K said it for me. There's nothing to add. 👏👏👏👏👏👏👏👏👏
Actually I have something to add - great photos! 👍
1 11 March, 19:04
What a wonderful feedback - Thank you very much to each of you 👍
gorby - your guess was right! It will appear on the Facebook page of Halberd Models 🙂
Yes Alec, I've been working on it all day - 24 hours a day! And because there wasn't enough time, I added the night. 😎 Joking aside, yes I spend a lot of time. And this winter was very warm here without snow/ice, so my airbrush sessions was not blocked by the iced roof window.
1 11 March, 21:43
Of course I had to come over and check out the glamour photos. Beautiful build and wonderful photography, as always. Such a cool build of a really unique subject
12 March, 01:15
The photos are well done to show off this stunning and unique build.
12 March, 01:38
Frank, you did a great job! I have no choice but to agree with the previous posts. And frankly, when your name appears on a project, we know in advance what kind of result we can expect 😉
Congratulations on the successful completion of this interesting model!
12 March, 10:47
Oh boy... I hope I can get my special hobby somewhere near this... a real stunner
12 March, 11:34
добавил новый фотоальбом.


27 9 November 2024, 20:59
Great build!
Reminds me of some of the funny jokes about the Smart on the TV "Friday Night News":
"Smart has sales problems. That's why every third Kellogg's box now contains a Smart. It doesn't matter if you miss it while eating - it will be excreted undigested." 😉
12 November 2024, 09:27
haha yup, still, I just bought my first alpha model and it is a ...............Ferrari!!
14 November 2024, 05:40


When clicking on a magazine issue, one can add it to the stash. But compared to a kit, one does not see who else have it in their stash (to eventually ask about an article/information in there). Could the magazines be handled as with the model kits?
12 March, 11:15
добавил новый фотоальбом.
17 изображения
MyAlbum
1:72
corrections at the tail after hints from a mate


Проект: MiG-21PFM

20 9 March, 13:40
That's a lovely Mig, well done!
Could you take some family photos with the rest of your fishbed builds?
12 March, 10:55
Completed the Hong Kong B-17F 1/48 scale. In my opinion this model is not for the beginner and very challenging for the intermediate modeler. Molding was excellent, very tight fight had to use the excto knife to fit parts. Guns were flimsy and broke off easily. Unless you're an expert modeler I would forgo the interior. May be the bomb bay portion. All in all, good kit but not worth over 100$ I paid for it. Hard to get replacement parts unless you call Hong Kong China.
1 12 March, 01:50
That would be useful information to add in the comments section of the kit page:
B-17F Flying Fortress (HK Models 01F002, 1:48)
")
12 March, 08:02


добавил новый фотоальбом.


4 19 November 2024, 03:15


добавил новый фотоальбом.


97 19 April 2023, 14:53
Thanks for coming across - interested in the story behind this build? Great ... a year ago I didn't have a lot of experience in model building. As a kid I built some models and around 10 years ago I started again but didn't even finish the model I started. At this time I had basic knowledge in using an airbrush. So around one year ago I decided to dig in again and started building a model car (you can see in my projects), but didn't even know techniques like pre-shading, post-shading, ... So as I had this kit at home for over 11 years, I decided to give it a try. From watching YouTube videos I tried to study all this techniques and this is the result. First military plane ever, first kit using techniques like pre-shading, post-shading, weathering, ... it was hard, it was nerve-wracking sometimes, I did a lot of mistakes and I couldn't do all the things I wanted to do but in the end I'm happy with the result. I also think that this kit was not the best choose for starting ... 90% of this model is painted in Revell email colors I already had "in stock". I appreciate all of your feedback and I'm really interested in it. Please keep in mind, that this is my first plane ever using above mentioned techniques BR Thomas
19 April 2023, 14:59
Awesome result even for someone with much more practice. A quality model for sure!
Nice detailing overall. The cockpit and exhaust areas are looking very good! Too bad you didn't choose any ordnance/weapons for it.
The funny thing is that the Eurofighter (Hasegawa kit) was 3 years ago for me as well the first model after a 15 years break. Just like you, I tried relearning from tutorials.
I also finished the Revell double seater and I remember the nose landing gear was particularly weak and bending under the model's weight. How did you sove this? Or was that not o problem for you?
Because you asked, a small a side comment from me: you can try in the future maybe to better blend those grime or dirt streaks (from the underside for instance) with the main aircraft color in order to avoid a hard edge. Some of these streaks might have a hard edge in reality, but most not that much. Did you use oils for that? I am asking because not all oils behave the same. For instance the MIG oils are good for washes but in my opinion too "volatile" for an adherence to the main color, making the blending more difficult. For such streaks I prefer the oils from Winsor & Newton which are actually also staining your main color allowing for a beautiful blending (with the help of turpentine of course). The difference might be difficult to understand the way I described it, but quite clear in practice. But this might be just a subjective matter in the end.
19 April 2023, 15:27
@Marius: thank you for your feedback! Now I see that the ones on the underside are not blended well. As you say the edges seem to be too hard. I will try to do it on my next build. I used Abteilung 502 oils and I'm pretty fine with them.
During the build I had tons of issues with gaps, bad fittings, … but no issues with landing gears. Although I recognized that the landing gears were a little bent and quite tricky to attach. Thanks for sharing your feedback - have a nice day
19 April 2023, 15:47
Thomas, you can be proud on yourself mate, you've modelling skills I can see that. I agree that this Revell kit isn't the best kit to start with...but hey, you created an absoluty nice Typhoon. Marius talks about an oil brand, I prefer also the oils from Abteilung 502...very subtle oils for fine art works suchs as leaking oil streaks! If you want a reference model for subtle oil streaks, look at my project of a British F-4.
19 April 2023, 19:34
@Jos: Thank you so much for your feedback! I will keep going and I already started my next build Mil Mi24 from eduard. I´m not able to say anything bad on Abteilung 502 oils (but I only used this brand for now ... ). I´ll will check out your British F-4 later today. Have a nice day mate.
20 April 2023, 05:49
All´s well that ends well! For me there are no flaws or drawbacks visible on this beautiful model.
20 April 2023, 09:35
Hi Thomas!
(a) Congrats on the Eurofighter! She really looks lovely! (To be honest, I like the fotos with the white background better 🙂 But the built is awesome!)
(b) Same life story here more or less 🙂 So, you are not alone! Keep it up!
20 April 2023, 09:51
Hard to believe this is the first build of the model. You did great. As Marius writes, it's a great result even for someone with much more experience. 👍
With each additional model you build, you gain more confidence and gradually find your own techniques that suit you and lead to even better results.
20 April 2023, 10:52
Impressive result, particularly when reading the story (!!!) - I myself had like a 20 years break in the Hobby and basically re-learned everything from videos & media (and wondered about all the marvels in materials and aftermarket I had no access to as a young modeller...) - this is an excellent "first model". And you took on a kit that - as far as I saw & was talking to people - that appears to be sub-par and difficult in more than one department - great way handling that too 👍 - I guess it can go directly to Zeltweg 😉
Regarding Oils (my favourite treatment for all kinds of effect) - I use Winsor & Newton (from an art-supply store in Vienna...) and had no reason to try others - they just "work" and are fairly versatile - I found the technique, thinning ratios, method of application, drying time and "technique and tool used for removal" being the relevant factors with which a variety of effects can be executed. Just love to experiment and learn new things with that stuff... I apply them directly on MRP paints without varnish and count in the effect of a wash or so on the final color, which also works fine (at least to my satisfaction... 🙂 )
20 April 2023, 15:57
@Neuling vielen Dank für das positive Feedback!
20 April 2023, 17:50
@Giorgos: Many thanks for your feedback! Appreciate it and I'm very happy that you like my build. I did some pictures with white background but I was not that happy with the result so I shared the ones with black background. I also prefer white background and tbh the shading was much more visible with white background. I'm looking for a photo box so probably pictures from my next build will be with white background
20 April 2023, 17:54
@Ludvik: Thank you for your feedback. I can't tell you how much I learned from this build, starting from how the improve glueing the parts together until getting more and more comfortable with the airbrush. Never thought that I'm able to use highly diluted paint (5%) and do post-shading. But I need to say after a view trials and playing around with pressure, distance and confidence I managed to do it without any bigger issues
20 April 2023, 17:58
@Slavo: I totally understand you - I was so impressed by finding out how this market developed ... amazing how the quality of the sprues improved compared to this old kit. I already have a good stock of kits and opening these boxes was really amazing for me. About the kit ... yeah ... not the highest quality I guess but with patience and putty you can fix almost all issues and I think the kit choose me, as it stayed with me for a decade 😄 I'm planning a diorama with a concrete ground and Zeltweg number painting, so he will be in small Zeltweg later. Regarding oil washes and weathering I also learned a lot and I'm confident for my next build. I really appreciate your feedback and enjoyed reading it. Have a great day
20 April 2023, 18:08
@Giorgos: I added some pictures with white background. Do you like them?
21 April 2023, 08:30
I've heard of several experienced modellers that got frustrated and binned this kit, so kudos for conquering this one as your first jet! 👍 With an excellent result as well 👏🏻
Still, if it's going to be an EuFi in 1:48 this is basically the best kit around, same applies to Revells Tornado, another true PITA from what you see+hear.
What I noticed is that a lot of beginners (including me) make their start into modelling extra hard as they shy away from the "pro" AAA Kits and buy the cheap "beginner" ones - which are mostly really old and frustrating...(typical things I wish I knew before 😉 ) But great that you ve got the needed tenacity and looking forward to more jets from your bench 🙂
21 April 2023, 09:10
@Daniel: vielen Dank für dein Feedback. Ja, es war tatsächlich ein Kampf mit mir selbst dieses Modell fertigzustellen. Oft genug war ich an dem Punkt, wo ich ihn einfach beiseite stellen wollte. Aber er lag halt 10 Jahre herum, dann dachte ich mir, ich probier es einfach mal ... als nächstes kommt mal ein Hubschrauber - Mil Mi 24 eduard (Zvezda) weil ich mal was mit Photoätzteilen machen wollte und der eduard kit war da preislich ganz ok. Wahrscheinlich auch nicht die allerbeste Wahl, aber denke wenn ich den Eurofighter gepackt habe, schaffe ich den auch ... Danach dann das Warzenschwein von Academy - von dem erhoffe ich mir wirklich sehr viel. Mal schauen.
21 April 2023, 09:31
Ein toller Eurofighter, gratulatiere!! Gefällt mir sehr gut!
Und noch dazu in österreichischen Markierungen. Sieht man m.E. viel zu wenig.
23 April 2023, 08:07
@Mittelfranke - vielen Dank! Als Ösi musste ich wohl diese Markierungen wählen ...
24 April 2023, 08:46
@NAFO: thanks - not perfect, but acceptable for the first attempt
24 April 2023, 11:12
Thanks @karatel and @Micheal appreciate your positive feedback
18 March 2024, 18:24
Based on the end result, it doesn't look like a first build after a 10 year hiatus!
This thread made me wonder just how many of just came back to the hobby after such a long spell- thanks to Covid! 🤔
18 March 2024, 21:27
It seems that this hobby has its own special charm - it is difficult to abandon it permanently. Many of those who took it up in childhood return to it in adulthood. I have left it and returned to it several times. The reasons were varied, but Covid was not among them.
18 March 2024, 22:00
Really nice build Thomas of a kit that's not the easiest to put together well. Top job Thomas.
19 March 2024, 07:43
@CaptGPF and @Gary: many thanks! I really appreciate your feedback. Indeed the kit was a challenge, but I still sit in front of this plane from time to time and watch it ... 😄 reminding me off all the beginner mistakes I did ... @Ludvik: Similar on my side, childhood modeller as most of us, then teenager with totally different interests, gave it another try in my late twenties but didn't even finish the kit (I still have the unfinished car somewhere). Came back in 2022 almost exactly 2 years ago after stumbling upon a youtube video of Scale Model Shed. That was kind of inspiring so I was looking for the old kits and found the Samba bus and the Eurofighter .... the journey began and you know what .... my P-51 Mustang won first place on last weeks IMPS Austria so this time I will stay in 😄
19 March 2024, 12:21
I forgot to congratulate you on your beautiful Mustang winning the IMPS. I agree with you guys - this is a hobby that has that ability to draw you back - even if we take a long hiatus from it. 😀
19 March 2024, 17:28
Thanks! Was very surprising because I didn´t even want to show it there ....
20 March 2024, 07:09
Thanks a lot @karatel - let me check it out 😉
4 December 2024, 16:27
I showed the Eurofighter at this weekends Scale and Paint in Vienna and to my (and I guess also for a lot of others) surprise the build was awarded in out of the box category. Quite a surprise for the first ever done plane in my young modelling life 🤣
2 10 March, 07:10
Agreeing with the others here, great result overall - nice paintjob and weathering! 👍
The main color might be a little bit too pale in my opinion, but otherwise very spot on regardless.
1 10 March, 22:29
Thomas, congratulations on your model award! As they say, he who can, can.
1 10 March, 22:37
many thanks @Alexander @Ludvik and @Neuling! Appreciate your feedback! @Alexander: indeed it looks a bit pale, but back at the time I was happy to complete the build - I followed the manuals and used the Revell enamel paints for this. But the Austrian EF has a different color tone than the German one. German ones are more blueish, Austrians are more greyish, but always depending on the light for sure.
11 March, 10:26
Congrats on your win! This was a beautiful build through and through - and perfectly weathered - not too much, but just enough based on usage.
1 11 March, 14:50
Ah, I didn't know that. Indeed, looking at some more reference pictures I can see that they are more greyish.
Learned something new today, appreciated! 👍
1 11 March, 16:50
many thanks @CaptGPF! @Alexander: I also learned that recently and I absolutely did not consider that when I did the build. Maybe it was just luck 😆
12 March, 09:22
добавил новый фотоальбом.


17 15 December 2024, 02:30
The interior looks pretty sweet. I have always been curious about the need for a sleeper on a tow truck. I suspect all towing companies stay local. I do not imagine there is a high demand for long haul towing.
29 December 2024, 07:02
Merry Christmas Bill. I think that they used them for storage mainly, and secondly to get changed, after extreme weather? I don't believe, that they were actually slept in? I'm sure someone will have a more in-depth answer though.
29 December 2024, 10:32
As an avid, Big Rig fan, this is awesome!
You knocked it out of the park, mate!!!
I was dubious about that sleeper, fitting in with the whole thing, especially as I've worked on both the cab and the rear body, but this is excellent!
The colour is perfect , there's just enough chrome, and not too many decals, to take your eyes off the build!
Fantastic mate! Very nice and well done 👍 🙂 🙂
3 January, 13:11
Beautiful model! Considering how the resin day cab looked at the start it came out amazing well. Really love the dark grey and silver paint scheme. May adopt it for a future project...
1 3 January, 13:34
How did I miss that great tow truck!? With the problems you were facing, you deserved this trophy for sure.
12 March, 07:20
добавил новый фотоальбом.
19 изображения
Luella Bates goes to New York
1:72
Celebrating the life of Luella Bates, one of the first women to professionally drive and test heavy-duty trucks, paving ...


Проект: Luella Bates goes to New York


 2+
2+ 11 11 March, 08:31
Thanks everyone, glad you like it. I originally picked up the kit as a littke palette cleanser but fell down a research rabbit hole learning about Luelle Bates. In January 1920, Bates drove a Model B to New York City, where she attended the New York Auto Show. During her stay, she met with Secretary of State of New York Francis Hugo and became the first woman truck driver to receive a driver's license in New York. There's a photo of her with the NY officials that inspired the dio.
1 12 March, 08:26


добавил новый фотоальбом.
14 изображения
Spitfire Mk.Vc Trop
1:48
Decal job complete


Проект: Spitfire Mk.Vc TROP

12 6 March, 20:16
добавил новый фотоальбом.


19 10 March, 15:36
....yes.....being dragged around in a flying bomb is fine...flying around and attacking the "enemy"...not so much....
11 March, 09:41
The idea wasn't mine, as it was a commissioned build.
But thanks for the feedback anyway.
12 March, 08:17
добавил новый фотоальбом.
10 изображения
Junkers Ju88 A-1
1:72
The kit comes with decals for the interior, but only tells to use the decal # 57 (instruments panel). The seatbelts, a c...


1 12 March, 08:16
добавил новый фотоальбом.
152 изображения
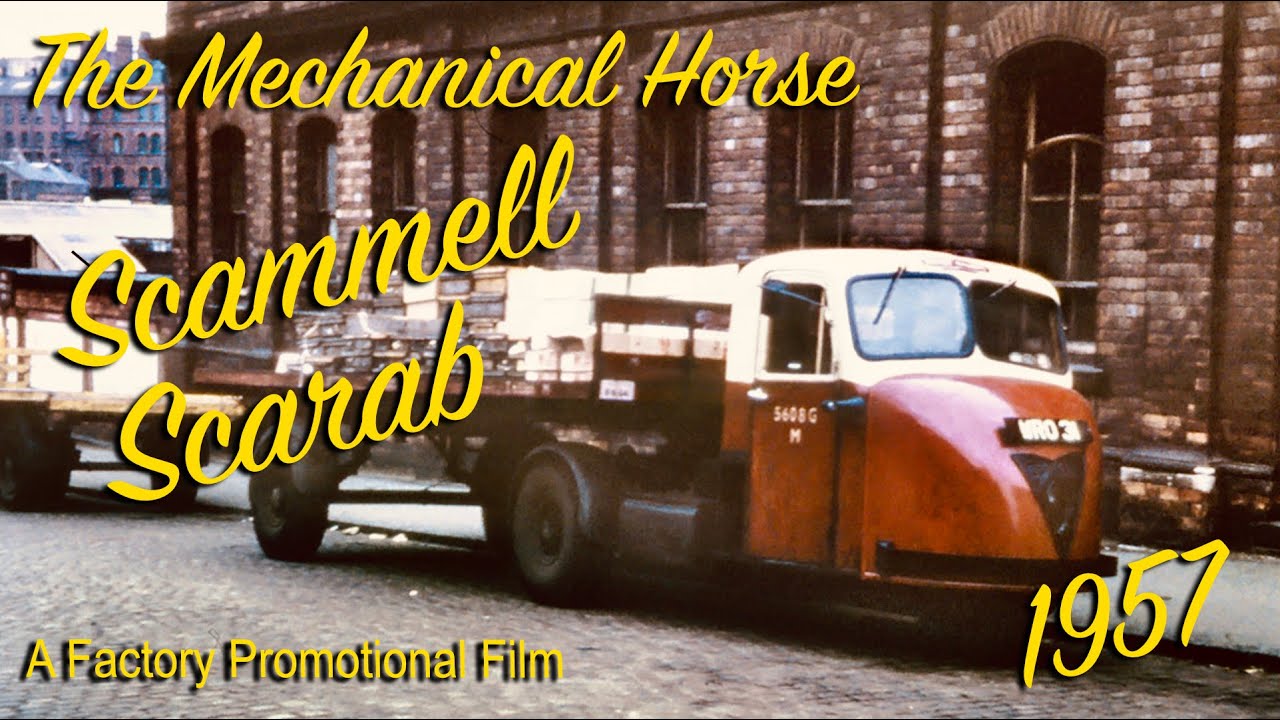
The less charismatic Scammell brothers. Scarab & Mechanical horse.
1:76
And, relax…..think of soothing things like poetry….. I wandered lonely as a cloud…
What you talking about man? This is B...


Проект: Scammell Scarab

64 1 December 2024, 15:42
Looks like a tuk tuk, anyways its really nice to see you on another project. Im excited to see the fuck ups and final result. Hope your misses doesn't mind you being in love with another woman 😄
1 December 2024, 18:21
Welcome Kesa & Robert. 🙂
Kesa Mrs Gorby is used to my plastic passion obsessions. 😄
And yes it does look a bit like a tuk tuk. Incidentally there have been a couple of screw up so far but obviously I won't be telling everyone as I want to make it look like I know what I'm doing. 🙂
2 December 2024, 07:48
Hi Gorby 👋
Another interesting one 😃👍
Nice project, they used 3wheel trucks like these at Cadburys factory as they need tighter turning circles round the plant.
2 December 2024, 22:40
Glad you're tagging along Mr D.
Their turning circle was one of the reasons they where so successful. Do you have any association with Cadburys - other than eating their products of course. 🙂
3 December 2024, 06:46
Remember these trundling down Zetland Road and Linthorpe Road from the train station. BR and their parcel/freight division use to operate them.
3 December 2024, 08:05
Hi Mark, apparently British Rail was the main user of these things.
3 December 2024, 08:08
That will be another session of scratch modeling of famous (with 30,000 it must be famous) British cars 👍 So ugly that they begin to be beautiful.
3 December 2024, 08:10
Hi Frank, they certainly are famous in Britland...although probably only with men of a certain age. 😄
3 December 2024, 08:36
Hi Gorby...No just eating 😂 l live not far from factory n seen documentary on it too.
Like the project 😁👍
3 December 2024, 09:30
Thanks Mr D.
Been on their factory tour, as a chocoholic it was wonderful. 🙂
3 December 2024, 09:39
One interesting thing to have in mind is that Gorby set to build the ancient 1962 tool of the Scarab and scratch the Mechanical Horse precisely when there appeared recent (and immeasurably better, as for the Scarab - I guess) 3d-printed 1:72 kits of both the Scarab and the French relatives of the MH (i.e. FAR tractors)... But that's Gorby (much to our delight!) 👍
3 December 2024, 11:32
THERE'S 3D PRINTED KITS!!!??? 😄 😄
I'd be too tight to buy them anyway.
I'm about a month into the build so far and quite enjoying it....mostly.
3 December 2024, 11:44
We know you would enjoy this - and we enjoy too... Plus: if you are going to turn the Scarab into a wrecker / recovery vehicle (!!!)... extra joy. Very Gorby-esque work! 👍 👍
3 December 2024, 11:52
"Would you like some parts with that Flash sir" 😂
I know you will pull a great job out of it Gorby 😀👍
3 December 2024, 19:09
Following this masochistic exercise 😄
The tow truck you fell in love with, was it used to tow Reliant Robins?
3 December 2024, 19:19
Good grief, I appear to have attracted a crowd. 😳
I didn't realise the Robin was globally infamous. That would be a great idea Jan if I can find a cheapish 1/76 one. 😄
Thanks all for taking an interest. 🙂
4 December 2024, 08:05
Taking a seat. The nasties the kit, the more Gorby likes it… I'll forgo spelling out the logical conclusion from this. 😄 😄 😄
4 December 2024, 15:22
😄 😄 😄
Welcome to the show Alec. I have some nice kits in my mini stash, for some reason they keep being overlooked. Maybe I choose kits which make scratch-building feel like an easier option. 😄
4 December 2024, 15:29
Thanks mates....as usual I'm playing catch-up with the build report.
(I'll let you into a secret. I don't start the report until I have a very good idea that things might work out. If I'd completely screwed up - you'd never know about it.) 😳
4 December 2024, 18:45
🤣🤣 prevention better than cure 😜
Where about in the UK were they produced ?
I vaguely remember the 3 wheel electric milk floats as a kid.
4 December 2024, 19:36
I think they were built at Scammell Lorries Ltd in Watford.
In fact there is now a road in the area called Scammell Way.
Typical of Britain, close the factory and name a new road after it to remind us that we used to actually make stuff. 🙁
4 December 2024, 19:44
Your 'secret' is a good idea: start a build report lately not only shows a success, but also makes the build look quick! Must copy this idea 😉
5 December 2024, 09:30
😄
The one down side is that as I only do one project at a time it looks like I'm doing bugger all for about a month. 😄
5 December 2024, 09:35
Gorby, I follow the same strategy with build reports. Trouble is, I eventually catch up and then snail-pace it to the finish…
5 December 2024, 13:57
Nice to see this kit. Build the Scammel Scarab as a youngster from Airfix. And looking at the sprues I would say these are from the the former Airfix kit.
Have fun building it 😉
13 December 2024, 12:28
Great progress and entertaining narrative 🙂. The trailer wheels turned out nice, I can't imagine making something like that. Just curious: why not make one and cast a copy (I think you have done that in the past)? Or does this have to do with that logical thing…
13 December 2024, 13:59
Thanks for the comment mates. 🙂
Lex: Yes this is from the old Airfix kit. Quite enjoying the build so far - although that's probably because most of the build is scratch work. 😄
Alec: Typically the trailer wheels look like a different size to the other wheels in the kit which is why I had to cobble something together rather than cast them. I've been meaning to try and scratch wheels for a while so it was also a bit of an experiment. Hopefully future ones will be better.
1 13 December 2024, 15:28
Love the subject and the build. Not really knowing what I'm talking about I'd say it's as british as british can be
13 December 2024, 15:50
Thanks Michael. You're quite right, they are as quirkily British as it's possible to be and unlike most quirky British vehicles these were a actually successful. 🙂
13 December 2024, 16:00
Like what you have done so far, good thinking on utilising items , l always look at a item before l throw it away to see if it could be useful.
My fire extinguisher handle was just offcuts laying in my scrap tub., ps it finished now will photo tomorrow.
Your right...a MC Donald's or frozen pizza box would be bit out of place 🤣 Fire ash, tin cans, spud peel n bit of dog poo most likely 😄.
Quite rewarding the scratch build l imagine.
Looking good 👍👍
13 December 2024, 20:01
Looks like I'm a bit late to the party, but pulling up a chair way in the back to follow along 🤣 looks like a fun little project
13 December 2024, 21:09
Thanks mates. 🙂
I have to fight against an inherited hoarding gene, so it's a bit of a fine line I have to walk with saving odd and sods for scratching.
At the moment it's very enjoyable project. It's helping to keep my grey matter from seizing up completely, working out how to make something from a pile of bits.
1 14 December 2024, 07:43
I am pulling up a seat. I can't wait to see what you do with the scratch building of an I beam.
15 December 2024, 05:33
Really creative way to make rubbish. Im honestly surprised at how well you can DIY and scratch stuff, top notch stuff. Either way the progress is nice.
Also if you don't mind me asking, what operation did your missus go through? Having to administer blood thinners sounds pretty serious.
22 December 2024, 16:00
Thanks Kesa. 🙂
Mrs Gorby had a hip replacement op. Normally she'd just need medication for the blood thinning but fortunately for my scratch-building junk pile, they thought injections would be better.
Okay, that makes me sound like a bad person. 😄
1 22 December 2024, 16:19
Gotta agree with shadowlight. Your not a bad person 🙂. This reminds me of a quote from one of my favourite games: "I'm not an angel, but when you see Trevor your gonna swear I am one." Except It's "I'm not an angel, but when you see Kesa your gonna swear I am one." 😄
2 22 December 2024, 16:58
@ Kesa
GTA-5 by any chance Kesa ??
Interesting build this one ... good to follow.
Did you have any 3wheel vehicles in your part of the world ?
👍😄
2 23 December 2024, 00:36
I like the exhaust (yeah i know, a half assed comment) but good god I have never seen a more perfect card... ever.... Truly a masterpiece gifted to us from the scratch building god 😄
1 26 December 2024, 14:43
Progress has been slow. I have a problem with Seasonal Affective Disorder (SAD) so everything slows down including brain and enthusiasm. Particularly enthusiasm. It's the part of the year I have more difficulty working out how to make parts and usually the first or second attempts end in disaster before something passable emerges.
Perhaps I should drum into myself "Must do KITS in the winter…. Must do KITS in the winter..."
1 3 January, 15:33
Thanks Jennifer. 👍
It almost certainly isn't accurate but I won't be loosing any sleep over it. 🙂
4 January, 12:04
Luckily this dusty work in between didn't kill you (even if the mask looks like it tried hard), so now we see new marvellous scratch work 👍
15 January, 16:16
Thanks Robert and Frank. 🙂
It was quite a good mask Frank, it's now black on the outside but completely white inside. Mind you my entire workshop* is completely covered in a fine black dust which I haven't had the enthusiasm to clean up yet. Maybe tomorrow.....or the day after. 😄
* I call my workshop 'The Hutch'. I'm a veggie, which means I eat rabbit food, therefor.... 🙂
15 January, 16:28
Learning a tonne about scratch work, thanks for all the details. Everything looks amazing.
15 January, 23:05
Wow, impressive scratchbuilding. I love it. Nice to see you do something useful once in a while… 😂😂😂
1 16 January, 03:56
Thanks very much everyone for your nice comments.
I must admit that this part of the build was more irritating than enjoyable, although having said that it was certainly preferable to 'Useful work'. 🙂
1 16 January, 07:52
Thought I'd pop n see how Gorby is getting on with his scratch building 👀.
Very nice... Great job on the Jib 👏 very skillful to pull this build off the way you have.
Pleasure to follow 😀👍
1 24 January, 21:38
After the labour of love you did for your daughter, which of course isn't a chore being the loving dad you are, it's back to the salt mines to get some real hard work done 😀
That's some great scratch building on the jib, and the
Scammell is really looking the part.
1 24 January, 22:02
Thanks mates. 🙂
Hopefully there should be another update in the next couple of days.
25 January, 07:25
It's great what's being created again - the kit base seems to be a challenge.
Good succeed!
1 25 January, 09:13
Thanks Marko.
Of the two builds, I'm finding the kit conversion (the Scarab) to be more of a challenge than the full scratch-build (The Mechanical Horse & trailer) which isn't what I was expecting at all.
25 January, 09:29
Still progressing slooooowly. These tiny 1/76 bits seem to take longer to make than they do in larger scales. 1/48 feels huge in comparison and 1/35 would probably blow my mind.
This update means the Mechanical Horse is now complete, yaaaaaayyyy. 🙂
Eeeerm, except the tiresome colouring-in bit of course. 🙁
2 26 January, 11:49
I had a brush very similar to that one.Had it for twenty years,changed the head a few times and the handle thrice.LOL.
1 26 January, 13:05
gorby, your pic 73 reminds me an old joke:
A drunk man comes home and his wife is waiting for him with a broom. He asks her: "Do you want to clean or are you going to fly off again?"
Nice scratch work again 👍
1 26 January, 13:37
This is simply the master-class scratch work tutorial. Chapeau bas!
1 26 January, 13:53
True about the binmen, pick a metal bin off the floor to their back, everything was in it. No recycling back then. By the way that's a rather fetching brush ( Erm, Boom, Boom)
1 27 January, 11:52
Gets better every time 👏, the old bin wagon used to have a storage bucket on the side... remember they had brooms n couple shovels...for when the stuff fell everywhere,
I remember they used to come round the back of the house open the gate "which they never closed" and Cary the old black rubber type bin on there back, they used to hopp on the side of the wagon between streets " Before Health n safety 🤣" most bin-men were on the sick with bad backs before 50.
Remember the heavy rubber lids that said "No Hot Ashes"
No faffing getting it built 🤣 famous word's.
Great work so far 😀👍
27 January, 21:19
A funny thing happened to me the other day, this duck said. . . . . . . . . . . . .
28 January, 05:32
Thanks very much for your comments mates. 🙂
Mr D: I'm old enough to remember the predecessor to the black plastic bins, the galvanised steel ones – the ones which rusted and sometimes when they were picked up the bottom fell out. Thankfully they were replaced before I started to work nights because bin day used to be a very noisy business. 😄
Thanks to everyone again. 👍
2 28 January, 06:27
Such an interesting subject. I'm enjoying both your writing *and* watching the build. 🙂
1 28 January, 13:25
I was just about to write the same, love the humorous comments to the updates Gorby
1 28 January, 13:35
Aye aye, I think Gorby may have missed his true calling 😉
I love the garbage collection nostalgia. I got the feel for the British variety from Mr. Bean. 😄
28 January, 22:44
@Alec K. Try the Dustbinmen, you can get episode's on You Tube. A late sixties, early-ish seventies sit com. The cart was nicknamed Thunderbird 3. I think it was written by Jack Rosenthal , which I think he wrote London's Burning too.
1 29 January, 05:31
Hmmm... what iis this? Strange, unusual, I like it. Will have to check it out.
29 January, 05:36
Thanks for the nice comments mates.
Alec: When I left school in the late 70's there wasn't much call for someone who talked rubbish in Coventry. The politicians were mostly in London. 😄
Mark: I've never head of that programme.
Bas: welcome to the oddness. 🙂
1 29 January, 06:16
Gorby: Based in Manchester cast of characters included Heavy Breathing, Cheese and Egg, Winston and Eric. Cheese and egg was the gaffer of No.3 Gang, Heavy Breathing the lothario, Winston fervent Man City fan and Eric who was Welsh.
1 29 January, 08:52
😄 😄 😄
Oh, dear I'm not sure I can keep up the same standard of utter drivel. 😄
1 29 January, 16:53
Two buttons and a milk token , surely a man of affluence. Very nice scratch building Gorby.
1 2 February, 19:24
Apart from the amazing scratch building going on, i think the commentary near takes the cake, i check in every day for further updates and have a really good chuckle after work..really brightens my day, thanks @gorby!
1 3 February, 06:03
😄 😄 😄
Thanks all. I think my button business might struggle with two buttons per hour. Mind you, they're hand-made….Etsy here I come. 🙂
Michael: I can't guarantee the quality of my prattling but it's nice to hear my own flavour of odd is appreciated. Also, I like your little furry friend (No that ISN'T a euphemism 😄 ).
Although progress has been slow there was a bit of a boost yesterday and I'm hoping that something (hopefully not the kitchen) will get painted by next weekend. 😮
Now that's jinxed it hasn't it.
2 3 February, 08:07
A Wheely good job 🫣 , They would say it was a visual obstruction now days.
Keeping to the photos nicely 👍
2 3 February, 15:24
I'm slowly getting the the finish line. Someone pointed out this nice video about the Scarab which shows what a game changer it was (why does everything on YouTube have to claim it's a 'GAME CHANGER!!!!!' and when you watch it seems they've only found the cure for insomnia.).
Youtube Video
1 6 February, 16:28
These details you've made from scratch are simply unbelievably awesome... I suppose I should buy the same glasses (photo #99 😉
1 6 February, 17:25
Nice magnifiers! I have been using an optivisior in conjunction with 3+ magnification readers for years. The trick is not to let anyone see you wearing that. What magnification is that Amazon find you are sporting?
1 6 February, 17:58
Watching in awe, yet again. Really enjoying the ride Gorby 😀
Oh, and warm beer is an awful nightmare to us savage continentals 🍻
1 6 February, 18:14
It isn't the first time I've used magnifying glasses but these are a GAME CHANGER!!! 😄
Alec: I usually use the 3X magnification although these do go up to 5X – which may take some getting used to as it's like being drunk without any of the pleasure. 🙂
Jan: Obviously non Brits have to chill their beer to hide the flavour. 😉
Thanks all for taking the time to comment mates. 👍
3 6 February, 18:46
I went to Zenni optical website and got on the online chat. Told the person I wanted glasses with my short distance correction for doing close up intricate work with +2 magnification. He helped me adjust my prescription to this and they made me a set for $35 that are an amazing help.
2 6 February, 19:15
that seems a great idea Ben. gorby, those details are truly stunning.....
1 6 February, 22:52
Thanks mates. 🙂
Ben: The new eyes cost me £35. The built in LED light is a revelation as much as the better vision. The old mag glasses had a light but the extra batteries made it too heavy and very uncomfortable to wear so I didn't put batteries in it. The new one has a rechargeable battery built in which make it much more comfortable. Which is just as well as I need it for about 90% of my modelling now.
7 February, 07:48
Sorry about my tardiness in updating this album, blame my daughter. I keep telling her I've retired and should be leading a life of leisure but that apparently means nothing to daughters. I can't hold her entirely to account as I've been pruning a tree this morning. I can be a bit, errm, lets say "vigorous" when it comes to pruning. The trees probably think of it more as a near-death experience 😳 . Is attempted arborecide a thing?
Aaaannnnyyyway, the fun is over. Now it's time to suffer. Yes I've arrived at the colouring-in bit where I traditionally snatch defeat from the jaws of victory. 🙁
3 22 February, 16:24
Great job on the colouring and marking Gorby.
The captions to the pictures make it an even more enjoyable experience 😄
1 22 February, 16:42
No need to apologize, dear Gorby, the Feb 22 update was something worthy for us in the gallery to wait for... 👍 👍
22 February, 16:56
I think Mrs Gorby wouldn't be impressed if I sent our daughter to a different continent so I could spend more time playing with plastic. Might be worth considering though. 😄
Thanks very much for taking the time to comment Alex and Mark. 🙂
1 22 February, 18:04
Great scratch-conversions with this old Scammell Sacrab kit. Impressive work.👍
22 February, 22:33
You're welcome, she did it under her own volition (I think the smell of lacquer thinners drove her) a nice outcome on your Scammels too, brought back some memories of when I were a lad.
1 23 February, 10:23
Looks great.... should be very proud 👍 you put a lot of work in and created something very unique... Great model work 😁👍
1 23 February, 21:17
Fun to follow, fun to read, fun to watch. I dare say: the jaws of victory are still open...
5 24 February, 12:27
That level of MICROSCOPIC scratch building is OBSCENE! I'm always at awe of your projects (including the roller of death)!
1 26 February, 21:31

A couple of months ago Jan said something and it's taken me this long to think it though. Thinking isn't a natural state for me, when it happens the neighbours complain about the noise. The idea for the perfect extra vehicle jumped into my head in the early hours of the morning. This project is invading my dreams! 😮
I'll let you try and work out what it is as I take you though the build. A clue: Most people in Britland would have seen these on the roads, but not one of us wanted one.
1 2 March, 16:13
Great job on the car of your dreams Gorby, love the Robin, the car only the British would build.
You keep amazing me with your scratch building marvels, and I thoroughly enjoyed the comments 😄
2 March, 16:23
Thanks Jan, and thanks for the idea which I sort of took and twisted a little ( incidentally, it isn't a Robin 😉 ).
1 2 March, 16:34
Now, after reading your funny captions for a long time, I'm up to date again. For a non-native English speaker it was sometimes difficult to understand, but thanks to the great help from DeepL I was able to giggle a few times 🙂
At first I thought, and you would definitely be able to do this, that you were folding a Trabant (that iconic East German vehicle) out of cardboard true to the original!
2 March, 16:45
Ah, I just found out it is an AC invacar, never heard of outside of the British isles I think? 🤔 Still, great scratch building!!
2 March, 16:48
That Invacar of yours is a masterpiece of scratchbuilding, Gorby! I am astonished!
2 March, 17:12
Thanks all for your nice comments.
Jan: These monstrosities were very common and infamous on the roads here in Britain particularly in the 1970's.
Sorry Frank, I am prone to quite a lot of antiquated Britishisms. I like to keep them alive well beyond their expiry date. 😉 I think the Trabant would sue if it knew you were likening it to the Invacar. 😄
Thanks again mates. 🙂
1 2 March, 17:26
Unbelievable... You turn for just a bit your attention away from the Scammel brothers... and Gorby appears out of the blue with a finished scratched 1:72/1:76 Invacar...!!! You are on fire, mate! 👍 👍
1 2 March, 17:42
Thanks very much Alex.
Maybe it's just that I have difficulty focusing on one subject. 😄
2 2 March, 18:06
I can't believe you scratch built everything in this album. I have never heard of an Invacar before today, but now I feel like I know them.
2 March, 22:04
Thanks Jennifer I'm glad you like it/them. Don't forget I can't claim credit for the Scarab cab as that was the basic kit which started all this nonsense. 🙂
Incidentally there were quite a few different types of Invacar based on a similar design. This is the one I was mostly aware of in the 1970's 80's.
3 March, 08:03
Hi Gorby the Invacar looks 👍 great .....l remember them parked outside the P.O on a Monday morning.... Motorcycle handlebar,s , they did a great job holding up the traffic 🤣.
Like the gorilla glue headlights ..... good little technique 👍
Nice your keeping the memories alive 😃👍
1 3 March, 16:11
Thanks Mr D. Now it's difficult to believe these death traps were allowed on the roads.
I was chatting to the heating engineer today while he was servicing our boiler. He was saying he needs a hobby which isn't too expensive. When I mentioned modelling he asked to see my models and was blown away that it's possible to build things like the tiny Invacar from scratch. He ended up late for his next appointment as he wanted to see my whole collection. 😄
4 3 March, 16:44
@Jennifer it was a part of Socialism..... a dirty word in north America 🤣
The french Invacar made these look like a Bentley 😂 l think in the 80's the french would restrict you down to an Invacar licence for Drink driving.... Definitely a punishment 😮
2 3 March, 19:05
The one in East Germany was also for sure an attack against the health of the driver!
commons.wikimedia.org/wiki/Category: Simson_Duo
Please remove the blank in between - otherwise a smiley is generated and destroys the link 🙁
2 3 March, 19:08
You should definitely consider building a bubble car in future then Gorby..... keep an eye out for right blister packaging or make that vacform, you can get a small dental on for about £90 I've seen a few Mates use.
Time, money,time, money.... never enough to fulfill the modeling dreams 🤣
3 March, 20:06
I just found this on AliExpress:
£97.19 | Dental Vacuum Forming Molding Machine 1000W Former Thermoforming Tool Mouthguard Forming Machine with Steel Balls
a.aliexpress.com/_EzfnBIo
3 March, 20:07
That is hilarious! I had no idea about VSP's. It's a good idea, though.
3 March, 20:08
£90!! Do you think I'm made of money. 😄
No, I want to have a go at making a vac forming machine myself….and if I screw that up maybe then I'll look for the key to unlock the padlock on my wallet. 😄
3 4 March, 06:57
I have to say, to whip out that little car from scratch over a WEEKEND is amazing to me. That's pro scratch-building skill in action 👍
4 March, 13:44
Thanks Alec....although it is significantly less amazing that it took just over a week rather than a weekend. 🙂
4 March, 14:41
Yes you can make them, make a box with a vacuum nozzle size hole, the top of box has lots of holes, add a hinge frame with wing nuts, so box n frame open like book,
You can use halogen heater or hot air gun to soften medium.
Be an interesting project.....and have plenty of good uses.
I wish l had one when l broke my mig-23 canopy!😬
You will have to give use a group display of you builds sometime 😃👍
1 4 March, 22:02
Mr D: I've already put all my scratch-builds in a collection you can view anytime you like. 🙂
4 5 March, 07:54
I never realised you had built so many from scratch .... You will need a panoramic camera 🤣
Very impressive work 👏😁
1 5 March, 11:12
BMW Driver's indicate through telepathy, fortunately my tin foil hat (milk bottle tops and scraps of old bacofoil) prevents this and allows me to ignore their ignorance/arrogance. But then again I find most people who drive German machines are prone to this. H'mmm, is this a leftover Teutonic plan from WW2, to annexe the B6325. Very, very impressive modelling there too. Whoa, a Wartburg just nosed down our road. Be seeing you.
10 March, 05:40
😄 😄 😄
Thanks for commenting mates.
I hope you enjoyed your Wartburg Mark (I assume it wasn't Wartburg castle? 🙂 ).
1 10 March, 07:35
If I remember rightly (This is were the tinfoil works t'other way) Wartburg's were a step up from a Trabant.
1 10 March, 10:41
Thanks very much Jennifer. I wasn't sure the shovel was good enough until I slapped some paint on. Quite please with it now. 🙂
1 10 March, 17:36
Thanks Mates. 🙂
The colour certainly brings back memories for me although I'm not sure 'Royal Cov' will catch on, particularity with ANYONE who has ever been here. 😄
12 March, 07:49
добавил новый фотоальбом.


88 29 September 2024, 18:45
Any suggestions on which squadron would be most appealing?
29 September 2024, 19:09
The IsraDecal publication is absolutely pricesless for this project!
29 September 2024, 21:31
Cool project, following along as well. Not sure I can help you on the squadron selection - lots of good options.
4 October 2024, 17:10
Perhaps knowing which squadrons participated in "Swords of Iron" would help?
4 October 2024, 18:37
I love the IAF, and Israel. Your model looks great so far. I'll be watching!
6 October 2024, 01:28
This will be a nice little gem to the collection.... nice tidy work so far 👌👍👍
6 October 2024, 14:03
Just starting the F-16AM (ROCAF) version of this so I'll be following along. What color are you doing the cockpit tub? I've got a mix for dark gull grey that "looks close" but curious what you settled on.
Oh, also the kit comes with a bunch of 500lb resin Mk. 82s I don't plan to use, along with resin MERs for them. Let me know if you want them.
6 October 2024, 14:11
I have six aircraft in the collection:
S-199
P-51
F-16C
F-16I
F-4E
F-15E
When it's all done, I'll put together a single collection!
2 8 October 2024, 01:08
Great cockpit.! In some photos the paint job is really weather beaten, are you planning to replicate it?
10 October 2024, 06:22
Alberto, could you provide a link to the photos you are seeing?
10 October 2024, 23:17
Okay. Well, the "Swords of Iron" operations have been very hard on all these aircraft in Gaza. Should be pretty torn up when I get done.
11 October 2024, 14:29
Starting again after a couple of distractions got in the way…
14 October 2024, 21:25
Sadly, the update parts for the F-16I from IsraDecals is not all that great. The antenna fairings for the sides of the intake are okay, but the ones for the sides of the nose are kinda poo...
16 January, 03:40
I think I can add the detail from the kit part to the resin part...
16 January, 06:02
I follow. And I see one big mistake I made when designing my workshop. A Big drawback is the Big desk. Arranging it takes a lot of time!
1 16 January, 07:20
Looks like the resin parts will work. Just takes quite a bit of time. Panel scribing will take some time too. It seems to be worth it!
16 January, 23:16
BTW, I tend not to arrange too much on the table unless I am doing a Tamiya kit...
1 16 January, 23:17
That big scale seems to need a big amount of plastic - so I join the big show! The Minion looks cool 🙂
Was only a bit confused about the order of the pics in the album (yeah I know, can be afford to move a bigger amount of pics in "Manage" ...)
1 22 January, 22:41
I'm a fan of Merlin... living life in reverse...
The pics are newest first and tell the history of the build.
23 January, 03:21
I sanded the wing roots quite a bit. Looks like they went on okay. Should be minimal sanding with a little Surfacer to close any gaps.
23 January, 03:31
Hi Desert 👋 looking good....see your getting good use of the scotch tape, Do you use super glue for wings on larger models? Or stick to stand cement?
Nice subject by the way 😁👍
1 23 January, 21:54
Thanks. I'm using standard Tamiya Extra Thin Cement. The quick Setting cement is not good for those joints. The regular cement, when given plenty of time to cure is pretty good. The fuselage joints have come out really strong. The wings are good when plenty of milling is done to make the joint very clean. Then the cement has a large surface area to cling to. So far, its all gone very well.
1 24 January, 00:38
Thanks Desert👍 l get concerned sometimes on larger parts if the extra than is enough. Sounds like if you have good surface it will be ok.
Good luck with the build 😃👍
1 24 January, 11:31
I'm with DM. I love the quick-setting but it's just not as strong. I also reinforced mine with some sprue "spars" but they had to be thinned down a little because the wings are quite skinny and would bulge otherwise.
2 24 January, 17:12
There are a ton of antennas on this bird. Sadly, the flaps fit very poorly so much cleanup is needed. All the other mods are roughed in and will clean up with primer and dressing...
26 January, 04:10
With the nose antenna mounted too low, I have had to see if I can remove them and reposition them higher to match the real aircraft...
1 29 January, 19:58
Both antenna are 1.5mm from the radome aligned on the panel line to the rear of the antenna and spaced down from the piano hinge line.
1 29 January, 23:13
Getting close to primer phase. Need to paint the canopy interior and blend the navigation light pods on the sides of the inlet…
1 February, 00:27
Somehow I was mentally making the masking process far more difficult than I needed to...
4 February, 03:35
Thanks! Masking the antenna next and then painting the underside. I'm painting the entire model separate from the slipper tanks. Then trying to figure out what weathering to apply. Some of these ships are pretty haggards looking after all the sorties from the "Swords of Iron" conflict...
8 February, 16:25
It's a good kit. It has an amazing quantity of ordinance options. The fit is good. I did not have the aftermarket main gear well. It is a real improvement over the kit parts. The kit feels a bit like a Kinetic F-16 with a slightly fiddly intake. There are parts in the kit to make a "Big Mouth" F-16B/D. So sorting through all the optional and unused parts is probably one of the most time consuming parts of getting through it. I would build it again...
2 11 February, 15:58
Calor look spot-on 👍 once clear goes down be great match.
Very nice work, what filler do you use ? Looks better than one l have ?
Good luck 😀👍
1 15 February, 16:46
So far, I have only used the Mr. Surfacer 1500 gray. I have also used a little Mf. Dissolved Putty. Very little filling needed with very careful prep of joints and seams...
1 15 February, 23:02
The main gear are pretty much done. I need to touch up the hydraulic lines when the gear are put in.
1 18 February, 01:13
Time for the second coat of gloss... Needs to be really smooth finish!
1 20 February, 21:33
Second coat is on and the surfaces are very smooth without being heavy, fat, plump, too thick...
1 21 February, 04:52
First markings are on. Now we see how the Cartography Decals from 2010 work in 2025...
1 21 February, 06:55
It's looking great.... very nice indeed.
I always put a little masking tape on the bottom of my tires....save scratch black tire paint while working.
Keep up good work Deserts 😀👍
1 21 February, 14:11
Markings are all on now! Weathering and panel lining is in progress.
3 28 February, 22:47
The F-16 already looks great. I love the Israeli three-color camouflage.
1 1 March, 08:04
Wow Marlin! You're really rolling this one out quickly! Are you using magnets to keep their conformal fuel tanks in place?
1 1 March, 15:26
Magnets for the CFTs is a great idea… but sadly no. I may try Ultra Violet Light cured resin…
1 2 March, 18:32
The shape of the CFTs is really kinda off. There is a "twist" to the shape that makes the rear opposite in fit with the front...
2 March, 20:01
Wowsers! Agree with Nathan... This looks like (a lot of) BIG and beautiful work 👏
1 2 March, 23:14
It's pretty done now. But I need to add the AIM-120 C7s and the Pythons. I am still surprised at how heavy this kit is. The F-15I Ra'am will be heavier! So here it is! Cheers!
6 March, 06:12
Wonderful result! Where are you storing your models? 🙂 looking for ideas for my 1:48 scale ones
1 6 March, 13:57
The ram for the canopy is about 3 to 4 mm too short for getting into the back seat. However, when the airplane is on alert (waiting for intel) the canopy is not held all the way open. The crew chief will climb the ladder and reach in to the cockpit to raise it more for the back seater to ingress...
6 March, 19:55
I will add a few photos of the storage cabinet I built for these large 1/32 scale planes! It was a bit of work in its own right. The wood is olive wood I milled from slabs out of an olive tree. Took me about six months to compete the cabinet. I will place the photos at the end of the album...
2 6 March, 19:57
Be nice to see.....you built some nice subject's nice homage to the service they provided "Allied" obviously 😃👍
1 6 March, 20:14
Christian A and Mr. D, the last 12 images in the album now show the cabinet I am using to store the Israeli Aircraft and Armor...
6 March, 21:53
Cabinet Dimensions: H 42" x W 54" x D 20" (H 107 cm x W 137 cm x D 51 cm)
6 March, 22:12
That is a stunning cabinet. A fitting home for such a regal plane.
2 6 March, 23:26
Thanks! The Cabinet was designed specifically for this collection!
1 6 March, 23:51
The olive wood is really nice, the cabinet's really help keep the dust off the models, l use one of those soft Makeup brushes to dust over now n then, they are so soft they won't break anything off, l ordered a mixed pack online... Definitely didn't want to go in the store n buy them 🙄🤣. But they work a treat.
This current model is turning out very well 👍👍
2 7 March, 19:55
Thanks Mr. D! Truly appreciated! I tend to use soft paint brushes the same way! Cheers!
7 March, 20:15
Nice achievement on the cabinet, looks awesome and I see that you are a big F-16I fan 👍
1 7 March, 22:06
Actually, I really like all F-16s! They are perhaps the most influential, and attractive, flying machine of all time... at least of the Jet Age!
2 8 March, 00:16
I have 8 more F-16's yet to build. They are all NATO except for two of them.
4 8 March, 23:18
There could be a couple other "palette cleansers" in between this one and that! I need to complete three Me/Bf 109 kits. A Swiss and two G-6s in 1:48.
1 11 March, 18:51
Really nice finish on your SUFA. Really cool build.
Like the other have said really nice body of work in the cabinet. Top job Sir.
12 March, 07:30
Hinckley Model show,Sunday 6th April 2025.Hinckley leisure centre,Hinckley LE10 1BZ,doors open 10.00,closes 16.00.Admission prices,cash only please on the door,Adults £5.00,Child & Concession £3.00 and family ticket £10.00.
12 March, 07:30
добавил новый фотоальбом.
9 изображения
Convair XFY-1 Pogo WIP, Mistercraft 1/72
1:72
two nasty pictures to show the disaster.
Décalco to the random transparency, fragile and especially oversized.
Everythin...


Проект: Convair XFY-1 pogo

20 17 February, 09:02
Interesting build,👍 early Days of Vtol, few pilots could manage the machine.
Looking great 👍
1 5 March, 19:56
The panel shades correction did its job 👍
Wheels are easy to scratch, I think at least one of mine was not original 😁
1 10 March, 11:21
...the world needs more pogos.....massive and beyond difficult to fly and land....
XFY-1 VTO "Pogo" | Album by Lochsa_River (1:48)
1 11 March, 09:48
добавил новый фотоальбом.


40 4 September 2017, 09:24
Count me in! Great work so far... Love the Rafale!
One thing I find interesting is there often seems to be multiple people doing work going on of like aircraft... for example, a while back it seemed like everyone was doing Phantoms, then just recently it has been Flankers. Is the Rafale next? Hmmm... I do have a couple in the stash... 🙂
10 January 2019, 18:03
Decals and wash done. Unfortunately there is some fog on inside of canopy. Probably dust from varnish spraying because I was not using CA. What is left is just some final weathering and putting everything together.
6 March, 08:23
Thanks! Of course there will be more photos, but not sure yet when.
12 March, 06:56
добавил новый фотоальбом.
15 изображения
Munition für den Stützpunkt
1:35


Проект: Munition für den Stützpunkt


 7+
7+ 17 25 September 2023, 09:07
Started working on the armoured doors for in the of the bunker. Making them of plastic sheet.
26 September 2023, 19:56
Working on the bunker parts goes pretty well. First adding filler, then sanding to create smooth concrete. Repeating that process just as much as needed to get all of the concrete looking smooth. After that I'm gonna add the lines of the woodwork that stayed behind in the concrete after it had dried.
11 October 2023, 08:14
Started adding the lines of the woodwork on the inside parts of the bunker. Really satisfied with the result so far.
16 October 2023, 19:50
Thanks Mathias. I hope so too. 🙂 Besides that everything is going well so far it's also alot of fun working on this project. Let's see where I can take this.
17 October 2023, 18:41
Also started adding lines of the woodwork on the other wall of the other inside part of the bunker. Sanded the rounded part of the bunker smooth enough to add the lines of the woodwork there too. Work on one of the two armored doors is nearly finished.
23 October 2023, 18:55
Finished and placed the armored doors. Added pics of 3 of 4 figures of the MiniArt set. I replaced one MiniArt head with a Tamiya head (the already painted one)
29 October 2023, 18:56
All four MiniArt figures are build. Next step is to paint them. Work on the Tamiya figures had begun. I've added a number inside the bunker. I tried 3 times but it's not getting better than this I guess. Still not satisfied with the result though.
12 November 2023, 19:51
Glued the separate parts of the bunker together. Glued alot of ammo boxes the last couple of weeks. Put them in front of the bunker in a sort of test set up together with 2 of the figures.
26 November 2023, 18:59
After quite a while working again also on this project. Drawing the lines of the woodwork with a pencil and then creating them by using Vallejo putty.
11 March, 20:42
добавил новый фотоальбом.
27 изображения
Bell XP-77
1:72
The fight continues. Corrected the rudder and reshaped the nose a bit to more resemble the original - unfotunately the c...


Проект: Bell XP-77


37 10 February 2022, 20:20
As I travel often between Germany and Poland and did move my workshop to DEU I decided to duplicate it in Poland as to not loose time without my hobby. This is my first pararel project in the workbench in Poland. Another short run.
10 February 2022, 20:31
Unusual model... Following!
Lucky to have duplicated your workshop 🙂 👍
10 February 2022, 20:46
Cleaned up the wing today and deepened the first wheel well. Did use pattex sos glue to fill the edges. I can not reccomend this glue enough - it works far better than any filler and is easy to sand. I use it also as glue where possible as it gives a strong join.
11 February 2022, 19:53
@Cuajete and Guy: welcome! I bought jut the tools needed to do simple kits so I do not waste my time on not modeling 🙂
11 February 2022, 19:59
Deepend the second wheel well and removed the injection stubs. The plastic is very hard to sand but very easy prone to overscraping wit a scalpel blade. This is going to be a greater challenge than the hawk.
13 February 2022, 18:54
This little gem will need a lot of TLC. I looking forward to following your progress.
14 February 2022, 01:35
Watching with interest for sure! (just a word of warning here, Patryk - I remeber from one review of this kit that the vacu canopy is too small - have you checked it already?)
22 February 2022, 20:44
Thank you for joining Robert and Daniel! @Robert: I did a search for builds of this kit - there is a problem with canopy fit but nothing not to overcome. I did actualy stumble on an open canopy picture of the XP-77 during the search - the canopy didn't slide back but went rotating downwards flush into the fuselage so only the front frame is visible after opening. If I will have to much problems with fit I might replicate it in the open position.
23 February 2022, 12:55
Open canopy surely would add more interest to this fascinating plane, Patryk 😉
23 February 2022, 13:38
Managed to cut of and sand the resin from the castings block, unfortunately breaking the rear cockpit wall in the proces. Glued it and the control stick to the tub with pattex sos glue. Additionaly i managed to prime the resin parts.
Thank you for joining and the comments Mates!
6 March 2022, 16:41
Dry fitted the resin inserts - they fit very good to the fuselage halves - no sidewall trimming needed. After that I primed the back portion of the seat and the insides of the fuselage.
13 March 2022, 17:40
First layer on the resin parts and fuselage interior painted. I prefer to brush paint small parts in this scale, saves a lot of time of paintbrush cleaning and after a clear coat and wash you don't actually see any difference. The Ranger V770 engine on 99% of pictures I have seen was pained Neutral Gray, so I went with this suggestion. The instruction states that it was black.
18 March 2022, 14:59
Second layer on. Started some detail painting in the cockpit and did clean up some of the kits parts. Thank you for joining Villiers!
19 March 2022, 17:44
Did some rought preliminary detail painting on the seat and engine - it will be corrected after the second layer. Need to get sone rust and copper colors from my workbench in Germany to finish the engine detail paintig. Did also test fit the exaust ports to the fuselage sides - much trimming was needed for both the ports and fulelage to get a good fit. You can see the difference - lower on the picture is the fuselage side which is allready corrected.
20 March 2022, 18:24
More datail painting and silver drybrushing for the seat and cockpit. Small corrections needed, the camera catches more than my eyes. Next a coat of clear flat and a dark wash awaits.
28 March 2022, 10:37
Managed to glue the cockpit together, working on parts cleanup, which is extremely difficult due to the plastic beeing extremely sanding paper resistant. Reworking the exhaust system to beter match the original.
22 May 2022, 16:30
Cleaned up all of the parts and sanded them to 2500 grit, now they are ready for priming. Assembled the propeller and glued the engine front in one of the fuselage sides.
25 December 2022, 16:44
Fingers crossed 🙂
One of special features of this plane was, that the canopy was not opening by sliding, but rotating backwards into the back fuselage. 🙂
Youtube Video

25 December 2022, 23:23
Thank You for this valuable reference Robert! It helped to solve some questions that I had, might reeork the exhaust system after seeing this.
26 December 2022, 08:28
Primed the small parts with the 1st layer of Tamiya spray matt black.
26 December 2022, 18:08
Did prime the other side of the small parts with the 1st layer of tamiya black matt. Rescribed one side of the fuselage as the original scribing was almost invisible and added a document pocket to make the cocpit a bit more busy. Did also put the first layer of Interrior green to the front wheel bay.
30 December 2022, 18:32
Glued the wheel bay and cockpit to the fuselage side today. No issues with fit.
3 January 2023, 20:39
Thanks Mates, dry fitted the fuselage halves together and no issues besides some putty will be needed in the lower part of the front fuselage. The wing will need some shimming of material where it meets the front wheel bay but nothing significant. Having more fun with this one than the P-36 or the mainstream U-2A.
3 January 2023, 21:39
Some advice needed dear Mates: what glue is best to use by vacuform canopies? This is my first attempt, do not want to mess it up.
3 January 2023, 21:41
In such cases I first glue some pieces of stretched sprue (made square-ish in section first with a knife) around the edge of the opening (in distance from the outer edge equal-ish to the canopy thickness) and then I use drops of thin cyanoacrylate glue one-by-one letting each flow under the edge of the canopy and dry for few seconds before applying the next one... But it is quite time and nerve consuming...
3 January 2023, 21:49
Well, I guess there are as many ideas as the mates who use the vacu canopies. I'm afraid of putting together transparent parts and CA glue, so I either stick to some sort of PVA/Kristal Klear (forget the sanding afterwards) or UV glue (usually Bondic, can be sanded after drying very well in UV light).
4 January 2023, 11:12
Thank You for the advice Łukasz, maybe the ye olde card modeling technique wil be also a feasible solution - butapren glue 😜
4 January 2023, 17:14
Bondic is a good idea, much less risky than CA glue - the UV setting glue was available in Germany under Revell brand too (I bought such a set few years ago while visiting Erfurt)
4 January 2023, 17:59
Ahhh, butapren, never forget 😁How did it go?
- Granma, have you seen my butapren?
- Nope, but have you seen that dragon in the kitchen?
For the non-Polish readers: this glue used to contain trichloroethylene when we were young 😄
4 January 2023, 18:42
Welcome Thomas!
@Łukasz: Thats a good one😂. I remeber in my town the nice lady that worked in the shop that had then in the 90's would sell me only one tube at a time because she was concerned about my health.😜 I was a card modeler for many years, converted to plastic only a few years ago.
4 January 2023, 21:06
@Robert: Thanks, I will try too look it up next week in Germany.
4 January 2023, 21:08
In injected plastic, it usually works to protect the cockpit from the ciano by immersing it in Future (or similar) and letting it dry before gluing with ciano. In vacu I don't know, but I guess it will work too. However, I wouldn't risk it if you only have one copy of the vacu.
5 January 2023, 20:00
@Cuajete: thank you, this is an interresting method indeed. Thinking about making an opened canopy which will reduce the effort and show more detail in the cockpit.
6 January 2023, 20:17
Progress so far. Added weight to the fuselage an closed it. Managed to paint most of the small parts also. Fit was good in regards of joining the fuselage. A long sanding session awaits in order to get a smooth effect before adding black primer. Also rescribed the panel lines as they were too shalow. Also need to rework the exhaust in the closed position as depicted on the reference I got.
1 May 2023, 15:30
I will Robert! It will be done, currently working on 5 projects divided between homes in Poland and Germany, so it might take some time. Thanks for still beeing here!
1 May 2023, 15:42
Update: scribed the lover wing using photo s and the 1:48 czech model kit as references. Small corrections will be needed but under a few coats of black primer and then silver the effect will be ok. The kit had almost no detail on the underside of the wing.
19 August 2023, 19:06
The fight continues. Rescribed the right side and reworked the exhaust according to photos and the czech model kit. Painted all the small bits. Looks maybe a bit rough on the picture but pretty much ok for the normal eye - it will be refined before priming
22 December 2023, 19:15
The fight continues. Did attach the wings to the fuselage, the fit was very poor. I filled the gaps with pattex sos glue which I use as filler with very good results. Sanded one side with 800 grit sanding paper and got a flush join.
27 January 2024, 17:58
Done also with the other side with rescribing, reshaping of the exhhaust system anf filling and sanding gaps between the wing and the fuselage. The underside awaits.
31 January 2024, 12:06
The old Special Hobby kits are not for the faint of heart.
Keep going. Looks good what you achieved so far.
I like the Pattex super glue too.
31 January 2024, 19:47
Thank you for you kind comment Michael! I am satisfied with the progress so far as it is a very challenging kit to get right.
31 January 2024, 20:04
Work continues. Rescribed and scribed all the missing detail as seen on period photos. Got over the hardest part which was canopy attachment. Dipped it with a german equivalent of future clear first, then fitted it to the fuselage and carefully worked around it with super glue to good effect. Need to do this a few times in order to blend the canopy into the fuselage. There were some gaps between the canopy and fuselage but they were filled succesfully with super glue.
8 April 2024, 17:36
Great job with the canopy, Patryk! The finish line is on a horizon now 😉
8 April 2024, 18:37
Patryk, you did well to immerse the transparent part in Future to protect it from the gases produced by the cyano.
You are doing a fantastic job with this kit 👍
8 April 2024, 18:50
Thank you for your kind comment. The build will still take some time as I want to experiment with the new eduard 3d panels and see if they can withstand spray can painting. I will try to coat them with this german Future gloss equvalent as I already tested it on decals and several spray can paints and sealers and this stuff withstands everything I was able to test it on to this time.
9 April 2024, 10:37
Completed the sanding around the canopy. I am very satisfied with the result. It is maybe not visible on the picture but I managed to get a flush connection of the canopy to the fuselage.
21 April 2024, 18:21
Attached the horizontal stabilisers with pattex gel glue to have time to tweak their position as they do not have any attachment points. Had to sand both to get a similar look as one was bigger as the other. It is ready for painting, now on to test the eduard panel decals and to see how they stick to the plastic and react to tamiya spray paints.
22 May 2024, 18:32
The fight continues. Corrected the rudder and reshaped the nose a bit to more resemble the original - unfotunately the ca gel I used went into reaction with the painted resin engine and I need to repaint it after I paint the fuselage. Did prime it with the first coat but unfortunately found many areas to correct - its an old short run after all. Did rework the cooling system - it looks better live then on the picture. I think it begins to turn out ok. Time for the next coat.
1 10 March, 20:43
добавил новый фотоальбом.


93 20 January, 15:01
I started another quick OOB build. After a super small Spitfire, it's a small Bf-109
20 January, 15:09
In Police Service? Are you kidding me? What did they want to do with it?
Anyway, nice start. Peeking at this one for a nice OOB build too.
21 January, 18:51
Michael, they used them to keep deluded citizens from leaving the warm embrace of the homeland. And to interdict spies and other Western miscreans. Mostly flown by military pilots, so it was really a part of the Air Force. Czechoslovakia had a similar institution before 1939, primarily to keep Luftwaffe spy planes from infiltrating, and this continued this tradition, just against different enemies.
3 21 January, 19:28
Thank you, gents!
Michael, Alec's explanation is very accurate. There is nothing to add.
Thank you, Alec
1 22 January, 09:12

Thank you, mates!
I completed the main build. The fit of parts is absolutely excellent 👍
2 3 February, 12:29
interesting topic and very promising progress Jakub! Taking a seat 🙂
10 February, 09:54
Watching! I think I should send you my kits to have them built. I can't come close to this one!
10 February, 21:55
A quick OOB build @jakub?😉 The construction and paintwork is so well done that you would almost forget that this model is only a few cm tall. The pictures are a feast for the eyes.
17 February, 09:47
Thanks mates, for your comments!
Lukasz, i´m curious too 😄 I wiil try to mix it to match the red color used on decals.
Bohrmann, i thought i would be faster 😄
1 17 February, 13:59
It looks excellent. Love the subtlety of the shading, but you can still definitely see it on the photos. May I ask how you use that Wauchop mix on pic 18?
18 February, 07:44
Thank you, mates!
Alberto, i use ,,wauchop mix´´ and insignia white both the same way. First i spray camouflge color. Then i mix this color with wauchop mix and spray darker patterns (over panel lines and some random rivet lines) Then i do the same with the mix of camo color and white. Finaly, i respray the whole surface with diluted camouflage color to achieve the desired contrast. this procedure can be repeated until you are satisfied.
1 18 February, 12:28
So, Wauchop mix is a murky brown to use as a contrasting warm mixing color to the camouflage color? Whereas the white is the color for the bleached variant of that same camouflage color?
18 February, 17:28
Yes Patrick. I am using it this way. And during weathering steps, you may use this black-brown mix to create some dirt using an airbrush gun.
18 February, 18:10
Looking at your results, this might be a very interesting way to obtain some differentiating shading. Do you have a mixing ratio at hand, so I can give it a try myself? Thanks in advance! 🙂
18 February, 18:44
I'm sorry Patrick, i'm not able to tell you a mixing ratio. I just mixed some amount of black and brown to create some ,,dirty color". But i think, that it is not very important. For this purpose you just need some dark color. Maybe dark grey will work the same way.
This is how Chris Wauchop use his mix for postshading: chriswauchop.com/201..s-a-kittyhawk-mk-1a/
19 February, 09:54
No worries! I'll just mix a dirty brown concoction and experiment a bit. 😉 Thanks for that Kittyhawk link btw!
1 19 February, 14:06
Thank you Alec and Lukasz!
In the end i changed a mix ratio a little bit. So, the final ratio was app: 55% C81 russet
35% H17 cocoa brown
10% LP35 insignia white
25 February, 14:30
I agree with Alec and Łukasz. Very nice painting job.
@Jakub, thanks for the red color mix information 👍
2 25 February, 20:18
Thanks mates!
I finished the airbrush gun work and applied a layer of glossy varnish. Now, i´m ready for decals.
2 2 March, 18:45
Really great work, Jakube! Fantastic job with the painting and tonal layers of each shade.
2 March, 21:06
Great work so far. I like the paint job, but the decals bring her realy to life. I can't wait to see her finished. 👍
4 March, 07:00
A nice looking bird (that is not a euphemism or a double entendre) Jakub. 🤘🥸🤟
4 March, 21:47
Thank you, Mr D! Riveting is not my work. This kit is comletely riveted by the producer
1 5 March, 09:38
It's really fascinating to see how this model is developing, step by step. What strikes me is that you just can't tell that this is a 1/72 scale model, even when you zoom in with the camera., also considering that the ME-109 is a small aircraft in real life. It is just flawless and made with very great care. Should I be told that this is a 1/32 I would have no doubt that it is. Great work!
1 10 March, 14:43
Thank you very much, mates, for your kind comments!
Lukasz, i was definitely more drunk then brave when i was overspraying decals 😄 Of course, i screw it up, so it took two evenings to fix it 😄
1 11 March, 19:57
Jakube, it looks really great!
And if I didn't know it is in 1/72, I'd bet it's in 1/48.
12 March, 04:39
добавил новый фотоальбом.


23 9 March, 17:35
@Mike Bird
The wheels are Rotiforms from cults3d: cults3d.com/en/3d-mo..miniatures-2-offsets
The decals I designed myself.
1 11 March, 20:02
That looks pretty cool! Those rims reminding me on the ones on the BMW M1 of the 1990s
2 12 March, 06:14
добавил новый фотоальбом.


15 25 February, 04:09
Thanks guys. You two always have reserved seats in the VIP section.
@Nils - I've only ever found one, relatively obscure, full-colour picture of McCoy's C-130. All the available decals seem to get the colour scheme wrong (mainly the gold/yellow coloured dollar sign), so I'm looking to correct that.
25 February, 18:31
Got some of the insides painted. Given that you won't see all that much of it, I'm skimping on some of the details I might otherwise have attempted. I must be getting lazy. Don't tell Spanjaard.
26 February, 17:30
After having painted the interior and assembled the fuselage, I think my choice to skip some details was justified. Trying to fish the wires through the small hole I made in the bottom, I had my workbench spotlight shining right down the back cargo door... and I still could barely see anything. Getting the motors wired up was a bit of a challenge, but I think I might need to add some more resistance to the circuit under the base. Sometimes, especially when dealing with multiple motors, the individual resistors will create a rotation speed that perfectly vibrates the plastic that it will buzz. The more motors, the greater the chance. I added a small (10 ohm) resistor to the circuit and they all seemed to calm down nicely.
27 February, 16:24
Thanks Alec. Now comes everyone's favourite part... putty and sanding!
1 28 February, 15:44
Hello, Greg!
I'm watching your work with interest.
The question about electric motors: which ones and where to buy?
1 March, 11:13
Good to see you hanging around, Peter!
Dennis - Thanks. I don't have a specific motor that I use, but I usually get them off eBay or AliExpress. What you want to look for is the size. The best ones I've found are 4mm wide by 8mm long and run on power between DC 1.5V to 3V. One thing to consider is the length of the shaft as well. I buy some that have a short (2-3mm) shaft, and some with a longer shaft. This gives you a bit of flexibility in where you can put them inside the model. For example. If you stick a motor into a P-51 Mustang, there's lots of room for the motor to hid in the engine area. It's nice and round. But I built a 1/144 scale Cessna and the short triangular shaped engine cowl meant I needed to push the motor back into the cockpit area. I didn't have a motor with a long enough shaft that time, but it sure would've been handy. 🙂
1 March, 17:30
If you find any that are smaller than 4mm wide... let me know. I've got a project idea that needs an even smaller motor than that!
1 March, 17:31
So far so good on the decals.you can't even tell that I screwed up while inverting the money bag marking for the other side. The bag needed to be flipped… but not the dollar sign. Luckily I had a backup decal and a very sharp knife. 😉
5 March, 14:38
Some CAREFUL masking of the decals. Hopefully this is going to work. 🙂
6 March, 17:00
Masked off the grey undercarriage coat and got some desert yellow on. It's starting to look like a thing.
7 March, 16:22
Nice progress. I am FREAKIN' about that tape lifting those awesome decals up… 😅
7 March, 19:40
Yeah, me too... but I put a significant coat of Future both under AND over them. They seem pretty sturdy. We shall see though...
1 7 March, 20:24
im kinda nervous, im afraid that the tape migth tear those decals off.
keeping my fingers crossed for this.
7 March, 21:20
It was a bit dicey removing some of the camouflage tape, but so far so good, I think.
1 8 March, 14:42
Not 100% happy with my job on the camouflage, but I'm super glad the decals seemed to have survived... and worked even better than I expected. Might just quit while I'm ahead on this one. 🙂
1 10 March, 16:34
добавил новый фотоальбом.
188 изображения
Baubericht
1:200
A few boxes are still missing.


Проект: IJN Mikasa


 2+
2+ 70 31 October 2022, 06:18
Let's hope so. The conditions are particularly good this time. Not only do I have a Pontos set for this model, I also have an MK 1 set on top. So let's see what I can conjure up from it
1 November 2022, 10:35
Zur Entspannung jetzt was bodenständigeres?
Ich bin auf jeden Fall dabei!
1 14 February 2024, 16:16
Schön Sven.
Ja, der Ausflug ins Star Wars Universum war nett, aber ich baue doch am liebsten Schiffchen. 😉
Sehen wir uns auf der EME?
14 February 2024, 16:19
Leider nicht. An dem Wochenende kann ich nicht und ich muss dieses Jahr etwas Urlaub sparen. Ich habe für Hamburg im September gebucht.
1 14 February 2024, 16:24
Sehr Schade.
Und Hamburg im September kann ich leider nicht.
14 February 2024, 16:25
Schön zu sehen, das japanisch Bügeleisen ist im Bau. Bin schon gespannt auf das Ergebnis!😳
1 17 February 2024, 13:55
Ganz neu für mich, schiffe. Gespannt wo's hingeht. Hals & Beinbruch 💪🏼
1 17 February 2024, 15:08
Fein, das freut mich euch dabei zu haben.
Glaubt mir, bin auch gespannt wo ich lande. 😄😉
18 February 2024, 05:17
I forgot that you came on board, Dietmar. Nice to have you there. 😀
2 March 2024, 07:18
Nice workbench. And how on earth do you keep your cutting mat that clean?
Das Modell? Ja das Modell wird halt wieder super. Eh klar! 😉
1 5 March 2024, 17:23
Thanks Michael.
That's easy. Before I started building the Mikasa, I rotated it 180 degrees. If you look at the picture with the bow view, you will notice the paint and glue residue in the back corner. 😁
6 March 2024, 12:22
Fantastisch was du mit dem Rumpf gezaubert hast, Jörg und das in der kurzen Zeit 👍
1 15 March 2024, 07:04
Looking great! Steady hand! I would think hullred but I had to look up the word "antifouling" 🤔🦐🦞🐙🦑
1 15 March 2024, 07:38
Thank you both.
It's unbelievable what was mixed into the antifouling paint back then, Tini. 😲
15 March 2024, 10:04
Great work so far 🍿
Slight off topic I'm interested in the storage you have behind it. Particularly the one between the brush storage and the three tall draws. My question is de you convert another storage to give the racks for your tray things and if so how/what did you convert? I have the same storage system but have not found anything like that rack and it's a great idea I'd like to use.
Cheers and keep the good work going as it's going to be a great model. 👍
1 16 March 2024, 10:36
Hello Sy Bar.
Thank you.
Do you mean this rack?!
hobbyzone.pl/en/modu..niversal-drawer.html
It is very modular and can be adapted to the respective use. I use them to store the organizer drawers for my etched parts.
16 March 2024, 13:54
Alter! Hier sieht man erst, welch gigantische Arbeit du jetzt schon wieder investiert hast. Namensvetter, das wird wieder was richtig feines von dir, da bin ich mir zu 100% sicher.
Bin auf jeden Fall wieder dabei und staune und staune.
gruss
Jörg
1 16 March 2024, 22:57
Das freut mich, Jörg.
Schön dich an Bord begrüßen zu dürfen. 😄
17 March 2024, 06:29
Showed up because I heard there was a grinding orgy of chiseling, but now i'm staying for this incredible build!
1 21 April 2024, 14:51
Es wächst und gedeiht! Schön mit anzusehen. Der dunkle Anstrich sieht wirklich super aus, gefällt mir ! Weiter so Jörg 👍👍👍
1 27 April 2024, 15:51
Jörg - you always have the most interesting, detailed and fascinating builds! I love how you convey your thought process as you build your masterpieces! Definitely watching to see this new masterpiece!
1 27 April 2024, 16:46
Danke Hans-Jürgen. 😉
I'm very pleased, CaptGPF, that you like my little construction reports so much. 😁
28 April 2024, 05:02
This weathering is outstanding! Also, you're giving me severe desk envy for your workshop setup!
1 27 May 2024, 10:55
Many thanks to you both.
Yes my workbench turned out really cool, NLAWScametovisit.
3 June 2024, 08:34
Sorry for your los, Jörg, but it's good to see you're getting back to our wonderfull hobby.
1 28 October 2024, 11:00
Rough seas you had to steer through lately. My condolences. Hope future waters will be much calmer and this build helps navigate them Looking for more progress here. 🙂
1 28 October 2024, 16:57
Thank you for the kind words Michael.
Yes, I hope that things are going well again now.
29 October 2024, 06:08
Looks like you are doing amazing work! Definitely following this build. 🙂
1 30 October 2024, 18:36
Wow, how did I miss out on this awesome project? Very involved detailing going on! I love the paint finish so far!
1 16 November 2024, 11:31
Thank you, everyone. Yes, the Pontos guns are truly phenomenal.
Thanks for asking Dietmar, everything is fine again.
1 8 January, 06:36
Fantastic detail on a beautiful ship! You make it hard to resist getting converted to the 1:200 scale 🙂
1 23 February, 09:01
Thank you Chrisswe.
Yes, you can really conjure up some great details at this scale. But from what I see in your scale, you rock it too. 👍
1 23 February, 10:44
Thank you very much Tini.
But at the moment I'm taking a little break. Let's see if it continues again next week.
1 24 February, 11:56


/ru/search.php?q=*&page=newsfeed&fkSECTION[]=Newsfeed
search-solr.php?lang=ru
35
35
/ru/search.php?q=*&page=newsfeed&fkSECTION[]=Newsfeed
35
todo