
newsfeed
pridal nový fotoalbum.
43 snímky
Nevada Snake
1:48
Three days of work. But it’s on. Not 100% correct but it does the job. Happy.


projekt: Block 32: Nevada Snake

![1:48 F-16C [Block 25/32] Fighting Falcon (Tamiya 61101)](/products/img/9/0/5/105905-15655-78-t180.jpg)
 16+
16+ 20 16 January, 22:38
a lot of aftermarket sets - curious how the fit so I watch the show 👍
1 18 January, 06:41
Awesome aftermarket p0rn! 👍, I like your cautious approach, can never dry-fit too much.
And a hint... the new 3D printed sidewinders from ResKit are awesome, without any assembly needed, consider changing over Edo's...
1 26 February, 19:50
I ageer, they are awesome! But still different than the needed CATM-9, so I have tried to adjust the Tamiya winder to a CATM.
26 February, 21:02
I agree with Sergej, this looks like aftermarket p0rn! But hey, that's what we are here for! 😅 Bring it on, Sid! 💪🏼
1 26 February, 22:59
pridal nový fotoalbum.


70 20 January, 15:01
I started another quick OOB build. After a super small Spitfire, it's a small Bf-109
20 January, 15:09
In Police Service? Are you kidding me? What did they want to do with it?
Anyway, nice start. Peeking at this one for a nice OOB build too.
21 January, 18:51
Michael, they used them to keep deluded citizens from leaving the warm embrace of the homeland. And to interdict spies and other Western miscreans. Mostly flown by military pilots, so it was really a part of the Air Force. Czechoslovakia had a similar institution before 1939, primarily to keep Luftwaffe spy planes from infiltrating, and this continued this tradition, just against different enemies.
3 21 January, 19:28
Thank you, gents!
Michael, Alec's explanation is very accurate. There is nothing to add.
Thank you, Alec
1 22 January, 09:12

Thank you, mates!
I completed the main build. The fit of parts is absolutely excellent 👍
2 3 February, 12:29
interesting topic and very promising progress Jakub! Taking a seat 🙂
10 February, 09:54
Watching! I think I should send you my kits to have them built. I can't come close to this one!
10 February, 21:55
A quick OOB build @jakub?😉 The construction and paintwork is so well done that you would almost forget that this model is only a few cm tall. The pictures are a feast for the eyes.
17 February, 09:47
Thanks mates, for your comments!
Lukasz, i´m curious too 😄 I wiil try to mix it to match the red color used on decals.
Bohrmann, i thought i would be faster 😄
1 17 February, 13:59
It looks excellent. Love the subtlety of the shading, but you can still definitely see it on the photos. May I ask how you use that Wauchop mix on pic 18?
18 February, 07:44
Thank you, mates!
Alberto, i use ,,wauchop mix´´ and insignia white both the same way. First i spray camouflge color. Then i mix this color with wauchop mix and spray darker patterns (over panel lines and some random rivet lines) Then i do the same with the mix of camo color and white. Finaly, i respray the whole surface with diluted camouflage color to achieve the desired contrast. this procedure can be repeated until you are satisfied.
1 18 February, 12:28
So, Wauchop mix is a murky brown to use as a contrasting warm mixing color to the camouflage color? Whereas the white is the color for the bleached variant of that same camouflage color?
18 February, 17:28
Yes Patrick. I am using it this way. And during weathering steps, you may use this black-brown mix to create some dirt using an airbrush gun.
18 February, 18:10
Looking at your results, this might be a very interesting way to obtain some differentiating shading. Do you have a mixing ratio at hand, so I can give it a try myself? Thanks in advance! 🙂
18 February, 18:44
I'm sorry Patrick, i'm not able to tell you a mixing ratio. I just mixed some amount of black and brown to create some ,,dirty color". But i think, that it is not very important. For this purpose you just need some dark color. Maybe dark grey will work the same way.
This is how Chris Wauchop use his mix for postshading: chriswauchop.com/201..s-a-kittyhawk-mk-1a/
19 February, 09:54
No worries! I'll just mix a dirty brown concoction and experiment a bit. 😉 Thanks for that Kittyhawk link btw!
1 19 February, 14:06
Thank you Alec and Lukasz!
In the end i changed a mix ratio a little bit. So, the final ratio was app: 55% C81 russet
35% H17 cocoa brown
10% LP35 insignia white
25 February, 14:30
I agree with Alec and Łukasz. Very nice painting job.
@Jakub, thanks for the red color mix information 👍
2 25 February, 20:18
Thanks mates!
I finished the airbrush gun work and applied a layer of glossy varnish. Now, i´m ready for decals.
2 2 March, 18:45
Really great work, Jakube! Fantastic job with the painting and tonal layers of each shade.
2 March, 21:06
Great work so far. I like the paint job, but the decals bring her realy to life. I can't wait to see her finished. 👍
4 March, 07:00
pridal nový fotoalbum.


4 March, 15:42


pridal nový fotoalbum.
6 snímky
Aero L-39 Albatros KP | No. 15 | 1:72
1:72
Mal was altes bauen :)


projekt: Aero L-39 Albatros


 11+
11+ 2 28 February, 13:53
pridal nový fotoalbum.
64 snímky
Modelcraft | No. 48-021 | 1:48 | North American F-82E Twin Mustang (WIP)
1:48
WORK IN PROGRESS. UPDATED: 4/12/24...


projekt: North American F-82E Twin Mustang

74 7 February 2024, 10:08
Welcome Robert, Jennifer and Gorby, very pleased to have your interest 🙂 your definitely right there @gorby. I mean I'm used to building 'duff' old kits, but this kit is duffer than the duffest thing ever made by the worlds duffest person! If that makes sense! Hahaha 🤣🤣
20 February 2024, 00:42
With all the faith within me I summon blessings upon you in this build Neil. This one makes AA Models look like Hasegawa. With that said I felt a great sense of accomplishment upon finishing mine ( something I rarely feel).
20 February 2024, 01:52
it takes courage to even start such a great quality model.... but you are certainly getting good result out of it, looking forward the end result
20 February 2024, 03:15
Welcome! Thanks very much for all your encouraging words mates. You talented bunch are all very kind to show interest in my efforts with such a humble kit. It's definitely fighting me! I've got it a bit further along now, will add some imagery soon - we're at the primer, sand, prime, sand stage. Hahaha!
1 March 2024, 09:23
Thanks for wrestling with this beast of a kit so I don't have to. 👍 Looking good so far with lots of your elbow grease.
7 March 2024, 21:56
Cheers mate! 🙂 Thanks for your encouragement. I'll continue the battle on this one 👍
18 March 2024, 19:53
I'm used to building old kits that need 'help'. But this one needs a bit more than usual. After a lot of pre-paint priming filling/scraping/hacking/filing/sanding work and then more post primer fiddling, it's beginning to take shape somewhat. I couldn't resist giving it a blast of aluminium lightly on the wings last night! 😉 👍
10 May 2024, 13:12
Remarkable perseverance and patience Neil. Most people would have given up on it by now.
10 May 2024, 14:16
Hi Gorby 👍 Thanks mate! Yeah, I'll get it into some kind of Mustang shape hopefully.
10 May 2024, 19:17
I for sure would have given up!
a lot of work but the result is convincing 👍
11 May 2024, 06:44
Is it weird that I could feel your pain, just by looking at the photos of your build?
11 May 2024, 11:36
Hi Thomas 🙂 yeah, it's tried my patience that's for sure. Thanks for your words of encouragement though mate, really appreciated 👍 I'll get there. At the end of the day, if it looks (a bit) like a Mustang then it is a Mustang!! Obviously it's no Hasegawa! @mike, hehehe. Yeah I've kept my language polite, but not surprised my pain was still apparent! 🤣 Thanks for dropping by 👍
11 May 2024, 12:39
Thanks Nathan - I know you 'appreciate' this kit journey also! I'm really not sure that a stars and stripes aluminium scheme is gonna be the easiest finish to help hide imperfections of this kit either. But I'll do my best 👍
15 May 2024, 12:16
Following! Watching your builds of those older kits is something I can never get enough of because of the quality of your builds and the nostalgia factor. Big Respect from my side. Greetings, Patryk.
15 May 2024, 12:57
Hi Patryk 🙂 Thanks mate! That means a lot. It's true that more often than not, it's a bit of a slog to get these oldies into shape. It's often tempting to bin one, hahaha 🤣 Especially when I look on the feed and see all these wonderful new kits which seem to (nearly always) fit in such an accomplished manner. But I rather masochisticaly choose to continue! Who knows why!? You're very kind, especially as I'm aware of your own skills. Greetings back atcha matey 😎👍
15 May 2024, 20:27
Hi mates. Thanks very much for checking in again and your encouraging words, hope you're both well 🙂 👍 Your feedback is most gratefully received and buoys me up to continue attacking this dastardly duo! POW! BANG! KAPOW! 👍 😉
28 June 2024, 09:35
It'a always a joy seeing someone transform an older, ill-fitting kit into a work of art. following!
6 July 2024, 15:20
Hiya CaptGPF 👍 you're extremely kind to me, I'm trying to drag this kit into something respectable, it's not the best kit (understatement!) But it is a stunningly beautiful airframe and surprisingly large too! Thanks for your compliment 🙏
@Mr D thanks very much for your message also, I've built a few metallic finish aircraft of late, with each build my ability to add shade and depth to a metal finish is improving, though a long way from great! 👍
Thanks also for the likes to all who've dropped by too 🙂 I've parked it for a few days again to let everything cure. But more pics again soon 👍
6 July 2024, 22:59
See what you mean, the canopy is 1:46 scale 🤣, lve often had to re-make parts from old spru's n use super glue-gel to build up poorly moulded parts. It's not good but part of modeling l think.
Looking good 👌
7 July 2024, 08:42
I'm beating it into shape - slowly! Handful of recent pics added. Thanks for the likes all too 🙂 👍
28 August 2024, 16:03
Very good 💯.. Nice job done, l like the build process uploads , it's good to learn tips n techniques.
Brilliant 👍👍👍
28 August 2024, 17:37
Thanks very much Guy. You're very kind and most welcome here. It's definitely not the easiest kit I've ever undertaken and it's taking some time to build because of that. But I hope (slowly) it's beginning to look (somewhat) like a twin Mustang! Such a cool looking aircraft! 😎
8 October 2024, 20:12
Very nice progress and it's already almost painted!👍 btw interesting way of using cable ties for squeezing big parts together. I hope ypu have heard about releasable cable ties: hellermanntyton.com/..ble/rel250/131-22510
8 October 2024, 21:11
Thanks very much mate, yes getting there but by bit, slow and steady. Appreciate your comment... Interesting info on reusable cable ties, that's a good shout. I'm still working my way through my original stash, but your suggestion makes perfect sense for my next purchase when needed 👍
8 October 2024, 23:54
Hello Rui 🙂 Welcome mate, really nice to have your interest in this 'dodgy' old kit I'm attacking! 🙂 thanks also to those who've liked 👍
13 November 2024, 11:37
Looks really nice and unusual 👍
Have you installed an on-board telephone, given the distance between the pilots?
3 March, 17:15
pridal nový fotoalbum.
17 snímky
F-16AM Ukraine "Viper in the Fields"
1:48
The weapons load out is complete.


projekt: F-16AM Ukraine “Viper in the Fields”


 6+
6+ 33 12 December 2024, 15:30
The next project has been selected, along with a shelf of doom F-16 that will be built alongside this one.
12 December 2024, 15:35
This build also went down the rabbit hole of launch rails. I did have several LAU-129 type that I was able to use for my Makos build but not for this one (which will require them). Likely it will be after the new year before any of my orders will arrive but I should be able to continue with the sub-assemblies since these items are nearly the last things to be attached.
20 December 2024, 00:07
Took time today to remove the forward fuselage in preparation for the KASL resin update.
23 December 2024, 02:49
Welcome aboard Robert, Guy, & CaptGPF!
Work had halted since the last update as I was on vacation. I did have some progress today and will add photos in the morning.
30 December 2024, 02:56
Added shots of the built Reskit drop tanks as well as the resin KASL MLU nose.
31 December 2024, 00:41
Taking a seat as well, interesting project. Looking forward to the camo scheme!
31 December 2024, 01:37
Welcome Alexander, Cristian, and Naram.
Small amount of work completed today which included adding the MLU strengthening plates and the wing warning receivers.
1 2 February, 18:27
Added some update photos. I found a resin ACES II seat and decided to add it to the build. Finally attached the updated wingtip rails and attached the tail. Progress has slowed a bit due to bench time along with deciding to start another F-16 build. Triple build!
16 February, 01:29
New images online confirm the use of ALQ-131 and GBU-39 by UAF F-16s. These have been added to the project load out.
17 February, 23:17
I ended up finishing the GBU-39s with paint and decals. They are now ready to attach. I guess I should get working on the actual kit now lol.
20 February, 21:35
No worries Nathan, I also did the weapons before the plane itself on my last kit too.
The SDBs look really nice - good job with masking/painting the different parts! 👍
20 February, 22:35
I generally work on the ordinance while I wait for the paint to dry and cure. 😜
21 February, 16:28
Thanks Alexander!
Capt: I've been working on all the stores for what seems like forever.
Today a little paint work on the exhaust.
1 March, 20:09
Welcome Vincent. Added a couple of shots of the completed weapons load-out.
2 March, 19:17
Nice 👍 Including some small diameter bombs to punch little holes in aggressor tanks!
2 March, 19:57
Thanks Bughunter & welcome SM!
Work continues on the drop tanks now with decals and some shading.
4 March, 15:28
pridal nový fotoalbum.


22 29 January, 13:24
@Ben M, I use two hands to handle the airbrush and put the kit in a support.
1 27 February, 05:24
Those straight and true airbrush lines are impressive. I definitely need to try to improve…
1 27 February, 05:55
More details about my pre-shadding: Airbrush Fengda FE-180 with 0.2 needle, Tamiya XF-1 paint diluted with Mr. Hobby Lacquer Thinner around 80-90%, Pressure: 1 bar. The needle has been polished with Tamiya compounds.
5 27 February, 06:19
Wow polishing the needle with Tamiya compounds is quite the idea. I think I will try that! Which compound out of the three are you using for this? I'm assuming it's the finish product.
27 February, 06:58
@Cristian A, you need the 3 compounds: coarse, fine and finish. You will see how smooth will be the needle after coarse polishing. Because chinese airbrush needles are not very well finished.
2 27 February, 09:26
Polishing the needle is a great idea to avoid blotches. But I think it's more a matter of being able to move the airbrush in a perfect straight line and being able to start and stop the paint flow precisely where you want. Something you seem to have mastered.
2 27 February, 09:43
@Thomas, please try to use 2 hands and you will see how much control you gain 😉
2 27 February, 09:58
pridal nový fotoalbum.
10 snímky
Cessna 172 (1:48)
1:48
Comlete model. Base made from pine wood, plaster and modeling grass and bushes. Box cover (not shown on this photo) - fr...


projekt: 1:48 Cessna 172

17 10 November 2024, 09:15
Great build! Small question: how did you make those wheel-fairings? The model I want to make also needs these 'boots'.
1 21 February, 18:38
I'm slowly building this #$@%^ kit myself after nearly giving up several times. Don't be too hard on yourself, you did a great job considering the source material. Paint job is on point!
1 March, 13:19
Anton, you were right! Wheelfairings are included (although the instructions say 'not to be used'. Well, we'll see about that! ;-P Cheers!
4 March, 15:22
pridal nový fotoalbum.
8 snímky
F-16C Makos OIF
1:48
Some paint work on the exhaust with a Kinetic D exhaust in the background.


projekt: F-16C Makos OIF


 3+
3+ 23 12 December 2024, 15:36
I randomly opened this kit's box while selecting my Ukraine F-16 build. I have no idea why this kit was halted but can hopefully salvage the build.
12 December 2024, 15:38
Some progress today. I sanded off all the filler on the intake and attached it to the fuselage. Also cleaned up around the cockpit area. I decided to keep the old pilot installation instead of replacing with a resin seat.
17 December 2024, 16:46
I hope the build salvage goes well. What you did in the past looks good.
18 December 2024, 03:17
Nathan, You're becoming more like me. 😉 Opening a box, seeing a half-built kit and not remembering: 1) that you had it in the first place, 2) what you intended with it, 3) but are willing to go in a completely different direction with it now. I do like the fact that you have a 3"x5" card with notes of your intentions in the box. I should start doing that. Pulling up a seat to watch the progress. Kind regards, Dutch
19 December 2024, 14:11
Thanks Jennifer & Welcome Dutch
Yes it is a problem. At least I left myself a note as seen in pic one. I feel bad for the poor guys that get my kits after I've passed on lol! Like this one it could be half built. Another thing I do is scavenge weapons from other kits. I think everything for this one came from my Kinetic F-16D.
19 December 2024, 14:42
My goodness a real rabbit hole I've fallen into researching the underwing & wingtip launch rails. I think I've found the correct LAU-129 type in my Kinetic F-16D kit.
19 December 2024, 23:55
One photo added of the weapons/drop tanks that I had completed right before vacation.
30 December 2024, 02:59
I'm actually building 3 🤣 but one of them is a ghost build. I'm very interested in your F build!
2 February, 18:35
Some build progress here: Added the FAB Scale wingtip rails since I ran out of the rails previously scavenged from my Kinetic kit. Also the main tail section has been glued in place.
1 16 February, 16:37
Thanks Desert Marlin! Going slowly, but I'll get there eventually.
1 18 February, 23:24
Made some time for painting the exhaust. Also work on the load out which turned out to be more work than I anticipated.
1 1 March, 20:17
Missed this one while watching your UAF F-16.
Interesing backstory - will watch with interest what you make of it now. Exhaust looks nice already!
2 March, 22:45
Thanks Desert, Jennifer & Alexander! Welcome to the build Alexander.
I have now applied masking to the exhaust and attached the subassembly to the fuselage.
4 March, 15:24
pridal nový fotoalbum.


32 22 May 2021, 19:09
Started building the Asuka Firefly. No pics from the actual build but Asuka builts very nice and fast. Everything fits very well. Using a detail set from Black Dog with the hessian camouflage. Started to add hessian tape made from masking tape to make the transitions from the hull to the pieces of tape more smooth. Also pictured are the tank crew busts I'm gonna use.
22 May 2021, 19:30
Figure busts are from Resicast. I really like the stuff Graham from Resicast makes.
22 May 2021, 19:41
I'm gonna add additional stuff on the front part the hull. First I have to finish the lower hull part with the suspension and finish the tracks because the hessian tape pieces cover the upper part of the tracks and hull. Then upper and lower hull parts can be glued together and additional stuff like spare tracks and/or boxes can be adder.
23 May 2021, 17:33
Nice! I'm using the same kit for a French did soon. Good to hear it went together well as its my first Asuka kit.
24 May 2021, 18:16
I'm curious: once you have the figs in the hatches is it obvious at all that this kit has no turret interior or 17pdr breech?
24 May 2021, 18:17
Thanks Michael! Currently building 4 Asuka Sherman kits and they all are excellent. When you use the Asuka turret and you put full figures in the turret you won't see that the kit hasn't turret interior because they will fill most of the hatch opening. The turret I'm using here is the turret of the Black Dog detail set. In that toen there's only room for half figures.
24 May 2021, 19:11
Gave the Firefly it's first layer of gray paint. Build the MiniArt British tank riders with heads of Hornet I'm gonna use. Also working on the Bronco T62 workable tracks instead of the belt type tracks in the kit. This is not a project I'm working on regularly, but more as a side project while working on others.
14 November 2022, 19:30
Finished construction of the Bronco tracks. They fit well. Next step is painting and wheatering. The pictures show the dry fit of the tracks.
4 December 2022, 18:48
After a long time working on this one again. The Firefly has got it's base color.
26 October 2024, 18:49
Gave the Sherman a wash to make it darker and started painting the details.
3 November 2024, 20:20
Glued the driver inside the Sherman and added the tracks. After that glued the hull parts on eachother.
8 December 2024, 19:49
The hessian tape camo on the Sherman is painted in a US olive drab base color. Now started to add more camo colors.
19 December 2024, 20:34
Added a few pics of the Firefly so far. One of the few things left to do is adding pigment on the lower part of the hull.
16 February, 11:32
pridal nový fotoalbum.
3 snímky
Airfix Hawker Hurricane Mk.1
1:72


projekt: Airfix Hawker Hurricane Mk.I


 2+
2+4 March, 14:48


pridal nový fotoalbum.
144 snímky
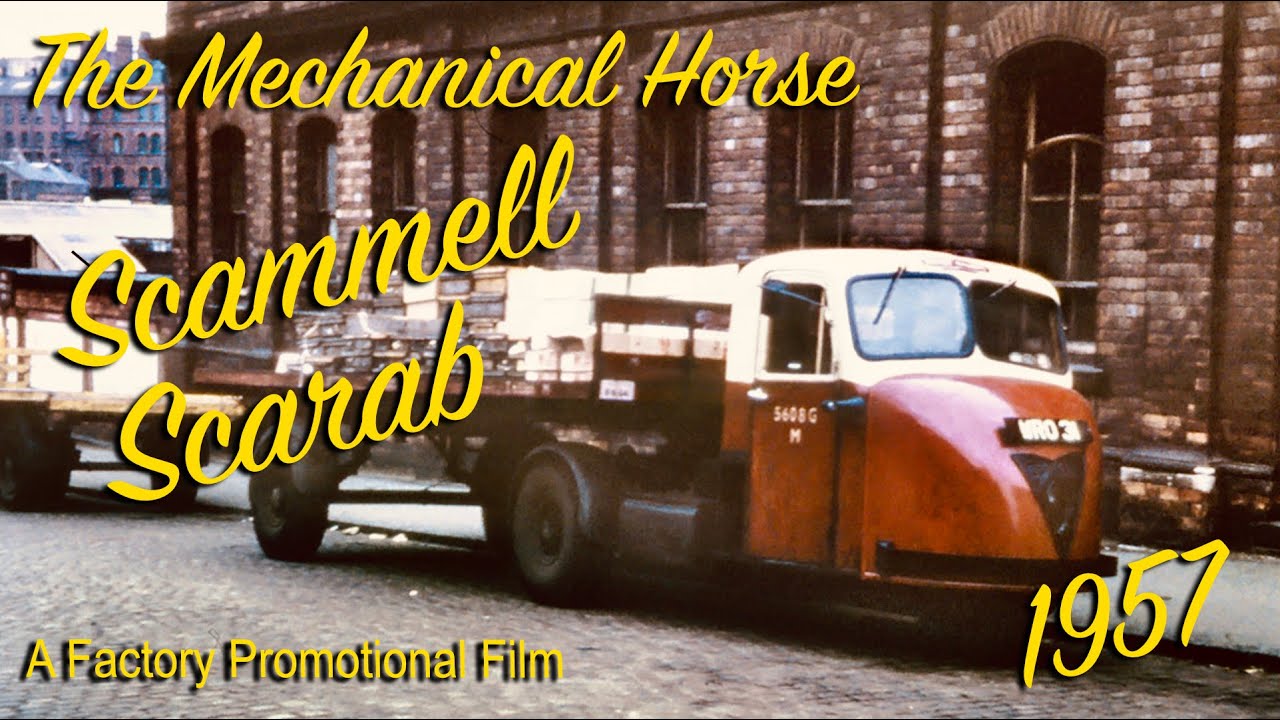
The less charismatic Scammell brothers. Scarab & Mechanical horse.
1:76
I’d completely forgotten (I seem to say that a lot) to add the Scarabs windscreen wipers, so here are the windscreen wip...


projekt: Scammell Scarab

57 1 December 2024, 15:42
Looks like a tuk tuk, anyways its really nice to see you on another project. Im excited to see the fuck ups and final result. Hope your misses doesn't mind you being in love with another woman 😄
1 December 2024, 18:21
Welcome Kesa & Robert. 🙂
Kesa Mrs Gorby is used to my plastic passion obsessions. 😄
And yes it does look a bit like a tuk tuk. Incidentally there have been a couple of screw up so far but obviously I won't be telling everyone as I want to make it look like I know what I'm doing. 🙂
2 December 2024, 07:48
Hi Gorby 👋
Another interesting one 😃👍
Nice project, they used 3wheel trucks like these at Cadburys factory as they need tighter turning circles round the plant.
2 December 2024, 22:40
Glad you're tagging along Mr D.
Their turning circle was one of the reasons they where so successful. Do you have any association with Cadburys - other than eating their products of course. 🙂
3 December 2024, 06:46
Remember these trundling down Zetland Road and Linthorpe Road from the train station. BR and their parcel/freight division use to operate them.
3 December 2024, 08:05
That will be another session of scratch modeling of famous (with 30,000 it must be famous) British cars 👍 So ugly that they begin to be beautiful.
3 December 2024, 08:10
Hi Frank, they certainly are famous in Britland...although probably only with men of a certain age. 😄
3 December 2024, 08:36
Hi Gorby...No just eating 😂 l live not far from factory n seen documentary on it too.
Like the project 😁👍
3 December 2024, 09:30
Thanks Mr D.
Been on their factory tour, as a chocoholic it was wonderful. 🙂
3 December 2024, 09:39
One interesting thing to have in mind is that Gorby set to build the ancient 1962 tool of the Scarab and scratch the Mechanical Horse precisely when there appeared recent (and immeasurably better, as for the Scarab - I guess) 3d-printed 1:72 kits of both the Scarab and the French relatives of the MH (i.e. FAR tractors)... But that's Gorby (much to our delight!) 👍
3 December 2024, 11:32
THERE'S 3D PRINTED KITS!!!??? 😄 😄
I'd be too tight to buy them anyway.
I'm about a month into the build so far and quite enjoying it....mostly.
3 December 2024, 11:44
We know you would enjoy this - and we enjoy too... Plus: if you are going to turn the Scarab into a wrecker / recovery vehicle (!!!)... extra joy. Very Gorby-esque work! 👍 👍
3 December 2024, 11:52
"Would you like some parts with that Flash sir" 😂
I know you will pull a great job out of it Gorby 😀👍
3 December 2024, 19:09
Following this masochistic exercise 😄
The tow truck you fell in love with, was it used to tow Reliant Robins?
3 December 2024, 19:19
Good grief, I appear to have attracted a crowd. 😳
I didn't realise the Robin was globally infamous. That would be a great idea Jan if I can find a cheapish 1/76 one. 😄
Thanks all for taking an interest. 🙂
4 December 2024, 08:05
Taking a seat. The nasties the kit, the more Gorby likes it… I'll forgo spelling out the logical conclusion from this. 😄 😄 😄
4 December 2024, 15:22
😄 😄 😄
Welcome to the show Alec. I have some nice kits in my mini stash, for some reason they keep being overlooked. Maybe I choose kits which make scratch-building feel like an easier option. 😄
4 December 2024, 15:29
Thanks mates....as usual I'm playing catch-up with the build report.
(I'll let you into a secret. I don't start the report until I have a very good idea that things might work out. If I'd completely screwed up - you'd never know about it.) 😳
4 December 2024, 18:45
🤣🤣 prevention better than cure 😜
Where about in the UK were they produced ?
I vaguely remember the 3 wheel electric milk floats as a kid.
4 December 2024, 19:36
I think they were built at Scammell Lorries Ltd in Watford.
In fact there is now a road in the area called Scammell Way.
Typical of Britain, close the factory and name a new road after it to remind us that we used to actually make stuff. 🙁
4 December 2024, 19:44
Your 'secret' is a good idea: start a build report lately not only shows a success, but also makes the build look quick! Must copy this idea 😉
5 December 2024, 09:30
😄
The one down side is that as I only do one project at a time it looks like I'm doing bugger all for about a month. 😄
5 December 2024, 09:35
Gorby, I follow the same strategy with build reports. Trouble is, I eventually catch up and then snail-pace it to the finish…
5 December 2024, 13:57
Nice to see this kit. Build the Scammel Scarab as a youngster from Airfix. And looking at the sprues I would say these are from the the former Airfix kit.
Have fun building it 😉
13 December 2024, 12:28
Great progress and entertaining narrative 🙂. The trailer wheels turned out nice, I can't imagine making something like that. Just curious: why not make one and cast a copy (I think you have done that in the past)? Or does this have to do with that logical thing…
13 December 2024, 13:59
Thanks for the comment mates. 🙂
Lex: Yes this is from the old Airfix kit. Quite enjoying the build so far - although that's probably because most of the build is scratch work. 😄
Alec: Typically the trailer wheels look like a different size to the other wheels in the kit which is why I had to cobble something together rather than cast them. I've been meaning to try and scratch wheels for a while so it was also a bit of an experiment. Hopefully future ones will be better.
1 13 December 2024, 15:28
Love the subject and the build. Not really knowing what I'm talking about I'd say it's as british as british can be
13 December 2024, 15:50
Thanks Michael. You're quite right, they are as quirkily British as it's possible to be and unlike most quirky British vehicles these were a actually successful. 🙂
13 December 2024, 16:00
Like what you have done so far, good thinking on utilising items , l always look at a item before l throw it away to see if it could be useful.
My fire extinguisher handle was just offcuts laying in my scrap tub., ps it finished now will photo tomorrow.
Your right...a MC Donald's or frozen pizza box would be bit out of place 🤣 Fire ash, tin cans, spud peel n bit of dog poo most likely 😄.
Quite rewarding the scratch build l imagine.
Looking good 👍👍
13 December 2024, 20:01
Looks like I'm a bit late to the party, but pulling up a chair way in the back to follow along 🤣 looks like a fun little project
13 December 2024, 21:09
Thanks mates. 🙂
I have to fight against an inherited hoarding gene, so it's a bit of a fine line I have to walk with saving odd and sods for scratching.
At the moment it's very enjoyable project. It's helping to keep my grey matter from seizing up completely, working out how to make something from a pile of bits.
1 14 December 2024, 07:43
I am pulling up a seat. I can't wait to see what you do with the scratch building of an I beam.
15 December 2024, 05:33
Really creative way to make rubbish. Im honestly surprised at how well you can DIY and scratch stuff, top notch stuff. Either way the progress is nice.
Also if you don't mind me asking, what operation did your missus go through? Having to administer blood thinners sounds pretty serious.
22 December 2024, 16:00
Thanks Kesa. 🙂
Mrs Gorby had a hip replacement op. Normally she'd just need medication for the blood thinning but fortunately for my scratch-building junk pile, they thought injections would be better.
Okay, that makes me sound like a bad person. 😄
1 22 December 2024, 16:19
Gotta agree with shadowlight. Your not a bad person 🙂. This reminds me of a quote from one of my favourite games: "I'm not an angel, but when you see Trevor your gonna swear I am one." Except It's "I'm not an angel, but when you see Kesa your gonna swear I am one." 😄
2 22 December 2024, 16:58
@ Kesa
GTA-5 by any chance Kesa ??
Interesting build this one ... good to follow.
Did you have any 3wheel vehicles in your part of the world ?
👍😄
2 23 December 2024, 00:36
I like the exhaust (yeah i know, a half assed comment) but good god I have never seen a more perfect card... ever.... Truly a masterpiece gifted to us from the scratch building god 😄
1 26 December 2024, 14:43
Progress has been slow. I have a problem with Seasonal Affective Disorder (SAD) so everything slows down including brain and enthusiasm. Particularly enthusiasm. It's the part of the year I have more difficulty working out how to make parts and usually the first or second attempts end in disaster before something passable emerges.
Perhaps I should drum into myself "Must do KITS in the winter…. Must do KITS in the winter..."
1 3 January, 15:33
Thanks Jennifer. 👍
It almost certainly isn't accurate but I won't be loosing any sleep over it. 🙂
4 January, 12:04
Luckily this dusty work in between didn't kill you (even if the mask looks like it tried hard), so now we see new marvellous scratch work 👍
15 January, 16:16
Thanks Robert and Frank. 🙂
It was quite a good mask Frank, it's now black on the outside but completely white inside. Mind you my entire workshop* is completely covered in a fine black dust which I haven't had the enthusiasm to clean up yet. Maybe tomorrow.....or the day after. 😄
* I call my workshop 'The Hutch'. I'm a veggie, which means I eat rabbit food, therefor.... 🙂
15 January, 16:28
Learning a tonne about scratch work, thanks for all the details. Everything looks amazing.
15 January, 23:05
Wow, impressive scratchbuilding. I love it. Nice to see you do something useful once in a while… 😂😂😂
1 16 January, 03:56
Thanks very much everyone for your nice comments.
I must admit that this part of the build was more irritating than enjoyable, although having said that it was certainly preferable to 'Useful work'. 🙂
1 16 January, 07:52
Thought I'd pop n see how Gorby is getting on with his scratch building 👀.
Very nice... Great job on the Jib 👏 very skillful to pull this build off the way you have.
Pleasure to follow 😀👍
1 24 January, 21:38
After the labour of love you did for your daughter, which of course isn't a chore being the loving dad you are, it's back to the salt mines to get some real hard work done 😀
That's some great scratch building on the jib, and the
Scammell is really looking the part.
1 24 January, 22:02
Thanks mates. 🙂
Hopefully there should be another update in the next couple of days.
25 January, 07:25
It's great what's being created again - the kit base seems to be a challenge.
Good succeed!
1 25 January, 09:13
Thanks Marko.
Of the two builds, I'm finding the kit conversion (the Scarab) to be more of a challenge than the full scratch-build (The Mechanical Horse & trailer) which isn't what I was expecting at all.
25 January, 09:29
Still progressing slooooowly. These tiny 1/76 bits seem to take longer to make than they do in larger scales. 1/48 feels huge in comparison and 1/35 would probably blow my mind.
This update means the Mechanical Horse is now complete, yaaaaaayyyy. 🙂
Eeeerm, except the tiresome colouring-in bit of course. 🙁
2 26 January, 11:49
I had a brush very similar to that one.Had it for twenty years,changed the head a few times and the handle thrice.LOL.
1 26 January, 13:05
gorby, your pic 73 reminds me an old joke:
A drunk man comes home and his wife is waiting for him with a broom. He asks her: "Do you want to clean or are you going to fly off again?"
Nice scratch work again 👍
1 26 January, 13:37
This is simply the master-class scratch work tutorial. Chapeau bas!
1 26 January, 13:53
True about the binmen, pick a metal bin off the floor to their back, everything was in it. No recycling back then. By the way that's a rather fetching brush ( Erm, Boom, Boom)
1 27 January, 11:52
Gets better every time 👏, the old bin wagon used to have a storage bucket on the side... remember they had brooms n couple shovels...for when the stuff fell everywhere,
I remember they used to come round the back of the house open the gate "which they never closed" and Cary the old black rubber type bin on there back, they used to hopp on the side of the wagon between streets " Before Health n safety 🤣" most bin-men were on the sick with bad backs before 50.
Remember the heavy rubber lids that said "No Hot Ashes"
No faffing getting it built 🤣 famous word's.
Great work so far 😀👍
27 January, 21:19
A funny thing happened to me the other day, this duck said. . . . . . . . . . . . .
28 January, 05:32
Thanks very much for your comments mates. 🙂
Mr D: I'm old enough to remember the predecessor to the black plastic bins, the galvanised steel ones – the ones which rusted and sometimes when they were picked up the bottom fell out. Thankfully they were replaced before I started to work nights because bin day used to be a very noisy business. 😄
Thanks to everyone again. 👍
2 28 January, 06:27
Such an interesting subject. I'm enjoying both your writing *and* watching the build. 🙂
1 28 January, 13:25
I was just about to write the same, love the humorous comments to the updates Gorby
1 28 January, 13:35
Aye aye, I think Gorby may have missed his true calling 😉
I love the garbage collection nostalgia. I got the feel for the British variety from Mr. Bean. 😄
28 January, 22:44
@Alec K. Try the Dustbinmen, you can get episode's on You Tube. A late sixties, early-ish seventies sit com. The cart was nicknamed Thunderbird 3. I think it was written by Jack Rosenthal , which I think he wrote London's Burning too.
1 29 January, 05:31
Hmmm... what iis this? Strange, unusual, I like it. Will have to check it out.
29 January, 05:36
Thanks for the nice comments mates.
Alec: When I left school in the late 70's there wasn't much call for someone who talked rubbish in Coventry. The politicians were mostly in London. 😄
Mark: I've never head of that programme.
Bas: welcome to the oddness. 🙂
1 29 January, 06:16
Gorby: Based in Manchester cast of characters included Heavy Breathing, Cheese and Egg, Winston and Eric. Cheese and egg was the gaffer of No.3 Gang, Heavy Breathing the lothario, Winston fervent Man City fan and Eric who was Welsh.
1 29 January, 08:52
😄 😄 😄
Oh, dear I'm not sure I can keep up the same standard of utter drivel. 😄
1 29 January, 16:53
Two buttons and a milk token , surely a man of affluence. Very nice scratch building Gorby.
1 2 February, 19:24
Apart from the amazing scratch building going on, i think the commentary near takes the cake, i check in every day for further updates and have a really good chuckle after work..really brightens my day, thanks @gorby!
1 3 February, 06:03
😄 😄 😄
Thanks all. I think my button business might struggle with two buttons per hour. Mind you, they're hand-made….Etsy here I come. 🙂
Michael: I can't guarantee the quality of my prattling but it's nice to hear my own flavour of odd is appreciated. Also, I like your little furry friend (No that ISN'T a euphemism 😄 ).
Although progress has been slow there was a bit of a boost yesterday and I'm hoping that something (hopefully not the kitchen) will get painted by next weekend. 😮
Now that's jinxed it hasn't it.
2 3 February, 08:07
A Wheely good job 🫣 , They would say it was a visual obstruction now days.
Keeping to the photos nicely 👍
2 3 February, 15:24
I'm slowly getting the the finish line. Someone pointed out this nice video about the Scarab which shows what a game changer it was (why does everything on YouTube have to claim it's a 'GAME CHANGER!!!!!' and when you watch it seems they've only found the cure for insomnia.).
Youtube Video
1 6 February, 16:28
These details you've made from scratch are simply unbelievably awesome... I suppose I should buy the same glasses (photo #99 😉
1 6 February, 17:25
Nice magnifiers! I have been using an optivisior in conjunction with 3+ magnification readers for years. The trick is not to let anyone see you wearing that. What magnification is that Amazon find you are sporting?
1 6 February, 17:58
Watching in awe, yet again. Really enjoying the ride Gorby 😀
Oh, and warm beer is an awful nightmare to us savage continentals 🍻
1 6 February, 18:14
It isn't the first time I've used magnifying glasses but these are a GAME CHANGER!!! 😄
Alec: I usually use the 3X magnification although these do go up to 5X – which may take some getting used to as it's like being drunk without any of the pleasure. 🙂
Jan: Obviously non Brits have to chill their beer to hide the flavour. 😉
Thanks all for taking the time to comment mates. 👍
3 6 February, 18:46
I went to Zenni optical website and got on the online chat. Told the person I wanted glasses with my short distance correction for doing close up intricate work with +2 magnification. He helped me adjust my prescription to this and they made me a set for $35 that are an amazing help.
2 6 February, 19:15
that seems a great idea Ben. gorby, those details are truly stunning.....
1 6 February, 22:52
Thanks mates. 🙂
Ben: The new eyes cost me £35. The built in LED light is a revelation as much as the better vision. The old mag glasses had a light but the extra batteries made it too heavy and very uncomfortable to wear so I didn't put batteries in it. The new one has a rechargeable battery built in which make it much more comfortable. Which is just as well as I need it for about 90% of my modelling now.
7 February, 07:48
Sorry about my tardiness in updating this album, blame my daughter. I keep telling her I've retired and should be leading a life of leisure but that apparently means nothing to daughters. I can't hold her entirely to account as I've been pruning a tree this morning. I can be a bit, errm, lets say "vigorous" when it comes to pruning. The trees probably think of it more as a near-death experience 😳 . Is attempted arborecide a thing?
Aaaannnnyyyway, the fun is over. Now it's time to suffer. Yes I've arrived at the colouring-in bit where I traditionally snatch defeat from the jaws of victory. 🙁
3 22 February, 16:24
Great job on the colouring and marking Gorby.
The captions to the pictures make it an even more enjoyable experience 😄
1 22 February, 16:42
No need to apologize, dear Gorby, the Feb 22 update was something worthy for us in the gallery to wait for... 👍 👍
22 February, 16:56
I think Mrs Gorby wouldn't be impressed if I sent our daughter to a different continent so I could spend more time playing with plastic. Might be worth considering though. 😄
Thanks very much for taking the time to comment Alex and Mark. 🙂
1 22 February, 18:04
Great scratch-conversions with this old Scammell Sacrab kit. Impressive work.👍
22 February, 22:33
You're welcome, she did it under her own volition (I think the smell of lacquer thinners drove her) a nice outcome on your Scammels too, brought back some memories of when I were a lad.
1 23 February, 10:23
Looks great.... should be very proud 👍 you put a lot of work in and created something very unique... Great model work 😁👍
1 23 February, 21:17
Fun to follow, fun to read, fun to watch. I dare say: the jaws of victory are still open...
5 24 February, 12:27
That level of MICROSCOPIC scratch building is OBSCENE! I'm always at awe of your projects (including the roller of death)!
1 26 February, 21:31

A couple of months ago Jan said something and it's taken me this long to think it though. Thinking isn't a natural state for me, when it happens the neighbours complain about the noise. The idea for the perfect extra vehicle jumped into my head in the early hours of the morning. This project is invading my dreams! 😮
I'll let you try and work out what it is as I take you though the build. A clue: Most people in Britland would have seen these on the roads, but not one of us wanted one.
1 2 March, 16:13
Great job on the car of your dreams Gorby, love the Robin, the car only the British would build.
You keep amazing me with your scratch building marvels, and I thoroughly enjoyed the comments 😄
2 March, 16:23
Thanks Jan, and thanks for the idea which I sort of took and twisted a little ( incidentally, it isn't a Robin 😉 ).
1 2 March, 16:34
Now, after reading your funny captions for a long time, I'm up to date again. For a non-native English speaker it was sometimes difficult to understand, but thanks to the great help from DeepL I was able to giggle a few times 🙂
At first I thought, and you would definitely be able to do this, that you were folding a Trabant (that iconic East German vehicle) out of cardboard true to the original!
2 March, 16:45
Ah, I just found out it is an AC invacar, never heard of outside of the British isles I think? 🤔 Still, great scratch building!!
2 March, 16:48
That Invacar of yours is a masterpiece of scratchbuilding, Gorby! I am astonished!
2 March, 17:12
Thanks all for your nice comments.
Jan: These monstrosities were very common and infamous on the roads here in Britain particularly in the 1970's.
Sorry Frank, I am prone to quite a lot of antiquated Britishisms. I like to keep them alive well beyond their expiry date. 😉 I think the Trabant would sue if it knew you were likening it to the Invacar. 😄
Thanks again mates. 🙂
1 2 March, 17:26
Unbelievable... You turn for just a bit your attention away from the Scammel brothers... and Gorby appears out of the blue with a finished scratched 1:72/1:76 Invacar...!!! You are on fire, mate! 👍 👍
1 2 March, 17:42
Thanks very much Alex.
Maybe it's just that I have difficulty focusing on one subject. 😄
2 2 March, 18:06
I can't believe you scratch built everything in this album. I have never heard of an Invacar before today, but now I feel like I know them.
2 March, 22:04
Thanks Jennifer I'm glad you like it/them. Don't forget I can't claim credit for the Scarab cab as that was the basic kit which started all this nonsense. 🙂
Incidentally there were quite a few different types of Invacar based on a similar design. This is the one I was mostly aware of in the 1970's 80's.
3 March, 08:03
Hi Gorby the Invacar looks 👍 great .....l remember them parked outside the P.O on a Monday morning.... Motorcycle handlebar,s , they did a great job holding up the traffic 🤣.
Like the gorilla glue headlights ..... good little technique 👍
Nice your keeping the memories alive 😃👍
1 3 March, 16:11
Thanks Mr D. Now it's difficult to believe these death traps were allowed on the roads.
I was chatting to the heating engineer today while he was servicing our boiler. He was saying he needs a hobby which isn't too expensive. When I mentioned modelling he asked to see my models and was blown away that it's possible to build things like the tiny Invacar from scratch. He ended up late for his next appointment as he wanted to see my whole collection. 😄
4 3 March, 16:44
@Jennifer it was a part of Socialism..... a dirty word in north America 🤣
The french Invacar made these look like a Bentley 😂 l think in the 80's the french would restrict you down to an Invacar licence for Drink driving.... Definitely a punishment 😮
2 3 March, 19:05
The one in East Germany was also for sure an attack against the health of the driver!
commons.wikimedia.org/wiki/Category: Simson_Duo
Please remove the blank in between - otherwise a smiley is generated and destroys the link 🙁
2 3 March, 19:08
You should definitely consider building a bubble car in future then Gorby..... keep an eye out for right blister packaging or make that vacform, you can get a small dental on for about £90 I've seen a few Mates use.
Time, money,time, money.... never enough to fulfill the modeling dreams 🤣
3 March, 20:06
I just found this on AliExpress:
£97.19 | Dental Vacuum Forming Molding Machine 1000W Former Thermoforming Tool Mouthguard Forming Machine with Steel Balls
a.aliexpress.com/_EzfnBIo
3 March, 20:07
That is hilarious! I had no idea about VSP's. It's a good idea, though.
3 March, 20:08
£90!! Do you think I'm made of money. 😄
No, I want to have a go at making a vac forming machine myself….and if I screw that up maybe then I'll look for the key to unlock the padlock on my wallet. 😄
2 4 March, 06:57
I have to say, to whip out that little car from scratch over a WEEKEND is amazing to me. That's pro scratch-building skill in action 👍
4 March, 13:44
Thanks Alec....although it is significantly less amazing that it took just over a week rather than a weekend. 🙂
4 March, 14:41
pridal nový fotoalbum.


3 28 February, 14:21
pridal nový fotoalbum.


55 25 March 2020, 16:59
Started assembling the crane and steel beam of the lasercut kit. This is a wonderful kit, really looking forward to that base building 🙂
25 March 2020, 17:02
Thanks mate! No - just clicked together straight out of the box to see what this kit has to offer 🙂
26 March 2020, 05:24
Thanks! I Just bought the crane and the steel beams as I'm going to Do the building structure with styrofoam. All the parts I'm using from the kit are really great. Perfect matching, easy to assemble and lovely detailed, thumbs up!
26 March 2020, 12:55
Thanks Spanjaard and Brian, much appreciated! @Brian the wall does not come from the kit, this is scratch build from styrofoam. From the kit I use the crane and steel beams, which is indeed very nicely.
16 April 2020, 04:12
Very nice detail work and paintjob on the lamp and pipe 👍
Like the detail on the wood Window😎
16 April 2020, 22:05
Nice weathering on the wall. What did you use to make this wall?. Also like the paintjob on the crane motor 👍
26 April 2020, 17:17
Thanks mate! I use Depafit for the walls. It´s kind of styrofoam/ insulation board which is available at the hardware store. Very nice material to carve and easy to paint. Carved the damages with a pencil. Then lighlty sanded the whole surface. Applied a very thin blackgrey wash. Then painted different sand and greyish shades all thinned down to a wash.
27 April 2020, 04:44
Very Nice progress coporado. Your scratch work on the locker door and wiring is Great. 👍 Keep it comming
13 May 2020, 21:29
Thanks gentleman, much appreciate your encouraging comments! Mike, Stefan welcome here and good to know you´re watching!
17 May 2020, 10:31
Spanjaard, Rui thanks so much for your kind comments! Prepared the concete floor in order to attach the walls. Scratch bulid fire basket as little detail for the outside
20 May 2020, 16:13
Finaly, the walls were mounted to the base and all the bathroom stuff was attached.
24 May 2020, 05:21
First class scratch building especially the TGA (Technische Gebäude Ausrüstung). I love your details in the "restroom" (newspaper, Bürste and 3-Lagiges!) and electrical installation included black distribution boxes (Bakelite!!). 🙂
24 May 2020, 07:29
Thank you Bernhard, happy you like it. Was quite hard to sacrifice 3- Lagiges for the dio in these times 🙂
Made some progress with factory utilities.
30 May 2020, 16:15
@Bernhard yes Bakelit switch, eagle eye 🙂 I remembered These from my grand Patents home 🙂
30 May 2020, 16:22
More details for the factory. Had a nice welder set, unfortunately without cart. Scratch built this one from plastic profile, wire and some remaining parts of a completed kit.
1 June 2020, 16:25
Nice workbench, Mate 👍. I would go for a darker tone ir color on the wood top, just a two cent😎
9 June 2020, 20:11
Thanks Christian and Rui 🙂 Rui the workbench still needs weathering, this will tone down the wood color to a darker shade
10 June 2020, 05:06
Yes, i agree Mate, i thought it was done 👍.
But as you mention that... You know what i thougt when i saw photo 45, for the first time? It would be interesting to creat contrast between the Bath Room floor and main workshop floor, maybee with some kind off chess ceramic floor??? But i thought it was too late. Anyway just a two cent opinion. I'm not famliar with the 40s tank workshops, but bath rooms usualy have that kind of pavments and walls to ease the cleaning...😎
10 June 2020, 12:30
Hehe Rui I had the same idea with the locker floor 🙂 Got these floor tiles --> 3D Floor Tiles - Design A (Reality in Scale 35111, 1:35) Putting them on the floor or even on the wall it came out like a hotel or private bath room. They looked just too noble for a factory locker room. So I discarded the tiles and left the floor in it´s concrete look.
")
12 June 2020, 04:39
those desks look amazing now! and the touch of the panzer drawings is sublime!!!
12 June 2020, 08:25
Ohw yah??? Hehe. But that ones where very expensive tiles and with diferent formats, (small pieces for the corners??? That's for rich people mansions or chalés. 😄 i was thinking something simpler pathern more like, One squared black Shaded /one square white... with some craks. Or only white if on the walls😉
Hey Mate, I agree with Spanjaard 👍
12 June 2020, 18:56
Thank you spanjaard, thank you Rui, much appreciated and happy you like it 🙂
@Rui Unfortunately I didn't found any apropriate tiles. Tried to scratch build with styrofoam and styrene but the result Was rather poor. So I left it with the concrete.
Completed the workbench with adding more Tools and some tank parts. The machines got their wiring and were plugged to the Power supply.
22 June 2020, 04:37
Only seeing this now. Incredible work. Just amazing. The detailing and treatment is perfect. Following for sure.
23 June 2020, 00:46
Thanks for your kind words Rui! Browsing through some pics of old factories I discovered carts used for carrying small stuff and loudspeakers installed. Found these would be nice detail for my dio. Some residues, plastic sheet and sheet metal helped to scratch built both.
23 July 2020, 17:03
Daniel, Rui thank you for your comments. Finally I completed the missing part of the crane to lift the Panzer IV turret.
6 August 2020, 05:26
Such an amazing artwork, so realistic 👍
Love it how you scratchbuild all those little details
17 January 2021, 16:45
Started the figures. To achieve the look and feel for the scene, some kitbashing was done. Heads come from Hornet and are just lovely in in their sculpting.
27 January 2021, 16:10
poor guy on his knee is thinking he is going to see snowy landscapes soon😉
27 January 2021, 16:12
Hi Sascha, how did you paint the walls and the floor? Looks realistic. Nice weathering
28 January 2021, 06:44
Thanks mates! @Spanjaard: Bad day for the youngster, he´s in charge for the beer later 🙂
@Norbert: basic material is Depafit, a styrofoam type. Available in your DIY store.
It´s more stable than Styrodur, comes with a lightly structured surface like plaster and can be sanded.
First I carve any structures like damages etc.
Next steps apply to the the whole wall:
First coat with silver grey, once dry another coat with a mix of 50/50 silvergrey and pale grey is painted. Once this coat is dry a black wash is done, to create a good contrast for the details. Therefore the wash should be pretty thin to keep a good balance between base color and black.
Once this has dryed properly, the whole wall is sanded with 600 sanding paper. The sanding brings variation into the colors, as the black is removed more or less in certain areas and releases the base color.
Finally certain areas receive detail painting using a less thinned black wash for deeper areas such as cracks. Base color, white grey and any other colors at your desire are used to highlight certain details, like edges of cracks.
I found this technique in the "bible" of styrofoam modeling by Emmanuel Nouaillier. Absolutely worth having that in stash. --> amazon.de/Perfekt-bi..tungen/dp/3837511634
28 January 2021, 12:29
Yes very realistic look. Thanks for the detailed description.
28 January 2021, 16:06
Very Nice plumbing 👍 😄 Nice progress.
The figures look good but the one with the head looking upward looks a bit forced. I think the eyes could do part of the rotation not the head, just my two cent, Mate 🤔
28 January 2021, 20:47
Thanks Olivier! I´m quite happy with this technique as it applies to all scales and is quite easy and cheap, achieving nice results.
@Rui: Thanks and you´re right, the position of the head brings pain in the neck 🙂 I cut the necks a bit and rotated the heads to a more healthy position 🙂
29 January 2021, 05:22
I'm glad that my humble constructive opinion matters . Thx 👍
IMHO, one thing that i have noticed in the modelers who use these extremely well detailed heads is that they leave the necks too long and end up ruining their very realistic appearance even when they are excellently painted😎
29 January 2021, 12:02
@rui the proper length of necks is a tricky job. Lots of factors such as age, constitution, body shape etc need to be considered. I struggle here as well figuring out the best solution. Though I appreciate any hints 🙂
30 January 2021, 06:40
Yes, I believe you, I was generaly speaking, Imho, many fail to adress that issues well.
Your two guys are looking good now 👍 keep it coming😉
30 January 2021, 11:56
Checking images of the original tank workshop I encountered the crane was operated from a platform mounted to the crane bridge. From residues and plastic sheet this one was scratch built.
12 February 2021, 17:05
Ganz großes Kino was du hier zeigst, Wahnsinn die Details wie Steckdose, Bohrmaschine usw..
12 February 2021, 18:13
Dankeschön Dietmar!
Olivier thats true, the more more progress it gains the more Detail comes to mind. Hope to complete that one Day 🙂
13 February 2021, 07:03
Again, Nice scratchwork 👍 detailing makes the diference. keep it comming Mate😉
13 February 2021, 12:31
Thanks Rui! Honestly, detailing is the most enjoyable job, you know what I mean - flipping through your Marder dio pics 🙂
Figure conversion is done so far. Next is priming and corrections.
14 February 2021, 16:18
Finally, started the painting on those figures. Skin parts are most challenging, so this is the task for the next days/ weeks. First head completed, painted in acrylic.
26 February 2021, 12:13
Seriously cool work all over - and excellent skin/head-job on the first figure too! 👍
Pose & Expression suggest this could be a German WW2 version of American Chopper? 😄
26 February 2021, 13:23
Yeah, only with tanks instead of bikes - quite an idea Slavo 🙂 ! Your own bespoke custom panzer III....
I wish I could paint figures like that, excellent !
26 February 2021, 13:53
Thank you for your encouraging comments, mates! Your patient attention to this neverending project is much appreciated!
@Slavo: For an American Chopper he definitely misses a beard, though it´s only a German Chopper :-D
Next face completed during the weekend. This one was not going as well as the first one. As the expression is different to the first one, the surface and details are much smoother. Found it quite tough to place highlights and shadows at the right spots. Challenged my patience seriously.
1 March 2021, 13:22
Daniel, Olivier, Rui, Xerxes - many thanks mates! After a long break I put some color on the next face. Some corrections and blending still to be done.
13 June 2021, 14:36
Slow progress on those figures, 5 of 8 faces painted. Keen to have faces completed in 2021 :-D
9 October 2021, 14:40
Stumbled across this album for first time today. Amazing crafting skills demonstrated from beginning to end. Blown away by your great eye for realistic detail, and how you create atmosphere. Brilliant 👍👍🙂
9 October 2021, 15:50
Rome was not built in one hour, and neither your amazing dios. No rush🙂
9 October 2021, 18:13
Thank you for all your kind comments, mates! Started to put some paint on that clothing. Some more blending on the shirt is neccessary. I recognized that Khaki isn´t very handy when it comes to light and shadow 🙂
19 March 2022, 16:41
Not sure why I only seen this one now
What a great job
Love all the detail
A big job
Amazing
19 March 2022, 16:58
What an incredible project!
I'm in awe at how well those figures are painted. You should give them names because they look like they might come alive. 😄
4 April 2022, 14:39
Thanks gorby and Tom!
@gorby: giving those figures names might end up in psychologic therapie for me in case my wife will find out 🙂
5 April 2022, 10:22
Wohoooo this one is still alive 🙂 Time to blow off the dust and get it finished. 2 more figures were painted the last days - 3 more to go. Just some shots with the painted figures to give a brief idea where the journey goes 🙂
1 5 February, 15:29
Fantastisch, wie Du die Figuren bemalt hast. 👍
Von welchem Hersteller ist den der Senior im Blaumann (Bild 126)?
6 February, 11:52
Dankeschön, Christoph! Die Figur selber ist glaube ich aus einem Miniart Set. Alle Figuren habe Köpfe von Hornet bekommen, daher ist auch der senior Kopf. Ich meine es ist einer aus dem HH31 Set.
6 February, 21:04
Some modifications on the tank were conducted in order to achieve more historical accuracy and of course make the model more interesting 🙂
15 February, 17:11
A cabin was needed for the guy operating the crane. This one is going to be attached to the bottom of the crane at a very late stage. Made from plastic sheet and spare parts.
19 February, 14:00
Thanks bud!
The last steps were all about the crane´s wiring and making it carry the tank turret. The wiring was made from, guess what - wire 😄 I used parts of an old telephone cable. The harness was made from anchor chains, 3D printed hooks and of course wire.
4 March, 13:54


pridal nový fotoalbum.
54 snímky
The most demanding build I have ever done!
1:48
Now the wings are finally added.


projekt: McDonnell XF-85 Goblin

57 20 February, 21:14
I was so crazy to start another build while waiting for now decals to arrive (for this other project).
That is the most demanding beast I ever tried! Not because it is bad - no, the opposite! A full resin build, cast and 3D printed parts, PE and more.
Some guess work regarding type and kit is allowed - so I do not link a project yet 😉
I hope this will generate some interest ...
20 February, 21:32
Another project! YES!! But careful, don't let the shelf queens get restless…. Hmmmm, what the heck is this?! Something US, judging by the cockpit color. And it looks like an ejection seat maybe, so something with a turbine engine??
1 20 February, 23:02
- US: check 👍
- ejection seat: check 👍
- turbine engine: check 👍
That is still a big list. US jets are 244 topics here. Ok, not all have an ejection seat.
20 February, 23:15
Hm, that looks a lot like the cockpit of the XB-85 Goblin and could therefore be the very good resin kit from Halberd Models 😉
1 21 February, 07:50
I'm about to start working on a kit with lots of 3D printed resin so it's nice to be able to follow a project by someone experienced 😊
1 21 February, 09:43
Welcome to all!
Oh yes gorby, I can't resist! I have already x started projects, x+1 one doesn't make a big difference 🙂
And Bingo: yes, you are all right about the Goblin 👍 That is the mother of all egg planes 😎
It is a great kit, but I think not an easy one!
- You should think twice (or better more often) where to cut the resin parts from the cast! I may have done it wrong in some areas.
- sometimes it is hard to see, where the part starts or the cast ends which brings you in trouble later with fit issues
- some 3D printed parts are very very filigree, you don't know how to hold or handle. I'm not a 1:700 ship builder!
- at some points the manual do not show clearly the correct place of a part. After checking reference pics (a must!) I realized my guess was wrong. If you add it to the wrong place you will get in trouble later for sure.
- there are some very tight fits, especially with cast parts. Best is again to check reference pictures if you really reached the final position or a part is not yet deep enough in its place and you need more cleaning of seams.
I will finish the Vega before this beast when the new decals arrive.
2 21 February, 10:45
Some more pics are added showing the prepared cockpit walls. The first inner part is also prepared, the front of the jet engine.
I forgot to mention that there are nearly no color information regarding cockpit and so on in the instructions. There is a colorful 4 side view showing decal and stencil places.
21 February, 19:03
" I have already x started projects, x+1 one doesn't make a big difference "
BWAHAHAHAHAHAHAHA... spoken like a true model builder~!
1 21 February, 19:16
Thanks mates!
Now some progress on the carriage, which is part of the kit (but I had to modify it).
24 February, 18:55
The exhaust and intake look remarkable. Getting all those PE blades in the correct place can't have been easy.
1 1 March, 15:13
Following. I like the 3D-printed foot holders. The metal pins are also a nice detail. That exhaust and intake look like they were a challenge to put together. Where did you get this model?
1 1 March, 15:25
Thx mates!
Yeah gorby, that was challenging! See also pic 17.
Jennifer, those food holders was unbelievable filigree, as most of the 3D parts! You really don't know how to touch for cleaning and handling.
For exhaust and intake I followed the manual to cut parts, but made some wrong decisions. This makes it later even more complicated 🙁
I ordered this directly at Halberd, but they sell it also on ebay. But they seems to have some production issues with power outages etc due to Russian invasion.
But I recommend to think twice about it: it is not cheap; it provides nice details, but it is on the other hand some kind of "short run technology". So I had to do a lot of dry fitting and surgery to get things right - but all on resin parts! As I said, that is the most demanding build I have ever done! I will show more soon.
2 1 March, 15:39
Very nice work! I love the bizarre stubby shape of the Goblin. A real life egg plane.
2 March, 07:01
I least expected this flying egg with wings on your workbench 🙂 I haven't seen it built yet and I'm looking forward to a master piece from your hand.
2 March, 07:16
Thank you for your time to leave a comment mates!
@Alec It was? It is! Two aircraft were built, 6023 and 6024, and both are in museums.
The kit provides decals for the 6024. Regarding the details this is more complex. Both looks different today, the kit is different compared to both as they are shown today. And even the b/w photos shows many different things: with or without winglets, with one skid, (kit option), with two skids below the wings, the kit has two pitots on the wings - the one in the museum not. And much more!
Yes gorby, me too! That's why I called the project "The mother of all egg planes." 🙂
@Bernhard I looked around and also have not found it built yet, also not in the bigger scale. And I think I know now why as it is definitely not an easy walk!
Your interest is fuel for motivation 👍 so I will add more pics.
2 2 March, 09:27
Welcome Erik!
On evil bay even more: https://ebay.de/itm/167316587705 but I think this includes import taxes. The 1:32 kit was even more, but is not available now.
When I ordered mine it was no more available within two days - all sold.
The offers on evil bay in Asia are going crazy already: https://ebay.de/itm/156691540922
But as I said, it is not the price tag which makes me nervous .... I hope I'm able to finish a kit this time!
2 March, 10:00
Welcome David! Nice to know you are watching.
Now with teaser of the whole bird 😉
1 2 March, 12:13
Love the teaser, wasn't sure what to expect but that does indeed look like an eggplane.
1 2 March, 12:40
I'm a little late, but I will definitely watch this talent show diligently! (and the topic is fantastic!)
1 2 March, 15:12
You could always do the canopy when it smashed into the arrestor hook and belly landed on the desert.
1 2 March, 21:09
David, I added a picture of the emergency landing skid for you. I will not mount it, but the empty mounting brackets as PE. So no landing in desert, but into a museum.
Welcome Ben, nice to see you here!
2 March, 22:10
Fantastic job! No doubt you are an artist, bughunter!
I'm following with close attention and anticipation of your next progress.
1 2 March, 22:21
Wow, Thank you both! Now I need a red face smiley .
There is not much difference between pic 26 and 46. I masked the rims and primed/painted the wheels. Some black paint in deep holes and on the food step. The big boost comes form a simple wash with oil paints as this brings up the nice rivets and other details on the cart.
And since you asked so kindly I added more progress pictures.
I stepped on the gas as we have our next club meeting in about a week and our annual show soon after that. It would be great to have the model ready by then!
1 2 March, 22:50
Ben, I collected a lot of pictures from walkarounds, museum pages, Flickr and so on.
I must say (even I have only decals for the 6024) the 6023 in the "National Museum of the United States Air Force" in Dayton, Ohio is in a much better, more original state. It uses a original cart. See the gallery with 21 photos on the official museum page: nationalmuseum.af.mi..onnell-xf-85-goblin/
The 6024 in Nebraska is on a simple steel frame, no winglets, the hook looks strange. Seems to be polished, without all the nice stenciling. Seems to be trimmed for a nice look, but not very original.
2 3 March, 00:27
Oh the National Museum of the United States Air Force is so good. I try to go at least once a year. It's just a couple hour drive from me. Beyond worth the price of entry too…which is $0. Beautiful work on that cart Frank. It looks the part.
2 3 March, 03:21
After the "Flying Flea" another interesting dwarf has appeared on your modelling table. 🙂 👍
I am particularly interested in this project of yours. Firstly because of the choice of model, but mainly because it is a resin kit with 3D printed parts. As I have several resin kits in my stash and have recently added two 3D printed models, this project is a great inspiration to me.
1 3 March, 09:54
Thank you mates and welcome Ludvík!
Here Halberd made a mix of cast and 3D printed parts. Only the very small ones are 3D printed. I checked both kits (it is also offered in 1:32):
- my small 1:48 one has 38 resin parts and 16 3D print detail parts
- the 1:32 kit 48 resin parts and only 6 3D print detail parts
That is not my first resin kit as I build e.g. kits from LukGraph (also combination of cast and 3D printed, but they move to completely 3D printed kits) and old resin cast kits from "SPIN Model" and "Alliance Models". Here I replaced small parts often with metal and wood. You will find those in my Projects, more to come.
I have not build a jet yet and that is somehow a different story (compared to my usual biplanes) with clear parts, surface details and more.
The most important thing with resin kits is a useless Tamiya Extra thin glue - you have to use CA or epoxy but it brings us many interesting kits which will never made it into a plastic kit.
1 3 March, 10:49
I was hoping for a bit more interest at least from the mates who have the kit in their wishlist or stash. But it is what it is.
More pictures ...
Has anyone ever polished such cast resin canopies? It might have been a possibility, but without a backup I didn't dare.
3 March, 16:42
Worst come to the worst, if you damaged the canopy you could always do it as the Goblin which smashed the canopy trying to reattach to the bomber. 😄
Well you certainly have the attention of one member with it in their wishlist. 🙂
1 3 March, 16:48
I am watching with interest, although I don't currently have anything in my wishlist that is resin.
1 3 March, 20:10
Jennifer, I think it is a good way to start with resin aftermarket accessories for your models to get a feeling for this material. There are big sets for replacing all in the cockpit or a engine with cowlings and parts around it for example from Eduard or CMK. If you can handle that than there is no more a big step to tackle a full resin model. Due to the 3D printing we see more and more accessories and kits in resin.
1 3 March, 20:25
gorby I know, you are always a big supporter 👍 And I hope that this particular wish on your wish list will be fulfilled one day, by whatever means.
1 3 March, 20:30
Even though I don't have Goblin on my wishlist, you still have my attention too. 😉
1 3 March, 22:08
I assembled a MPM Goblin long time ago and I have Special Hobby one in my stash. Surely, I am watching this build with utmost interest, Frank 😉
1 4 March, 06:29
You're always following me, my friends! 👍
Robert, the MPM is 1:72, the SH 1:48, right? If you prefer 1:144 there is a add-on in this Hobbycraft kit: Convair GRB-36 "FICON" (Hobbycraft HC1273, 1:144)
Please ee also: modellversium.de/gal..blin-hobbycraft.html
")
1 4 March, 09:05
Halberd announced a Limited Edition (100-120 kits) of the Goblin kit in 1:24 later this year 🙂
1 4 March, 11:06
Exactly - MPM is 1:72; SH is 1:48. It will be instructive to compare the latter with your build, I presume.
4 March, 11:51
I downloaded the manual of both kits at the very beginning of the project since Halberd do not provide color infos, just for checking beside the reference photos.
4 March, 12:16
I certainly would not miss bughunter build! Those that do are doing so at their own loss 😉
On that canopy: did you apply Future? That should help with clarity.
4 March, 13:51
Thank Alec 👍
No, I have not applied, because I heard some bad things (and read warnings on commercial cut masking sheets) about masking on a canopy with Future. And now it is painted so too late.
But on this model this is no problem: the front shield is mostly covered by the hook and not very visible. As I will show the main canopy in open state and it is open to the side, it is not very prominent too, additionally covered by the black ventilation pipes. And hey, the thing has been in the museum for more than 70 years, so the canopy is no longer clear! 🙂
And hopefully I can show some metal scratch work later that my build logs are known for!
1 4 March, 14:17


pridal nový fotoalbum.
149 snímky
F-4J Phantom II Black Bunny WIP & finished pictures
1:48


projekt: F-4J Phantom II Black Bunny


 10+
10+ 70 10 August 2016, 23:02
Give it a try! I did some research for a future F-4S and an F-4F build.
16 August 2016, 18:02
Do you mean the slats on the inboard wing? So between the foldable part and the fuselage? Or the ones on the actual foldable parts?
16 August 2016, 18:11
Another question: Are you building the Black Bunny as an F-4J or an F-4S? The J only had inboard slats, the S had both inboard and outboard slats.
16 August 2016, 18:19
I'm just browsing through your album and saw you are using the Wolfpack Hard wing flap down set; F-4J it is! The F-4J has no outboard slats. Be aware that contrary to the trailing edge flaps the slats were rarely down when the plane was on the ground. Only for maintenance and special occasions. Under the wings you'll find three hinges per side. These hinges cant the slats in a forward/upward angle as to create an opening between the slats and the wing to keep the airflow over the wing in high lift manouvres. At the moment I don't have my external hard disk with me but I'll try to link some internet sites which were/are helpfull to me. Just a moment...
16 August 2016, 18:40
forum.largescaleplan..pic=44604&page=2
arcforums.com/forums..php?showtopic=224033
These articles show you all the itty gritty details. It's a long read but worth it every page!
16 August 2016, 18:49
Hi Hagel
first of all thanks for the help. ok, i am a bit confused here, probably due to my own ignorance, but also because the instructions from Wolfpack are also not clear. let's go step by step
yes, you are right, F4J is what i was trying to do (probably taking some licenses in regards to accuracy i am afraid....).
In any case, i have the two areas encircled in color in the picture. in the yellow area, we can see what i have already cut and the leading edge flap (not slat, i hope i get it right now), this will be (since i already cut the wing) down.
now, in the foldable part, i can choose to leave it as it is, or cut the leading edge, and use the part form the wolfpack kit. that will show this part, also down
i have the following picture (thanks Rex) that shows both down, in an N version.
[img1]

the only option is to do the surgery and use the lower one, am i correct?
again, thanks for the help, it seems now that i need it even more than i thought 😉
16 August 2016, 20:29
Oops... As I read your other question over here I realised I am wrong in telling you about those three hinges... Those were also only on the F-4S. And late F-4E's, F-4F's and F-4G's for that matter. Just stick with what other members answered in your other item.
16 August 2016, 20:33
thanks Clifford. pity i am advancing very slow. and progress will probably be 0 in the next week or two....
16 August 2016, 21:10
Yep... I'm affraid some cutting is on order. 😉 Rex provided you with a very nice picture. In this picture you can see that the flaps just fold down, nothing too fancy. Good luck and I hope to see some pictures!
BTW time to update my own RF-4E album...
16 August 2016, 21:34
Alea iacta est 🙂
cutting is done. thanks a lot for all the help. next update will take some time. i will be looking forward seeing your RF-4E Hagel 🙂
16 August 2016, 23:00
by the way, i have repainted the instrument pannels... again. i think i have done it 3 times already. this time, with brushes rather than markers. even if they are suppose to contain acrylic paint, they do not seem to really be permanent. more complex with the brush, but i think it is better. no pictures of that yet, sorry.
16 August 2016, 23:02
hah, they sure end up looking all chopped up when we add improvements to them, don't they? Looking forward to seeing this when you get back to it.
17 August 2016, 02:13
finally some time to work. cockpits are almost done, a few little details, choose one, and maybe this weekend i can finally glue the fuselage from once and for all 🙂
22 September 2016, 23:38
Impressive work so far Spanjaard, that cockpit looks really good 👍
23 September 2016, 06:14
Those pits look divine, I hope your going to use the Aires forward wheel well bay or you could find yourself in a world of pain.
23 September 2016, 06:57
did have the same problem with my albums, you can add everything you want, they don't show up in the feed.
It's a pretty nice (understatement of the year) cockpit... 1 for testing and one for real... 😉 I wish I could achieve the same results...
23 September 2016, 06:57
Wow, looking great! How did you make the yellow-black on the ejection handle Loops?
23 September 2016, 07:01
Using the Aires forward wheel bay underneath the Aires cockpit makes the cockpit fall in place perfectly.
23 September 2016, 07:07
Great work on these cockpits, especially the seats look very authentic 👍 !
23 September 2016, 07:37
thanks a lot everybody 🙂
@Michael, yes, i am using the aires wheel-bay, but I had to sand everything until i could see through 😛 it is very, very tight space. i will have to sand a bit more in the sides of the cockpit for it to fit.
@Holger, y simply painted in yelow, and then make the strips with a very thin brush, 4-0 or 5-0, not sure.
23 September 2016, 17:51
@Bart, the idea was to make just one, but the carpet monster took a part of it... never to be seen again. so i ended up buying a second, to get the part i was missing... then the piece in the new set did not match the old one, so i started to paint the second one, and though about scratch building the missing part usign the one of the second as a model.
Then i realized that the film for the dials was faulty, so i contacted Aires about it.... and i must say that the support of Aires was SIMPLY EXCELLENT, they sent a replacement for the film, and they even throw in the piece that I lost (no fault of theirs), with no cost from my side. So BIG THANKS TO AIRES that is realy support. and really fast by the way.
so i ended up with too complete cockpits, both partially done... so I am finishing both. I will use the best one, and then I have two options. I can buy a second Hasegawa F-4J,. or maybe take a Phantom that I did maybe 25 years ago, remove the paint (what a horrible job i did then) and rebuild it top to bottom, adding the finished cockpit.... will see.....
23 September 2016, 20:02
Thanks KlausH, your pics on F-4E Phantom II - 57th FIS Kevlavik - | Album by KlausH (1:48) were certainly a great inspiration 🙂
24 September 2016, 16:12
Those cockpit are just breathtaking! I realise that I have a long way to go... 😄
3 October 2016, 17:26
thanks Marc, for once i am happy with those cockpits (after painting them three times each 😛) but the wings unfortunately are not going to good. Due to all the surgery it was hard to get them to join in the right way.... so I did use some pegs and some carefully heating from hair-dryer, but that created some damage that it is being complicated to repair.... it will be a pity if the outside does not match the quality of the cockpit. on the other hand, i am learning a lot with this kit.
3 October 2016, 21:23
This is looking fantastic so far... That cockpit is really awesome!
4 October 2016, 12:38
thanks Marc for your kind words and encouragement. and thanks Michael, if i could achieve just 25% of what you have done with your F3H-2 I would be a really happy modeller 🙂
4 October 2016, 19:03
Oh you are well on your way. Your cockpits look WAY better than mine. I am really looking forward to see this thing come together.
4 October 2016, 20:16
thanks Michael and Elias, I will do my best and I hope I can keep the expectations 🙂
4 October 2016, 21:57
thanks a lot. no much progress lately. wings attached, and lots of putty and sanding done to fix the damage in the wings. new pictures will be added before the primer is applied.
25 October 2016, 22:13
finally some time to work on it. mistake with primer (Mr Surfacer 1500), but i managed to remove it completely, and tried with Vallejo Surface primer. it worked exactly as i wanted it.
now, i will leave it rest for 24/48 hours. I guess i will paint it all in back X-1 from Tamiya. leave it for a couple of days, then mask it and start working on Alclad in the tail section....
14 November 2016, 00:37
I hope the vallejo primer will stick to the model when you are spraying. Is looks nice when applied, but it tends to peel off whenever you apply some tape or blutack... Mr surfacer is a lot harder to spray (try cellulose thinner), but it stick to the model whatever you do...
14 November 2016, 09:15
I agree with Bart. You can thin Mr surfacer with Gunze cellulose thinner.
The Vallejo primer looks nice, but repairing any "forgotten" spots is nearly impossible.
My primer of choice is the grey primer from Zero Paints, a car modeling brand.
14 November 2016, 17:18
Spanjaard, I just noticed you (re)scribed the Air Force Inflight Refueling Receptacle on the spine, the multiangled panel. This is only present on Air Force birds, not on the Navy F-4J and should be filled. This is a good test to see how well the Vallejo primer reacts on reapplying... 🙁
14 November 2016, 22:49
ok, this requieres a bit of investigation. I did a test, with some masking tape (straight from the roll, full power) place is in one of the pieces, pressed it hard, remove it and the primer did not present any problem. no peeling or anything.
On the other hand, when I applied Mr. surfacer 1500 it did not look good, kind of grainy, that is usually a sign the that paint is drying before hitting the surface. in fact, after maybe 12 hours, a piece of kitchen paper rubbed gently had plenty of black dust. that is not how it is supposed to work
I have been looking for reviews around, and either people love this Vallejo Primer or really hate it. In regards to Mr Surfacer, it was almost impossible to get it in ESM a few weeks ago (i think i got the very last bottle there, and i was quite lucky). it sold out everywhere. if everybody is crazy about it, must be for a reason, but for me it certainly did not work. again, I used it first for the time ever, and certainly not thinned.
It seems that temperature/humidity can have a big influence in this cases. 22 degrees at home, Amsterdam humidity is usually high. am I just being lucky that one of them work with the weather conditions at the moment?
any thoughts?
14 November 2016, 22:57
I had some problems with the zero paints primer (white) too.. you spray it.. it looks superb, you can scratch it with your nails, it sticks to the model. first layer, the same you can do what you want. After a week you put on some masking for a second layer... when removing the masking, all masked areas were back to the bare plastic, all layers came off at once... For Mr Surfacer, it can be hard for your seals in your AB, because it is thinned with cellulose thinner, and that is very corrosive for seals. it can also be a pain to find the right dilution to be able to spray it... and it smells ... but it still is my favorite
15 November 2016, 10:02
thanks Patrick i did not see your message before... i guess i will need to apply some putty and sanding there...
thanks Bart for the details about the zero paints. i may give a try to Mr Sufacer in the future. i may use my old airbrush, to avoid ruining the seals of my fairly new one.
15 November 2016, 10:57
Bart is right again🙂 The Zero paints primer is wonderful stuff for figures or single color car bodies, but I had some problems with masking too.
But.... Zero changed the formula (they even gave away free samples via Hiroboy) and I can say from experience that their new formula is as rock solid as MrSurfacer, even with masking.
I would still recommend the new formula of Zero primer, being airbrush ready is a real pro. 👍
15 November 2016, 13:18
You can order Zero paints in the Netherlands from thescalemodeler.com/.
They're from Heerhugowaard, pretty close to Amsterdam Spanjaard.... 😉
15 November 2016, 13:20
or from Domino (www.domino.be) in Belgium. @Kees, I will need to try the new formula then... time to go shopping (I hope my girlfriend doesn't read this, or I will get comments like: why aren't you so enthusiast to go shopping for clothes... )
15 November 2016, 14:17
thanks for the information Kees and Bart. and thanks for the comment gorbygould
today i have masked the area of the Air Force Inflight Refueling Receptacle on the spine, and sanded it without any trouble. i will airbrushed it later today if i can, and hopefully post pictures of the result.
15 November 2016, 16:40
thanks Erik. today i airbrushed the sanded area, and it looks good after a couple of hours. well actually it could look better, but that is not fault of the primer. it is me. somehow the panel that i needed to cover is still visible (very faint, but it is certainly still there). so tomorrow i will need to sand it again. well, let look for a positive side, i will test the endurance of the primer again 😛
what worries now is an airbrushing mistake next to the air intakes. i wanted to cover some difficult spot that was not correctly done before, and by accident I used now too much paint.
I hope i can correct it tomorrow with some very light sanding (not the easiest area for that). if i can not fix it, I may be forced to remove all the primer and do it all over again.... 🙁
16 November 2016, 00:07
a few pictures with the progress of the last days. starting to use alclad in the tail and ailerons
25 November 2016, 00:08
Really looking awesome man... Love to see what you come up with for the metal areas. A great area to get a little creative with.
25 November 2016, 03:39
Thanks Michael and Patrick. I will may be add a bit of blue transparent alclad, and certainly paint the chute cover that I mistakenly masked.
Some magnesium still have to be applied in the ailerons , and some more detail. Once covered with varnish, maybe some light wash, well see
25 November 2016, 08:38
The chute cover is painted in the fuselage color. You did it right!
25 November 2016, 17:00
thanks Kees, Mike and Christian, i am really honoured with your comments. 🙂
Patrick, in most F-4 you would be right, but for the VX-4 i have several pictures where it is also in metal color, instead of black
aviationphotocompany../h6ED6AACE#h6ed6aace for example
in this picture it looks more bluish than black, but the chute cover is certainly metallic. i have a few more actually.
25 November 2016, 19:24
actually there is something that beats good research.... it is to actually use the results 😄 with i did a late for that chute cover. although still on time. i am not so sure about some other details that i realized about yesterday....
26 November 2016, 11:49
by the way, do you know what exactly are those yelow sort of bands you see in vertically in the tail and horizontally in the sides? i see some F-4 that do not have some of them. i did not remove any (and in some picutures of "black bunnies" i see them and in some i do not) so i will paint them all in yellow. what i am uncertain is if i should simply use bright yelllow of if clear yellow over silver/aluminium is more correct.....
26 November 2016, 12:24
http://www.network54.com/Forum/47751/thread/1397996138/F-4S+%26quot%3BBlack+Bunny%26quot%3B+1-72+Fujimi
Do you mean those yellow stripes like the one next to the bunny on the tail? As you are building an F-4J you don't need them. On the F-4S the so called 'slime lights' were introduced. Those are low intensity formation lights. When those lights are off they tend to have a very pale green hue.
26 November 2016, 19:06

thanks a million for the information Patrick. Ok, so i should have removed them.... well, i think in this case i will throw the historical precision through the window and leave them.... it will not be 100% accurate but i like too much how it looks right now, so i will not risk sanding them and needing to correct such large areas 🙁
I corrected the Air Force Inflight Refueling, and the results were good but not 100% satisfactory. this areas are a lot bigger and there is a lot more complicated detail around, so i will leave them there.
26 November 2016, 21:55
After some finishing touches, everything was looking good, paint as even polished and ready fir decals and dry transfers, but the only thing I could see where those damn yellow lines....... The words "you are gonna regret this moment" came to my head a hundred times while I masked the area to start sanding away the first of those formation lights....why did I choose to ignore that part of the instructions???? Well, first one almost gone, five more to go.... Wish me luck!
2 December 2016, 11:25
removed 3 of them already, and covered them again with primer.... some marks are still visible looking closely but ... well lesson of the day, next time, read more carefully the instructions 😛
3 December 2016, 00:32
well, it look longer than expected for the update, but finally here you have a few more pictures. before any transfer was used, and after i place quite a few. still, a lot stencils to go. i have the problem that one of the sheets was not in the set received... so waiting for the manufacturer and the site where to purchased to provide a solution..... i will not be able to work on it during Christmas, so this will probably be the last update for 2016. merry Christmas and happy new year to you all 🙂
21 December 2016, 00:00
Looking fantastic. Merry Christmas to you also and a Happy New Year.
21 December 2016, 01:00
Looking great Spanjaard! Especially the exhaust area is amazing 👍
21 December 2016, 07:32
Can't wait to see the progress in the new year. But until than, happy holidays Spanjaard!
21 December 2016, 08:21
Thank Erik and Lex. I will advance on this one until I have only only weapons left, then probably start the academy F_4j and choose what weapons will go on each at the end.....
21 December 2016, 15:49
Wow this is really looking awesome. Your attention to details is so impressive.
21 December 2016, 16:33
Thanks a lot everybody, your comments mean a lot to me. specially coming from people that I consider far above my skills 🙂
21 December 2016, 19:41
you mean because I chopped some many things on this model? 😄
well, it seems the patient will survive, but I was not that sure at the beginning! (see first album)
22 December 2016, 00:11
Nice one so far. Did you use black for the paint of dark grey? Soon I want to make a black camouflage too
22 December 2016, 13:40
I tried with Mr surfacer, but for some reason it went quite bad and had to remove it completely (never used before, maybe I did something wrong). Vallejo black primer worked like a charm (first time use too). I handled it, sanded it, everything...., and no problem at all. I airbrushed Tamiya X-1 over it, and then Future, layers as thin as possible. I am really happy with performance of future, not many products can survive the amount of handling I have submitted it to....specially with the transfers. Some simply did not want to leave the support sheet regardless of the pressure exerted. I was afraid with the bigger ones (bunnies etc), but those were the easiest ones
I wanted almost shiny so that is why I did not use the gray primer. Black required very little polishing
22 December 2016, 15:04
thanks Jean and Edwin. i have to start working on it. it should be finished soon, but i still have lots of stencils to place. and there is even one sheet that was not even included in the package i got. Hopefully i will get the missing decal sheet from hobbydecal, unfortunatelly they have not answer my messages yet, and the "after sales service" form, simply does not work.....
4 January 2017, 21:11
thanks, still adding stencils. and still no answer from hobbydecal.... 🙁
9 January 2017, 18:14
thanks a lot Ricardo. i am still adding stencils, but job is progressing 🙂
12 January 2017, 00:53
a little update, all transfers i had have been placed (no answer from hobbydecal, i gave up on them). then covered with future, left to cure for a couple of days, added the water slide decals, and then covered again with more future.
i got some kind of reaction between the future and the micro sol/set, it created some kind of matt areas (hard to explain).... fortunately new layer of future seem to have resolved the problem.
slats, flaps etc are not yet glued, landing gear is on its way (temporary "crutches" in place, so the paint is not damaged)
17 January 2017, 00:22
it took forever to get them in place... it is almost a thousand of them (no kidding) in the set! although you do not use all, and i miss one sheet with around 130 yellow and red ones (a pity not to have them)
17 January 2017, 09:37
Ahh, Stencils. When I grow up, I am going to do a 1/32 Navy F-4 in "new delivery" condition,,,,,,and put every single stencil on it that was there before a jet flew it's first mission. I will probably do a "new delivery" 1/32 Skyhawk before that,,,,,,,but, the Phantom had so many more than a Scooter.
I just need to figure out which marking was painted on, which was a decal, and which was a sticker,,,,,,,and figure out how to replicate that in 1/32 scale. Contests don't like it, but, "decal silvering" was a very real thing in 1/1 aviation, as was "sticker lift",,,,,,,,the trick is to know exactly which things were painted on and not do that to those stencils. "Paint ridges" were common in real life, also, if something was painted on using tape instead of a stencil set. "Bleed under" when using a stencil set happened a lot, too. We didn't do that stuff over and over on 1/1 jets, such as a modeler does to "get it right." If we were changing the nose number on the flightline, and it turned out a "little fuzzy",,,,,,it flew that way.
17 January 2017, 16:34
I feel better now Rex, I did not know that i was adding more realism when I did not manage to get some of those stencils to stick to the model! big thanks 🙂
if you are planning to do the F-4 in 1/32, i could recommend the stencils from hobbydecal, they have some sets that you can use for the stencils, i believe you probably have every single one that was used..... Being bigger than 1:48 probably you will have less trouble than i did. some of the tiny ones simply ignored all my attempts to convince them stick to the model.....
17 January 2017, 17:03
Geez, a stenciler's dream,,,,,,,,look at this sheet from them. hobbydecal.com/detail.cgi?number=al32003v1
Thanks for the tip, I see the markings, the stencils, and the door numbers. And "only" 8 sheets of stuff to stick on the model, lol.
I will send them some money.
17 January 2017, 17:27
i must also say that i have tried to contact them several times about a missing sheet in my set. and they never answered. i also see that they have not published anything new in 2016 and that there is nothing in the section of "coming soon" of their site.... so i think they may be out of business, or almost. Their products appear as "out of stock" in most online stores. so i have been reluctant to try to buy the set complete set again from their site.... if you order and you receive it, it would be good to know.
17 January 2017, 17:53
Wow, this is awesome! And those stencils... makes my brain hurt to even think of applying all of those.
This is going to be epic when finished!
17 January 2017, 17:58
mhh, don't know why I missed this?! Very nice and clean work. I much like the effects in the exhaust area but first of all the overall look 👍
Cheers, Christian
17 January 2017, 18:31
glad you like it Michael and James. welcome to build Christian 🙂 your opinions are really appreciated.
17 January 2017, 19:27
I like this scheme. The amount of stencils ... wow, that's a lot of work.
19 January 2017, 20:49
it certainly took a while😉
and i still have a few pending, just a handful.
19 January 2017, 22:28
Well, you still have some open spots (not that much) to place them if you would receive them...
20 January 2017, 07:39
thanks Clifford and Ed. i was hopping to get it finished (or at least close to it) before the end of this month, but it is been hard finding time for it 🙁
23 January 2017, 23:40
thanks for the encouragement Michael, and thanks for the compliment Dale 🙂
24 January 2017, 22:19
I'm feeling residual pride by association in this build because "one of us young guys" is the mastermind behind it.😉
25 January 2017, 00:48
Amazing patience for all those small decals! Looks great Spanjaard!
28 January 2017, 18:09
Thanks Bart, it is finally finished and placed in the display cabinet in the living room.
14 April 2017, 13:53
Dammit well done! I love the arresting hook system most!👍 Beautiful!!!
14 April 2017, 14:01
thanks Bart, Holger and Christian, your comments are really appreciated
14 April 2017, 14:11
Wow! That is a stunning result Spanjaard it looks fantastic, I can see now why it took so long.
14 April 2017, 16:07
thanks a lot Grobygould, Erik, Augie, Patrick, Kurt and James. I really appreciate your feedback, and glad you like it. and thanks a lot for the support and help along the project. by the way, next one is again a F-4J. Academy this time. i was going to use the second cockpit, but after reading comments about how well the Eduard one fits, i will probably keep the Aires for the future, and use the Eduard one.
14 April 2017, 20:21
thanks/bedankt a lot Dan, Clifford, Jay, Martin, MrLongSir, David and Lex.
i am proud of it Lex, i think it probably is my best model so far 🙂
15 April 2017, 09:53
Wow, great build and awesome album. Your narrative is great, surely a valuable resource for anyone building the F-4J 👍 Your metalworking skills are top as well. Thanks for taking the time to record it all!
15 April 2017, 14:13
thanks Alec K, i have great help along the way in this build, so i am happy if the album helps others 🙂
15 April 2017, 14:35
This is just fantastic Spanjaard!!! An absolute beauty, you should be quite proud of this one. 🙂
15 April 2017, 19:53
Very nice build! You mention the use of future, where do you buy that? I can't find it anywhere in the Netherlands. Am i not searching hard enough?
19 April 2017, 08:32
thanks a lot for the nice comments Daan and Kees
no Daan, i believe it can not be found here in the Netherlands. I got a bottle directly from US, But it is quite expensive (but works like a charm in my opinion). then I found a seller in Amazon. they ship it directly from US, But sell only in UK France and Germany. Delivered in UK is quite a good price, in Germany and France, it goes more than double. I asked to ship here, but they said no.
I am thinking in getting a couple of bottles to UK, if i go there for work at some point, or maybe to friends in France or Germany, but it bothers me to pay double......although it still a lot cheaper than what I paid to ship directly from US.....
19 April 2017, 19:05
I can get the large bottles of it at Walmart for like $6USD. If we could figure out how much shipping costs are from the US to wherever maybe I could help out getting some to Europe for those interested.
19 April 2017, 19:44
thanks for the offer Michael, how large are those bottles? i got one of 27oz (798ml), i am sure that in US is possible to get them bigger.
problem is that shipment may cost a lot, duty import should not not be a big deal, since the value of the package would not be that high....
19 April 2017, 21:10
Eriks top tip: ebay.co.uk/itm/231144736712
Maybe a bit expensive but it's the real thing and easy and fast to get
19 April 2017, 21:19
thanks Erik but with 250ml, with shipment, it is 20EUR. it is basically the same price as getting it by yourself from US.....
19 April 2017, 21:41
thanks for the nice comment. and thanks again for the help during the project, really appreciated 🙂
20 April 2017, 17:26
Spanjaard. :-O A masterpiece and there is no other word for it. There is not one image that hasn't had my jaw on the keyboard. just beautiful work and the attention to the detail speaks volumes of your patience and talent.🙂 👍
I am seriously in awe. 👍 👍 👍 🙂 🙂 🙂
16 October 2017, 09:34
Looks good Spanjaard. Black is one of those colours that is hard to get right,
16 October 2017, 10:33
i can't believe how i missed this build, looking stunning Spanjaard big huge kudos 👍 👍 👍
16 October 2017, 11:15
The guitar string with the copper wire coms cable, and the hand painted helmets have me thinking your a wizard with a master touch. 👍.
I keep going through you album, and every time I do, I discover something else you have not mentioned. You deserve all the comments and compliments posted on your build Spanjaard. 🙂
You have left all of us in your dust. 👍
Genius. 🙂 🙂 🙂
16 October 2017, 16:39
All of that detail you got into that kit is just awesome! Great job!
/B)
16 October 2017, 17:30
wow, i am really happy with all those comments, thakns Dale, Murad, Bernd, Konrad, gorbygould, Björn and specially thanks Kerry, you make me blush 🙂 . it took a considerable amount of time and work and i am happy you all like it. i certainly do.
16 October 2017, 18:33
You have certainly got my creative juices re energised Spanjaard. Inspirational is what it is. hehehehe. ZOOM. !! :-O 👍
16 October 2017, 19:00
I think it is about time I did a spook. Can't decide between it or a Tomcat.
17 October 2017, 19:28
turkey or a rhino... hmmm I would have a hard time choosing too Clifford.
17 October 2017, 22:25
Augie. What did you say for Clifford to be have like this. :-o :-o :-o ???
17 October 2017, 23:36
well, for me, after two rhinos in a row (second almost finished), next planes will be .... two turkey 🙂 but not before I do something with wheels, for example
18 October 2017, 00:01
Spanjaard, well done sir! Not sure how I missed this. I love how you constantly say scratch built. Easy. Pfffttt.
Clifford, thats easy. Snag a 1/32 Tamiya Phantom buddy. That will keep ya busy.😉
18 October 2017, 00:42
I could only afford a Tamiya 1/32 scale F-4 in my dreams. LOL. But I do have a Revell 1/32 F-4G with all the Tamiya aftermarket goodies(Photo etch) Metal gear, resin wheels and seats. I actually took it out today and looked at it, then put it up.
18 October 2017, 01:14
OMG. :-O Decisions decisions !!! How hard you guys have got it . 🙁 hahahahaha 🙂 👍
18 October 2017, 03:44
Clifford, I managed to snag one in a trade. I came out WAAAAYYYYY ahead. The guy was an armor guy and I had the exact kits he was looking for. He did an even on swap. I could not believe he did it, but he did. So keep your eyes open.
And an aside to that. A guy I have done business with before is allowing me to make payments on the Tamiya 1/32 F-15E. So I will have that baby in a few weeks. 🙂
18 October 2017, 04:00
thanks Donald. 1/32 spook? tempting, but at my current speed, it will take me a couple of years! besides, I am thinking on going into smaller scales rather than bigger ones. they take a lot less space later, and can be as much fun, or even more, if you want to make the same details 😛
18 October 2017, 05:34
I have come to the conclusion that limiting the scale I work in is not going to work for me. Too many things I like in a variety of scales.
18 October 2017, 21:07
Augie, plus it impacts space limitations not at all. A 1/72 Herc or BUFF is still a really big model. So my motto is that is what we have ceilings and 30lb test fishing line for.😉
18 October 2017, 21:14
the main enemy of those models is not the danger of falling, or dust... is the people that live in the same house 😄
18 October 2017, 21:32
yes, cats and models can be an interesting combination... dogs are probably safer, since they less inclined to climbing....
19 October 2017, 17:06
The house I just moved into was previously occupied by a young cat. The POS owner kicked him out the door and left him. So he is a neighborhood cat now. I feed and water him. But I can not bring him in because I would have to make him into Chicken and cashews if jumped on my shelves. LOL The dogs dont even look up there.
20 October 2017, 16:40
Whoa, I really love your detail work and scratch build - very impressive! Man, I love F-4s 😄
29 November 2017, 07:40
I think we should just automatically bump Spanjaaard's F-4 builds once a month to the top of the newsfeed so we can all oooh and awe over them. I never get tired of them... I mean, the number of decals alone...😉
29 November 2017, 15:45
thanks a lot Greg and Donald, you are making me blush! 😳 🙂
i need to finish the second, and get to build something different, probably even without wings this time 🙂
and one day, i have to take proper pictures of them finished.... the "foto session" of the completed bunny was not exactly what i had in mind.....
29 November 2017, 17:18
We all expect nothing less Spanjaard. Always a stunning result. 🙂
Cheers mate. 👍
29 November 2017, 19:35
Brutal... qué pintaza tan buena tiene ese Phantom. Menudo trabajazo le has hecho y el resultado bien ha merecido la pena. Me gusta mucho ese esquema. Enhorabuena, Spanjaard!
8 December 2017, 20:34
@Cuajete Muchas gracias! creo que el black Bunny especial, vi el de monogram hace 30 años y al final me he quitado la espina 🙂
@Lode, thanks for the compliment, but i think you have that and more seeing your 1/350 Prince of Wales!! 🙂
8 December 2017, 21:42
thanks Frank and Arne. it was actually finished 8 months ago. a but surprised to see this build getting so much attention lately 🙂 (no complains about the compliments of course 🙂 )
11 December 2017, 23:49
Awesome build Spanjaard! 👍 Love the details and especially the cockpit. Very good!
12 January 2018, 20:47
thanks a lot Ingo, glad you like it. your comment means a lot to me 🙂
12 January 2018, 21:43
I've said it before and I'll say it again. You military and airplane guys, your detailing never ceases to amaze me. Great job, Spanjaard.
28 January 2018, 15:42
Black Bunny was a marvel! Beautiful and inventive build! Well done Spanjaard!
27 April 2022, 01:40
I was wondering when this build would pop up again! For me, this is almost like the "mascot" build of Scalemates. I think this was one of the first projects that made me realize what kind of community is here beyond just the database... and I've been following Spanjaard around ever since!
27 April 2022, 05:56
Thanks Peter and Greg. You make me feel really happy. I am also really happy to be back in the bench, after a extended "break"
27 April 2022, 07:51
Greg this one was posted prior to me joining Scalemates but I have long been a fan of Spanjaard's F4s. Maybe if we ask very nicely he might, you know ……. Ummmm ……. do another one? 😁
27 April 2022, 08:35
It's an honor to have the privilege of seeing this fantastic work again after a long time. Congratulations, Spanjaard!
27 April 2022, 09:53
And here we go again😬! Nice Spanjaard this reminds me to do a black bunny too😬! Someday…
27 April 2022, 11:21
Thanks Peter, Cuajete and Konrad. I am blushing now!
I have some F-4 in my stash... but not in 1/48. Actually one of them will be a Bkack Bunny (a lot less decals on 1/144 scale) But there is the second cockpit (done in this build) that should get some use....
Konrad, if you do a Black Bunny, I suggest the decals i used in this build. I think they have them also in 1/32, if you are insane enough 😄
27 April 2022, 19:36
believe me, it was a great pleasure when I finished those stencils, this set has (literally) a thousand of them. but I love to see how it looks now, so it was worth it 🙂
27 April 2022, 20:57
Hi Spanjaard - I appreciate I'm a bit late to the party here, but just spent some time in my lunch hour having a look through this album, as I saw it pop up the other day and... Wow! I know I can't add much more than others have already, but what a thoroughly fantastic (and informative) build. Just looks awesome! You must be rightly proud! 🙂 👍
3 May 2022, 13:16
Thanks a lot Neil, really appreciated.
Thanks also Jos, coming from the maker of one of the best Phantom I have seen here, your comment means a lot to me!
3 May 2022, 21:10
hi David, yes they are part of the Aires kit. You only need to paint them and place them. it is one of the things i like of Aires, nothing is pre-painted. that, and the amazing detail. and on top of that, if something is wrong their customer service is also really good. I wish only they would require less sanding to fit in the cockpit.
12 May 2022, 18:25
Why I missed this?
Overall good built, classic results.
I bet you must input a lot energy into it👍
1 October 2022, 13:16
Thanks Chang Li, yes, it took me a while and all the holes I made on it to get all that aftermarket took certainly some energy 🙂. But it was a pleasure to build it, and I love to see it in my display cabinet, so quite happy about it
1 October 2022, 21:11
Excellent work! Beautiful result sir!!!!
I really need to get the decals to do this one to go with my Vandy 1 F-14D.
2 October 2022, 02:31
Wow...this is an amazing project 👍
I spent nearly an hour enjoying and studying every photo.
2 October 2022, 03:33
Thanks Donald, this decal set certainly takes some time, but the Tomcat will certainly look great in this livery!
Thanks also Rui, that is a really great compliment, really happy you like it so much
2 October 2022, 13:43
Spanjaard, the 14 looks awesome all black. Once I get the 4 done, they will look great together. You should do a 14 to go with this one! The AMK kit comes with the markings.
F-14 Group Build F-14D Vandy Complete | Album by smokeriderdon (1:48)
2 October 2022, 16:45
Thanks Guy
I will have it in mind Donald, they will look great together!
I have a couple of cats in my stash that are waiting for far too long actually. Maybe next will be a black one!
2 October 2022, 20:25
Absolutely beautiful work. The paint job and markings are stunning.👍
6 October 2022, 03:47
Great rendition of the black bunny! Probably the most striking scheme the Phantom ever wore. Definitely an eye catcher on the shelf with "mere" camo and ADC gray birds. Great build. 👍
6 October 2022, 04:45
thanks a lot Stephen and John, really appreciated
i agree in regards to this lively being really attractive. But i also have a grey F-4J, I actually built both one after the other 😄
6 October 2022, 06:52
It is a pleasure to enjoy again the magnificent photos of this album after all this time. I love the black scheme with the bunny and those blue stripes. Congrats again, Spanjaard! 👍
6 October 2022, 17:16
Well this is truly a Phabulous Phantom😳… a black beauty, impressive build Spanjaard!
1 March, 23:53
This build is like one of the Scalemates standards. Been seeing it annually for 9 years now, and it never gets old. 🙂
Love it!
1 March, 23:57
thanks a lot Dick, Greg and Alec K. it may miss a bit of weathering, but I doubt I will ever dare to touch it again 😄
2 March, 06:42
I agree with Dick and Greg 👍
The years have not taken their toll on this black beauty. I'm glad to see it again after all this time.
2 March, 19:28
Wow, what an awesome build - lots of great detail, including all your scratch-build solutions. And a great finish too with the black surface and those white markings (especially the bunny on the tail 😄). 👍
3 March, 07:27
thanks Alexander, the markings are the fantastic set of dry transfers F-4J Phantom II (HobbyDecal AL48001V1, 1:48) , it takes quite some time and patience to place those 1000+ stencils, and the big ones like the "NAVY" and the bunny are intimidating, since they are truly make or brake, in fact I had an issue with the A of one of the "NAVY" ones but managed to get it to look decent
3 March, 08:28
thanks Martin
the issue with the transfer that I mentioned before can be seen in some of the pictures, like 136 F-4J Phantom II Black Bunny WIP & finished pictures | Album by hetspanjaard (1:48) , let's call that weathering 🙂
3 March, 09:54
Man, my finger gets tired scrolling to the bottom of this thread...
Also... you said "they are truly make or brake" which I'm going to adopt as a new phrase. Not sure if you intended it or not but usually it would be "make or break"... but as model builders there is no such thing as a broken model. We just might have to apply the brakes and slow down a bit and fix something, but it's almost never a complete loss.
Or maybe it should be "make or take a break" - that works too... 🙂
Pay no attention to me. 🙂
3 March, 16:36
ha ha ha, you are certainly correct, it was a typo, and I meant "make or break"..... but "make or brake" or your even better "make or take a brake" is really fitting for our hobby!
I usually check what I write to avoid typos etc, glad I did not do the job correctly this time (probably quite often anyway!!! 😄 )
3 March, 19:04
Most excellent Spanjaard, a masterpiece. Agree with Greg, takes forever to get to the bottom of this thread, but very much deserved.
3 March, 21:42
Yeah, I think Greg's right. There are a few builds that have become quite iconic on Scalemates and this is one. I have spoken to Spanjaard about this build a couple of times asserting that it is my favourite build of his. I have gone back to it a few times just to add a little wonder to my day. I suppose I am guilty of searching for motivation from time to time and each of my "Mates" has a build I search out on occasion. It may not even be their best build but they each have a build that I feel attached to. Lode's Prince of Wales battleship and Alex G's Lamborghini get me back time after time!
4 March, 06:38
you are make me blushing! placed at a similar position to Lode's Price of Wales or Alex G's Lambo..., I wish!! glad you like the Black Bunny so much, but those two are a different league 🙂
4 March, 14:07
pridal nový fotoalbum.


33 12 August 2023, 00:03
The frame is constructed in the first building step. It's a bit complicated to analyse, but you have to get through this to get all the components ready to fit between the profiles.
22 August 2023, 23:06
All welcome, I now assembled the front and 4th axles. All are movable in a steering position, but as usual you have to decide and then fix everything. Also I found that one set of wheels is not parallel, so I cut the steering arm and added a millimeter of sprue roundel. Does this not appear if they test-fit these kits, or did I make a build error?
9 March 2024, 22:22
All 4 axles are now added to the frame, together with the shock absorbers that I had to shorten a bit at the front axle. The torsion bars are fixed at one side so I can remove the air bellows for painting.
18 March 2024, 23:59
The fuel tank hoops and steps are now replaced with PE. The steps are quite hard to bend in the right order and no dimensions or angles are given to mount them.
14 April 2024, 20:13
The radiator is now detailed with the Voyager silver mesh. You only see the front side now, it's on both sides. When it was assembled I realised that the air horns also need a PE part. There is some warping in the sump and the top cover, I hope it isn't evident looking through the front grille later on. The air tanks must be stripped like the fuel tanks, but you get equal lengths of PE strips to attach two kinds of tank. Therefore I clipped 4 of them and redrilled the hole on the end. The assembly with the 2 tanks and the container is suspended on a single PE part that I had first bent the wrong direction, I hope it doesn't get fatigued.
27 April 2024, 22:53
I started the interior with some colored PE from Eduard. The Black Dog figures are assembled and also a Maim figure and two Legend armament sets were added to the project. But the Maim gunner appeared to have a large backpack, so I don't know he's feasible.
4 May 2024, 21:50
Continuing the interior with the seats. Also the fenders are completed, it's very important to align the bent beams that sometimes are replaced woth Voyager assemblies. It's preferable to use that, the replacements are sturdier than the originals.
22 June 2024, 22:48
The cabin exterior is done using some original kit PE and clearparts, but both have problems. The clearparts are not calibrated and have distortion because of this. I will be replacing the large parts with plexiglass. The kit PE is wobbly because it's not thick enough., I even had to hammer it quite a while. Then I found out Voyager does replace half of the protection kit, but not the large parts behind the doors. At least half of the creases are removed then. But Voyager messed up at the hood closing strip, providing two identical parts in stead of mirrored ones. This could be remedied with some re-riveting.
29 June 2024, 23:52
The pVoyager photo etch cabin roof is constructed with all its nightmarish embossing deformities corrected, the badly fitting airco module that was mosly bent the wrong way around so it broke at one instance. I replaced the 3 largest clearparts with a piece of Trumpeter 1/350 airplane set transparent box cover, that has the right thickness to be able to sand the corner roundings in it. The air purifier system is not installed completely, because that would impede the clearpart masking. So now it's down to interior painting.
15 July 2024, 01:26
Looks amazing so far!
I'm also amazed at the number of projects you have on the go and still manage to achieve such remarkable results.
15 July 2024, 14:03
Thanks Gorby, this was now put to wait for the Essex carriers, but as these are awaiting some last details it can go ahead now. The NATO green interior is painted after the appliance of the Eduard masking set. This replaces the kit masking set and has a cool black film, but still needs some trimming on the outside masks of the smaller windows.
22 October 2024, 12:09
The truck cabin is now finished with the Eduard safety straps. While fixing the roof I noticed that a small strip should pass over the rear to make the internal frame fit to the rivets in the PE.
24 October 2024, 10:43
The hood is dry-fit on the frame and it seemed that one fender had to be rearranged. I prepared the PE for the rear view mirrors that are quite complicated. I also built the Gecko Models pallet truck as a dio element. It's a very fine kit, there is only one pallet contrary to the image with the 4 pallets on the truck.
26 October 2024, 23:24
I added the Italeri 20ft container to the project as one of these is clearly visible on the Tankograd pictures. I got it from the store next door. I might cjt up the container to get a better composition on the dio and like that I can get 2 out of 1.
7 November 2024, 16:23
Welcome. I assembled the container in a few hours, an easy process if you wanted to show it closed down. But the option with open doors is incorrect and needs some changes to the locking system. I had done this with the right door, but it would make no sense to have the pallet loader blocked by the left door so I have to change that one too. I made a sketch of the design for the dio, though the cut might be more oblique to gain some volume.
8 November 2024, 01:28
The container is sawn in two and painted in some typical shipping container colors.
12 November 2024, 21:38
The rear view mirror and the winches are built. The chassis part for this has some sink and needs sanding. It will be difficult to add the cable to this assembly, the drums will not revolve because of a narrow fit.
1 24 December 2024, 00:38
Looking great. Very nice details. Sometime it is a shame to cover all this shining brass with paint...
24 December 2024, 16:27
Thanks, Goldman. In this case I think the many colors will improve the aspect. I added a folding ladder to the exhaust frame and used the Voyager turned bolts for the bumper. then I built the Hardox container with the kevlar blankets. Small parts are used for the connections to the container. I decided the two splintershields for the gunners are oversized and should be replaced with Evergreen, making them half as thick. I also looked at the Legend armament, the Mk19 will improve on the barrel proportions and the M2 might be a bit overkill with the televisor. But the kit M2 is in 2 halves and has a bad cooling sleeve.
2 February, 16:10
Beautiful work Steven.
Does this kit include the parts to be able to build it as a tractor unit (the fifth wheel etc.)?
2 February, 18:37
Thanks, Goldman. The fifth wheel remains even with the armored box on it, but the rear frame covers guiding the trailer are not used. They can be found. I also noticed a flashlight on the cab is left off in this version. The mudflaps are connected lower on the frame.
1 3 February, 01:59
Both weapons are built without the special visor, even if that meant cutting into the M2 to remove the support. I discovered flaws in the armored container from the kit and decided to correct them. In Tankograd you can see the rear of the truck and it shows that the support frame for the container should fit between the towing eyes of the truck. Hobbyboss seems to have missed this in their contruction and now the frame goes on the outside of the towing eyes. Also one of the access ladder rungs seemed to fit under this frame. That was the Hobbyboss solution for having shortened the container with 3mm, also visible on the Tankograd picture. I had to rebuild the container frame and add an edge to the container to make that ladder fit again. Another strange observation is the shadow from the gunner's position, showing that the M2 turntable was fit in a rectangular hole. No trace of that is found in the Hobbyboss container roof. Maybe I'll correct that one before I start painting.
3 February, 15:34
After a good wire brush polishing round of the cabin PE, painting started. I had only enough NATO green for the cabin, but I was able to do the armored container in rust colors. Even the interior should be like that, so it was real fun to bring up all those corrosion colors. I started with Gunze H7 orange and then shadowed in a mix of Tamiya black and Gunze Russet. Then a mix of Gunze H7 and yellow lighted everything up.
4 February, 14:24
The M1070 frame takes a complete Tamiya paint jar to fill every nook and cranny. The armament is primered black and I alos found a photoframe that fits the dio.
7 February, 13:11
Camo colors are completed and the Hardox rusty color is added, based on Gunze H7 with some dark brown and yellow. I used a few SKP lights from an LMTV set. Now I noticed that I closed down the cab without the radiator in it...
11 February, 12:10
The truck and container decals are applied. I made changes to the numbers on one of the containers according to the registration system. Some details were scratched, like the bumper identification marks that were for some reason left empty by Hobbyboss. On the rear armor I painted the nickname of the truck. The cables were added to the winches with some parts unmounted. I did open up the cab to add the radiator I forgot. The base is made from thick cardboard with the concrete slab edges cut into it.
14 February, 16:36
2 new Blast figures are added, one to push the pallet loader and the second to accompany the one in the armored container. I painted the cartboard to look like concrete slabs and added pigments and wash to the truck.
1 March, 01:22
The truck is now slowly coming together. I made the mirrors out of some Earth Metal scraps and I removed one backpack from a figure, replacing it with an alufoil copy of another figure's vast.
1 4 March, 02:41
pridal nový fotoalbum.
16 snímky
1:72 Trumpeter Curtiss P-40B/C
1:72
The painting and weathering of the P-40B/C is nearing its finishing.


projekt: 1:72 Trumpeter Curtiss P-40B/C

34 2 November 2024, 14:16
Unfortunately I realized too late that Trumpeter had reversed the colors. 😫 So I sanded down my current work and re-primed it.
17 November 2024, 15:06
I sanded off the faulty green paint, then sprayed the entire top of the P-40 with Tamiya XF-52 brown enamel, then applied a fade pattern of Mr. Hobby H44 pale brown paint using a sponge.
20 February, 07:22
Rotten luck with the camo. Although I recall reading that the AVG aircraft camo was unique to each aircraft. Great recovery 👍
1 20 February, 22:39
The painting is unique, but broadly similar. I was mainly looking for the painting of No.46.
1 21 February, 06:41
The linked youtube review is for Jian Ji-2 (Kopro 3141, 1:72) wich is a different box and tool
")
see super-hobby.co.uk/products/Jian-Ji-2.html for contents of this box
")
4 March, 13:44


pridal nový fotoalbum.
14 snímky
Hurricane Mk II night ops
1:72
Ready for weathering


projekt: Hurricane Mk II night ops

3 25 February, 14:06
Starting to paint after priming. Flat black lower . Dark Grey - Dark Green upper
26 February, 20:40
Decals are on, Roundels on wing did not flow into panel lines too well..? Also, I always that that was a funny looking '7' for "LK 7"..
4 March, 12:58
pridal nový fotoalbum.
64 snímky
Dual P47D build
1:72
And here are pictures of Tamiyas sleepy gal


projekt: Dual P47D commission


47 11 February, 01:20
Yes, tamiya cockpit is really nice for the scale, in general, a real joy to build!
11 February, 10:41
Really nicely detailed cockpit. The paintwork is also very interesting, I particularly like the lively surface of the A23.
1 22 February, 06:02
@Rui S thank you man!
@c124c Thank you mate. And yeah, livery on a23 had quite a bit of shading, its a lot of fun, and in my taste looks really good haha
Thanks for support and the likes guys!
24 February, 19:02
The paint jobs don't look bad.
But on both models the chassis legs are mounted backwards - so they point backwards and not forwards like on the original.
1 4 March, 12:56
pridal nový fotoalbum.
9 snímky
MAN TGM GW-L 2
1:24
My first scratch-build item


projekt: MAN TGM GW-L 2 KatS


 2+
2+ 10 28 January, 14:06
")
")
Thanks Boozer. But I think I will build my Unimog first before building this truck. So I won't run out of kits. I always wanted to buy the recovery truck and convert it to a German one, simply changing the cab to a Mercedes Benz Actros or MAN TGM.
1 10 February, 07:55
I also got that kit recently! Looking forward to your modifications. My one will be probably just out of the box
11 February, 18:59
I seem to remember KFS used to offer a off-road conversion kit for MAN trucks. I'm pretty sure it at least included the bumper which might be hard to scratch build if you can't print it. Can't find the kit anymore tho
1 28 February, 11:11
I searched on the internet for this kit but I couldn't find it either. We will see how this trick turns out
28 February, 12:25
Just realized the bumper out of the box is accurate for offroad already since it's a 4x4, and the same as in your pictures. I had started working on a similar project but with the older MAN TGA kit from Revell as a basis and that required heavy modifications all around. I'm glad you're moving towards more custom projects because they are a lot of fun to get into, and watch other people get into...
1 March, 15:25
pridal nový fotoalbum.
8 snímky
Gothic Gabled House - Anklam, Germany 1925
1:87
Doors, windows and some details painted.


Scratchbuilt
5 28 February, 21:34
Looks nice so far 👍
Are you planning to put in some floors and ceilings, perhaps made of cardboard? This would prevent identical lighting conditions behind all the windows and perhaps make it look even more realistic.
1 2 March, 21:01
Welcome to all. @bughunter: for this pilot project (it's my first building) I won't be using any interior fittings (ceilings and walls) or lighting. It's mainly about testing whether the construction works without any problems and how something like this could look when finished. For my colleague, who drew and printed it in 3D, it's also the first time he's tried something like this and he needs feedback.
Let's see if and how I can create curtains. Because that's all you can see on a bright day when you look into a building from the outside.
2 3 March, 09:33
Oh wow, impressive project 👍
So now, with the 3D printing we could have any building actually me thinks
4 March, 12:37


pridal nový fotoalbum.
30 snímky
Panavia Tornado ECR "Tiger Meet 2018"
1:72
All decals done on the plane. There are still some left for the tanks and missiles.


43 31 January, 15:52
Looks very good. The idea with the masking tape for the wingbags is great!
1 15 February, 16:58
Thank you guys and welcome. Hope I live up to your expectations.
I have noticed that there is a completely missing part on the kit. But it is clearly visible on the real airplane. Have a look here: airliners.net/photo/..ornado-ECR/5002301/L
You can see an attachment on the underside at the front next to the nose gear doors, which is pointed at the front and has white dots/sensors. I will probably have to rebuild this. Does anyone know exactly what it is and what function it has?
1 18 February, 13:17
Coming along nicely, but I wonder which missing part on the ECR you mean? I will also shamelessly 😉 copy your method of covering up the holes where the wings fold, great idea! 👍
1 20 February, 11:46
Sorry, saw the link above regarding the missing part. Always thought that only the GR.4s had another thing there.
1 20 February, 12:18
Just noticed that there are no IRIS-T missiles with the kit. There are only AIM-9 Sidewinder included. But on all pictures I found of the 46+57 Tiger Tornado you can see the IRIS-T. So I'll check what I can do in this matter.
20 February, 16:56
There are two in the Revell Eurofighter Tigermeet kits, if you want another colorfull Luftwaffe jet.
1 20 February, 17:39
Alternatively you might want to invest in the Hasegawa set: Europe Aircraft Weapons Set (Hasegawa 35115, 1:72)
1 20 February, 20:06
Thanks @DerMattes and @Łukasz for your recommendations. I found the IRIS-T as a free 3D file on Thingiverse and tried to print it in 1/72. But you can forget it. The file was designed for 1/9 and therefore far too delicate at 1/72, so the print didn't run cleanly. Well, I haven't really warmed up to my 3D printer yet anyway. At least the printed pilot and the ladder worked reasonably well.
In the end I actually ordered the Hasegawa kit. Eurofighters will certainly follow in the future, so I'll certainly need the missiles from the kit.
1 24 February, 10:10
The decals look great!
If you get Hasegawa's Eurofighter you get all the weapons Łukasz mentions. Hasegawa going out of their preferred way of selling weaponless kits. This kit has IRIS-T missiles for use in Greek F-16 Block 52+ nad Italian Tornados and Meteor missiles for use in Rafales. Quite the bargain me thinks.
2 24 February, 10:28
I did not know, that you have a 3d printer, try this free IRIS-T: cults3d.com/de/model..le-iris-t-look-alike
I printed some missiles from sufa312, like the Kormoran for my F-104G. Works great and detail is great.
2 24 February, 10:32
Oh, the file from sufa312 really looks good and better to be able to print. I downloaded the file already and will check that out in the future. For now I will wait for the Hasegawa set.
25 February, 10:06


/sk/search.php?q=*&page=newsfeed&fkSECTION[]=Newsfeed
search-solr.php?lang=sk
35
35
/sk/search.php?q=*&page=newsfeed&fkSECTION[]=Newsfeed
35
todo