

Blade Runner Spinner Fujimi 1/24

Modifying the kit cockpit instrumentation console parts to add Paragrafix photoetched detail parts

Molded cockpit details removed and replaced with Paragrafix photoetched detail parts

Molded cockpit details removed and replaced with Paragrafix photoetched detail parts

Molded cockpit details removed and replaced with Paragrafix photoetched detail parts

Kit footwells removed and replaced with Paragrafix photoetched detail parts

Side vent grills opened up and replaced with Paragrafix photoetched detail parts

Side vent grills opened up and replaced with Paragrafix photoetched detail parts

Pre-shading of panel lines and details in Tamiya Smoke. Interior painted in custom blue mix of Tamiya blues.

The seats were pre-shaded in Tamiya Smoke and then over lightly sprayed with Tamiya light brown

Center console with Paragrafix photoetch in place. Sprayed with Alclad II polished aluminum and then a wash of highly thinned Tamiya smoke over the top.

Underneath the center console I've inserted a strip of very thin clear plastic sheet. I've then coloured areas of the sheet in different colours so when backlit (with a white SMD) you'll get some buttons in different colours.

More cockpit details added and painted. Dry fit testing of angled bulkhead which sits behind the seats.

Testing the driver's main console and foot-well light

Testing the driver's main console, TV monitor and foot-well light

Testing the center console light

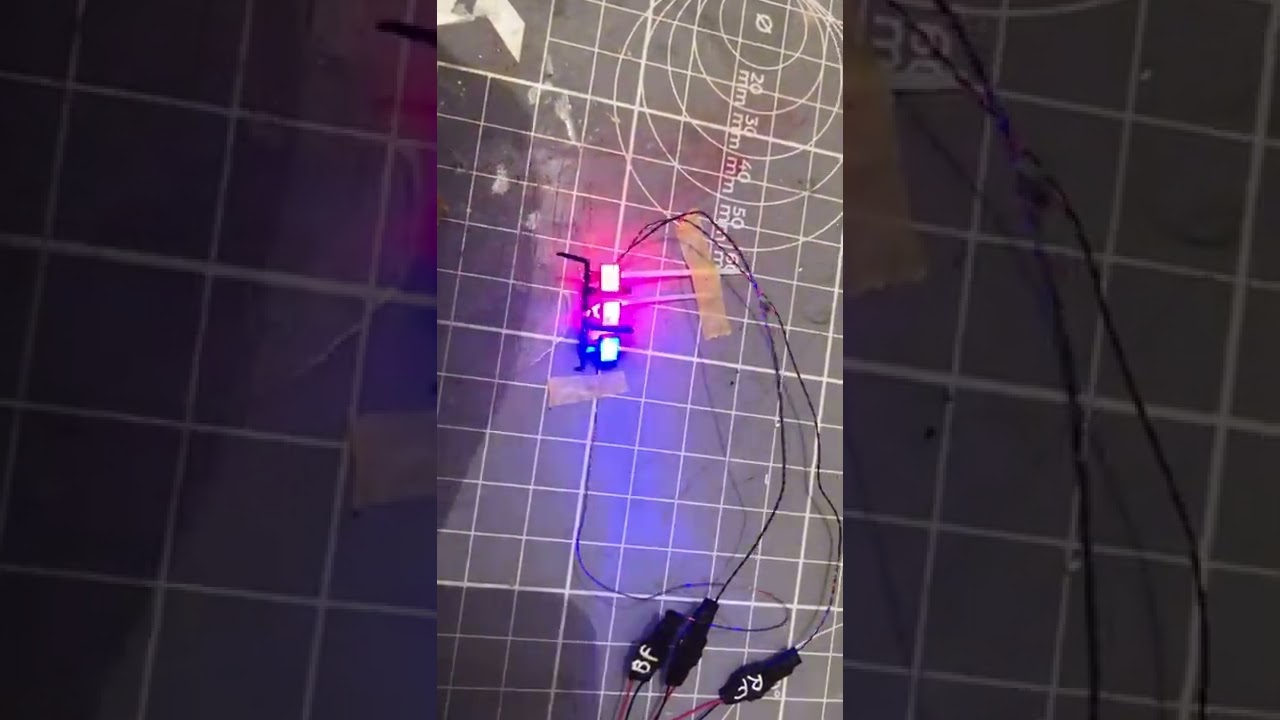
Left side blinky lights built and ready for install.

Left side patrol amber light built and ready for install.

Masking the underside grills

Underside grills painted in light gull grey. Will be weathered later on.

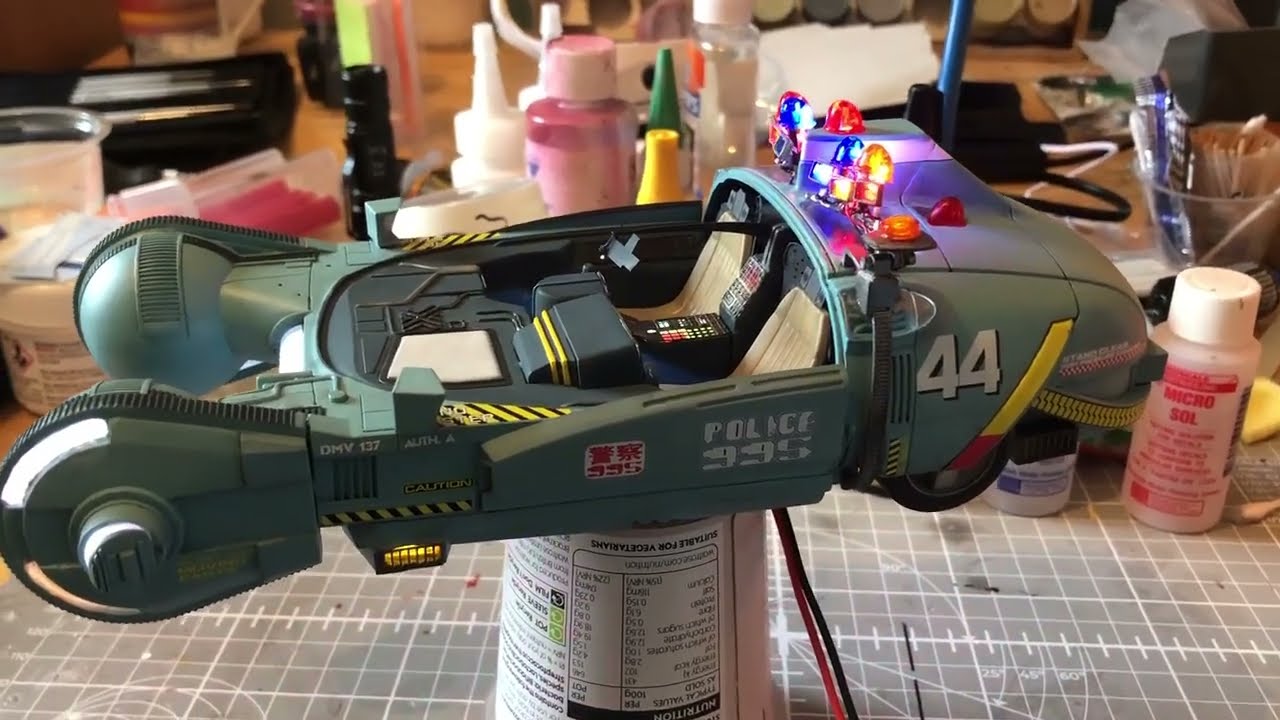
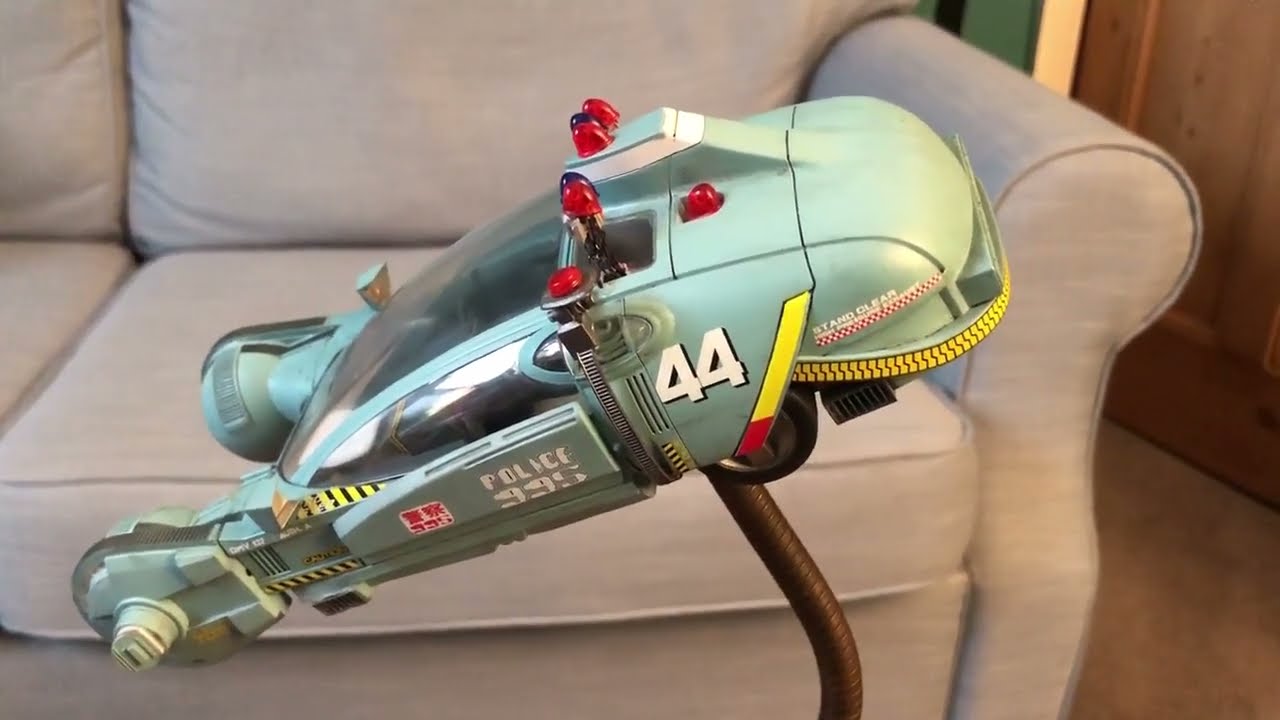
Main body colour is a custom mix of Valleo Air paints. I decided to go for a lighter blue rather than a dark version. Means I can weather it more subtlety and I prefer this colour!

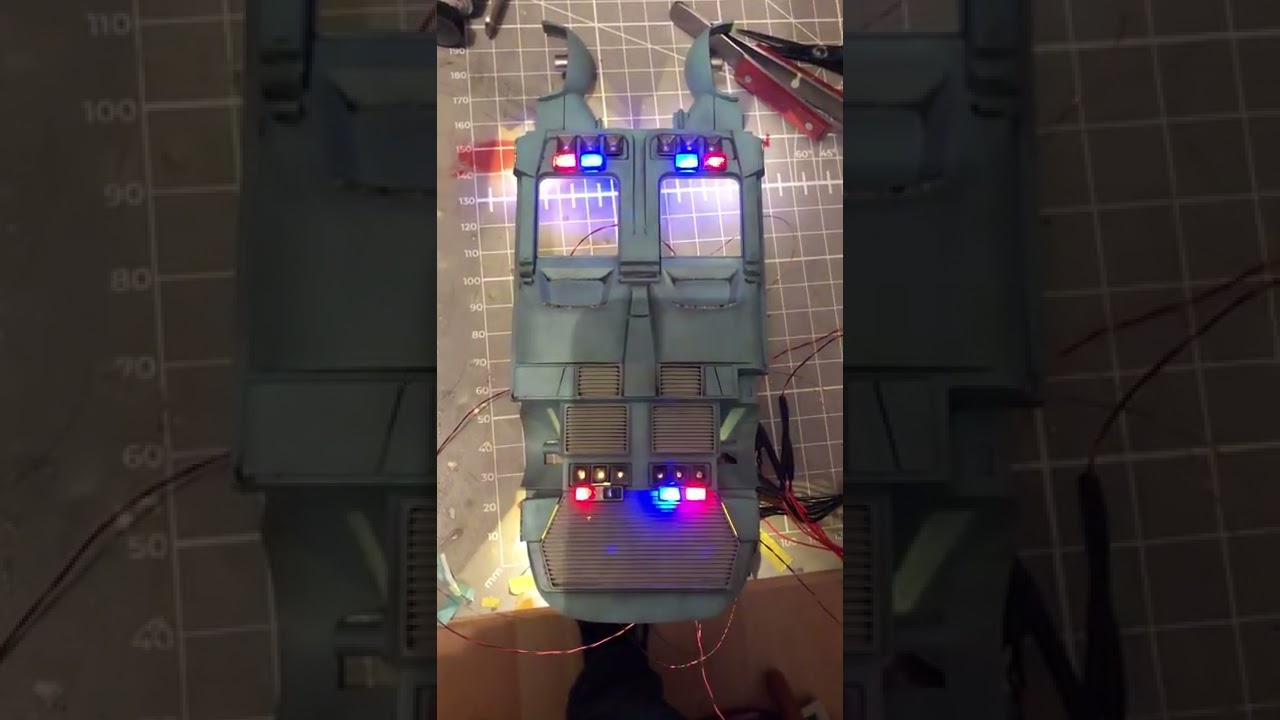
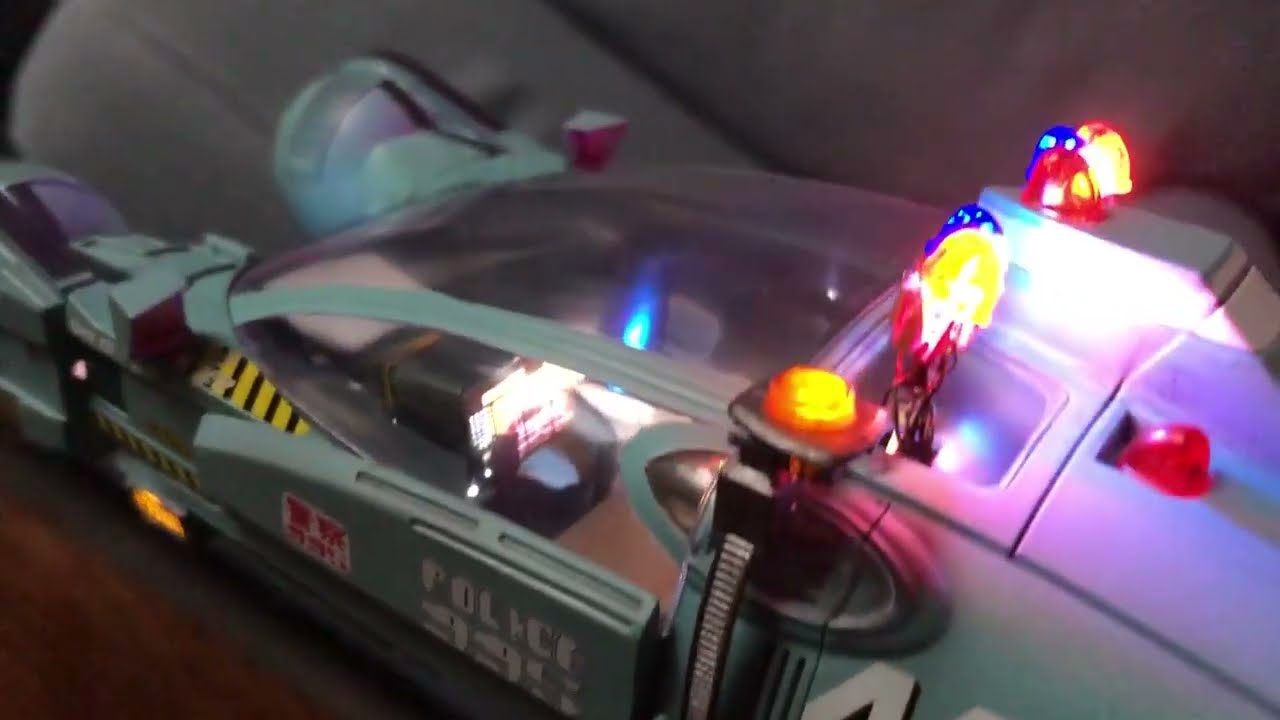
Weathering and lights installed on underside

A view of some of the wiring for the tiny nano SMDs in floor of the car

The wiring progresses!

Wiring the two halves together

Dry fit testing of the top and bottom sections together. Wheel arch nano SMDs also wired and ready for fitting.

My blade runner spinner in full flight!

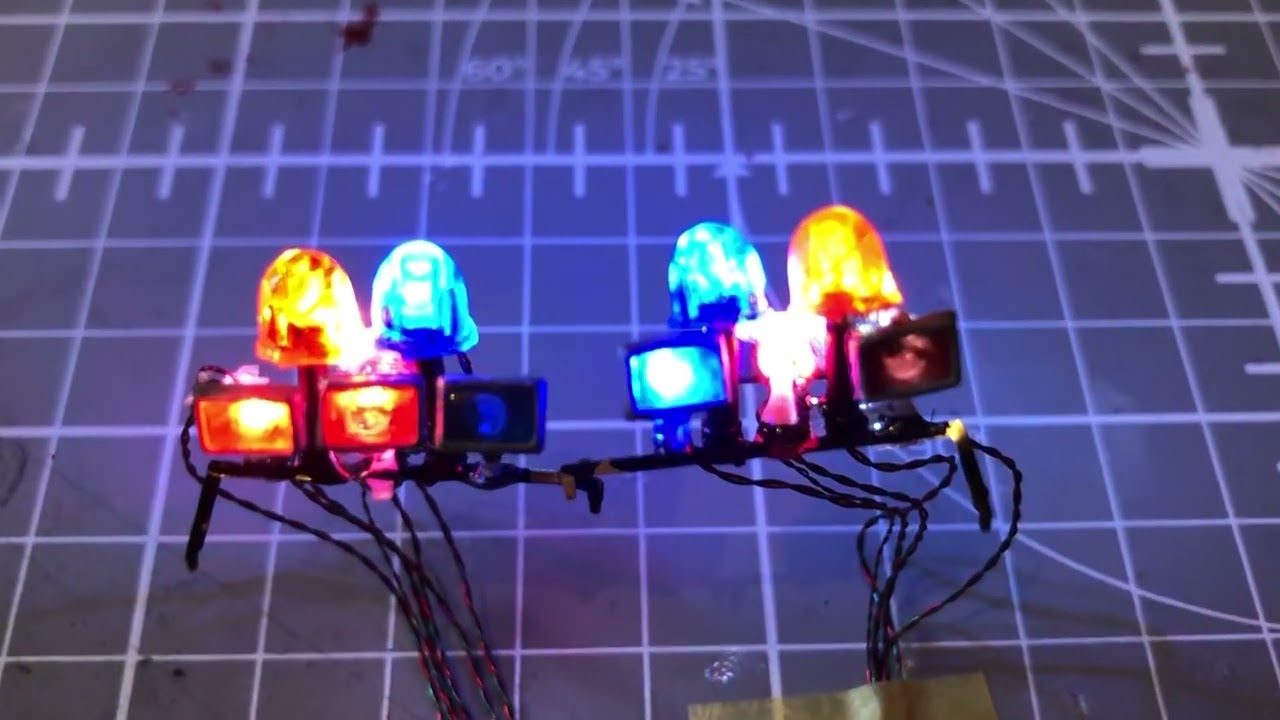
Blade Runner Spinner with blinky gumbal lights

Blade Runner Spinner with nano SMD light install on a custom display stand.
Коментари
29 8 January 2022, 17:16
Yep I'm gonna enjoy this build and it will certainly be a challenge to light it. I usually control my lighted models with the Inner Light solution from Scalectronics. However, that solution does not allow control of nano SMDs. So for this build I'm gonna have to go for a simpler approach.
11 January 2022, 08:58
Great idea on using colors on a clear strip of acetate to achieve a variety of colors on the consoles!👏 I've been experimenting with a similar idea..
12 January 2022, 21:20
Just playing with the Nano SMDs for the 'blinky' lights - here's the test Youtube Video
17 January 2022, 18:49
I'm curious about how you did the console graphics. Did you make them yourself?
19 January 2022, 20:11
Hi guys thanks for the comments. JD, the console graphics backing film is included in the Paragrafix photoetch kit. Other backlit colours I've created using the clear film with painted areas technique. Gotta say I'm surprised by how many SMDs I'm having to use - I didn't realise how much of this needed lighting.
20 January 2022, 11:02
Here's another video - this time I'm testing the blinky lights/gumballs or the underneath of the car Youtube Video
26 January 2022, 18:54
I've now wired up the full set of Blade Runner Spinner roof blinky (gumball) nano SMD lights. As I'm not using any micro-controllers I've just used a mix of steady and different flash rate SMDs.
Youtube Video
27 January 2022, 12:08
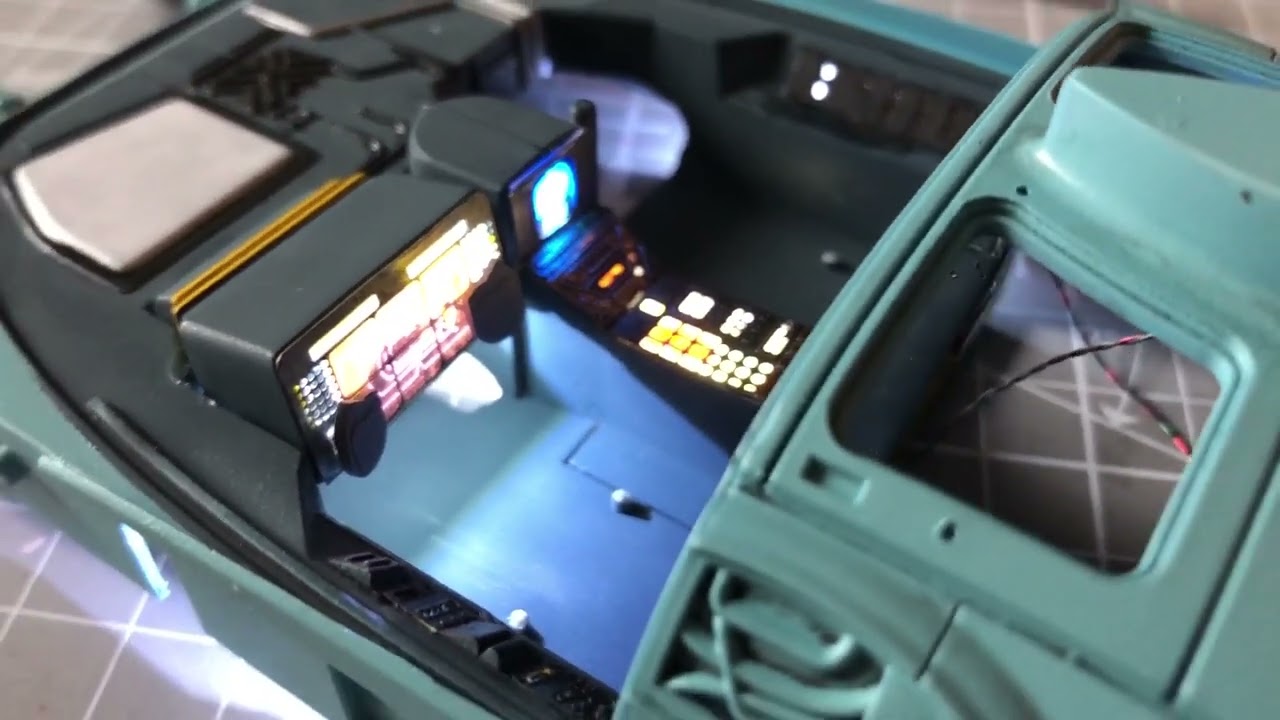
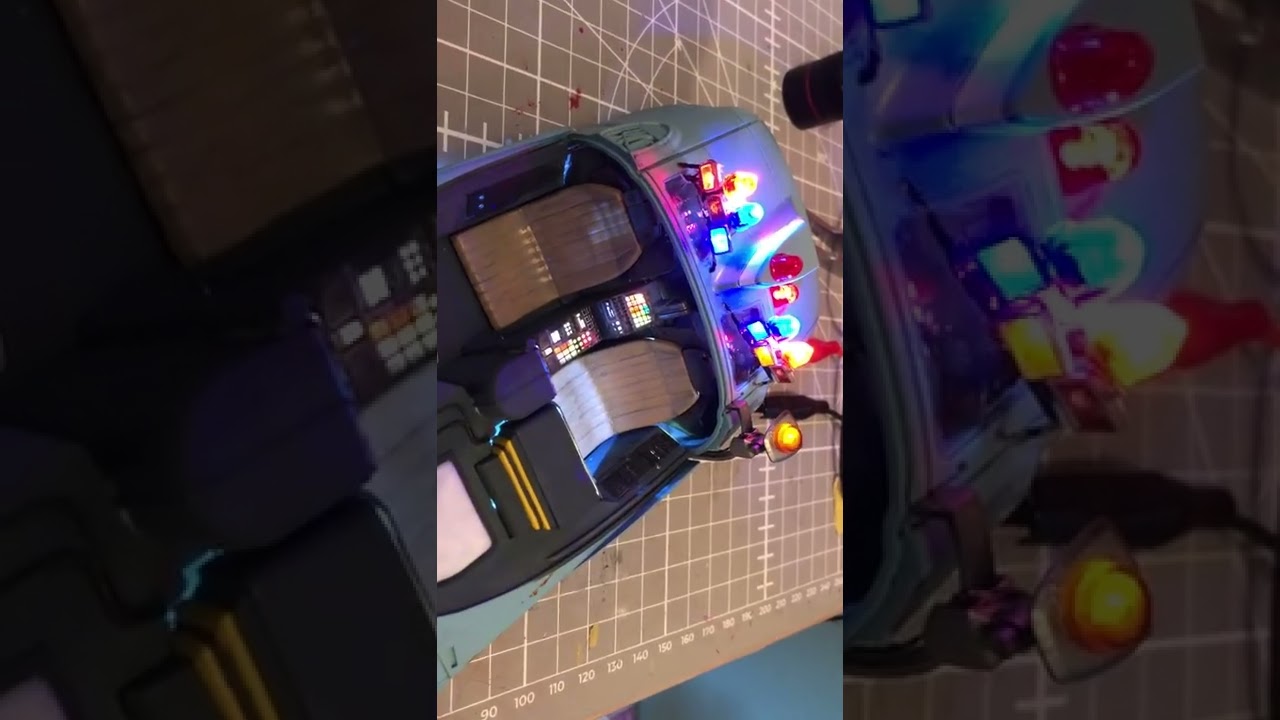
I've now installed and wired up nano SMDs into the cockpit of the car. The backlit films on the main diver consoles are included as part of the aftermarket Paragrafix photoetch set for the 1/24 scale Fujimi kit. The center console is backlit with one cool white nano SMD and I've added clear film with coloured areas to give the effect of different coloured lights/buttons.
Youtube Video
27 January 2022, 12:28
Here's another video showing the cockpit a little more finished Youtube Video
30 January 2022, 17:48
Here's my near completed Spinner. Just the canopy and foot well glass to install and some touch up, minor weathering and gloss/satin coat sealing - Youtube Video
13 February 2022, 12:40
"I've seen things you people wouldn't believe..."
Hi all, here's my pretty much complete Blade Runner Spinner Flying cop car. This is a daylight video with part II being a night time video.
I really enjoyed this build and the challenge of squeezing all the nano SMDs in. I thought the car would look best flying 😉 so I've made a custom base and flexible mount to display it. Some minor touch-up and decal repair, but pretty much done. Shout if you have any questions on this build.
Youtube Video
20 February 2022, 15:56
Here's the night time video showing the lights working Youtube Video
20 February 2022, 16:11
Absolutely outstanding! 🤘🤩🤘 A very inspirational build. It's been enjoyable to watch, and although I would like to see many more shots of how you did certain things, it's been an awesome ride. 👏
21 February 2022, 00:42
Album info
Building the iconic cop car from Blade Runner with full working lights and detailed photoetch parts from Paragrafix.
