AREA 88: "Call in Hawkeye!"

I love this ARII boxes. So exciting to see what's inside!

Oh, my... I guess that's what you get when you buy a cheap "partially started" kit off eBay. This will take some heavy duty cleaning...

Not perfect. But I found white plastic underneath all that mystery gunk. We can work with this.

This Tsukuda Hobby kit seems to be the "goldylocks" kit for this project. It's better than the 1/144 Airfix MiG-21s (which I only really use as cannon fodder to be blown up), but not good enough for a staring role like the Eduard ones.

As you can see from the sprues, there's enough detail for a MiG-21 to be in a strong supporting role in this project. It's good, but not so great that it'll outshine the RA-5C Vigilante.

I hate empty cavernous air intakes, so let's add a bit of plastic card and frame out the space a bit.

Yeah. That's better. Also plenty of room inside the fuselage for the engine lights and still enough to add some explosion bits later.

The inside of the MiG-21 is a bit tight, but I don't need all that much for this one.

All buttoned up... now for some putty. The the area where the cockpit connects to the rear fuselage on the RA-5C is a bit thin, so I added some plastic card to bring the joint up to the same level.

Time to add a pilot. It's a bit of a tight squeeze, especially with the seat going in as well.

I finally broke down and bought paint other than Tamiya. Vallejo has a very good "MiG turquoise" so who am I to argue?

Canopy's fit... barely. They worked during the dry fit, but after glueing them in place they've rubbed some of the paint off the pilot helmets on the inside. Oh, well, nothing I can really do about it without a LOT of extra work.

First coats of paint... and some masking for the second one on the RA-5C.

Yeah. I thought about freestyling the camouflage... I'm glad I didn't. One small masking error on the nose though, but we can fix that.

No masking issues on the MiG-21. Looking good... albeit a little too "clean".

Yeah. A panel wash and now we're looking a little more "lived in", right?

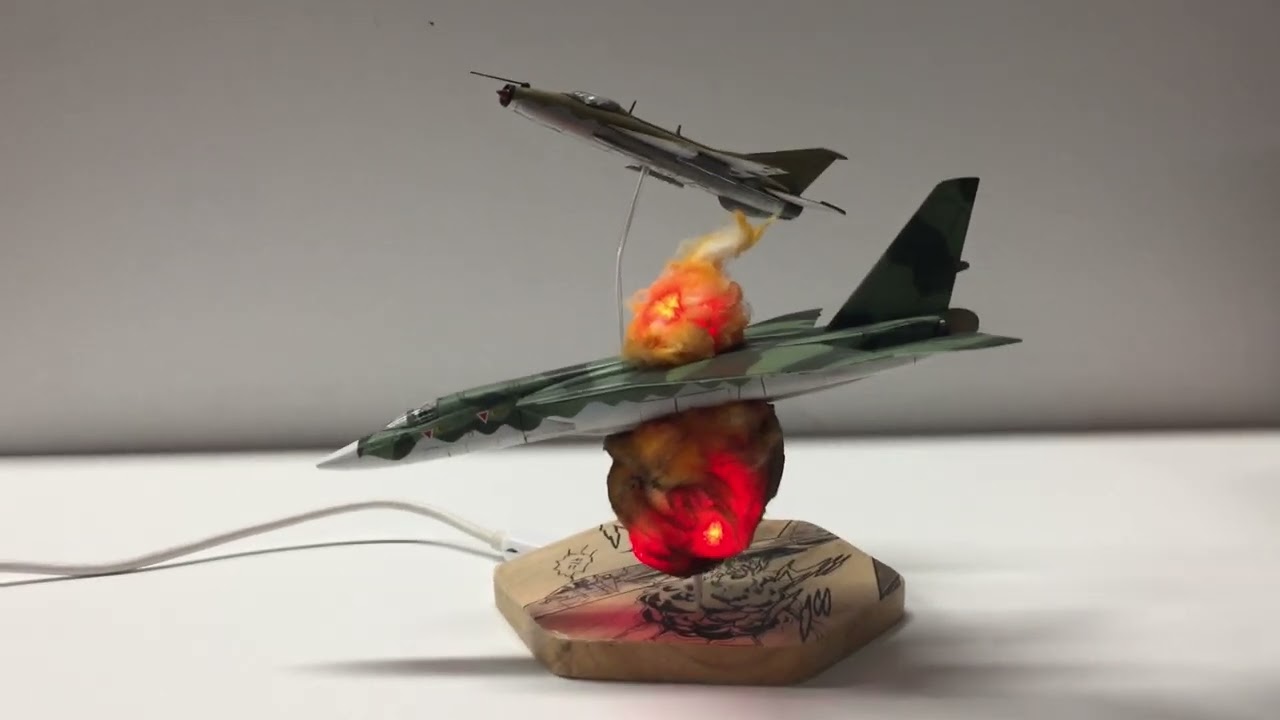
Some painted cotton to start trying to figure out how the explosion is going to look. We can hide a few LED lights in there I think.

One red LED on top... two on the bottom... that should be enough, right?

YEAH Baby! BOOM!


Коментари
29 17 June 2022, 15:49
Since my main Tamiya airbrush is down for the count while I wait for one tiny part to make its way on foot from Japan to my door... I thought I'd start a project that has more construction than detailed painting required...
17 June 2022, 16:08
I bought a "slightly started" kit off eBay. Opened the box and it was quite the horror show. I don't know what the previous owner thought he was doing, but he painted it with some horrible gunk. It was so cracked and wrinkled, I thought the plastic itself was damaged, but after some soaking in a bath of lacquer thinner and some elbow grease, I discovered an actual plastic kit underneath. It's lucky that he somehow missed part of the tail, or I would have never known what colour the plastic was supposed to be.
17 June 2022, 16:12
I'm not sure how rare it is, but I haven't run across them very often. It was more a combination of "right in front of me" and "the price was right". I knew it had some issues from the photos online, but at first it looked much worse up close. 😉
17 June 2022, 17:36
that was a horror show to clear, but you did great. let's see rest of the magic 🙂
22 June 2022, 11:02
I gotta say, it took me a couple of stabs at the paint scheme for this one, but I'm pleasantly surprised at how well it turned out. Still time to screw it up, of course, but considering what a mess it was "under previous management", at least at this point I feel like I saved it. 😉
23 July 2022, 04:48
You are very productive at the moment 👍 It is hard not to overlook one of your great projects!
23 July 2022, 10:53
If I may make a suggestion Greg, the only thing missing is the pilot on a spring ejecting ... but I confess I'm not familar with how this story ends. Definately not well for the Vigilante!
Nice work
28 July 2022, 12:07
Hah... thanks for the tip Jay.. unfortunately the MiG-21 catches the Vigilante by surprise and there were no survivors... Once I'm done, I'll upload the sequence to my strobez.ca blog so you can check out the action. 😉
28 July 2022, 16:59
And... we're done! I have to say, looking at the before/after pics on this one... I impressed myself. I also think this is probably the best explosion I've been able to pull off. I've already blown up an F-14 and and F-111... but the RA-5C went up like a roman candle! 😉
2 August 2022, 05:51
That explosion is really looking great 👍 Is this steady light or those flickering LEDs?
2 August 2022, 09:56
Thanks guys. The lights are steady… but I should've made flickering ones. There's a pretty easy way to do it using cheap fake candle LEDs. Where were your good ideas when I needed them? 😉
2 August 2022, 15:03
Haha! I expect better from you next time!
In the meantime, I've updated the build on my blog page - so if you want to read the couple of pages this scene is based on, feel free. I've also including the video of the lights in action.
strobez.ca/wp/index...-in-hawkeye-area-88/
2 August 2022, 18:03