
Haber akışı
So...if I read the timeline correctly,this is based on a 1977 mold?
")
5 February, 00:26
That does look a confusing timeline. I'm pretty sure it shows that this kit is based on the 2025 tooling.
5 February, 07:59
yeni bir fotoalbüm ekledi.


31 12 September 2024, 06:45
Watching with interesst.
I've done one landing gear yesterday, very fiddly.
12 September 2024, 07:13
I am wondering how landing gear subassembly will fit; it will be next step.
12 September 2024, 08:00
The kit looks more "build friendly" than the DH88 Mikromir kit 1:48.
Looking forward to see the final result 👍🏻
27 September 2024, 12:23
Yep, Clear props brough realy high level of plastic kits. They are not same level as Tamyia/Eduard or...., but still very high.
Nice fitting and approximate details make a building friendly. Some small part surfaces keep milling prints due to local missing polishing of mould, but still fine.
27 September 2024, 13:52
Following closely your progress as I have an eye on this kit. Nice additions you make and valuable experiences you share.
27 September 2024, 14:00
Fit of the wing halfes is a problem indeed (bought the kit in the meantime), but I think you chose the harder route. Sanding/scraping down the contact areas between the upper and lower wing halfes should solve the problem without the need for extensive use of putty afterwards.
24 November 2024, 21:16
Michael Kohl, your recommendation could work. But, evidently not in my case.
Although that I thinned both halfs to try to fit them precisely as possible, a micro step was there after glueing halfs togther.
The gap between shorter lower and longer upper half was relatively big.
And the last think is, that lower and upper "profile" did not correspond to each other.
24 November 2024, 23:09
yeni bir fotoalbüm ekledi.
11 Görüntüler
Diorama Duck, broken (That's DUKW, actually. On your diorama it's Panzerkampfwagen III ?)
1:35


2 4 February, 18:19
yeni bir fotoalbüm ekledi.
7 Görüntüler
Hasegawa 09132 Macchi C.202
1:48
Hasegawa HAS09132 Macchi C.202 Folgore 1:48 (1995)


proje: (022) Hasegawa 09132

13 20 January, 16:36
i can not help with the riveting (never used the ones i have 😛 ) but about the panel wash, i can give you some suggestions. basically you need to use one based on a different solvent that the one of paint. so you paint acrylics, then use washes base on enamel or oils. do you paint with enamels? use washes based on acrylics. or use a wash that is not based on something that can damage the paints. after almost totally ruining a model by using white spirit to thin the oils i wanted to use, i decided to try something totally different. Flory models make a wash that is basically clay and water (quite possible something that could be possible be making at home, but that is for another day). the advantage of it, is that it does not affect the paint (acrylics, enamels, lacquers, acrylic lacquers....) and it can be removed and applied again if you do not like how it looks. in any case, my suggestion is to take an old model, and try some combinations on it to see which one works better for you, and use that in the future. you can even use a simple flat piece of plastic, practice your skills with the riveters and then use it for practice in paints and washes. at the end, the best is practice, practice and practice 🙂 take some pieces of plastic, give them a number and try the combinations, writing down what you did on it, until you find the one that work for you. good luck 🙂
3 2 February, 20:46
Acrylics, varnish gloss or satin , oil wash or as Spanjaard states Flory wash. Enamels/Lacquers, varnish, Flory or oil wash. But make sure your varnish is dry, as you can stain the model if it is still soft. Gloss varnish gives you a clean model with distinct panel lines etc. Satin can give you a slight staining effect as the wash will grip the rougher surface but this can aid in the weathering process. So 1. Paint 2. Varnish 3. Sludge or pin wash. Phil Flory does a tutorial on his YouTube channel.
1 3 February, 15:30
Hi, friend
I scrape pastel chalks and with the powder diluted with a few drops of water and with this I do the washing both in the cabin and on the outside of the model
Once dry, it is very easy to remove the excess with a cotton swab or a Keenex.
I hope the information is useful to you. greetings
1 4 February, 16:11
I don't have this riveter, but I've seen other modelers chamfer the outside edge of the yellow cover to improve the visibility while engraving.
1 4 February, 18:49
Just to put my two cents in, every time I paint then I protect it with a coat of gloss varnish (something similar to Pledge/Future). Then I can use any wash without worrying about the effect on the paint. Haven't had problems doing this. Regarding Tamiya panel line washes, I remove the excess around 30 mins after application with a cotton swab dampened with odorless spirit. Hope it helps!
1 4 February, 19:27
pastel chalks, sounds like the home made solution I thought possible, thanks for the info Zuly!
1 4 February, 21:34
Zuly - Thank you for the advice on the pastel chaulks...I have a set of those and will try the home made solution on an old model.
Spanjaard/Mark - Thank you! I ordered some Flory dark brown and grime washes.. they are not available in the US but there is a partner retailer that sells it for the company here in America. Should have it by the time i finish the build.
Carlos - Thank you! Saw some of the same videos as well. I will use some small masking tape to make the line and give it a try on the next model.
Alberto - Thank you! I use pledge/future on my canopys before masking/painting them on the model. So have plenty to use on a test model. I do use tamiya gloss coat/varnish before i decal/weather the model, and then matt clear when i finish the model/weathering.
1 5 February, 03:31
Hi Aman, Spanjaard, here is a tutorial for chalk/pastel washes I used. It works very well:
Youtube Video
5 February, 07:22
Apologies Aman, I should of stated that there is a US Distributor. Getting it direct would be a pain in the Arse.
5 February, 07:51
yeni bir fotoalbüm ekledi.


8 31 January, 16:43
As I said on Focke-Wulf project, I'm starting to clear out the shelf of doom and this project was a parallel to the The Battlefield - The Black Knight of Berlin (part 1) | Album by strobez (1:144) - mainly because the Platz boxes came with two kits in one. However, even though I've long since finished the Black Knight project, the "alternates" have sat warming the shelf ever since. About time I completed them. Truth be told, some of the early pictures in this project are also the same ones published as part of the Black Knight ones... but they're separate projects and represent a twin build process, so I'm hopefully forgiven.
3 31 January, 16:48
Now with an updated pic. Does anyone else have a problem with Tamiya XF-16 Aluminium getting a bit "splotchy" using Tamiya masking tape? No matter how long I let it dry (and in this case is was almost a whole year!), I always seem to end up removing a bit of the paint and leaving "tape marks" behind. I'll have to remask the coloured bits and give it another coat of XF-16 I think, but what a pain.
1 February, 19:15
Keen to see your solution to the XF-16 issues, Greg, and the end results!
4 February, 02:08
Well, the solution, seemed to be to just to mask the coloured bits and add a fresh coat… decals next. 🙂
4 February, 07:42
yeni bir fotoalbüm ekledi.


4 5 February, 06:53
")
yeni bir fotoalbüm ekledi.
15 Görüntüler
My biggest build/dio yet. And a learning experience 
1:350
Mom, look what I caught in the Atlantic ocean!


proje: Tamiya 1:350 Bismarck


 1+
1+ 5 21 January, 15:01
Yeah well I know kids who have made whole armouries out of cardboard and treehouses by themselves so I'd say this is a rather small project 😅 But compared to my other stuff, yeah it's pretty big. The more diorama there is, the more stuff there is to mess up
1 25 January, 18:54
Rigging takes a lot of time patience and swearing.
I very rarely rig anything so I'm afraid I can't offer any advice (other than not do it at all 😄 ).
28 January, 07:13
Yeah well it boils down to personal preference I guess. But I really want to make this build... Approachable...? So I'd rather add as many details as I can (that includes rigging). Either way thanks for the warning, often the word of a wise man is enough 😄
1 28 January, 10:15

How come? That should not be covered unless it is sinking on an even keel.
[img1]

2 February, 17:43
Well fuck me.... Guess its going to be historically inaccurate then.... 🙁
2 February, 18:11
It can still be corrected if you paint grey over the red. That works with a brush too.
3 February, 02:05
I wouldn't say your late to the party at all, if I were to guess then I think I'm somewhere in the middle of the building process. Still have to make the water and wait for 1:350 Eduard PE figures so theres more than enough party to go around! 😄
5 February, 06:47
yeni bir fotoalbüm ekledi.


48 14 December 2024, 17:30
I have this kit. It will not look as wonderful as this one you are building though!
1 27 January, 22:42
Well, that's a competition winner, but I guess you know this already. Excellent!
1 4 February, 10:12
Thanks to all for your comments and for the time spent following the construction and finishing of this model! The beautiful 3D printed engine from CMK helped a lot with the final result, even if being in a single piece it was not easy to paint it and enhance all the minute details
4 February, 22:09
Ciao Andrea, your builds are always awesome, but this one it's probably one of the best!
5 February, 06:43
yeni bir fotoalbüm ekledi.


4 5 February, 05:24
yeni bir fotoalbüm ekledi.


5 20 October 2024, 05:40
that is a seriously good looking ride. the custom paint job looks amazing.
1 3 February, 22:26
Wow! Great looker! Fantastic paint work! I did mine in the box art colors...kinda pain Jane but still, gotta love those Tamiya bike kits!
1 5 February, 04:26
Hi Mike.
You are very kind. Thank you.
The box art is very nice. Did you do the purple or black and gold? Both are striking. Yes the Tamiya bikes ate well made and a lot of fun with sub assemblies making the final stages hard to slow down and resist impatience lol
5 February, 06:41
yeni bir fotoalbüm ekledi.
40 Görüntüler
Airfix Consolidated Liberator 24H
1:72
These sprues look lovely. First, let them have a shower in a bubble bath.


39 17 October 2024, 05:42
Dear Nicolas
Thanks! Yes, happy and excited. It did take them a month BUT they told me so from the beginning and i got all the parts. Very happy with this kit so far. What do you think of the interior yellow green?
30 November 2024, 14:57
Hey Felix, a very promising start. Unfortunately I can't give you any tips on the interior color, I only know that with American aircraft it sometimes depends on the factory, as the same type was painted differently in different factories.
1 7 December 2024, 09:28
Thank you, Thomas! I am going with the yellow plane from 15 AF. Thinking of paintin the yellow crosses instead of using the decals. And i am a bit worried about the large decals for the nose art.
11 January, 07:43
@Thomas, danke dir! Eine Woche lange geschliffen, jetzt kommt der eigentliche Spass mit dem Bemalen.
11 January, 09:11
@Kenneth, thanks a lot! The sanding me took a long time but i really wanted to get it right, it's something i always struggle with.
1 11 January, 09:12
Great work, can I ask how you went about the weighting? I tried lots of small lead fishing weights with my Airfix Mitchell but ended up having to fill not only the tiny area given but also the room, behind and just below the cockpit, also behind the control panel and part of the room just behind the cockpit, every space I could find. I'm new to building American bombers, all the RAF ones sit on their tail wheel. Do you or any of the people who have commented have any better ideas than lead? I'm really looking forwards to seeing this project develop (especially as I have the kit myself and need all the tips I can get). Thanks Richard. Following.
1 20 January, 18:22
Dear Boywellum
Both the Mitchell and the Liberator require lots of weight. I bought liquid gravity but it's not heavy enough for the space provided. But there is an ladder for the entry door which will serve as a stand. So i have to go with that!
1 25 January, 06:55
Thanks Felix, that is very kind of you, these kits must have been designed with something in mind for them to work with the actual spaces provided but I have never found a definitive answer anywhere. If any other of the contibutors to your most excellent post have any ideas that would be much appreciated. Maybe Airfix expect us to mix some concrete and pour that in 😉 Cheers Felix, BW
1 30 January, 02:46
Dear BW, some modellers work with fishing weights or lead? I haven't, unfortunately.
30 January, 06:14
Great progres. 👍
Years ago I build the old Revell /Monogram Liberator in 1/48. I decided to glue some lead at the rear side of the engine firewalls. It helped, but wasn't enoght (I forgot the lead at the nose wheel bay).
1 30 January, 06:23
@Nicolas, that must have been a big bird! I struggle to put this 1/72 Liberator into the paintbooth 🙂
I am glad this kit provides a ladder as support. I bought liquid weight for this build but it's not as compact as i hoped it would be and wouldn't do the job with the spaces provided.
30 January, 07:11
Hi Felix,
I usually use fishing weights, the lead is more dense and has high specific weight. I fill all available space and fix it with PVA glue.
There are also aftermaket sets for the front interior, casted in white metal and intended to replace the plastic part:
B-24 Liberator Landing Gear ..aft Conversions 72009, 1:72)
This one however is designed for Hasegawa kit and most likely won't fit on Airfix one.
If non of this helps, I add more weight in front of the engine bays. This worked for me on my both Mitchell and He-219 (which btw is notorious tail-sitter kit).
")
1 30 January, 16:24
Looking great so far, it's very interesting to follow the detailed step-by step updates!
1 30 January, 18:48
Thanks a lot Alberto, glad you enjoy my modelling spam 🙂 did you get the kit too?
30 January, 19:00
Hi Felix, no, I built the old Liberator Airfix kit a while ago and had similar issues with the nose weight. I ended up using the ladder for the back door too 😄
1 31 January, 06:56
Hi Felix, I built the Hasegawa Liberator kit same years ago. I built a box in the nose of the plane around the nose gear and filled the entire space with lead shot. I also glued some lead sheets into the hidden area of the radio operator's room. You can find pictures of this in this report -> modellversium.de/gal..d=8276&origin=mb
1 31 January, 10:10
Dear Tony, Alberto, Pacific Strafer and Martin, thanks a lot for all the nice comments and advice regarding weight! With this build i will have to go with the ladder in the rear section, it is what it is.
To be honest, i think i should have done a flying Liberator. She just looks great that way, like on the boxart. But there are no figures provided!
1 31 January, 11:15
Little late to the party… nice build, despite the challenges and a kit that clearly failed Airfix's quality control inspection.
1 5 February, 02:40
Dear Jennifer and Alec, happy to have you onboard…it's never too late to party!🙂 Having lots of fun with this kit!
5 February, 06:26


yeni bir fotoalbüm ekledi.


25 28 October 2024, 19:11
The military version of the US built Lockheed Model 14 Super Electra was received by the RAF just before WW2 named the Lockheed Hudson. 🙂
30 October 2024, 16:17
Pulling up a seat for this one. An unsung aircraft of WW2, in that it doesn't get enough recognition for the service it performed. Also, some of these older Airfix kits are better than most people realise. All comes down to how well they are built.
1 6 November 2024, 11:05
Today I finally made a start on the Hudson. Inside of aircraft painted Vallejo Model Air Interior Grey Green. Pilot, navigator and gunner added. Wheel wells also painted interior grey green and glued together. Next will be adding all of the windows prior to gluing the fuselage together. 🙂
Thanks for the kind comment Stephen, I agree with you. 👍
Many thanks mates for your interest and likes Derek B, Stephen L & Djordje N. 👍
1 17 December 2024, 15:52
Fuselage together and side windows inserted with masking. Next will be the tail and wings. 🙂
Welcome Mr D, Jennifer, Dave and Andy, hopefully it'll turn out well. 👍
Many thanks mates for your interest and likes Alberto M, J35J, walaroo, Dave, Jennnifer F, Villiers DV & 1 other mate. 👍
1 22 December 2024, 16:06
Wings and tail now added, it's starting to take shape. 🙂
Welcome Nicolas. 👍
Thanks for the kind comment Mr D, it's definitely different from most other British aircraft from that time! 👍
Many thanks mate for your interest and like Matti T 👍
23 December 2024, 16:39
Following along. I love how the notion of the pilots slumped in their seats was a thing back in the day. God forbid one of them might have a hand on any controls 😄
1 6 January, 11:04
Underside of engines and main undercarriage added. Internal to the undercarriage painted BS interior grey green. 🙂
Welcome along for the ride Stephen, Bas Tonn, Gary & Finn. 👍
Many thanks mates for your interest and likes Jan P, Gary K. Chris TA & Kyriakos V. 👍
9 January, 17:03
Last of the transparencies added and masked. Next will be primer and pre-shading to be applied. 🙂
Many thanks Mr D & J35J for your kind comments. Your encouragement is much appreciated. 👍
Many thanks mates for your interest and likes Franck D & Mirko R. 👍
1 24 January, 16:53
Primer and pre-shading added. 🙂
Many thanks for your kind comment Jennifer. 👍
Many thanks mates for your interest and likes Patryk S, Lutz B & 1 other mate.
1 29 January, 15:42
First colour of the two now painted on, Vallejo Model Air BS Dark Green. Next will be the Dark Earth. 👍
Many thanks mates for your interest and likes Neil, Desert M & 1 other mate. 👍
4 February, 16:38
Amazing how even one coat of camouflage colour can make such a difference to the overall look of the kit. Really coming together nicely.
5 February, 06:02
yeni bir fotoalbüm ekledi.
63 Görüntüler
Beriev Be-6 flying boat/ By Playfix -Veb -Plasticart & Revell 1:72
1:72
Antenna wires and insulator's , l used 0.1mm stainless wire, it is great for correct scale.....but nightmare for kinking...


85 24 July 2024, 16:32
Thanks for the likes 😁👍 it's interesting to see how a 33 year old kit builds up ??
1 August 2024, 15:31
Great idea about the watch pins! ⌚ Definitely gonna try this out on my builds. Looking forward to the finished result.
1 September 2024, 08:43
Hi Edouard👋😀👍.
Yes l just get cheap ones of eBay, the do different sizes, you can pull ends n spring out for barrel look, or file ends last to have a recoil cannon look.
The gun turret nearly there now....lots of sanding n filling low spot.
Thanks for looking in on build.👍👍
1 September 2024, 13:24
I'm very curious to see the result. I built this model as a young boy too.
4 September 2024, 20:22
Hi Zbynek 👋🙂👍.
Thanks for your interest. Nice to know you had it too, l built X3 the Tu airliner and the bomber. But this was my favourite as l liked the shape and that it had floats n guns.
Got part of tail on this evening.
Keep looking in for updates 😃👍👍
4 September 2024, 20:57
Good to have you along Guy 👋😃.
Bit of fine sanding n tidying to do next then look at getting an engine effect in cowling area.
I replaced side vent for smaller one now, checked photos... and l made it way to big.
Catch you on the next steps.
7 September 2024, 20:15
Thanks to Everyone who has liked n taken an interest 👋😃👍.. Appreciate it 👍
7 September 2024, 20:16
Hey Mr D whats the Gorilla Glue like? Is it a clear PVA or a resin Super Glue Type? Do you use it just for clear bits or as n all purpose? Thanks in advance E.
12 September 2024, 21:46
Hi, it dries 100% clear but is slow.. to air dry ..so leave overnight.
But it's worth it as very strong. And is very neutral on paint and clear parts.
It's almost like an air drying epoxy, not harsh like super glue or poli ...very safe.
I only use it on clear stuff as it's stronger than PVA but not good for general building.. l do use it to fill gaps sometimes.
👍
13 September 2024, 10:34
Don't think I'd trust those decals. The red stars are easy enough to replace or paint on, the bort numbers might be more of a challenge.
13 September 2024, 12:47
Hi Edouard 👋..yes 🤣 lm on 12 model with it and never had anything come loose.
Mike👋.... No mention neither! I've purchased some more Soviet stars now, may have some numbers leftover from others project's.
Gorby, Thanks buddy 👍
13 September 2024, 15:53
This is a quite interessting plane you're building! I like the shape of the wings. Pretty good build and pictures.
18 September 2024, 04:57
@ Christian W.
Thanks buddy 🙂👍
Yes it a bit different, yes has nice gull-wings.
It's a trip down memory lane for me... I slapped one together back in 1991 as a kid.
Thanks for the interest.... I like seeing people's build processes n history....so doing the same.👍👍
18 September 2024, 16:41
I'm anxiously waiting at the monitor for the paint job! Fingers crossed!
18 September 2024, 19:04
Mr D ... 🙂 I like too to see, how much progress my skills during the last 10 years did. Good for me is, that I own most of my model kits since I was a kid. My first plane, car and truck are still in my shelf or boxes.
Because I stumbled somehow over your wip, I checked the history of the kit. It is rally unbelievble, that those engine openings are on the bottom of the motors. Amazing. I wouldn't notice that without your hint.
19 September 2024, 04:25
Cannot wait to see the result. Your work reminds me of my first kit, it was a Victor bomber by Matchbox (They had a JV factory in Shanghai at that time). But hard find it in the market now.
21 September 2024, 11:33
Hi Lorraine 👋.
Glad your interested 👍 there are X2 colour schemes for the be-6 the Soviet green or the Chinese blue, l liked the blue version but could only find suitable replacement decals for Soviet.
My first kit was the Matchbox Electric lightning,.... Built it with my dad....was nice as was 3 colour plastic out the box.
The first models l built on my own were the Veb/Playfix be-6, & Tu- bomber, so nice to revisit.
Got X2 models at min I'm preparing for paint.
Yours is coming along well...."carefully work" 👍👍
21 September 2024, 15:00
Thanks Skyhiker 👍
I usually use Velejo or AK acrylic, but I'm going to use Tamiya on this one as it won't fit in cabinet.....and l find Tamiya acrylic is a tough paint better for wear n tear, as I'm sure it's going to need dusting now n then 🙄🤣.
The Tamiya paint turns out to be darker than advertised on the lid n chart, I've ordered a white n thinner to Tone down.
Like you I've had 2x build going on.
The Fw-190 really pop's once decals are on..... Remember the trim tabs are red....l just had paint.
😁👍
12 October 2024, 21:34
As a child, I once built the kit with my father.
Very simple kit of its time. But the shapes and proportions are convincing and you really did a fantastic job with it. I'm looking forward to the finished model.👍
5 November 2024, 21:40
Hi Marko👋
Nice to hear you have good memories too, first kit l built with my Dad was the Matchbox Electric lightning, it was good as had 3 colours... think my dad painted few bits silver too.
the Veb Playfix kits l would buy on Saturday morning with pocket money it came with strange pot glue.
I built 3 or 4 definitely built the Bear soviet bomber...l can remember.
Funny you commented on this tonight......as l was just checking it over ready for paint in next few days. I've just been wrapping up my IAR-80 project.
😁👍 Stay tuned
5 November 2024, 22:19
Wow, it would be very excited to see the finished model.Very detailed research and nice details. I visited an aviation museum in Beijing few months ago and saw this aircraft. A beautiful flying boat indeed.
8 November 2024, 15:10
Hi Weizenbrot 👋
Yes it looks nice with it's gull shape wing, ione of its rolls was to search n destroy trespassing submarines with it's depth charges .
Think the Chinese one is Blue colour??
Thanks for interest 👍
8 November 2024, 16:44
Did you finish it? I just necro-surfed the whole build only to be unceremoniously dumped back at phot number 1 lol
10 November 2024, 02:20
Hi Trez, l have recently painted the bottom colour, l will be painting the rest this week, lve had few other projects on the go... Won't be long.
😀👍
10 November 2024, 16:02
Hi Mr D. Yes they are light-blue for belly like the Soviet ones and dark blue for the rest part. Some of them have even been modified with turbo-porp engines.
1 11 November 2024, 02:22
Hi Dave 👋 thanks 👍
Been working on this long time now between other projects... try n push to get her done now.
1 26 November 2024, 20:09
Es freut mich sehr, wenn da jemand ist, der noch so alte Plasticart Modelle zusammenbaut und sich dabei richtig Mühe gibt.
Ein Teil, was ich in meiner Jugend mehrmals gebaut habe, nur leider habe ich keins mehr davon.
Ich schaue hier weiter gerne zu. 🙂
2 27 November 2024, 16:31
Hallo,
Es freut mich wirklich, dass es dir gefällt und ich habe auch schöne Erinnerungen daran.
Ich habe auch den sowjetischen Bomber Bear gebaut, also werde ich mir diesen eines Tages zulegen müssen.
Danke für den netten Kommentar Bernhard 😃👍
27 November 2024, 18:09
Nice painting! Looks like a lot of masking tape died in the process. 😉
1 5 December 2024, 11:06
Let p equal the number of tubes of perfect plastic putty used.
And let t equal the number of rolls of tamiya tape used.
Then let f represent fun: f = p * t
2 5 December 2024, 13:55
Hi Gorby 👋 Ben 🤣🤣
Not kidding 😲 l need to re stock soon, un-masking was a marathon 😄.
I painted a thin coat of pink primer on the trim tabs tonight.... hopefully not need so many red coats to bring colour up.??
I have enjoyed the process on this one... nice now I'm getting towards the end a bit now.
Thanks for your interest 👍👍
5 December 2024, 19:27
Be-12 is not a modification of Be-6, do not mislead those who are not familiar with the topic. These are completely different planes.
The evil irony of the Russian army and navy in 96 is also unnecessary.
I can also make fun of Britain's modern army and navy.
The color from the bottom is not the same.
Photos of the Be-12 cabin can be found without problems.
myskillsconnect.com/..-vnutri-24-foto.html
15 December 2024, 14:41
Hi Jennifer 👋, hopefully get a bit of time get round to it soon, thanks for interest 👍
1 17 December 2024, 15:26
From the prehistoric era kit and it's hatching into a nice airplane. Fingers crossed with the completion!
1 9 January, 21:06
Oh yeah that's coming along nicely. From the photo of the original it looks like the plane is gloss or semigloss. I think I would go with a semigloss since it's not an airliner or racing plane.
1 9 January, 22:23
Hi Skyhiker 👋 l think your right 👍 just a bit of shine ...not to much!
I didn't think Matt/ flat would be right for water .
Thanks for 😀
9 January, 23:37
Really nice to look at, color dress and all the color details.
Great model.👍
1 10 January, 07:30
👋Hi Jennifer... thanks, I've taken the masking of the windows now... Antenna and prop work next.
Good luck on your Dio😀👍
25 January, 10:16
Thanks Captain, David.... glad you like it, just stringing the antenna,s. this evening.
😃👍
28 January, 19:24
Impressive nostalgia build. I also had this kit as a kid, unfortunately never built it. Following 👍
5 February, 02:59
yeni bir fotoalbüm ekledi.
4 Görüntüler
2022 Corvette Coupe C8 - wip
1:25
Prepared the parts for paintong - except the body itself.


proje: 2022 Corvette Coupe C8

10 23 August 2024, 05:55
One question I'm asking myself: do I want to build the RHD option? That would be pretty cool but it won't fit into my project of the Silver Corvette Collection. Good, that I have this kit twice. So I can build one silver and the other one in another color with RHD and fitting license plate.
Take a look (if you want) into my review - kitreviewsonline.de/..25-von-revell-07714/ - sorry, only available in German.
23 August 2024, 05:59
Curious that both RHD & LHD are available.
I've only seen one LHD C8 in the UK
23 August 2024, 08:56
Don't forget that other countries are also RHD including Japan, Hong Kong, and Singapore.
23 August 2024, 10:06
Yeah George, I was thinking that but would GM actually export Corvettes to those countries as well as India, Australia & New Zealand?
23 August 2024, 14:14
Christian, I read your review, and what did I see? The Revell now CAN make wheels, like the original ones- what a progression!
So, I'm curious for the build!
23 August 2024, 16:58
Thank you for your feedback and Information! While I wrote the review I was wondering that the Corvette never had RHD. I didn't do more research and believed my source.
I'd like tl see see some numbers how much Corvette were sold in RHD countries. Have to look that up. I think it should be a lot. Why else they gave this option to the costumer now? I think the japanese market could be the most interessting one.
23 August 2024, 17:58
4 months ago I started? Where did the time went? Nevertheless: yesterday I sat on this to check the status and sorted the parts for the planned color for painting. Not more.
5 February, 05:32


yeni bir fotoalbüm ekledi.


44 29 September 2024, 18:45
The IsraDecal publication is absolutely pricesless for this project!
29 September 2024, 21:31
Cool project, following along as well. Not sure I can help you on the squadron selection - lots of good options.
4 October 2024, 17:10
Perhaps knowing which squadrons participated in "Swords of Iron" would help?
4 October 2024, 18:37
I love the IAF, and Israel. Your model looks great so far. I'll be watching!
6 October 2024, 01:28
This will be a nice little gem to the collection.... nice tidy work so far 👌👍👍
6 October 2024, 14:03
Just starting the F-16AM (ROCAF) version of this so I'll be following along. What color are you doing the cockpit tub? I've got a mix for dark gull grey that "looks close" but curious what you settled on.
Oh, also the kit comes with a bunch of 500lb resin Mk. 82s I don't plan to use, along with resin MERs for them. Let me know if you want them.
6 October 2024, 14:11
I have six aircraft in the collection:
S-199
P-51
F-16C
F-16I
F-4E
F-15E
When it's all done, I'll put together a single collection!
2 8 October 2024, 01:08
Great cockpit.! In some photos the paint job is really weather beaten, are you planning to replicate it?
10 October 2024, 06:22
Okay. Well, the "Swords of Iron" operations have been very hard on all these aircraft in Gaza. Should be pretty torn up when I get done.
11 October 2024, 14:29
Sadly, the update parts for the F-16I from IsraDecals is not all that great. The antenna fairings for the sides of the intake are okay, but the ones for the sides of the nose are kinda poo...
16 January, 03:40
I follow. And I see one big mistake I made when designing my workshop. A Big drawback is the Big desk. Arranging it takes a lot of time!
1 16 January, 07:20
Looks like the resin parts will work. Just takes quite a bit of time. Panel scribing will take some time too. It seems to be worth it!
16 January, 23:16
BTW, I tend not to arrange too much on the table unless I am doing a Tamiya kit...
1 16 January, 23:17
That big scale seems to need a big amount of plastic - so I join the big show! The Minion looks cool 🙂
Was only a bit confused about the order of the pics in the album (yeah I know, can be afford to move a bigger amount of pics in "Manage" ...)
1 22 January, 22:41
I'm a fan of Merlin... living life in reverse...
The pics are newest first and tell the history of the build.
23 January, 03:21
I sanded the wing roots quite a bit. Looks like they went on okay. Should be minimal sanding with a little Surfacer to close any gaps.
23 January, 03:31
Hi Desert 👋 looking good....see your getting good use of the scotch tape, Do you use super glue for wings on larger models? Or stick to stand cement?
Nice subject by the way 😁👍
1 23 January, 21:54
Thanks. I'm using standard Tamiya Extra Thin Cement. The quick Setting cement is not good for those joints. The regular cement, when given plenty of time to cure is pretty good. The fuselage joints have come out really strong. The wings are good when plenty of milling is done to make the joint very clean. Then the cement has a large surface area to cling to. So far, its all gone very well.
1 24 January, 00:38
Thanks Desert👍 l get concerned sometimes on larger parts if the extra than is enough. Sounds like if you have good surface it will be ok.
Good luck with the build 😃👍
1 24 January, 11:31
I'm with DM. I love the quick-setting but it's just not as strong. I also reinforced mine with some sprue "spars" but they had to be thinned down a little because the wings are quite skinny and would bulge otherwise.
2 24 January, 17:12
There are a ton of antennas on this bird. Sadly, the flaps fit very poorly so much cleanup is needed. All the other mods are roughed in and will clean up with primer and dressing...
26 January, 04:10
With the nose antenna mounted too low, I have had to see if I can remove them and reposition them higher to match the real aircraft...
1 29 January, 19:58
Both antenna are 1.5mm from the radome aligned on the panel line to the rear of the antenna and spaced down from the piano hinge line.
1 29 January, 23:13
Getting close to primer phase. Need to paint the canopy interior and blend the navigation light pods on the sides of the inlet…
1 February, 00:27
Somehow I was mentally making the masking process far more difficult than I needed to...
4 February, 03:35


yeni bir fotoalbüm ekledi.


36 18 January, 14:50
A very nice gift. Well done. I wouldn't mind having one myself. I'm a bit surprised that Airfix has such massively out of scale recessed panel lines. If you do one for yourself I would fix that issue.
18 January, 15:32
Thanks all.
@Skyhiker that's not something I have the skillset for. Airfix has overemphasized panels lines on most of their 1/72 kits, that's just their "style" I guess. I don't mind it. Maybe the Italeri kit has more accurate sized lines in this scale, but it's also a much older kit so probably has its own issues. I have never and will never claim to be an expert on accuracy.
1 18 January, 18:56
yeni bir fotoalbüm ekledi.
11 Görüntüler
Hasegawa F-86D SABRE DOG 'J.A.S.D.F.'
1:72


proje: F-86D Sabre Dog

1 5 February, 04:14
yeni bir fotoalbüm ekledi.


1 5 February, 04:07
yeni bir fotoalbüm ekledi.
40 Görüntüler
Revell '68 Dodge Charger R/T
Slowly working on the bare metal foil trim


5 26 December 2024, 04:41
Finally got the airbrush and spray booth set up (after doing the motor by hand). Color inspiration I'm using is this:
dodgegarage.com/news..ic-for-tomorrow.html
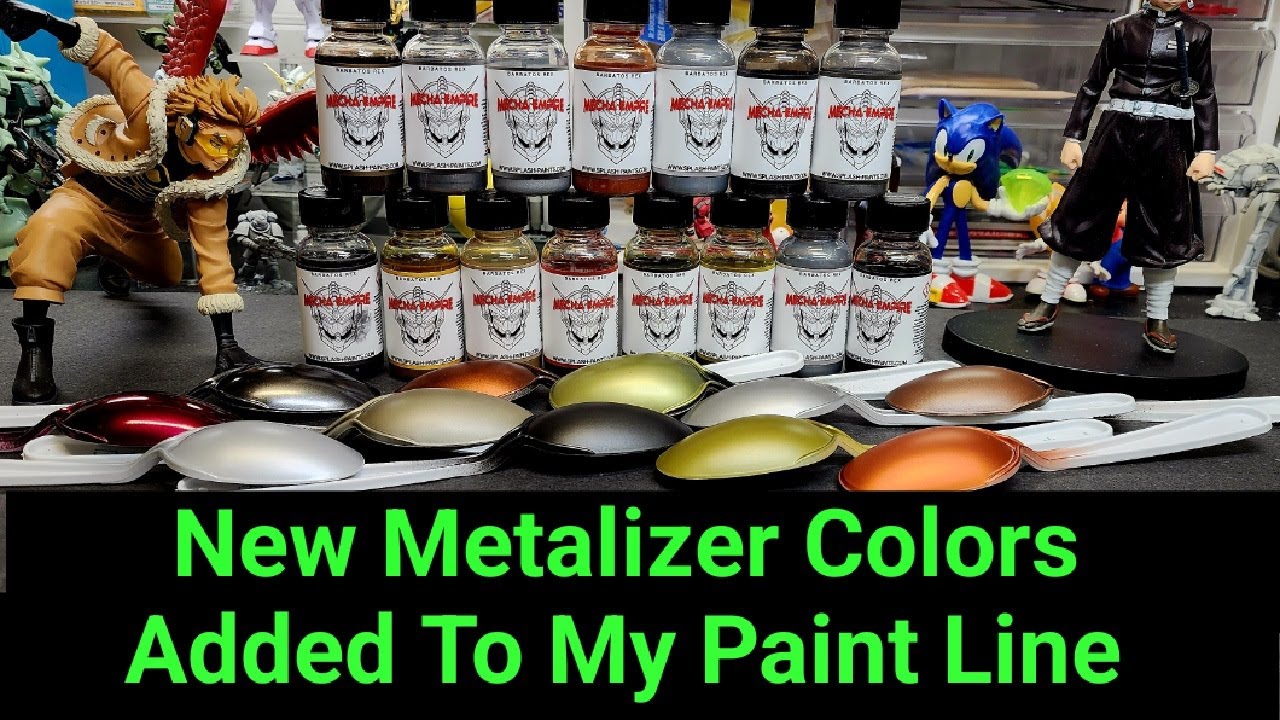
After some extensive searching, I've found a paint I want to use for the body. Sunburst Orange from Barbatos Rex. I'll probably top coat it over a metallic grey, or gunmetal grey to get the color depth I'm wanting. Here's what it looks like:
Youtube Video
1 28 December 2024, 01:41
Sweet Mopar ! I used this kit for my Bullit car chase combo, good kit. 👍
1 28 December 2024, 04:13
Finally have my paints ordered for the body. Also making full use of my new airbrush setup. The finish it so much better than brushed. Ended up going with Mecha Empires Copper Fire, which I'll put over top a base coat of gloss black. I MIGHT do a very thin coat of clear red on top to deepen the color. That might require some practice pieces first...
I'll upload a sample of those colors
12 January, 00:56


yeni bir fotoalbüm ekledi.


1 5 February, 03:36
yeni bir fotoalbüm ekledi.


87 5 December 2024, 08:10
I'm definitely following this! The idea of using drilling holes in small parts and inserting the needles is brilliant. Wish I saw this 2 weeks ago 😳
1 6 December 2024, 09:27
Welcome guys, yes holding spoilers is sometimes a real pain in the a**, I've learned this the hard way
6 December 2024, 11:40
Weirdly the X series acrylic paint is compatible with Tamiya's Lacquer Thinner, and it then acts a lot like lacquer. I have switched to buying lacquers only but still have some X series acrylics that I will ONLY put through an airbrush once thinned with their lacquer thinner.
1 17 December 2024, 17:49
I understand that the LP's are basically the rattle can lacquers in a jar. For 5 times the price.
17 December 2024, 21:01
Top idea to use the official Porsche config on the website! Tank you i'll configure one to better see all the details for the model. Double fun!
1 18 December 2024, 12:56
I can also recommend walkaround videos like these
Youtube Video
Youtube Video
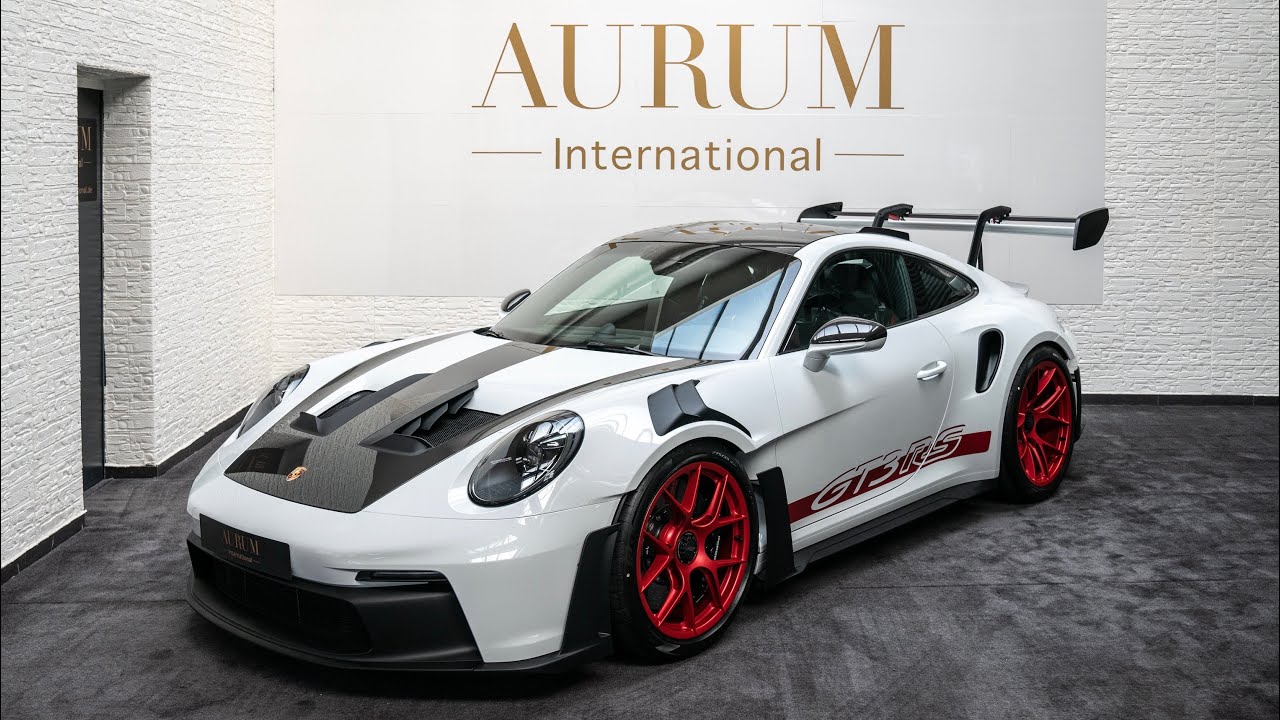
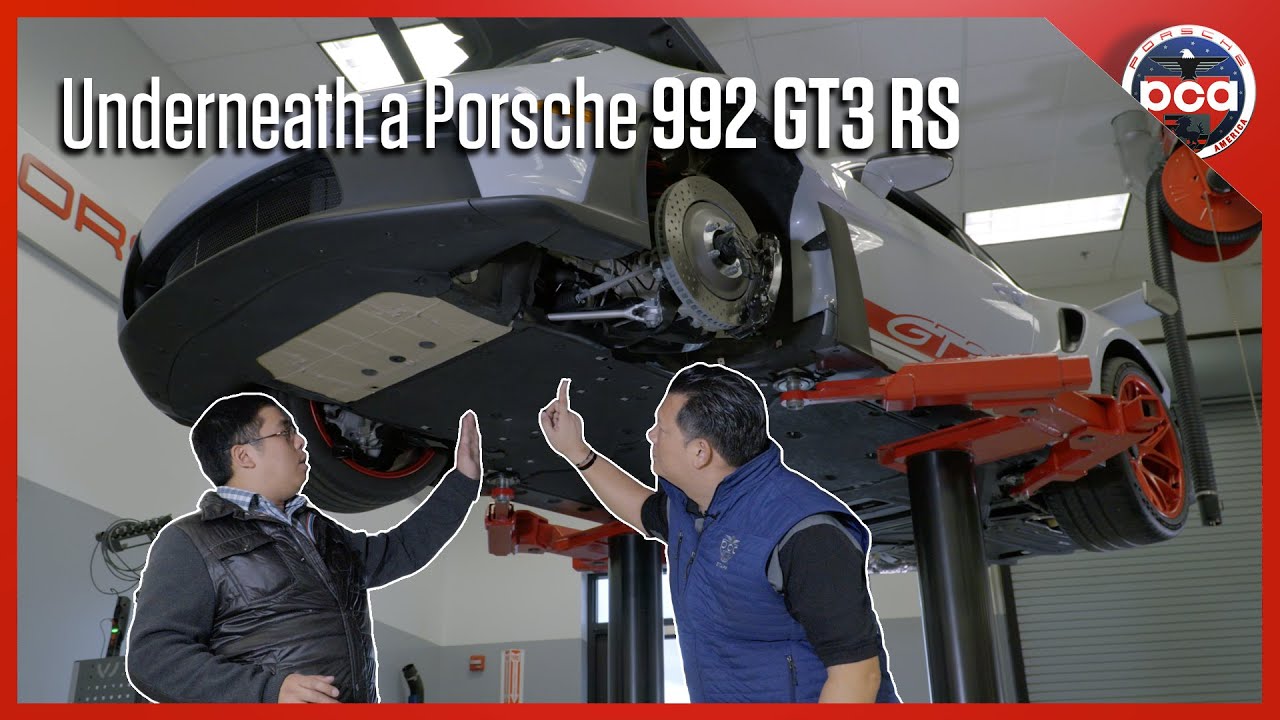
great source for all kinds of detail inside, outside and from below
2 18 December 2024, 14:38
@Alexander I'm still new to polishing paint, especially metallics, but my 1st gen Civic build was sprayed with X-34 thinned with Tamiya Lacquer Thinner. Main reason I've switched to this is using acrylic thinner constantly clogged my AB tip with the weather here.
Honda Civic GL (SB-1) | Album by Marktastrophe (1:24)
@Martin it's wild how prices change per locale, a jar of LP is a little less than half the price of a rattle can here and covers 3-5 times as much sprayed through an airbrush. (The low end of coverage is yellows and reds, of course.)
18 December 2024, 15:49
I really like your careful work and painting 👍
@Martin Tamiya follow simply the trend to lacquer paints, after Mr. Paint and and other started this trend. Ok, there is a smell but I really like the fast drying times and they are much more forgiving for airbrushing. When the Mr.Paint colors were new and people asked about them, my answer was always "It's like Alclad in color" 😉
19 December 2024, 15:06
The use of pins is a great idea. I've used this technique when I planned to pin the parts later, like on a resin kit, but hadn't considered it in other contexts before.
1 19 December 2024, 15:17
Lacquer or organic solvent paints are superior almost in every way to waterbased colors, some people might even prefer the smell 😄 I am just bewildered there is a trend towards something clearly not "environmentally friendly" in our supposedly eco friendly, green and polar bear loving world. Not that I am complaining...
19 December 2024, 17:08
I decant the Tamiya rattle cans and get +/- 75ml out of them. For approximately €8. The 10ml LP's are €5 each. If the paint indeed is the same , that's a huge difference.
And I mostly airbrush with lacquers. Much more forgiving in my hands than acrylics. I donated most of my acrylics to Spanjaard. The only ones I kept are for detail brush painting.
19 December 2024, 21:00
5€ for 10ml LP?? I sourced them for 2,69 a jar. I have to admit, I have never used decanted paint. Tried decanting once but was repelled by the messiness and did not end up using the paint. I think I still would prefer getting the jars. And if you consider you add up to 2/3 of thinner to the jar to make it airbrush ready the price difference isn't that great anymore...
19 December 2024, 21:16
@Martin To avoid to confuse people: the new lacquers are still acrylics! They are in solvent based thinner, in opposite to the water based acrylics. See for example a MrPaint label: "Acrylic lacquer based paint".
For completeness, enamels are another (oil based) paint class.
Sorry Alexander for hijacking your thread!
1 19 December 2024, 21:42
@Martin that could be the difference, I have never decanted a rattle can either. A 10ml jar is less than €5 here where a rattle can is around €12.50. I also average a 1:1 paint to thinner ratio so the thinner goes quite far.
(Currency conversions courtesy of Google)
20 December 2024, 02:57
@bughunter: I did not want to open the pandora's box either because it is an insanely broad topic but hey who does not like a healthy discussion! I get the feeling the word "acrylic" has become somewhat of a marketing term because it sounds cool and modern. So the consumer will think, "hey I have heard this before, this must be good".
It is basically the umbrella term for the "sticky stuff" in your paint. Paint consists in very broad terms from 3 parts: 1."colored stuff", the pigment 2."sticky stuff", the binder which binds the pigments 3. "runny stuff", the solvent which makes the paint more liquidy for easier application.
The "sticky stuff" is the aforementioned acryl, again a broad term for a myriad of different compounds. There are other categories of sticky stuff: oils, resins like polyurethane and many many more. In the earlier days the painters used compounds found in nature like shellac, tree resin or even eggs. When you paint an object, the solvent evaporates and the sticky stuff with the bound pigments inside remains on the object becoming hard and dry leaving you with an object in your desired color.
Depending on the chemical properties of the "sticky stuff" it can be soluble by different solvents like organic solvents or waterbased ones. Again in very broad terms the organic solvents are the "smelly" ones. But there are also overlappings like alcohol based paints which also can be diluted with water (Tamiya X and XF and alike)
3 20 December 2024, 08:50
It is an insanely broad topic, I would say just stick to what you are most comfortable with and enjoy the process!
20 December 2024, 08:51
Or learn something new by following Mr Shiny 😉
And I thin my decanted cans with 20-30 Mr SLT as well. To each his own, like Alexander says.
1 20 December 2024, 11:12
I am making progress guys, just the uploading is lagging behind. More pictures in the following days 👍
3 26 December 2024, 20:16
Looking forward to the pictures! Santa was good to me and I'm now the proud owner of this kit!
1 26 December 2024, 22:22
Just to throw my English spanner in the works, if you guys can get hold of some Winsor and Newton Galleria retarder, you should find that works too? Obviously testing, before you commit to the model, but it's an artists go-to, and you just need a tiny drop. Lasts for years, and for the money, it'll probably outlive each of us? Give it a Google and see if it's available in your area?
26 December 2024, 23:20
Joining the crowd and start with two cents of mine: I never got along with Tamiya paints. Exasperated I switched to Mr. Hobbcolor then. Improved my results further since using Mr. Color Levelling Thinner and closed the circle with Tamiya and Mr. Hobbycolor paints using the same thinner and about 10% retarder. Now I can use up my paints.
27 December 2024, 13:03
Apparently, all retarder contains glycerine. I'm no scientist, so don't hang me if I'm wrong! However, I did manage to dig this out, from years ago, and if anyone would like to look at the following link, then please do so.
My belief is, that sharing information, expands the knowledge of the hive?
Obviously, it's not my thread, so please feel free to PM/DM me with your experiences?
Alexander, thank you for your patience 🙂
1 27 December 2024, 20:01
Guys, thanks for your input and feel free to share your thoughts 👍
When using a brush for paint application I personally almost exclusively use Vallejo Model Color nowadays (similar paints from other brand as well, in the 17ml droplet flask). You apply a couple of droplets of your desired paints onto a wet palette an off you go, you can mix the paint on the go while you are working, it dries really fast, the droplet flask is very convenient. Great stuff. Almost never used Tamiya Acrylics with a brush with the seldom exception here and there. The glossy ones for example for springs, used a couple of times already.
Vice versa I for the love of me cannot stand airbrushing the Vallejo/MiG waterbased acrylics. I tried, i did not like the result. Something about airbrushing these paints just rubs me the wrong way...The way they clog the airbrush and the way they can be treated afterwards goes against my moideling habits. I know some modelers swear by them, I am not one of them.
So where were we? Paint retarder, so far I am d'accord with the Tamiya branded one and since I use it very seldomly it will be probably enough for a lifetime. So I am not seeing myself purchasing a bottle of Winsor and Newton anytime soon, but hey who knows, never say never!
1 27 December 2024, 23:14
Awesome work as always, taking a seat for the remainder of the project! 👍
1 29 December 2024, 22:27
Agreed, very much like the creativity of trying stuff like this. Definitely an interesting pattern. 👍
Would it be possible to try sewing yourself a fabric for the desired effect?
1 2 January, 22:48
With thin parts it is may be possible to wound a thread or wire around it as mask.
1 2 January, 23:01
I once saw a guy stretch a fishnet stocking over a motorcycle petrol tank and spray over it. The result was a perfect, snakeskin effect. Man, that was the coolest thing I ever saw! I think it was on Orange County Choppers, but I can't swear to it. I definitely admire your attempt to deliver the right impression. Creativity is what makes us stand out 100%
1 2 January, 23:37
Haha just sneak in while she's not home. You definitely proved the concept just need to fiddle with the medium
1 2 January, 23:50
Hey gents, Happy New Year!
Here is the video in question btw
Youtube Video
2 3 January, 00:09
Amazing 😳 This could make me having a go at building car kits instead of only aircraft.
1 5 January, 17:43
Is dry fitting necessary after all?
The bad fit of the mask and the missing B-pillar looks like they pressed this project out of the door for Xmas business? May be also Tamiya needs money in this though times, but it is bad if that kills quality.
5 January, 17:58
once again I'm blown away by your level of detail and ideas to create stuff out of thin air... honestly mindblowing. Thanks so much, I'm always learning something new when looking at your posts
6 January, 07:49
Not to rain on this parade, but according to the instructions, mask C goes on part D5, not D6. Could it be that even Alexander the Great is capable of a mistake? Now my entire universe shall collapse!
3 6 January, 16:48
Martin, you are absolutely correct and I have made an embarrassing mistake🙂
1 6 January, 18:02
Tamiya, I take everything back! Okay not everything, the missing B pillar is still not cool...
2 6 January, 18:03
I only knew where to look, as I have made the same mistake more than once!
2 7 January, 09:22
Martin, that is the "experience of an engineer": you recognise that you have made the same mistake before. 🙂
2 7 January, 09:27
So that's what my engineer degree is for!
Still another masterpiece in the making Alexander
1 7 January, 17:04
Yeah, that's cool.
Forgive me, I've just drooled all over my phone screen?
I'll be back, when the trauma team have evaluated me!
WOW!!!
1 10 January, 23:37
#141-146 adding details to the details. The level of skills makes this project really fun to follow
17 January, 08:50
The carpet texture process was fascinating Alex. CF has got the better of me but think I will have another try! Thanks mate! When will you start a You Tube channel???
1 17 January, 09:54
Thx guys, you are too kind. Peter, CF is not that scary, really. Once you`ve got the hang of it it is actually a really relaxing and enjoyable process, you should give it a try 👍
Concerning Youtube, I have thought about it and calculated it through. It will require an insane amount of dedication and time. Time which I will have to chop off from modeling and invest in filming, editing, uploading etc etc. Besides by now there are tons of modeling channels with maybe a couple of hundreds or few thousands of subs. It is very difficult to stick out and those who do have started their channels 10+years ago. Honestly, I think the golden days of Youtube are over anyway.
4 17 January, 20:05
Yes Alexander, and it is not only a big effort for you - it steals a lot of time from all the viewers! I prefer a build report with good pictures over the tons of videos.
2 17 January, 20:48
George, I understand your point and yes watching an 'unboxing' would I think be a little pointless but there are those out there that like them. In my case, when I took up the hobby I lived in a small mining town in Central Queensland Australia. No mentors, no clubs and the only modellers I met were on Scalemates. I now count quite a few as good friends, sometimes advisors and full time cheer squad members when I learn something new or build something they recognise as a step up for me. The camaraderie on Scalemates is wonderful and I will be eternally grateful to Tim for this site. All that said, a large part of my learning comes from You Tube. As I said I lived in a small, dusty little town 3 hours from the closest hobby shop, any other modeller or club. You Tube was a life saver for me. Yesterday I learned that a Tamiya Extra Thin cement bottle brush can be extended (and designed to do so) to reach the bottom of the bottle. The sort of stuff you learn from a bloke in the club in London, Berlin, New York or Pretoria. A lot of us don't have access to that wealth of experience for a question we didn't know to ask. It may not be applicable to you in your situation but it has a purpose for me.
6 19 January, 03:39
I don't watch "unboxing" videos either but Youtube is an incredible useful tool if you use it wisely and purposefully. It is a gold mine of useful information and I've learned an incredible amount from it and am very thankful to the content creators. Personally I wouldn's start a channel though because of the mentioned reasons
1 21 January, 06:48
I live in a "small" city in north east China, I say small but it has a population of approx one million. You Tube, along with most western social media, is not available in China. There is a web site called bilibili.com that seems to get some You Tube material, a lot of it is Japanese. However, modelling is very much a minority interest here, so the internet is my only companion. I like this site and iModeler.com.
21 January, 12:38

The polished result looks fantastic, the mirror too! I'm sure this little bubble will not be visible at the end ...
1 22 January, 22:43
Nah, Stuttgart will be fine but Shizuoka might need a few tips😄
1 23 January, 19:03
Whatever you did with the armrest on the door panel (the gray stuff that looks like fabric) looks amazing!
23 January, 22:09
Hey yngvenett, the same I did with the center console (pic 90) and dashboard underside (pic 175). Underneath it is the same dark grey paint like the rest of the part. Additionally I applied a mixture of XF-86 and X-21 (10:3 ratio) If you spray it fairly dry you get this fuzzy effect
1 24 January, 05:14
My dear mates, the build is progressing rathier quickly since I have a few days off right now. Looks like I might finish until the end of the week 👍
1 24 January, 05:45
This level of detail, is worthy of an award.
You've removed the bar, and created a whole new game!
Excellent work on the whole project, Alexander 👍
1 24 January, 07:25
hard to get anything better than this.... but I am sure Alexander will just exactly do that in the next build 😉
1 24 January, 10:01
Unbelievable stuff, Alexander! I was confused for a minute when I clicked on pics of the real car vs pics of your model, especially the interior. Great work, sir!
1 24 January, 13:23
That interior looks fantastic. Perhaps you can chop the roof off and turn it into a convertible so it stays visible. 😉
1 24 January, 13:41
@Marcel. If he chops anything off this, I'll personally fly to his part of the world, and apply a high voltage, to his genitals! This is where we're all lucky, because Alexander knows that it's there, and we've seen it being created. Once the lid is on, it'll all be hidden, like a great king's tomb 😉
1 25 January, 07:12
That's excellent work Alexander! Since such a knowledgeable bunch of modellers hung out here right now, can someone explain to me why my clear coating results have a satin finish at best? I usually airbrush on top of Vallejo air colors, and only with the alclad's clear could I achieve some shining results but that has been discontinued as far I know.
25 January, 08:20
Marcel, I thought about your offer but Mr. Bozzer's strenuous appeal made me reconsider
3 25 January, 08:55
Hey Evan, it is a broad topic but you can roughly boil it down to three things: 1. Surface preparation 2. Clear coat used 3. Thickness of the layer/ number of layers
I will use the terms paint/clear/clear coat/varnish interchangeably
1. If your surface is smooth, the applied varnish will also appear smooth and glossy, no brainer. This also applies to the paint you apply the gloss coat OVER, if it is flat (matte) or rough in texture etc the gloss coat will appear similar.
2. You can roughly divide clear in two categories: one component (1K) and two component (2K). Without going too deep into the chemistry the layer of 1K clears shrinks down considerably while it is drying, the solvent which is the bulk of the paint evaporates, leaving you with a thin layer of dry clear coat. 2K clears cure/dry by chemical reaction between the two components, while just a small portion of solvent evaporates leaving you with a thicker (glossier) layer. 2K paints are still a niche in scale modeling but if you want to achieve a nice car body finish there is almost no way around it
3. The more layers you apply, the better the result becomes. Also a no brainer. If you use 1K paints you need many more layers than with 2K paints. If I am saying more layers I mean the following: you apply 1-2 layers in one go, let it dry, carefully sand the surface with very fine paper (2000 or finer, just to get rid of the dust particles), apply 1-2 coats, let it dry.....repeat until you are satisfied. With 2K you will need less layers and less repeats.
2 25 January, 13:31
This is the gist of it from my personal experience, everyone welcome to add their two cents.
25 January, 13:33

Thanks Alexander, I had a feeling that there is no lazy way around it, so lots of (smooth) layers is the answer to a shiny result. I will commit and put the effort on my next project.
1 26 January, 10:48
What also helps with solvent based clears, is using Mr Self Levelling Thinner instead of regular thinners. That stuff is worth its weight in gold.
It slows the drying time a bit, so the clear can level off a bit more. Flip side, if applied too thick a coat, runners are a possibility.
2 26 January, 15:47
What a tease! Looking forward to seeing those "many parts" go together!
1 27 January, 21:24
Thanks a lot at all dear mates, at those who have followed this report and gave a thumbs up or two. I hope I did not bore you too much with my long winded explanations. Maybe you could even pick up some inspiration here and there. Another nice project, another lovely result, tried new techniques, learned something new. Stay healthy, stay positive, see you at the next project!
2 28 January, 20:40
Congratulations, this was an incredibly enjoyable build to follow and the end result is fantastic!
1 28 January, 21:08
Congratulations! It was a fantastic journey and I am very glad that you added lots of information during this building process. I took screenshots and actually bookmarked it because of some of your teaching skills. The finished car looks great, both on the inside and outside.
1 28 January, 21:42
Congrats! As said by many others, inspiring build and the result does not disappoint! A very good job also for the nice presentation with the mirror, looks like something actual marketing of the real car would do too! 👍👍👍
1 28 January, 22:24
She's a beauty mate! Your tutorial was informative and very professional. I particularly liked the chopstick sander. Definitely something worth remembering! The outcome certainly paid off!
I'm also glad to see, that you kept the roof? Your soprano skills are saved for another time!
Well done mate, put her in a case, and grab yourself a beer, you earned it 👍
1 28 January, 22:27
The daylight shots wonderfully add to the overall impression of a superb build.
1 28 January, 23:31

"I may even pick up an inspiration here and there". Understatement of the year! Alex G, you just drawing breath I use as an inspiration!!! Again, Peter Hardy is dumbfounded by your level!
2 29 January, 07:19
It's almost like you photographed the real thing. Outstanding work. And don't let Bozzer intimidate you. I'm sure he means well, but a convertible definitely would be an interesting option given your highly detailed interior work. 🙂 For this kit it would even save you the hassle with that b-pillar. Maybe Tamiya is working on that version and is that why they didn't bother with that pillar!
1 29 January, 11:52
Wow. Just wow. Fantastic result as always mate. Thanks for sharing the Mr. Shiny full experience 👍🏿👍🏿👍🏿🥳🥳🥳
Also reminds me that I miss my beloved hobby really bad. But in the moment there is no chance because there is no bench nor mancave 😞
1 29 January, 20:15
Hey Dennis, kitchen table, basic set of tools, off you go! I was in a similar situation 5 years ago while moving places and had no bench for like half a year, everything was stashed away in a storage facility. That did not stop me from realizing a few projects including a BMW Z3 and the green Opel GT. All fun and relaxing OOB builds. Unless you are homeless of course 😄
30 January, 08:15
@Dennis. I know some guys, who model from the back of their semi? (Obviously not while driving)
It's possible to do it anywhere, as long as you have the time. Don't dishearten buddy, you don't need all the fancy stuff, to have a good time? Please remember, it's a hobby, and it's fun! Just glue and paint, are enough to make a convincing model? You could always paint it white and hide it in the snow? 😉
30 January, 19:35
Note to self:
Don't spray grey primer on a truck, in a cardboard box, in the kitchen, because it's warmer than any other room in the house!
Two days later and I was still cleaning up the residue of the overspray and whatever else hit the fan!
I'd rather clean up the mould lines on an old Italeri kit, than do that crap again!!!
30 January, 19:41
Note to self. If I am as silly as Bozzer do not admit it publicly. Keep it to yourself.
4 30 January, 21:42
The teacher in Bozzer is helping new hobbyists to avoid some divorce inducing painting methods.
I can appreciate that.
😂
2 1 February, 08:19
Lol, I'm just trying to protect you guys and your kahonies? Believe me, it's eye watering, when your Mrs see's a dusting of grey, all over her kitchen! Now you all know why I built the mancaves? She's much happier now that I've taken my hobby to my palace of plastic. I can only imagine the pain, if she smells three resin printers, banging away, on the kitchen worktops?
Stay safe out there, fellas 100% 😉
3 1 February, 09:09
Glorious work!! Makes me want to start mine right now! I better finish what's on the bench first though
5 February, 02:09


yeni bir fotoalbüm ekledi.
5 Görüntüler
Tristar Pz.Kpfw. 38(t) Ausf. E
1:35


proje: Panzer Kpfw. 38(t) Ausf. E

1 5 February, 02:43
yeni bir fotoalbüm ekledi.
10 Görüntüler
Egg-104G Starfighter
1:Egg
With the seat glued in place, cockpit is completed.


proje: Egg-104G Starfighter


7 21 December 2024, 17:24
These egg subjects shows a lot of details despite the "seriousness". Very nice work so far.
1 20 January, 05:11
The size and shape of the aeroplane allows it to look as being able to be strapped on by the pilot.
5 February, 02:43
yeni bir fotoalbüm ekledi.
11 Görüntüler
1/144 Revell F-16C Build
1:144
Its a rough start on this build. There are areas of very fine detail that I'm very happy with and its why I selected th...


proje: Revell F-16C Jaws Version


 3+
3+16 December 2024, 14:24
yeni bir fotoalbüm ekledi.


10 4 February, 15:47
That looks so pretty. Beautiful assembly, the paintwork is great, and the lighting of the photograph is attractive. Nice subject.
5 February, 02:10
added a new article to onun personal gallery:

Jagdpanzer 38(t) Hetzer Panzergruppe Beyer
Vespid Models 1/72
tarafından Jeffrey E. Groves üzerinde Inch High Guy
5 February, 02:08
yeni bir fotoalbüm ekledi.


10 20 January, 17:18
hi everyone, starting a new kit simple build I hope for the begining of the year.
first step opening windows and hole in the hull.
20 January, 17:26
1ststep working on the openings windows, gouvernail, and decks to give a less toyish look. uploaded photos. Let me know if you have further suggestion of modifiction on deck and hull. thanks !
22 January, 11:13

additional pics to show progress. Santa Maria Carack did have the main bridge open and not closed. The kit propose you to have solid walls and paint them in black. I decided to open them. but I has also to create the prolongation of the main deck now visible.
Filled also the masts crippled with ejection pins..
24 January, 00:33
additinal pics I did research and it seem the bow of the boart is incorrect as it is in the recent replica of the santa maria or in the plands. I cut the upper breadge at the bow and will replace it by a triangular platform as seen in the pics. work in progress.
26 January, 21:12
Finshed painting of the main desk using 1mm band with 3 different wood collor to give some detail to the deck. May be not really accurate but give some interest on it. Next step masking and painting the hull. let me know what you think.
28 January, 06:42
now I getting stuck trying to paint the the hull. I tried to start by a clear tone ochre yellow and a wash with Citadel constrat seraphim. but I am far to obtain what I want in the ref pic I found on the wen. any thought shal I mask aslo the hull to make planck and fill it with more redish brown tone ?
1 February, 03:24
I'm building a similar small ship and decided to just use a wash to add realism. Masking individual boards on such a small model seemed not worth it to me.
1 1 February, 04:23
indeed will take a lot of time and there is a lot of reinforcment in the way. thanks for the advise.
1 February, 04:28
Also the hulls are very curved. Maybe next time I will try it but not this time.
1 February, 04:54
second layers with vallejo colors (I do not have oil paint with me). still too light for a boat that crossed the ocean. need more work on the hull.
2 February, 00:44
You have to lighten up small objects or they are just black holes. My little ship is too dark but oh well. Yours looks great. I should have painted before assembling like you are.
5 February, 02:03
yeni bir fotoalbüm ekledi.
34 Görüntüler
Heinkel He 70 F-2
1:72
I repaired the camo as best I could with a brush and reapplied the gloss finish.


proje: Heinkel He 70 F-2

34 4 January, 23:03
This is a test...this is only a test. If this were a real emergency my AMS would take over. I want to see if I can do an out of the box build. So far I have almost never been able to. Wish me luck.
4 January, 23:06
I think this is my first time with an ICM mold. The kit has a lot of flash and is very subtle in its markings. This creates a bit of a challenge cleaning things up because I have to stop and figure out what to take away and what to keep. But I think when everything is cleaned up it should be pretty straightforward.
4 January, 23:59
I think I am becoming an ICM fan. The mold is not the easiest but the subtle details and perfect scaling are great.
5 January, 14:54
There was one piece that was too big to fit. The instructions said that it was the backing for the control panel for the navigator. I started filing it down but then realized that Revell screwed up the instructions and it was actually the pilot's headboard. Now I have to repair the headboard.
1 5 January, 19:14
Well I blamed Revell for getting the instructions wrong but when I checked the ICM instructions they had the same mistake. The piece clearly belongs behind the pilot if you look at the kit. So either the engineers who designed the kit got it wrong or the graphics department got something wrong. Either way I went with the kit and not the instructions.
6 January, 18:43
Today I was going to paint most of the day but my airbrushes were not cooperating so I ended up brushing the interior.
6 January, 18:44
The more I work with this model the more I am truly amazed at how finely detailed ICM was able to make the mold. It's incredible. I hope I can keep any of those details without the paint just filling it all in.
8 January, 15:12
Welcome everyone. It's starting to come together. Soon it may even look like a plane.
14 January, 02:23
A bit more progress made today. Now I have to wait for everything to dry before attempting to put on the landing gear.
1 14 January, 13:26
A set of masks would have saved me a lot of time, but after shipping they would have cost more than the kit.
17 January, 15:14
Ouch, seen the very first picture.
few flashes but lovely plane with this inline engine version.
17 January, 15:21
Yeah, there was a lot of flash on the kit. It took me a day to get all the parts cleaned up but in the end the kit is actually not too bad.
17 January, 15:26
I got the bottom painted but I think I am going to give it a day to cure before masking it.
1 19 January, 17:37
This build is making me question why I predominantly use an airbrush instead of a paintbrush.
1 20 January, 15:33
Hi Skyhiker 👋
Always pays to give paint good drying time before more work, l like 48hrs on main airframe, probably why l tend to have couple of builds on the go ..... something to do between drying periods.
Looking good , l always hand paint my wheels, lve done 67 in 2yrs 🫣
Good luck on next steps 👍
21 January, 19:41
I got the base layer of RLM71 down. I'm not happy with the windows but I couldn't sand them down flat without damaging a lot of details. I'll have to see how it looks when the paint is dry.
23 January, 21:14
Coming along nicely 👍
An interesting wing shape.. interesting aircraft generally, nice 🙂👍
23 January, 21:35
The wing shape actually gave inspiration for the Spitfire. Rolls Royce - if I recall that right - acquired a He-70 for test purposes. Here the designer of the Spitfire saw the plane.
1 24 January, 13:41
That's an interesting bit of history Michael. I didn't know that but I did notice the similarities. As a matter of fact I was just comparing the two a few days ago.
24 January, 15:22
Well, somehow the landing gear broke on me, so I had to scratch build a new part. Seems to be working now.
24 January, 15:55
Good job on the camo, every plane probably has variations in camo so box art is good, it does work well as a camouflage that pattern, breaks up the profile well.
Nice build 👍
24 January, 19:29
Thanks for asking Jennifer. I'm slowly getting back on my feet. My fever is gone now, but I'm still pretty tired. I'm taking it one day at a time.
5 February, 02:01
/tr/search.php?q=*&page=newsfeed&fkSECTION[]=Newsfeed
search-solr.php?lang=tr
35
35
/tr/search.php?q=*&page=newsfeed&fkSECTION[]=Newsfeed
35
todo