Lotus 72C Ford - GP Great Britain 1970 - WIP

Everything starts with the central monocoque (with the model as well as with the real car).

The monocoque has 2 main parts of course: the cockpit and the body cover.

On top of the monocoque comes the cowling, which is mainly cast in transparant plastic. So I masked the windscreen with some BMF and Maskol.

Dryfit of the monocoque + cowling. I also added the radiator covers left and right of the monocoque.

The nose part has been assembled and sanded. The front wings will be spraypainted separately, although they will be sprayed in the same color as the nose. But I don't want to give the impression of a nose + wings being 1 part.

This is how the nose will look with the front wings attached.

Here you see the rear wing assembled, as well as the air box.

Overview of all the Lotus parts so far. Now I will start applying the white primer.

After the white primer coat, I applied Zero Paints white 'for Team Lotus/Gold Leaf cars'. It comes in a set with the red and gold paint which I applied also after careful masking.

Here is the result of the 3-colored nose with the front wings dryfitted. Of course the decals are not fixed yet.

Same exercise for the central hub, except for the gold painted striping which will be formed by a decal here.

And the radiator covers have been spraypainted in exactly the same manner.

All the painted parts together and dryfitted to give an impression of the completed bodyparts.

I also did some work on the tires and rims. I downtoned the heavy chromes wheels with some Aclad 2 "Klear Kote Flat". I also added the valves on the front tires; I still have to find the correct position of the valves on the rear tires.

The cowling has been spraypainted as well; the white arrow points to the masking tape which protects the transparant part of the windscreen.

Overview of the work done so far.

The body has been decalled - the cigarette sponsors are aftermarket.

Overview of the bodyparts. They still need to be clearcoated.

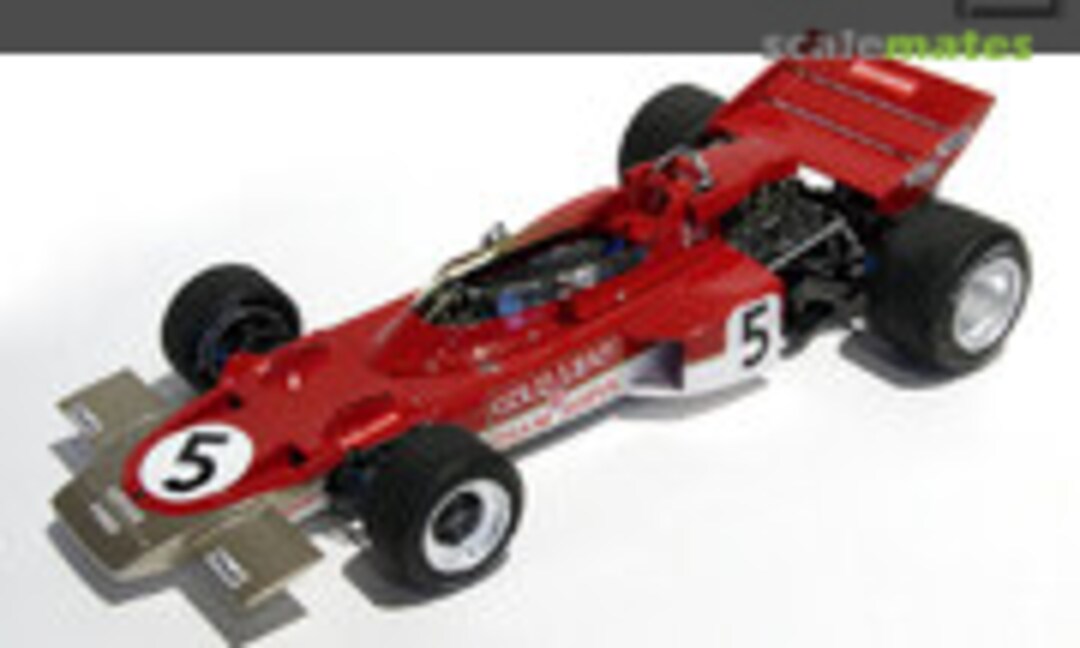
Watch out when you build the Silverstone version: the n° 5 decal is positioned wrong on the instructions. It should be turned towards the left hand side from the driver's view.

Here a reference pictures of the Lotus at Silverstone: note the position of the nr 5 number!

The interior was sprayed with Gunze Sangyo SM-07 chrome. The seat was painted in different shades of black to enhance the depth effect.

The plastic kit gear lever was replaced by an aftermarket metal one, and the dashboard has been thoroughly revised.

At the front I removed all the molded switches, and I drilled holes instead.

Next I fixed aftermarket metal switches in the holes. The kit instrument decals were used, but I sealed them with a drop of epoxy glue.

At the rear, I removed all the instruments because they were too small and did not offer the possibility to make the necessary cable connections. So I replaced them by aftermarket parts, the instruments as well as the connections.

At the rear of the cockpit, behind the driver’s seat, the radiators were fitted and provided with a wash for some more depth.

Another picture of the central hub.

Next I fixed the radiator covers.

View from the rear of the central hub.

Next I checked if the top cowling would still fit.

Looks ok, although I'm not very enthousiastic about the one-piece cowling+windscreen. It limits the possibilities.

And no matter how good your paintjob is, you will always see that the parts are only painted, and not seperate.

This is because it's impossibel to paint the join line between cowling and windscreen.

Dryfit with the nose and central hub.

And another dryfit with the painted parts so far.

I added the wiring to the dashboard rear, as well as the safety belts in the cockpit. The shoulder belts have been prepared as well. I also replaced the small bolts of the fuel cap by metal wire.

Here you see the wiring at the back of the dash board clearly.

Another shot of the wiring and the switches at the dashboard front.

Something missing in the kit is the support in the nose of the car, where a fire extuingisher should be fixed. I decided to add this construction for more realism. I used metal wire to assemble the supports.

Dryfit of the nose parts to the cockpit. Now I can start to spraypaint the parts.

Another dryfit shot.

Complete overview of where I am at this point.

The nose parts were painted in their basic colors.

It's a shame that the suspension was painted flat black during the British GP, but that's what it was!

Shot of the shock absorbers, kinda special metallic blue color there.

Clear shot of the scratched fire extinguisher in the scratched supports.

The suspension parts were drybrushed to make the details come out better.

This is how the nose part looks like as a whole.

Shot from the left side of the nose.

And something you won't see very often: the bottom of the Lotus...

Next I fixed the steering wheel and some other parts.

I also fixed the shoulder belts.

The parts behind the cockpit have been stripped off all the chrome, and resprayed with Gunze SM-07. I also connected most of the wiring.

Overview shot of the complete hub without engine.

Other shot from the central hub.

Shot from a 'normal' viewer's angle.

This is how I plan to show the finished model at modelling contests... Now all I have to do is build the engine...

Now we start building the engine. First job: spraying all the engine parts.

Then we start to assemble the engine block.

First I planned on replacing the intakes by aluminium turned parts, but the original kit parts looked so good once painted with Alclad, I decided to use them.

I also added the spark plug wiring and the fuel lines.

The Ebbro engine is not a Tamiya copy by the way; it's a completely newly designed engine.

Except for the wiring, no parts on this picture were replaced by aftermarket stuff.

And a last picture showing the engine bottom.

Next I fixed the rear suspension and the first scratchbuilt parts: the springs holding the exhaust and the rear wing supports which I replaced by metal wire.

The spring at the right hand side is a little too big, this will be fixed later on.

The exhaust were partly spraypainted with Alclad.

Here you can clearly see that the left spring is looking ok; the right spring is too long.

Next I attached the engine to the body.

Slowly the model starts to look as a Lotus 72C...

Picture from the car's rear.

And another one to complete the rear views.

Next I fixed the oil reservoir and the radiator, as well as the torsion bar and of course the wheels.

The tires haven't been sanded yet, they still look a bit too glossy.

The torsion bar was replaced by metal wire to get a more realistic diameter.

Last picture in this phase.

Next i could fix the large rear wing.

I also fixed the scratchbuilt wing supports to the wing.

I also installed the battery and I added some wiring. In those days F1-cars dragged the battery along during the GP.

Another picture from the left rear side.

And an overview picture.

The car is almost ready, so I took some show pictures from a lower angle.

This angle is closer to what you would see from 'a man's height'.

As you can see, I still have to adjust the exhaust spring.

The large rear wheels really look cool from here.

Last picture before completion of the Lotus.
Yorumlar
10 June 2012, 10:17
That is correct, although they only started to use them from 1971 onwards I think.
14 June 2012, 14:59
Ah, ok! Btw, very good work, what i can see! Cant wait for the next pix;)!
14 June 2012, 15:02
They had the treads for the rain, but they didn't use any slick tires until 1971. They just used the same kind of tire, no matter what kind of weather it was. In 1971, Goodyear and Firestone introduced slick tyres to Formula 1.
30 June 2012, 20:42
Thanks for posting this project, for me while i would like the kit, one more 1/20th might be a "Bridge too far" for me as I'm pretty slow at car. I will be following your work as I think any hints and tips I pick p will translate well onto the Tameo kit. I presume that you have used the zero paints Gold leaf set?
Keep up the good work and I look forward to seeing progress,
Regards,
Terry.
30 June 2012, 21:34
It has been a while since my last post. There is a good reason for this: the instructions mislead me which resulted in a wrong position of the decal with the racenumber 5. I noticed this to late, when I looked at my reference pics. So I asked my fellow modellers who have the same kit if they were planning on building another version of the Lotus, and I was lucky. Thanks to my friend Lesley who will build the Lotus in another race, I could get a new set of nr 5 decals and I spraypainted the white roundel to mask the wrong decal, after which I put the new nr 5 decal on top of it. After a few clearcoats it will be hardly noticeable.
5 July 2012, 17:58
Hi Guy,
As usual your work looks and is superb. No problem about the decals. I'm always happy when i can help a friend or a fellow modeler out.
Best regards,
Lesley
5 July 2012, 20:39
If it comes to racing cars,you are the man!
Great !!!
29 August 2012, 16:42
Hey Guy, great build! Have you soldered some of the metalparts? If yes, go on, it looks very fine in scale!
31 August 2012, 11:28
I agree with the comments, this is a very nice job! I have a bunch of Indy kits in my stash - you are encouraging me to start one! 🙂
6 September 2012, 20:21
To anyone interested, I'll be taking this build along to KMK Scale World tomorrow! Check it out at the stand of the Paddock Modelbouw!
8 September 2012, 13:44
Aaah Super I will be there tomorrow and check it out!
We will see us!
Greetz
8 September 2012, 14:18
I have the T`bird 1955 0f Matchbox. How do i get the super glossy finish?
8 September 2012, 14:35
There really is no secret magic spell: just lots of gloss coats, and after each coat polishing will do the trick. It's a pretty intensive job, but it's worth the effort 😉
11 September 2012, 16:28
I added some more progress pics, we are nearing the completion 😉
11 September 2012, 16:29
WTF!!! Its coming very nicely together, Guy! Wheels, chassis, paintjob= Amazing!🙂
11 September 2012, 16:40
Too bad! But I'll be in Nieuwegein as well, maybe we can meet there?
13 September 2012, 10:53
Nieuwegein is a municipality and city in the Dutch province of Utrecht.
13 September 2012, 16:42
The IPMS Dutch National Convention 2012. Here is some more information:
euroscalemodelling.n..ernational/Home.html
13 September 2012, 16:42
Thanks Steve ,thanks Guy
Oh man this will be heavy,14 october Scale model Factory and 27 october perhaps euroscale.My family will kill me 🙂
But the 27 is a saturday.Maybe i have to work then,then i cant be there.
13 September 2012, 16:53
Nieuwegein! That's on my birthday. I'm there to celebrate. 🙂
13 September 2012, 21:49