Lancia LC2 - Le Mans 24 Hrs 1985 - Reference pics

When I purchased this model, it was already cleaned up, sprayed and decalled. All I did so far is paint small spots where the decals were not perfect, and I adjusted the chassis to fit into the body.

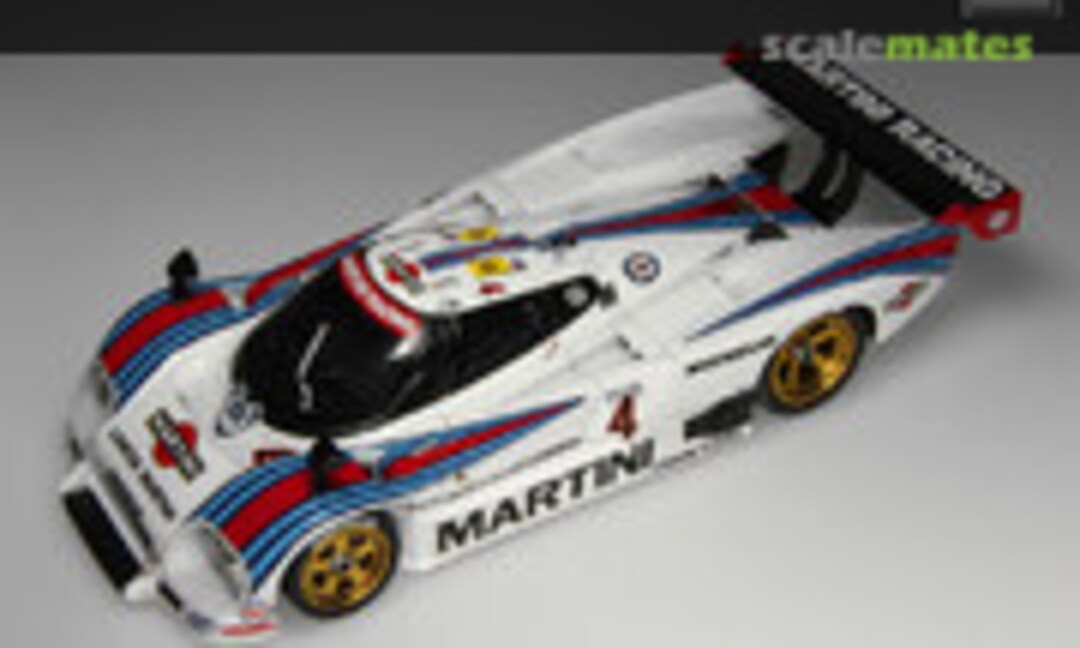
So all the credit for the nice decal job goes to my modelling buddy Serge 😉

I will clean this body now because it has gathered some dust over the years, and then I will spray some clearcoats.

The Lancia LC2 model, made by Modeler's is the only one in this scale which is accurate. Unfortunately the company has disappeared...

I used 3 clearcoats of Gunze Sangyo B-501 to seal the decals.

The window frames, which were clear coated as well, will receive a separate (flat) coat afterwards.

The body had been put aside to dry, so now it's time to start working on the cockpit hub. First I sprayed it polished aluminium. The bulkhead was done manually. Next I installed 1 part of the seat belts.

The dashboard was first sprayed in the same polished aluminium, the black top was done manually afterwards. The switches came with the kit, but the little texts and the white fuses were added, just like the seat belt fabric around the central support.

Next I sprayed the seat and I installed the other seat belts.

Finally everything was fixed in position, giving the cockpit hub a realistic look.

It's a shame that most of this will be hidden once the body will be fixed on the chassis, but that's how things are...

I also glued a nut in place where the model will be fixed to the base plate.

I painted and fixed the brakes first, after which I installed the completed wheels. Modeller's includes these wondeful golden rims and aluminium machined nuts in the kit; all I had to do was add a little air valve...

Once the wheels are all fixed and the front radiator is put in place, the chassis looks like this.

The body interior is painted flat black manually.

Once the body is dry, I start to fix the smaller parts such as the headlights and blinkers.

At the rear I fix the large cooling radiator which wasn't painted but just polished, since it's a metal part.

The window frames were given a flat coat at this point, and the area around the exhausts was painted flat black as well.

Dry fit of the chassis and body with cockpit in place. Everything seems to fit.

Still a lot of work to do, but the general idea looks ok to me 😉

The rear wing was assembled as well. I sprayed the tips red, the central part will be painted black afterwards. The mirrors have been cleaned up and primed as well.
Yorumlar
1 11 September 2014, 17:55
Yesterday, I went to a good friend of mine who used to build models as well. But he decided to quit and to sell his whole stash. Apart from those unbuilt kits, he has at least 30 or so models 'on the workbench' as well. So he invited me to have a look and see if there was anything that I would like...
This Modeler's Lancia LC2 was one of the builds that I couldn't resist buying. I see that it sold on Ebay for $335 or more, and he sold it to me for € 50... A bargain 😉
11 September 2014, 17:57
Beautiful italian and a real legend 👍 great work 🙂
11 September 2014, 22:42
...
Yer know!!! one reason I love Le Mans so much...
When I was growing up, because I am Ferrari tifosi, I also supported their Le Mans team.
But these days as Ferrari left the sport at the end of 1972, when founder Enzo Ferrari decided to concentrate all his resources completely on Ferrari competing in F1. It now gives me the chance to follow some other team/car besides the obvious;) Ferrari's still race there of course, but by independant teams.
Of course, I still smile when they do well.
Two teams I recently supported were Aston Martin and Bentley...
Lancia has an affiliation with Ferrari for me, the D50 being my vital case winning evidence!!!
So I have a very large soft spot for their Le Mans entries, based on all this waffle I've bored you with...
I SHALL BE WATCHING THIS GUY GOLSTEYN BUILD AS WELL, WITH VAST AMOUNTS OF ENTHUSIASM😄😄😄
3 October 2014, 10:11
Nice work. I'm always impressed by all the decals you have to apply to finish a car model.
3 January 2015, 08:23
Finally I decided to continue this model, and I posted some progress pics.
25 October 2016, 12:36