

Стрічка новин
")
додав новий фотоальбом.


11 14 August, 21:18
I love you how had your daughter choose the color! I sense a scheme to draw her into the hobby? 😜
24 August, 14:10
I didn't ask her, she spotted what I was doing and told me it needs to be pink! Can't disagree with that hahaha. She's quite handy with Alan the Airbrush already, I think I'll buy her some cheap 1:72 planes to have a go with on her own for starters.
24 August, 14:15
If she's already handy with the airbrush - you're already halfway into reeling her into the craft! Good luck with that - and looking forward to the final result for this build!
24 August, 14:36
хоче цей предмет
 (Ultracast 48170)")
Curtiss P-40N Seat (without Harness)
Ultracast 1:48
48170 16 September, 14:59


")
")
")
")
")
")
додав новий фотоальбом.


44 30 September 2023, 11:59
Since Meng's instruction is much better than Takom's. I started my Meng Apache first and use the build experience for the Takom one later.
30 September 2023, 12:17
Great progress. Compared to TAKOM, MENG has included the right component. In your original picture you can't see any grille, just the radiator and the glass cover in front of it.
10 March, 23:19
Thanks @JollyRogers64. Looks like it, although I'm not too sure if it's a glass or a very fine mesh.
16 March, 07:58
Posted last update after a long hiatus with my wife's health condition. Finished the M230 chain gun and painted the Longbow radar and main body.
16 March, 08:01
Thanks John, much appreciated. Wife is better now but still recovering.
15 September, 10:23
Sweet, so much more detail than the academy 1:48.
Lovely job your doing with it 👍
15 September, 11:03
Thanks a lot guys. Apologies for the blurry pictures as I took them with my mobile. I think I need to invest in a new camera 🙂
16 September, 13:53
")
")


додав новий фотоальбом.


80 26 February, 14:43
Been cooking up this idea since I got the 1/72 RF-8. My original plan was to build the plane in the cover of the Osprey RF-8 book, flown by Lt Andre Coltrin over Vietnam. With a little help from a 1/72 version of the Furball MiG Master sheet, I will rearrange the nose and tail numbers to make BuNo 146871 as it flew in Vietnam during its 1966 cruise off the USS Oriskany.
I also found an Academy F-8E, which has decals for a VF-111 jet that flew on the same cruise, so decided I will build it as the RF-8's escort, which they often had during their photo runs. I also figured, why not build them together? They will be displayed in flight.
26 February, 22:47
Good to have you gents, looking to start this one soon! I like researching and adding reference photos, so I just added some in the meantime.
29 March, 13:32
Normally I don't follow 1:72 scale models...for this one I'll make an exception...😅😉, grab myself a seat here! Love those Crusaders...
23 April, 12:53
Got intrigued by Rando's comment on Jos' build, so I popped over here. Looks like a very interesting build as well!
23 April, 13:10
Happy to have you gents here, I'll be getting to this one just as soon as my elaborate P-51 build is done...
24 April, 14:14
Here we go, double Crusader build. Gonna be comparing the short-run Sword RF-8 with Academy's F-8, which has been the go-to in 1/72. I have extra Academy kits so I'm swapping out the RF-8 kit's nice resin seat, I'll use it for a future open canopy build. The pilots will be obscuring seat detail in a closed canopy anyway.
15 May, 03:54
Welcome David!
I assembled the PJ pilots and started nipping off parts to assemble the fuselage. Getting the pilots to fit in their seats is tricky so far. Fit on the Academy kit parts is pretty nice. Sword kit is not as easy since there's no locator pins but they align well
19 May, 04:25
Pilots are fully painted now. The F-8E pilot is based on Dick Schaffert, who was a pilot on this 1966 cruise. While I don't know of any specific plane he flew, F-8 pilots often flew jets that were assigned to others, so he's flying 149180 on this escort mission. In order to accommodate them, I had to remove the rudder pedals and front of the cockpit tub on the F-8E. It won't really be visible when the cockpit is buttoned up anyway.
27 May, 14:17
I didn't like how the Sundowner helmet turned out so I stripped the paint and airbrushed it this time with tiny wedges of tape, then shaped and touched up everything. Just need to add a black stripe for the visor groove.
29 May, 03:49
Thanks and glad to have you J35J! Pilots, seats, ejection handles, and joysticks are all in place. Time soon to start putting the jets together.
31 May, 04:40
Hello Guy, welcome 😊
Fuselages are together. Now getting all the panels and gear bay doors to sit flush.
8 June, 04:20
Thanks Calvin! It's quite nice if you remember it's a short run kit and you prep and test fit parts a lot before gluing anything. Has been a far from perfect first effort by me but I like how it goes together. It's shape is pretty accurate too. The Academy kit is very plug-n-play in comparison
8 June, 19:52
Welcome S M! I have been painstakingly installing the gear doors closed. Stuffing blutack in the wheel wells helps with frustration. Both F-8s have tiny aft gear doors on the main bays that took a lot of time to line up. The RF-8's nose doors were also very tricky. Happy to say I'm done getting the gear doors on.
22 June, 04:14
Me too - Bonanza gear struts. God bless Albion Alloys. Great stuff if you've not used any of their items.
23 June, 19:39
I have not but am always looking to add new things in this hobby, I'll check them out! I actually have an old Minicraft 1/48 Bonanza that I might do something with one of these days.
23 June, 20:49
Took a big long tour on the clear parts struggle bus this past week. Got glue smudges on a camera window, the windscreen, and canopy on the RF-8, which all had to be buffed out. Hopefully I get the canopies attached snug without issues tomorrow night. Finding that carefully lining the attachment point with Revell Contacta on a toothpick is less risky than TET.
28 June, 03:57
Like the planes. Like to see them in flighr. Like the effort you put in.
Feel you when putting pilots properly in and closing wheel well doors.
Anxious for the paint job.
1 July, 04:07
Thanks all, getting closer to painting. A ton of work has gone into smooth out and scribe the lines around the gear bays on both jets, not to mention persistent seams. Also turned my attention to sanding down and rescribing the fictitious bumps on the folding joints, which the RF-8 has as well. The RF-8 also has wedge-shaped plates on the droops, which were only present much later, so those were sanded down as well. There's still a few things I want to try to perfect before I begin painting. I also have to decide if I want to paint the wings separately, in all likelihood I'm going to glue them on first because I want the fuselage section to be flush.
21 July, 02:23
Alright, wings are on. I feel like this will make masking more complicated, but better for making sure they conform to the fuselage. I am so ready to paint these jets
8 August, 03:55
I missed this one, following. I love these side by side builds.
Great progress so far. 👍
9 August, 05:14
Hi friends three months later I'm finally painting the damn things. Here's my current take on preshading, blackbasing, what have you. Gave the white areas a white base that I preshaded with dark gull grey. Then mottled the black with white for some variation with the light gull grey. Elsewhere I built the missiles, launch rails, and painting the horizontal stabs.
16 August, 04:18
Coming along nicely! Your blackbasing tedhnique looks very effective, I am curious how they will turn out!
16 August, 05:04
I've painted the undersides of the CVW-16 birds. Unfortunately I did something stupid, something I even decided against at first--I tried doing a "pour" into the intakes to get them painted. This was a bad idea for the RF-8 in particular. I thought that since they were glued together I could get away with no leaks, but I saw the paint level draining, and I knew the paint would appear inside the camera windows. Lo and behold I saw paint when I peeked under the masks.
Feels horrible that I did this, even if I have some ways I could fix them. I can pop the side windows out and clean the bottom side windows, but putting them back in will be a pain since the side windows are meant to be attached from the inside. UGH. Any clever ideas to fix this mess are welcome, this is definitely one of those "mojo killers."
19 August, 15:30
Think I fixed the windows. The bottom windows will still be a little smudgy. But I was able to get the sides back in by gluing a toothpick to the mask and rotating it from the inside, then seating it on the frame.
20 August, 04:12
After fussing with the white for what seemed like forever, I finally masked to paint the gull grey. Unfortunately this revealed a ghost seam on the spine, so on the plastic putty goes. Hopefully it goes away.
30 August, 05:14
Fortunately I was able to defeat them with putty and paint! It's just crazy they'd show up after working on all the seams and surfaces for the past few months. I also removed the ECM blister from the VF-111 jet's tail, since reference photos and instructions showed they didn't have them at the time.
30 August, 22:50
Fussing a lot with the color of the nose tip. Also very difficult to mask off. Lots of touching up needed. The tip seems either a tan or greyish hue, but I have no photos to base it on.
5 September, 16:51
Thanks guys! Cleaned up the paint edges on the nose and feel a lot better about how it looks now. Also painted an anti-glare area in front of the camera fairing. Just gotta paint the tailpipes and it's on to clear coat and decals!
6 September, 12:06
They look really great! I have to say, the F-8 is one fine looking aircraft and your models definitely do them justice. I cannot wait to see them with decals! About ghost seams, I have seen them appearing on my models weeks after they are finished. I guess it's the cement seam cracking a little bit because of tensions in the plastic, but I have long since stopped worrying about it.
9 September, 05:05
Thanks Thomas! I appreciate that, I'm super anxious to start the decals myself, going to be the most rewarding part of the whole project. Still had some touchups and wanted to paint the leading edges of the flight surfaces with flat aluminum to represent Coroguard. Clear coats go on *I hope* tonight.
Gotta say, building two planes at once sure is a different kind of challenge and test of your patience. It's fortunate that they are mostly the same, but it's still time consuming to do everything twice. I spent at least an hour masking off the leading edges and it took all of five minutes to paint! Probably won't be doing a double build again for quite awhile.
9 September, 13:08
One side of the decals mostly done. Buncha stencils to do also. I'm super paranoid about breaking the ventral fins so I stood them up on wads of blutack which works pretty well.
11 September, 04:16
Finished these two last minute so I could enter them at Patcon 2024 in Hudson, MA. Was my first ever model show and it was a blast. I'll be uploading better photography of these soon, but figured it would be cool to share some pics of them at the contest. Really like how they've come together, they look so cool in formation like this
15 September, 22:36
додав новий фотоальбом.


5 16 September, 14:00
додав новий фотоальбом.


35 18 April, 05:15
This one is likely to be a quick little build. It's basically the companion piece to the Puss Moth, so I felt like I couldn't really build one without the other. Erik is right though, the kit is of an impressive vintage. It is indeed a few years older than I am, and has the flash to prove it. 🙂
Anyway, thanks for joining, there's plenty of seats available, so no shoving. 😉
18 April, 14:01
You say that now... but wait till you see how much putty and sanding is required~
6 May, 19:05
Well, it's supposed to be a Hawker Hart apparently... but the Hawker Demon is close enough... I mean, it's not like it's a Spitfire. 😉
6 May, 23:10
Good enough for me - I'm arguably one of the least rivet-counting persons in here... just asking/checking... 😉
6 May, 23:25
And only a masochist with ADHD would consider trying to convert it back to a Hart like the original 1957 tool... 🤪
7 May, 16:18
What did you call me? 😉
I mean, besides the dip between the two cockpits... are there any other differences? They look quite similar to me...
7 May, 17:57
Well, the "dip between the two cockpits" is the main difference I was referring to above... Plus, you'll have to skip the Demon's long exhausts, I guess...
7 May, 18:25
Not exactly sure what picture to take to update my progress… I'm working on bits of everything all at once!
10 May, 05:52
The main difference between a Demon and a Hart is the exhausts, the turret and the starboard machine gun. Will send a PM
16 May, 16:53
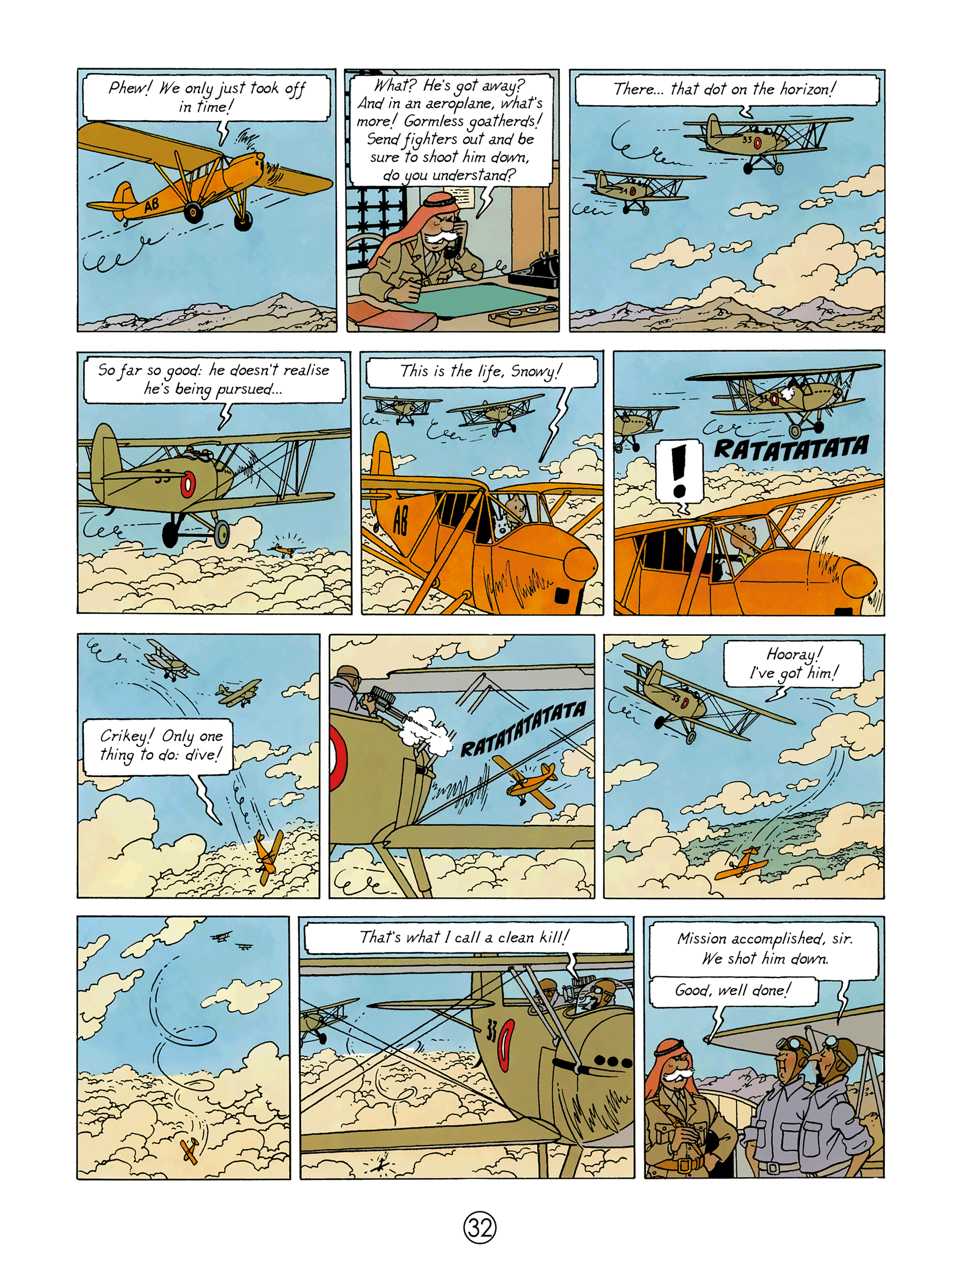
IF however (regardless of how a real Hart should be) what is shown in the comic ("That's what I call" etc frame) is indeed a starboard mg (please correct me if I'm wrong...) then starting with a Demon kit was perhaps indeed a better idea than starting with a Hart kit.... IF this is the case... then you'll only have to deal with the rear seat/turret thing and the free (ala Fury) exhausts, no?
16 May, 19:43
Yeah. I think so. Matthew provided some detailed comparison images but after looking at them and at the main page from the album... it seems to be a little bit of both...
16 May, 22:09
In Tintin in the Land of the Black Gold it could be a Hawker Hardy
i.imgur.com/57c2RcA.jpeg
23 May, 21:51
A couple of updates. The supports next to the fuselage were so weak that 3/4 of them snapped even before I got them off the sprue. So instead I just used some bent wire. The holes they are meant to slot into were gaping caverns as well, so a fair amount of putty was needed to make it at least slightly better. Now I'm left with a decision to make. The Hawker Demon has two large exhaust tubes that run from the engine down the sides. They're not present in the Tintin album (which most closely resembles a Hawker Heart I believe). So... do I leave the two side holes and the large trenches on either side of the engine cowling, or do I just shrug my shoulders and use the parts that came in the box?
The Blue Rider decals went on easily enough. They're a bit shiny, but I think I can deal with that.
11 September, 15:38
Thanks Matthew. I'm quite pleased with how the colouring came out too. A 2:1 ratio of Tamiya Buff (XF-57) and Khaki (XF-49) seems to have done the trick... or at least close enough for me.
11 September, 15:58
I just noticed the artwork has actual rigging on it, so it looks like I'm not quite as done as I thought. Besides that, only a few nice white fluffy clouds needed for the base.
13 September, 13:50
володіє цим предметом
")
Les avions de combat américains de la deuxième guerre mondiale Naissance d'un géant
Le fana de l'aviation hors série № 2
1995 16 September, 14:54
")
володіє цим предметом
")
les avions de combat britanniques de la deuxième guerre mondiale L'empire se venge
Le fana de l'aviation hors série № 4
1996 16 September, 14:53
володіє цим предметом
les avions de combat britanniques de la deuxième guerre mondiale L'empire se venge
Le fana de l'aviation hors série № 4
1996 16 September, 14:53


")
володіє цим предметом
")
Les Avions de combat soviétiques de la Deuxième Guerre mondiale. Le sacrifice des faucons de Staline.
Le Fana de l'aviation. № HS 6
KHAZANOV, Dimitri|et al.
1997 16 September, 14:53
")
")
")
")
")
додав новий фотоальбом.

2 16 September, 14:05
Okay I was afraid it was a cry for help and we are pushing YOUR limits with the crap you have to deal with every day 😄😄
16 September, 14:52
")
")
/uk/search.php?q=*&page=newsfeed&fkSECTION[]=Newsfeed
search-solr.php?lang=uk
35
35
/uk/search.php?q=*&page=newsfeed&fkSECTION[]=Newsfeed
35
todo