
Стрічка новин
")
додав новий фотоальбом.
24 зображення
Long Range Desert Group
1:35
«Pimped» the dashboard a bit.


Проект: LRDG Chevrolet truck and Willys


 4+
4+ 26 28 June, 23:44
додав новий фотоальбом.


48 19 June 2023, 19:38
This weekend both Essex and Hancock kits were started. You can compare these two on my garden table, Essex being a short hull version and Hancock one of the later long hull types. Therefore Hancock has the Ticonderoga Pontos set. I threw in a dozen of airplane sets and pillaged the Ion Model figures stock for about 420 seamen to take the stations. While making the requested change to the rear elevator (see shipmodels.info/mws_..pontos+essex#p919517 ) an error was discovered in PE part 605 and this can only be solved by completely scratching it. Also, I'll open up one rear elevator so I have to adapt the deck edge to that. The Hancock kit got some travel damage to the hangar deck, so that will have to be repaired too. But I think this is a good start to the project.
19 June 2023, 19:52
The hangar doors present a compomise that I can't accept, showing some inside detail but with all gates closed down and an exaggerated thickness. I decided to remove all of them, beginning with the Hancock sprue. You can compare with the original Essex sprue. To replace the partially closed doors, I can choose between Evergreen grated plates (subtler paneling though one-faced) or the same metal foil as used earlier.
24 June 2023, 22:56
The walls of the Hancock are now built. I found out that there are not enough Pontos PE doors of one design to replace all plastic ones, so Hancock and Essex will be getting a different type. A drawback to the hangar walls is the absence of locator holes. I made some pins myself. The plane cockpits were not in stock and will arrive later.
31 March, 01:55
Read a lot about the Essex-class carriers, really interesting history and very interested to see how your ships turn out 🙂
31 March, 02:02
Thanks, Rando. Today the second ship's hangar was closed off. In the Essex model I didn't need to remove a part of the hangar deck, so now there's a minute difference in the distance of the rear deck to the island structure. The fault should be in the Hancock bow section. I closed down some of Essex hangar doors, but I kept a peeping hole for the elevator shaft that I moved to the right like in Hancock.
2 April, 00:02
This is some project Steven. These are not exactly small models (i have one myself - CV-13 USS Franklin)....and so much extra detail you are adding. Watching in admiration. Great work so far.
2 April, 06:18
Thanks, Gary. The first PE parts are bent for the stern and the boat cranes of Hancock, after the hangar wall seams are removed with Tamiya filler. One part of the wall is badly fitting and needs to be shortened.
5 April, 01:27
Lots of PE particles are now assembled to giant deck support structures. I accidentally used the Essex front deck instead of the Hancock one, so I had to remove the PE plate causing half of the ribs to jump of again and restore this to the Hancock deck. Now I'm about to begin the same again for Essex, that has a slighty larger hollow under the flight deck.
8 April, 01:40
Nice progress Steven. Shame about the mix up but we all human, im sure at one point we have all used a wrong part or miss assembled.
Keep up the good work....and enjoy your build time.
8 April, 10:01
Thanks for the acclaim, now Essex is also loaded with PE parts under the front deck. I also removed the rear lift floor in the hangar deck, because it will be visible through the side doors. The deck edges are getting PE plating with the correct catwalk acces doors and fire station hatches, but I'm still thinking about methods to remove the space behind these PE parts. Drilling is not enough.
12 April, 12:38
Thanks Gary. The update today shows the reshaping of the Hancock bow. The angle of the kit bow is too shallow, so I cut out a wedge in the side and plied it back. The bottom part was split and clamped shut tighter, using sprue "rivets" to hold it closed. A lot of sanding followed, even after I had installed the port 40mm hubs on the hull. Another problem were the 18 doors that needed to be removed from the island structure, so I used my Proxxon for that. An extra is the comparison between 5inch/38 mounts from the kit, Flyhawk (yellow) and Pontos (Brown). Pontos is more detailed, Flyhawk has PE details and the kit is built up from different parts.
20 April, 10:19
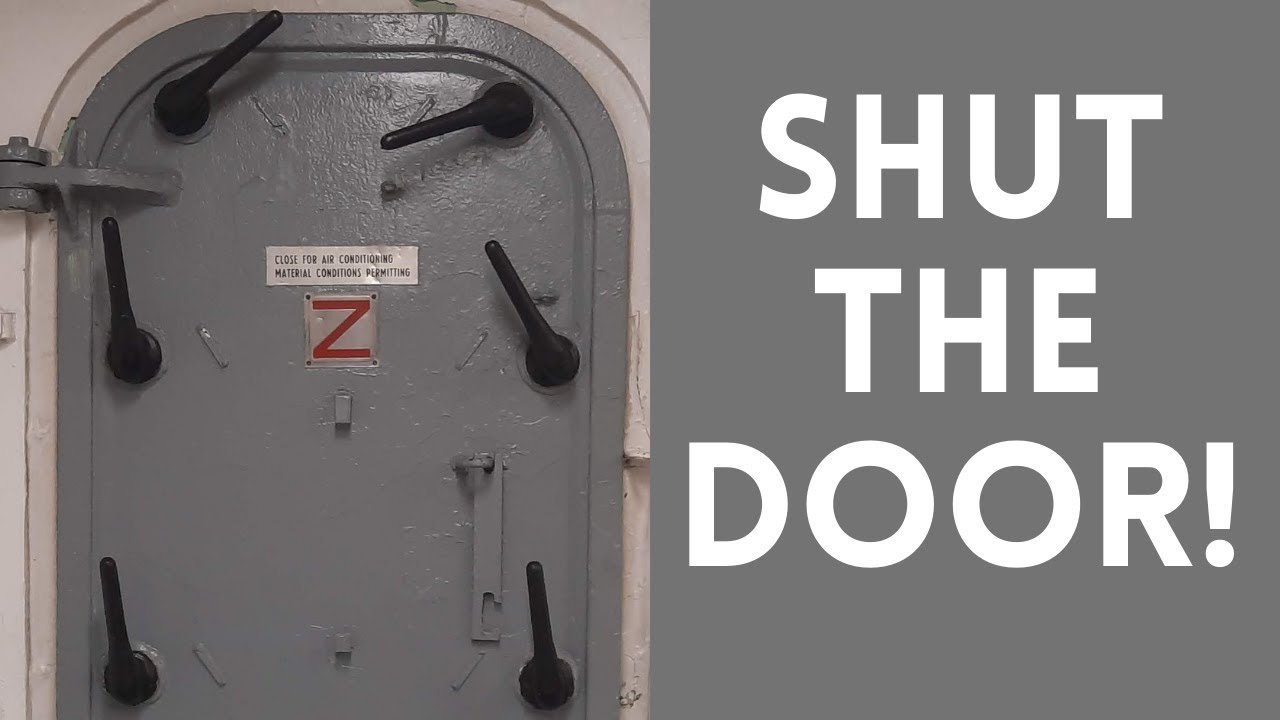
Thanks, Pietro. The islands now both have all watertight doors, and Hancock's island is already a bit further down the line sporting ladders, a PE walkway, the pri-fly cabin and a almost fully equipped smoke stack. For a movie about choosing the right watertight door in your model, see Youtube Video . I did find the correct type on some detail pictures in my books.
23 April, 13:24
A 45 picture update about Hancock's island. I made changes to the building plan where I saw the reference pictures didn't follow them. Loudspeakers were added. A cutout in the bridge deck was removed. The venturis on the different levels were added, but some don't extend far enough. Some of the PE hatches on the director towers needed to be scrounged from the ABSD project remains. All kinds of radar antennas are added, some I didn't find or identify yet, like the "stovepipe" antenna encircled on one reference picture. The SC-2 radar needed to be put on the platform for the side SK radar position. I did make the rear mast for the smokestack position, but removed it again because there is no trace of it in the reference. It might still be used on Essex.
26 April, 00:35
Thanks Christian. Again a large update with changes to the Essex island. The front structure is made identical to Hancock and some scratched galleries are added. I decided to move Essex to the march 1945 scheme. Pontos has some parts for 1944 Hornet that are useful here, like the bridge walkway. Some areas like the stern will have to be adapted too. The same radar antennas are used, but some of them on different positions. I now added more airplane PE to the inventory, some of these should be finished to be able to close down the hangars.
2 May, 13:12
The Avengers are now getting their PE cockpits, and the interior of the hangar is painted white.
6 May, 00:59
Thanks, the airwing continues with the Helldivers, the Hellcats and the Corsairs, that had the hardest fit, so it's a good thing I had only six of them. I still have the same amount of planes not getting a cockpit.
8 May, 00:25
Detailing of the port air outlet, the catwalk and starboard galleries of Essex. For Hancock it's only the outlets that were repeated. At first I was cutting small mesh parts, but it's better to cut them as a whole and add a PE crosshair. In the Trumpeter planes there is a tendency in the wing base to be cast offset (see color image) resulting in a skewed wing position when the fuselage halves are assembled. I'll often have to correct the angle. All plane fuselages have been fixed now and in the Helldivers and Avengers the seams are already filled and sanded.
11 May, 00:36
The Helldivers are first to be completed with PE parts. The Pontos airbrakes are an improvement over the kit ones, and they can both be used for stretched wings or retracted ones. I drilled open the wheel wells. In the Hellcats, the cowling is incorrectly cast with one lower opening, so I shoved a node in each one and sanded it flat. A new opening is drilled and an oil cooler vent is then cut out under that. Takes quite a while.
14 May, 15:06
The Hellcats are now all having a revised cowling and they also have a brass tube for the new prop position. The wheel wells are all drilled out and I made 10 scratch pairs because I only have 32 Pontos pairs for 42 Hellcats. For the Corsairs the wheel wells are rectangular which is a real pain to scrape out. The Avengers are still to be detailed, beginning with the tail wheels.
18 May, 00:52
That are quite a lot of planes you're doing.Defintely will complete the build
18 May, 11:59
I think so, Lode. Don't you fancy a carrier build yourself? You probably have a Yorktown 1/200. Today the painting of the airplanes was started. The wings are painted white but this I might have to redo in grey, they're too coarse. The planes are in grey now. I cut out the propellers and I needed extas for the Hellcats, so I changed the 6 optional 4-bladed Corsair props into 8 3-bladed ones.
21 May, 01:35
ton of little airplanes will certainly make a great flight deck, picture 359 seems an MC Escher design 😉
21 May, 06:23
Currently these planes are enveloped with gum to spray the camo on them. This is extremely tedious because the gum is not always adhering well and it must be sculpted exactly the same on each plane. I now painted the hangar floor in Lifecolor Deck Blue 20b (don't mind the overspray) and I also built the side elevators. This is a very nice fit from Pontos, but the netting supports are erroneously numbered 36 and this part is not abounding, nor does it fit the purpose. In stead of it should be used part 10, that was left in just the right numbers. The repair of the 5 inch/38 resin housings was first done with putty but then I wanted the outline to be improved and I made impressions with a knife flat and a drop of CA. Then break off the knife and a straight edge will result.
24 May, 15:21
The 5 inch guns are now all detailed according to reference pictures of the ships. Essex was different than Hancock, it had no blastbags nor ladders. But in the end I noticed I used the wrong type of ladder, so maybe those will be removed. For the single guns one double gun barrel was wrongly shipped, so I lengthened that one with a 1mm Albion tube. Also some small parts are not provided in the needed quantity, or the option of placing PE steps was not shown in the manual.
27 May, 12:48
The long range antenna pylons of Essex are according to the Pontos manual, but they copied this for Ticonderoga and that's incorrect. The 3d pylon should be left out for long hulls and so I can drop a 10th pylon for Hancock. One of the ladders for that can be used to complete the double 5 inch housings. Because of much unclarity in the manual I made many wrong folds on the catwalks and had to reassemble lots of parts with stress cracks. Also the deck edge elevator has a chain lift system that is now constructed out of a very fiddly frame that also breaks easily. But the end result is sturdy enough.
31 May, 00:43
All planes are now in sea blue and ready for the last camo paint. The prop tips are painted in yellow. Some wings were stripped, others were overpainted in light grey.
5 June, 10:50
Midnight Blue is almost completely added on all planes, only the Avengers still need the tail completed. Some of the wings had orange peel and were redone.
7 June, 01:02
Thanks Gary! It went on with the elevator shafts, the Avenger tail colors, the propellers that were masked with a metal roundel (after 2 hours I now have painted about half of them black - on two sides!) and then finally the cockpit set arrived and I soon had some new Helldiver and Hellcat cockpits. I wanted the Dragon Avengers to have a PE cockpit too, but this was a very tight fit even afer milling as far as I could in the fuselage interior.
11 June, 23:59
Thanks, David. Now it's decal time. 196 roundels on the wings, as many on the tails and again for the callsigns on the tailplanes. Essex has a horizontal white line that was trimmed with scissors and Hancock has a horseshoe. Still some more are coming, but for the numbers some research will be necessary. All decals were treated with Daco Sol. Plane interiors ar painted Vallejo Interior Green. Hellcat propellers are also painted.
14 June, 00:28
Thanks for the comments! Today most of the canopies are cut up, ground thinner and applied to the fuselages. I'm left with the Hellcat open canopies, these just don't look the part and I will probably have to remove part of the tail to fit these.
1 July, 22:58
I found a hack for making the perfect 1/350 Hellcat open canopy. Use 1/700 two-bar railing cut to four stanchions and bend this over the middle. By now I have placed all clearparts on the airwing. I now started t add the number decals on the Helldivers. You shouldn't follow the Pontos Hancock tailfin indications, these appear wrong as the number is always below the omega sign.
3 July, 20:01
Thanks, Gorby. All crates now are sealed with Pledge and the props are installed. For the Helldivers I needed to scratch prop spinners out of clipped spheric node ends.
6 July, 00:49
Tamiya grey panelliner wash is used on the top side of the airwing. I will be using a different shade for the bottom.
10 July, 00:36
A brown wash was done on the grey undersides of the planes. The also got rigged, each of them with a scrap PE antenna mast. The Avengers got guns in the turret and now I will paint all the canopies on the outside.
12 July, 00:41
All surfaces got a matt cote with Vallejo Polyurethane varnish, for the other side I avoided the gum because it removed some of the decals. Then all the wings could be fixed with a little drop of CA glue. There are no fitting locks for the stowed position of the wings, so all of them had to be manipulated in exactly the same position.
15 July, 00:38
And more still to come. The update shows the closing down of the hull bottom with a waterline plate, that needs to be filled in with a lot of CA to get a smooth fit at the bow. The anchor deck is painted and the anchor chains are added (1 set was sufficient for both). The rear elevator shaft of Essex got a trompe-l'oeuil bottom part because the extreme right side is visible from the outside through the hangar hatches. The bow portholes are deformed because of the modling and are all replaced with Pontos portholes, of wich you get enough to complete the hull.
18 July, 00:22
The decks are closed down after sanding the bottom. Some of the Pontos PE is interfering with itself, so that's clipped. I have some overview pictures for you, with the island and main guns in dry-fit. Now the catwalks can be added.
20 July, 00:25
Remarkable work!
I still can't get over that you are building two 1/350 carriers at the same time. Madness I tell you. 😉
20 July, 04:50
There is reason in it. For example the catwalk supports you see in this update, in stead of stopping at assembling 75 for one ship, you can do another batch for the second one, in stead of finding yourself a few years later in front of that task with the memory of those first 75 ones and having to do that all over again. I even found errors in one Pontos instruction that could be corrected with the other one.
Further in this update: fixing a sag in the deck caused by tensions in the connectors, just saw through the connectors after the deck is fixed to the hull. Also the ladder booms and a lot of Pontos steps that are either not present where expected to not fall off the ship, or that are mentioned in the manual but not used on the pictures. I also fixed the antennas to the catwalks.
25 July, 23:45
завершив цей предмет
")
Nutrocker P.K.H. 103 1a with 1/76 Super Armoured Fighting Suit
Nitto 1:76
Ma.K Series 19 (25139) 1999 Нові деколі 30 July, 20:48
володіє цим предметом
")
Tiger I Early Sd.Kfz.181 Pz.Kpfw.VI Ausf.E Early Production Das Reich Division
Border Model 1:72
TK 7203 2023 Нова прес-форма 30 July, 20:48
")
")
")
")
")
")
")
")
")
хоче цей предмет
")
CH-53E "Super Stallion" / MH-53E "Sea Dragon" Folded Main Rotor with Blade Fold Restraint Systems (7 Blades - 3 Engines) for A  ResKit 1:48unknown48 2024* Нова прес-форма
30 July, 20:34
хоче цей предмет
")
CH-53E "Super Stallion" and MH-53E "Sea Dragon" Engine Nacelles with Air Intake and Exhaust for Academy Kit ResKit 1:48unknown48-1 2024* Нова прес-форма
30 July, 20:33
")
")
-242 Bats \"MCAS Iwakuni\" (MYK Design A-285)")
 (Sweet 14-D002)")


додав новий фотоальбом.
233 зображення
Westland Seaking Mk41 German Navy 89+63 (50 Jahre)
1:48
I have waited four months for this moment. The timeconsuming tasks, the patience and the effort were worth it: I am very...


 6+
6+ 124 30 March, 15:44
You are welcome. As usual a lot of first rows free! Popcorn for all! 🙂
3 April, 05:00
What a combination: a great new kit, nice accessories and finally a master modeller at the tools - EPIC !
10 April, 16:20
Thank you JAM-SCREW.
Btw: just I saw you actual portfolio of sets for the Seaking! SCM Brand: JAM-SCREW
Absolutely remarkable!! I'm looking forward especially for the landing gear and main rotor hub. 🙂
12 April, 05:52
Just look at that winchframe !!! There is absolutely no doubt that after plugging these plugs the winch will be working. As with all your builds, for the watchers the path is the destination.
Wonderful wip pics - keep'em coming…… 🙂 👍
18 April, 05:02
Rapid progress sir! Very impressive attention to even very fine details for accuracy. Thank you for the updates and images.
22 April, 17:06
Michael ureol is A kind of foamed plastic. It comes in different degrees of foaming. The more foamed, the softer and lighter.
29 April, 09:32
Hallo sieht genial aus.
wo bekommt man sowas ? habe auch schon versucht sowas zu finden.
29 April, 09:39
Ah, that explaines as well the nice texture the cushions have. Thanks for the info.
And - by the way - as always a pleasure to follow your delicate modelling.
29 April, 10:43
Your are welcome.
Robert: vor paar Jahren habe ich von einem Modellbaubekannten Reste zum probieren gekriegt. Daher musste ich erst mal schauen, wo man das kriegt: eBay hier und da so wie bei Modulor in Berlin.
29 April, 13:08
Great looking detail you are adding, Berhard! Those seat cushions are fantastic.
29 April, 13:27
Vergiss nicht, einen Kasten Bier bereitzustellen, wenn du die bordtoilette nutzt 😉
29 April, 17:47
Thanks for comments and praise.I would like to share the praise with the excellent photographers (TN and BD). Ä Only such photos as from TN and BD make it possible.🙂
2 May, 16:10
It was probably difficult to wire all the little rotary switches on the back. I assume that they all work!
8 May, 09:42
Just absolutely fantastic Bernhard, I dont think everyone will appreciate just how difficult all those details you have added are to do. you have achieved what I only dreamed of achieving. I am lost for words with these details. Stunningly beautiful work.
8 May, 09:45
Thank you David, bughunter and Dan for you very motivating comments🙂. The Seaking is meanwhile my favorite helicopter. It was great to see one of them flying over the beach in Boltenhagen: we went on vacation there last year.🙂🙂
8 May, 15:13
I am impressed not only by your skills, Bernard, but also that you are not over-whelmed by the many, many fine details that you are taking on. RESPECT 🙂
8 May, 16:25
Last monday I had the chance to take a very close look on all these masterpiece subassemblies in person - an all new level of depth in detail, even by Bernhard's standards !
These oxygen bottles look as if they were very closely related to 500 pound bombs….. ? 🙂
18 May, 20:01
I'm happy that you like my bottles... 🙂. In fact, I have often used bombs as a basis for various parts. 🙂 This time, however, it is a sprue with a diameter of 4 mm.
19 May, 06:17
The level of detail is mad. amongst the best scratch-building I have ever seen on Scalemates.
26 May, 14:27
Excellent progress. I like how in Germany, when helicopter model parts get mailed, one just has to write "Bernhard" on the box and it gets delivered to the right person… 😉 😄
27 May, 12:21
I'm out of superlatives ! What can one say - you are constantly exceeding your own standards with this build, and that really says something !
Deeply stunned and impressed by your R.O. workstation !
27 May, 18:33
Well, first test is passed - package arrived. Second test passed looks in good condition. 😋. Now is the real test. How does the builder feel about the parts and are they suitable for this unbelievably excellent project.... time will tell.🍻
28 May, 07:02
JAM-SCREW.How big is your production facilities,you might need bigger premises as your products look great albeit in the hands of a master modeller.
28 May, 14:28
Wow, again every little sub-assembly is a fine model on it's own - fantastic 👍
30 May, 14:44
Thx for you feedback 🙂🙂
The entire interior is lined with upholstery, which is primarily used for noise-insulation. Until yesterday, I broke my head because I didn't know how to repicate it… After a conversation with a mate (thx Hanno), the brilliant idea came to me: Fimo clay.
The material can be processed excellently and is solid in the oven after 30 minutes at 130°. The most important thing is that it does not become bone-hard but left elastic and can even be sanded.
1 June, 08:20
150 pics and you didn't even close the fuselage. And not a second of dullness. Finest modelling entertainment. 🙂
4 June, 17:09
This morning I was curious and unpacked the chassis of Jam-Screw. As already written, the quality is outstanding. But everything is so filigree that you have to be very careful and not to break anything when handling. I had to improvise a bit here and there. In the end, I was finished after 2 hours. Including preparation for laying the cables.
8 June, 18:37
Der Baufortschritt ist echt sehenswert und beeindruckend Bernhard. Die Bilder vom Innenraum von Dir und Thomas sind toll! Es gibt leider sehr wenig Bilder vom Original und sind eine tolle Vorlage. Vielleicht macht ihr nen extra Walkaround hier. Ich freue mich schon auf die nächsten Bilder.
9 June, 15:13
Danke fürs Lob Tom. 🙂. Dank der hervorragenden Innenraum-Fotos macht es wirklich sehr viel Freude herumzupuzzeln. Mein Seaking Projekt hat, könnte man sagen, eine „kritische Masse" erreicht. Dank diversen Kontakten zu Hubschrauber-Spezialisten, und ehemaligem Wart und nunmehr der Connection zur Jam-Screw habe ich die Möglichkeit offene Fragen auch dort zu klären. Für seine CAD files hat JS / Andy und seine Leute hunderte von Fotos geschossen, zu den ein normaler Sterblicher keinen Zugang hat.
Deinen Vorschlag werde ich an Thomas weiterleiten. Deine Idee ist sehr gut.🙂
10 June, 08:18
Wahnsinn was du da reingesteckt hast allein die Instrumente und Sitze sind schon ne Show
17 June, 07:25
Thank you for the big praise. I am very happy to have such a large number of fans of this WIP.🙂🙂
Dietmar: nur dank der Unterstützung von einer Handvoll von Mk-41 Fans ist es mir möglich so tief in die Materie einzutauchen.
Übrigens: Ganz am Anfang wollte ich die Türen offen lassen und nur ein „bisschen" im Inneren tun. Aber als ich die Fotos von Thomas betrachtet habe, bin ich „getürmt und hab mich auf dem Boden versteckt". Irgendwann habe ich jedoch den „Zustand der inneren Ruhe" (die Phase wenn ich kein Problem mehr damit habe mich z.B. mit einem Rucksack aus Fimo eine halbe Stunde zu beschäftigen)🙂🙂 und betrachte es inzwischen als eine Herausforderung, wieviel ich von dem Zeug nachbauen kann.
17 June, 18:24
Very exciting to see what can be achieved with even a very good kit. Commitment and patience wonderful recipe for outstanding success. A pleasure to go along for this journey.
18 June, 08:41
Thank you for your unique and supportive comments !🙂🙂
It's a usual business copymashine/printer in tower design, Minolta serie 7.
18 June, 18:03
The interior is a delight to the eye, for sure. Inspirational modelling🙂
18 June, 18:28
🙂🙂.
The last big point for interior components is completed: rack for electronic equipment & foldable seat.
26 June, 12:27
God God! I'm just amazed how much scratch built detail you put into this build with each passing day!
30 June, 02:56
A waterproof green rubber mat is laid on the cabin floor of the SeaKings of the German Navy. However, not under the equipment rack and not in the area of the „shower cabin" (radaroperator workstation). There, the rubber mat was left out, shortened and folded upwards.
At the points of the mountingpoints and other hatches, access covers (probably also made of rubber) are incorporated into the rubber mat.
30 June, 12:13
i really love the details of the rack for electronic equipment & foldable seat.
30 June, 19:07
The lecture continues ! Altough it's a pity to partially hide all these wonderful details in the closing halves, I'm curious !
5 July, 08:12
After completing the engine housing I begun today detailing the bottom.
Just as on the fuselage sides, the equipment on the bottom of the Mk41 is different from the british variants.
10 July, 17:18
The level of detailing on this thing is simply too notch. Number of bits you have added must be in the thousands! Masterclass 👍 👍👍
14 July, 12:40
Einfach nur Geil.....hast du jede Niete nachgezählt, Bernhard 👍
Liebe solche Modellbauer da komme ich nicht mit
15 July, 11:19
Holy smokes, this is escalating everytime I'm checking the progress here !
The Airfix-guys must be crying for their mama by now…….😄
15 July, 18:20
Sehr schöner Innenraum. Ich liebe deine medizinischen Hilfsmittel. Bin selber im Thema drin und kann keinen Unterschied zu den realen Maschinen feststellen. Echt gute Arbeit!
20 July, 16:58
Thank you for the last wave of such nice comments. I have the last big hurdle to taken: installing clear parts for the cockpit without mess.
Qwertzel: freut mich, dass dir mein Medizin-Equipment gefällt. Du hast erwähnt, dass du selbst sehr dicht dran bist. Hab gesehen dass du auch einen Rettungs Quirl im Bau hast bzw. Eine ganze Menge von Feuerwehrfahrzeugen. Bist du selbst auch im Einsatz? LG B
20 July, 18:26
Ja, kann man so sagen. Bin seit mehreren Jahren bei der freiwilligen Feuerwehr, bei den Maltesern und beim DRK im Sanitätsdienst und Katastrophenschutz. Ab einem gewissen Punkt ist das ganze Rettungswesen eher eine Lebenseinstellung, anstelle eines Hobbys
20 July, 20:23
… and they are in place, flawlessly installed. I admire your precision, truly excellent 👍
27 July, 13:22
Thank you Alec: Your comment honors me very much.
Today morning I worked on the nose, installed several parts of SeMa Models And finally the „thing" looks like a Mk41. 🙂
28 July, 11:23
I look at the photos and marvel at the precision and modeling skill. Fantastic, Bernhard! 👏👏👏
30 July, 09:38
Incredibly realistic look and extraterrestrial cleanliness in paintjob and especially masking the clearparts, exemplary !
30 July, 20:29
хоче цей предмет
")
US Marine Corps F/A-18A++ VMFA-115 Silver Eagles Iwakuni Base
MYK Design 1:144
A-570 2021 Нова прес-форма 30 July, 20:27
")
")
")
")
")
хоче цей предмет
CH-53E "Super Stallion" and MH-53E "Sea Dragon" Engine Nacelles with Air Intake and Exhaust for Academy Kit ResKit 1:48unknown48-1 2024* Нова прес-форма
30 July, 20:25
хоче цей предмет
CH-53E "Super Stallion" / MH-53E "Sea Dragon" Folded Main Rotor with Blade Fold Restraint Systems (7 Blades - 3 Engines) for A ResKit 1:48unknown48 2024* Нова прес-форма
30 July, 20:25
додав новий фотоальбом.
5 зображення
Interflug Iljushin IL-62M
1:144
At first glace fit of the major parts was good. Unfortunately I didn't manage to glue the window parts level with the fu...


Проект: Interflug Iljushin IL-62


 3+
3+ 5 30 July, 07:20
Taking a seat and I keep my fingers crossed that the building will be joyful and successful, Michael!
30 July, 09:33
Can't miss an IF project 👍
That windshield is terrible - what's your plan for it?
And most importantly - are you going to build Lady Agnes? 🙂
30 July, 14:27
Hi mates. Nice to have your interest and you on board. Thanks Zbynek. So far it took much more effort than I expected. Lets see how it continues.
@Mr D: childhood memories. I suppose you build it in scale 1:100? VEB Plasticard?
Lukasz, I bent and glued it und sanded it flush afterwards. As I will use the Authentic Airliner decals for the cockpit windows, they do not need to be transparent.
30 July, 19:16
Hi Michael 👋,
Yes it was the Veb version, very basic....but l was enjoying building it as fast as l could.... Glue finger prints n all 🤣
Can you sort the cockpit glass ?? Surprised.... Zvezda usually very good.
Thanks for your upload..... I'm big Soviet era fan.
30 July, 20:20
Good choice Sir, the AA window decals are super cool.
Unfortunately some of their livery decals have some errors.
30 July, 20:24
")
")
/uk/search.php?q=*&page=newsfeed&fkSECTION[]=Newsfeed
search-solr.php?lang=uk
35
35
/uk/search.php?q=*&page=newsfeed&fkSECTION[]=Newsfeed
35
todo