
Стрічка новин
позначив цей предмет для обміну/продажу
")
Cowboy at Saloon
Pegaso Models 54mm
54-196 Ціна поки не вказана
17 September, 07:14
")
")
")
")
")
")
")
додав новий фотоальбом.
20 зображення
Mi-1M, model conversion by Special Hobby - WIP
1:48
I'm continuing to add detail to the rear of the cockpit floor. I'm using plastic plates, plastic profiles and wire to ma...


Проект: Mil Mi-1M Czech Air Force

23 15 August, 08:24
I still miss this small helicopter in my collection of flying machines used in Czechoslovakia. The time has come for me to rectify that. 😉
15 August, 09:26
Hello, Greg. I know there's a Mi-1M kit in 1/72nd scale. Unfortunately, only this and a rather old kit from Special Hobby exists in 1/48 scale. In addition, this kit is an older version of the Mi-1A, which is different from the upgraded version of the Mi-1M. It has a different nose shape, different cockpit glazing and other minor changes. And since I decided to build the upgraded version of the Mi-1M, I will not avoid modifications to the kit.
To give you a better idea of the extent of the modifications to the kit, I've included a picture with the differences between the Mi-1A and Mi-1M versions color coded.
16 August, 22:23
Oh, neat! I didn't realize there were so many changes between the versions. This is going to look great!
17 August, 15:09
Greg, thank you for your support.
____________________
I started building the model by making new transparent parts.
17 August, 22:31
Yeah. Nice work on the heat-n-smash moulding for the clear parts. That can be tricky to do.
18 August, 16:15
@Alec K
I used to buy ABC magazine regularly as a kid and eagerly awaited each new issue 🙂. I assume your mention of ABC magazine refers to the occasional modeling tutorial section.
@gorby, @Greg Baker
It's not too difficult to make new transparent parts by stretching warmed transparent foil over a pre-made template. Preparing the template is the most work. Stretching the warmed foil onto the template is just a routine that anyone can do after a few attempts.
18 August, 22:17
Hello, Robert! Good to see you here. You haven't missed much so far. Up to this point I've been more concerned with preparation than building the model.
28 August, 20:59
I want to try to use the sandwich construction in the production of new glass parts for the coptics. So I made (using the same process as the transparent parts) parts out of white plastic sheeting. These parts will have holes cut out for the windows. The transparent part will then be inserted between these two parts. The white outer and inner parts will form the embossed framing of the transparent part.
28 August, 21:18
Welcome, Jennifer, we're glad to have you on board and thank you for your goodwill. 🙂
30 August, 09:46
I came back from vacation and it started to rain. Ideal conditions for modelling. 🙂
So I'm back and continuing to work on the model. I need to glue the finished nose to the glued fuselage so the cockpit overlay fits exactly. That determines the workflow. First I have to finish the nose and the inside of the fuselage and glue all the parts that need to be glued to the fuselage halves from the inside. After gluing the fuselage halves together, I would no longer be able to get to these parts (or only with great difficulty).
Photos of the work progress will be coming soon.
13 September, 20:42
Oh some modeling for big boys, not glueing perfectly fitting parts together and throwing on some paint! Following 👍
13 September, 22:53
I glued several parts to both halves of the fuselage. These parts are glued from the inside, so they have to be glued before the fuselage is closed.
I also started working on making new parts for the cockpit.
14 September, 21:06
Wow, this is incredible work Ludvik! Thank you for sharing your steps - I've learned a lot from your pictures and descriptions!
14 September, 21:15
@Landlubber Mike
Mike, thank you for your interest. Welcome aboard!
I've had the idea for this rebuild in my head for a few years now. Mainly because I've been waiting to see if anyone would start making 1:48 scale Mi-1M kits. Unfortunately, to this day, no manufacturer has this kit in their lineup. So I decided not to wait any longer and start building a model from what I have available.
My rebuild is just beginning. Most of the work on the model is yet to be done. I'd also like to try some new techniques that came to mind while planning to build this model.
@Villiers
Thank you for the compliment. I appreciate it very much.
15 September, 09:15
I didn't have much time today, so I didn't make much progress on the build. But every little bit of progress counts. 😉
15 September, 20:43
Wow! You don't shy away from challenges! Watchinh with admiration, and hoping to learn lots too. Hoping you are not amongst the floods? Stay safe!
16 September, 12:29
J35J welcome! I hope you like it here.
Bruce, I like a challenge like that. I like to experiment and enjoy thinking of and then implementing ways to improve my model.
I appreciate your concern for my safety. I live in a town in the highlands that wasn't badly affected by the floods. Only the river that runs through our town has increased flow, but it hasn't spilled out of its bed. Moreover, our house is 80 metres above the river, so even if the river had spilled out of its bed, it would certainly not have reached our house.
17 September, 07:08
")
")


додав новий фотоальбом.


44 18 April, 05:15
This one is likely to be a quick little build. It's basically the companion piece to the Puss Moth, so I felt like I couldn't really build one without the other. Erik is right though, the kit is of an impressive vintage. It is indeed a few years older than I am, and has the flash to prove it. 🙂
Anyway, thanks for joining, there's plenty of seats available, so no shoving. 😉
18 April, 14:01
You say that now... but wait till you see how much putty and sanding is required~
6 May, 19:05
Well, it's supposed to be a Hawker Hart apparently... but the Hawker Demon is close enough... I mean, it's not like it's a Spitfire. 😉
6 May, 23:10
Good enough for me - I'm arguably one of the least rivet-counting persons in here... just asking/checking... 😉
6 May, 23:25
And only a masochist with ADHD would consider trying to convert it back to a Hart like the original 1957 tool... 🤪
7 May, 16:18
What did you call me? 😉
I mean, besides the dip between the two cockpits... are there any other differences? They look quite similar to me...
7 May, 17:57
Well, the "dip between the two cockpits" is the main difference I was referring to above... Plus, you'll have to skip the Demon's long exhausts, I guess...
7 May, 18:25
Not exactly sure what picture to take to update my progress… I'm working on bits of everything all at once!
10 May, 05:52
The main difference between a Demon and a Hart is the exhausts, the turret and the starboard machine gun. Will send a PM
16 May, 16:53
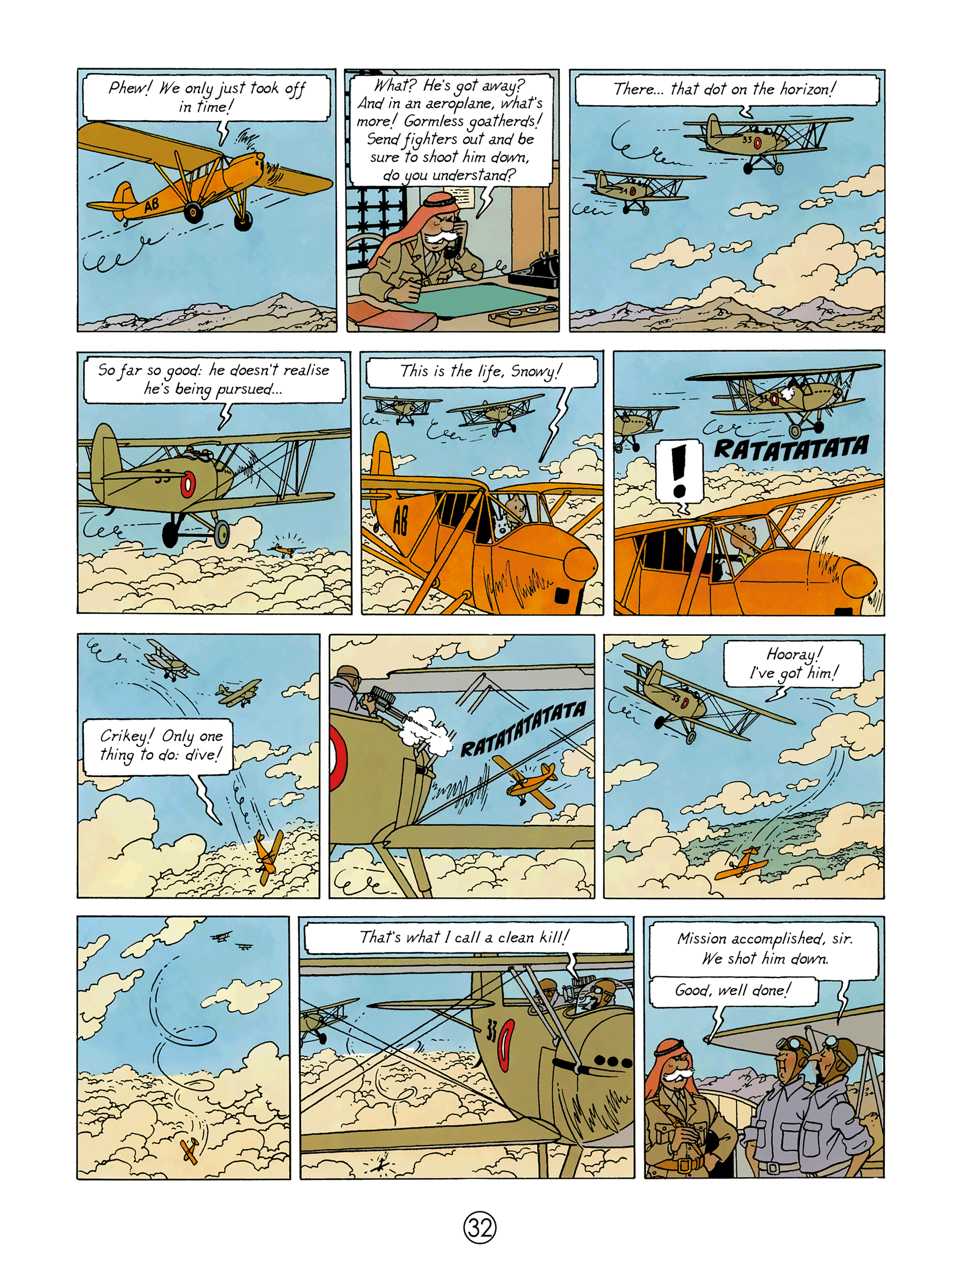
IF however (regardless of how a real Hart should be) what is shown in the comic ("That's what I call" etc frame) is indeed a starboard mg (please correct me if I'm wrong...) then starting with a Demon kit was perhaps indeed a better idea than starting with a Hart kit.... IF this is the case... then you'll only have to deal with the rear seat/turret thing and the free (ala Fury) exhausts, no?
16 May, 19:43
Yeah. I think so. Matthew provided some detailed comparison images but after looking at them and at the main page from the album... it seems to be a little bit of both...
16 May, 22:09
In Tintin in the Land of the Black Gold it could be a Hawker Hardy
i.imgur.com/57c2RcA.jpeg
23 May, 21:51
A couple of updates. The supports next to the fuselage were so weak that 3/4 of them snapped even before I got them off the sprue. So instead I just used some bent wire. The holes they are meant to slot into were gaping caverns as well, so a fair amount of putty was needed to make it at least slightly better. Now I'm left with a decision to make. The Hawker Demon has two large exhaust tubes that run from the engine down the sides. They're not present in the Tintin album (which most closely resembles a Hawker Heart I believe). So... do I leave the two side holes and the large trenches on either side of the engine cowling, or do I just shrug my shoulders and use the parts that came in the box?
The Blue Rider decals went on easily enough. They're a bit shiny, but I think I can deal with that.
11 September, 15:38
Thanks Matthew. I'm quite pleased with how the colouring came out too. A 2:1 ratio of Tamiya Buff (XF-57) and Khaki (XF-49) seems to have done the trick... or at least close enough for me.
11 September, 15:58
I just noticed the artwork has actual rigging on it, so it looks like I'm not quite as done as I thought. Besides that, only a few nice white fluffy clouds needed for the base.
13 September, 13:50
Looks great in these Danish markings and that colour. Btw what paint is it?
16 September, 15:27
Thanks guys!
Łukasz - the paint job comes courtesy of a 2:1 ratio of Tamiya Buff (XF-57) and Khaki (XF-49). I hadn't realized these were Danish markings though... that's very interesting. I'm going to do a bit of research about that.
16 September, 15:29
Looks quite Danish to me, though at least one Polish airplane sported these before the checkerboard has been approved (1918).
Thx for the paint info.
16 September, 15:50
the Danish flew with hawker nimrods between wwi and wwii but these had not the roundels on the fuselage but a large Danish flag on the tail, and of course no desert camouflage. I think Hergé must have known this.
17 September, 07:00


")
додав новий фотоальбом.
23 зображення
Grumman F6F-3 Hellcat (Eduard 1/48) - In progress
1:48
Finished!


Проект: Grumman F6F-3 Hellcat - VF27, #3

20 15 August, 15:48
Thank you folks, I hope to add couple of better photos later on, all of these were taken by my phone camera only.
17 September, 06:57
Hallo,
sind die Mosquito Control Surfaces und Flame Dampening Exhaust Shrouds noch verfügbar und zu verkaufen?
Viele Grüße
Thomas
")
Продано
9 September, 19:46
Hallo Thomas, ja, die sind noch da!
Hättest du sonst noch an etwas aus meinem Stash Interesse?
Gruß, Steffen
11 September, 21:00
Hi - die beiden Sachen sind dann alles. Ich komme mir selber etwas dämlich vor, dass ich das übersehen habe, als ich die Mosquito angefragt habe... seufz. Jetzt bin ich alles durchgegangen. Viele Grüße, Thomas
12 September, 05:04
Hi Thomas, damit ich das Porto bestimmen kann, muss ich wissen, wo du wohnst. Wäre PayPal ok? Gruß, Steffen
12 September, 21:26
Hallo,
der Versand wäre in Deutschland, hier schon mal meine Adresse:
Thomas Neuss
Wilhelm-Leuschner-Weg 5
25524 Itzehoe
PayPal (Freunde) ist völlig ok für mich.
Viele gRüße
Thomas
13 September, 06:43
Hi Steffen,
das wären dann 13.- für die Control Surfaces und 10.- für die Exhaust Shrouds + Porto, richtig?
Viele Grüße
Thomas
13 September, 14:22
Ganz genau! Das sollte als Großbrief für 1,60 EUR gehen.
Mein PayPal: steffen.kunze@posteo.de
13 September, 21:16
Prima - ich habe Dir per PayPal das Geld gesendet.
Viele Grüße und schon mal vielen Dank 🙂
Thomas
14 September, 11:46
Super, danke, kam an! Ich bin morgen wieder zu Hause und melde mich, sobald ich versendet habe. Gruß, Steffen
14 September, 23:46
Prima - eilt nicht, ich bin ab Mittwoch ohnehin 10 Tage unterwegs... 🙂
15 September, 11:07
")


володіє цим предметом
")
60'~70's Vietnam Saigon Shuttle
Tricar with The Driver & Passengers Gecko Models 1:35
35GM0111 2023 Нова прес-форма 17 September, 06:54
володіє цим предметом
 (Foxbot 48-076)")
Warriors of Light
Ukrainian Fulcrums: MiG-29 (9-13) Ukrainian Air Force 17 September, 06:53
додав новий фотоальбом.


10 9 September, 15:17
Hey, Oleg, a very rare object in excellent execution!Excellent attention to detail!
12 September, 14:41
 (Phase Hangar Resin 48242)")
")
")
")
додав новий фотоальбом.


42 9 September, 15:07
Hey,Oleg,very nice result!The wing mechanization of this model is impressive. The armament is very rare, beyond all praise!Great job!
12 September, 14:36
додав новий фотоальбом.
5 зображення
32548 U.S. 2.5 Ton 6x6 Cargo Truck
1:48


Проект: 2.5 Ton 6x6 Cargo Truck

4 16 September, 16:59
Thanks. This is really build from me. I hope my newer models will look better.
17 September, 06:52
")
")
")
")
/uk/search.php?q=*&page=newsfeed&fkSECTION[]=Newsfeed
search-solr.php?lang=uk
35
35
/uk/search.php?q=*&page=newsfeed&fkSECTION[]=Newsfeed
35
todo