
Стрічка новин
хоче цей предмет
")
Sukhoi Su-25UB Frogfoot B Canopy, Wheels & Lights Paint Mask Set for Trumpeter #02277
DN Models 1:32
32/827-074 2023 Нова прес-форма 1 October, 18:37
хоче цей предмет
")
Vought RF-8G Crusader U.S.NAVY Photo Reconnaissance Fighter VFP-306
ZDH Decals 1:72
72010 2024 Нова прес-форма 1 October, 18:36
")
додав новий фотоальбом.


22 10 February, 23:01
Thanks guys.
Hi Bart, I prefer the Border. The Border kit has more details and sharper edges.
1 October, 18:33
")
")
")
")
володіє цим предметом
 Model 11 (Hasegawa 19196)")
Mitsubishi F1M2 Type Zero Observation Seaplane (Pete) Model 11 (Japanese navy observation seaplane)
Hasegawa 1:48
19196 (JT96) 2009 Нова прес-форма 1 October, 18:34
")

")
додав новий фотоальбом.


52 19 June, 14:33
First print mostly successful. I will need to rework the thickness of the walls and the support struts for the roof. Much too thin.
19 June, 14:35
3d printing, I wouldn't know where to start. Is the ami 6 a file you found online?
19 June, 19:39
I did find it online, but was a little disappointed with the quality. It required a lot (and will need more) work to be able to print it. I mainly have to increase the thickness of the rear trunk area. The strange overhang roof in the rear needs to be sturdier as well.
19 June, 19:59
The second printing went much better. I made a mistake though, I forgot to add the support to both sides of the rear roof struts. Luckily one side seems to be strong enough to hold everything, and with a little paint I don't think the thin part will be visible.
20 June, 14:08
Good timing. After a bit of a summer break spent watching football, olympics, and playing video games with my son... I just started back at the modelling desk. After clearing up a couple of other, smaller, Tintin-related projects, I'm almost ready to tackle this one again.
21 August, 14:09
With the Hawker Hart off the bench and on the shelf… I guess it's time to tackle this one again. Getting the colour right was tricky. I finally settled on a 10:5:1 ratio of Tamiya XF-2 White, X-14 Sky Blue and XF-18 Medium Blue. Not perfect, but close enough I think.
18 September, 05:30
Thanks Cuajete. It might be a LITTLE bit darker than I was going for, but close enough for me. It looked lighter in the airbrush cup, but I suspect the darker undercoat is at play here.
18 September, 17:54
Got the windows in place. I used an old iPhone screen protector plastic cut to fit. For the interior windows I glued it them in place with some very small dabs of CA glue and then a brush of Future. However, for the open doors, I used the thinner "peel off plastic" that's supposed to keep the iPhone protector nice and clear until it's applied. Then I dipped them in Future and applied them directly to the doors. Let's hope there's enough adhesion once the Future dries. It SHOULD work, since I did the same thing on my Tintin Model T project for the windscreen. But that was flat… these have a bit of a curve to them.
20 September, 06:06
Looks like the windows are holding. Next up… painting some of the details.
20 September, 13:48
I just realized that I've been looking at the colour scheme from the album - specifically the scene that takes place at night where Professor Calculus is taken down the stairs and dump unceremoniously into the front seat of the Citron Ami 6 by a rogue wheelchair, blasting the doctor out the passenger door in the process. However... since it takes place at night, the colouring is different (i.e. darker) than it should be in the light of day. Now I feel like I screwed up the paint job!
26 September, 15:46
Basically done. Just a couple of tiny bits to add.. like the license plate!
29 September, 05:14
I took a page out of my Spitfire build. Not quite the huge cloud of leaflets needed this time, but basically the same technique to show the poor airborne doctor losing all his documents!
29 September, 16:23
This scene is making me smile lots! Really nicely depicted, and the scattered papers are working brilliantly too! Liking the juxtaposition of the bottle's label.... 😉
29 September, 18:46
Thanks guys! The feedback is much appreciated, and Bruce's comment about the bottle label made me laugh! This completes Project Number 49 of my Tintin series... I'm debating about what to do for the big 5-0. I have two main ideas in mind... one is probably a bit more iconic to the Tintin series, but the other one is going to be levelling up on the electronics side of things.. that is if I can get it working. So far my efforts have resulted in effectively nothing at all.
29 September, 23:47
And there we go. Some final pics to hopefully brighten your day. Just think, at least YOU weren't forcibly ejected from your own car by a rogue wheelchair. And, if you were... I hope you got pics!
1 October, 16:02
")
додав новий фотоальбом.
135 зображення
Focke Wulf Ta 152 H-1 (1970 tooling / Scratch)
1:72
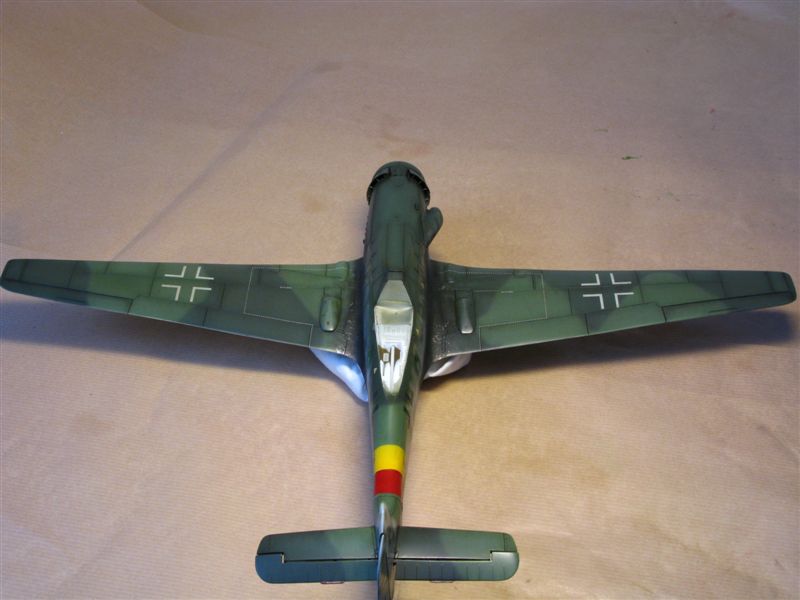
I added the green bar on the tail stripe.


Проект: Focke-Wulf Ta 152 H


87 27 January, 18:23
My next big project is turning this FROG into a Prince. Wish me luck I'm going to need it.
27 January, 18:25
I'm following. In my opinion the Ta-152H is the most beautiful plane of WW II. I got the kit from Kora in my stash and hope to start the build in spring this year. Good luck and, above all, have fun building it.
27 January, 20:18
Nicolas, I agree. It's a long, lean, fighting machine as they say. Definitely one of the more elegant designs to come out of the war.
27 January, 22:10
I had to widen the fuselage today, in order to make space, before I scratch build the cockpit.
29 January, 01:47
this is going to be awsome.
I am picking kits that are near perfect so I have fun.
but there are also people who pick not-so-perfect-kits like this Ta152 and they still have loads of fun!
GL 🙂
31 January, 13:12
Well mostly I pick not-so-perfect-kits because I'm a cheap skate. I'd rather pay 6 euros than 40 for a kit. I do have some moderately priced kits and they are a lot faster and fun to make, but often I just have the need to challenge myself and see where my skill level is at.
31 January, 17:56
@Skyhiker: I totally like your approach and I think you did a great start!
31 January, 19:16
same here @Skyhiker, I really like the 6eur price point. so affordable. probably thats why I started to look into the 1/144 scale 🙂
31 January, 19:58
Excellent work on the exhausts, and the cockpit is coming along nicely.
2 February, 03:24
I did a bit more today but I can't seem to get any images to upload. Anyone else having these problems?
2 February, 19:03
Looking at photo #17 I want to give a tip:
I would be a little careful keeping the roll of masking tape on the table. I like keeping them in a holder, or placed in a bag, to avoid the side of the roll picking up all kind of dirt.
2 February, 19:10
Yes, I keep my tapes in a bag but it doesn't seem to help as well as it should. I think I need a better bag. When I photograph things at this scale there is more dust than I realize.
2 February, 19:18
I can finally upload my images again now, I was having problems too.
2 February, 20:13
Treehugger I cleaned my tape and got a new bag. Thanks for pointing that out. No need for fuzzy tape.
2 February, 20:20
I have to take a break and will be back in a week. I must say I am in love with this plane. It's really a beautiful design with those long wings. I can't wait to get back to it.
8 February, 06:54
I'm going to build this one from my stash this year, definitely following! 👍
8 February, 14:14
The canopy was totally uneven and so I decided to do the risky thing and file it from the inside. Hopefully I didn't just ruin it.
2 March, 13:17
This kit has its flaws but nothing that can't be corrected with a little bit of skill. Are there more accurate kits out there that are easier to build - yes. But the modern trend of wanting perfect kits seems counter to the art of modeling. If you have ever built a model from a block of wood you wouldn't call this kit useless. Challenging or time consuming I can agree with but it is not crap.
10 April, 08:09
I haven't given up yet. Sometimes life forces me to take breaks but I hope to get back into this one soon. I have to put a lot of tiny details in the cockpit next and I need the right head space for that. Kits like these take time and often I will start easier kits mid process to keep things flowing. I absolutely agree that reboxing old kits without a mold date is deceptive. Thankfully with this site we can look up the history and sometimes see the sprues before buying anything. I've only had one kit that I couldn't do anything with. I bought it for 20 bucks opened up and threw it directly in the trash. That was a Top Gun F/A-18 Hornet snap kit, which really was a piece of shit.
10 April, 16:03
Following. Really looking forward to the end result.
Especially since I built this kit myself last year. Although I didn't put so much effort and detail into it as you are doing.
10 April, 21:29
Worked on the canopy and tried to figure out how the scratch built cockpit will fit into the body.
2 May, 23:45
Trez your message is pretty cryptic. Are you talking about panel lines or internal wing structures? The last photo is just a dry fit. I haven't started with dealing with any panel lines yet. I've been working on the inside of the wing walls to make something that gives an impression of space for the wheels.
6 May, 11:45
Trez, thanks for your ideas. I'm using a lot of photos and the instructions from a 1:32 model to help figure out what is going on. This little model is a challenge to correct but I'm having fun pushing my skills and learning as I go.
6 May, 15:36
I worked out most of the cockpit issues today. It's not perfect but I got it in there.
15 May, 23:09
Moreno, I'm glad you're liking it. This is kinda pushing my skills a bit. We'll see what happens in the end together.
15 May, 23:11
Getting this kit to accept a cockpit was like pounding a square peg through a round hole. I had to reshape the whole damn fuselage.
16 May, 03:35
Whoah!!! Amazing what you did to that old tooling! Very cool to watch! 👍🏼
16 May, 15:20
Really liking what you're doing, Skyhiker, and learning lots too. Impressed with your skills 🙂
16 May, 19:43
Łukasz the shape of the hood is really off in the kit. The superglue is just material for me to try and sculpt into a better hood.
16 May, 20:26
No, It's just cheap super glue from a discount store that I poured right from the tube and hardened with accelerator.
16 May, 22:08
Well the fine engraving blade I just bought broke within a day of use. Very frustrating.
23 May, 14:42
Luckily I bought a .02 mm blade in addition to the .01 mm that broke. It will have to do even though I would prefer the lines to be a little bit thinner.
23 May, 15:06
Amazing progress! Once you go the route of updating such an old kit, there's no way back, is there?
24 May, 22:19
Thanks Patrick, your right there is always more to discover and do. I'm having fun with it. Of course I have no idea what it will look like in the end. I'm spending far too many hours allowing myself to be lost in process. But if that's what it takes, why not?
24 May, 23:19
It's amazing how every kit I look at of a FW Ta 152 H is different. All the photos of the original aircraft are so blurry that details are impossible to pick out, so I'm left with looking at kits and guessing which ones are correct.
26 May, 01:25
Anyone out there with a book on the TA 152? I'm trying to figure out if the top of the flaps have a vertical line down the center of them or not. From underneath there is a line there but I am getting conflicting images of the top surface. Can anyone post a decent image?
28 May, 16:28
I looked through some of my books and picture collection. But to find even a picture of the Ta152 is rare. 🙁
28 May, 17:06
Thanks Mattes. There are a few decent books out there but they go for 80 Euros and I can't afford that. I doubt the library would have anything worth while. Maybe the model shop will let me look through one of their books but usually they are sealed in foil. Hopefully someone here has something. Getting panel lines correct is not so easy. Even worse are the rivets.
28 May, 17:49
I found this image which clearly shows the flaps divide in two sections. Interestingly the sections are not even like the underside.
[img1]
29 May, 05:48
Maybe this would be helpful? flugzeugclassic.de/f..hlands-bester-jaeger
I do not have the magazine, but kind of stumbled over the link 😉
31 May, 13:34
Thanks Ben, this kit gets a bad rap. It's not as bad as people make it out to be. Of course I am putting a lot of work into it to make it better. But if its done straight out of the box it's not that bad. The backwards propeller is a stupid engineering mistake but that's an easy fix.
31 May, 23:54
Yeah, I was a little heavy handed, but it's not a problem. I just glued it back together. I prefer trenching and filling over trying to get the lines the exact depth overall and then accidentally sanding away lines. The only problem with using this method is the deep panel lines can make the model unstable in places if you are not careful. But in the end it should all work out.
7 June, 21:47
I am slowly moving forward on the panel lines behind the scenes. This is the part I have to force my way through because I don't really enjoy it. But it is coming along and I could have some photos soon.
2 July, 18:21
Thank you Moreno, re-scribing is definitely the part that's the least fun for me too. Some days I have to force myself just to do one line. If you do that once a day eventually it gets done. But yeah, re-scribing sucks.
6 July, 16:21
Big step made with attaching the wings. It makes me feel like I am moving forward after all.
7 July, 14:33
An impressive amount of work, your patience and skills are incredible, congrats!
11 July, 20:02
Wow, what an insane amount of work you put into this project! I am humbled by your perseverance and attention to detail!
12 July, 03:34
Thanks Thomas, I enjoy the process of trying to figure out how to do stuff. The model is just an added bonus in the end.
12 July, 13:20
Thanks Moreno. I'm having fun with it, mostly. The panel lines were a drag but I got through that part. Hopefully after the primer I won't have to any major touch ups. But we will see. One step at a time...
13 July, 16:13
Watching you making process is indeed great to watch. The plane is starting to look great!
16 July, 22:54
Wow! How do you filled the lines? How was you able to calculate the exact quantity?
17 July, 05:43
Moreno, I used an engraving tool to cut deep lines and then I rubbed white putty into them. By rubbing the excess off it automatically brings the lines to just below the surface of the model. As the lines dry they also shrink a bit. So, it was not too hard to do. The trick is to use enough water and a brush to apply the putty and to use enough water on a paper towel or cotton bud to remove the excess. Hard to get to areas need to be cleaned up with a wooden tooth pick.
17 July, 06:01
I never would believe that the base kit is a Revell's offering.... Awesome job!
17 July, 06:31
I worked on some details today. Tomorrow I will give it another coat of primer and hopefully start the riveting.
17 July, 21:24
I am debating with myself when the best time to do riveting is. If you do it before priming you run the risk of filling the holes. If you do it after priming it makes it harder to correct mistakes. If you do it after the final paint job you run the risk of fucking everything up. Anyone have any experience with riveting?
19 July, 13:17
Regarding riveting: I have done it before priming but I don't see why you could not do it after. You'l have to sand after as the riveter leaves 'rings' around each divot (as it pushes the plastic out). In my experience, a thin coat of primer has negligible impact on the rivet holes (if it had, this would be a problem with any factory-riveted kit).
20 July, 23:38
Alec, I tend to agree with you. My thoughts on doing the riveting after the primer was that the rivets may remain a bit better defined. But I am not convinced. I think I will have to do some tests for the future. By riveting before and after the primer on some styrene, then spraying a color coat over both should give me a better idea of which I prefer. Right now I feel like I prefer not doing it at all, because riveting is a pain. But that's just me feeling sorry for myself for wanting to do a half way decent job on this kit. I do wish I could find some reliable riveting guides for this plane. It seems like everyone is just guessing at it.
21 July, 00:00
Thanks Patrick, I haven't mastered riveting or panel lines yet but I'm learning. I am pretty limited in my tools and the scale is not the easiest. But with practice and study I hope to improve.
21 July, 22:44
I've realized that one of the benefits of doing the riveting after the primer is that you can make sure that most of the sanding is completed. However inevitably there are areas that get messed up and sanding is required after all. I just haven't found the perfect solution.
21 July, 23:33
Enjoying your progress a lot, the transformat is amazing.
I must say your plans are so clear and great reference where do you get your plans like these from, I search the tinternet but never find any as useful as your plans, any extra guidance would be appreciated
22 July, 08:12
I drew my plans on the computer by looking at various images on the internet. Unfortunately I haven't found any place to download great paneling or riveting guides. There is a Russian website that has blueprints that I sometimes use but I'm not sure if it is still available. I didn't use it for this project.
22 July, 08:31
Sy Bar, which plane will you be doing next? I can look around for blueprints and see if I can find anything useful.
22 July, 13:37
Cheers Skyhiker v kind offer and thanks for the info. Not sure what will be next and if plans will be required but I'll keep you in mind should the need arise.
Keep up the work I'm loving watching the progress 👍
23 July, 20:34
Widened the wing roots and I am continuing with the riveting today. Also I did a lot of research on the proper colors to use, which was not as easy as one would think. They certainly are not what the instructions say.
24 July, 17:51
Great work as usual! I'm curious about the colours: aren't they the late RLMs?
24 July, 18:48
The colors are late RLM colors but not exactly as the instructions say. To start with they call for the hood to be RLM83 which of course is wrong, since in actuality that was a marine color and blue. Many paint manufacturers have some type of green with that number but it was based on a typing mistake in the original RLM records. I believe the hood should be RLM73 as in the original photos it is a bit darker than 81. The fuselage is RLM81 and RLM82, but there were three variants of 81, two that were brownish and one more green. The green is the correct one for this plane. The under carriage is RLM76, but once again we have three variants to choose from; one that is greyer, one bluer and one more tan colored. The greyer one is correct. There is confusion about whether the nose is red or black. I still have to do more research on this. I believe the propeller blade was RLM70
24 July, 19:16
I hope to be finished with the riveting today. Most of my time was spent trying to figure out which of the conflicting diagrams was closest to the original. I don't know if I got it right since there are no surviving planes left.
28 July, 10:23
Great Work on this old Revell Kit and there is still one surviving aircraft.In National Air and Space museum.
airandspace.si.edu/c..11/nasm_A19600317000
29 July, 14:01
National Air and Space museum has a different version of this plane. It is very similar but there are a lot of differences.
29 July, 14:37
I redid the engine today and laid down a second layer of primer. The rivet lines came out well. There are just a few small touch ups on the engine cover and wing tips to do before I start on the wings.
30 July, 15:59
Thanks DerMattes. It's more a scratch build than a kit at this point. It's starting to come together. I still have a while to go though. How is a scratch build defined at the official contests?
31 July, 00:46
It's like you are building a vac kit with the amount of work and attention to details you are putting into this build. Impressive and inspiring!👍🏻
31 July, 08:04
I made a gunsight out of 7 scratch built parts that is only one millimeter in size.
31 July, 14:23
Next I have to try and repair or replace the front windshield. Somehow it cracked when I was sanding it down. Is it me or do the clear parts on Revell kits always have problems?
2 August, 04:51
Well I painted the propeller today but afterwards I had to clean my Iwata airbrush and change the needle. Unfortunately the needle noozle broke off in my airbrush and there is no way to fix it! Now I have to rely on a cheap Chinese knock off to finish painting until I can save an extra 150 bucks to buy a new airbrush.
8 August, 16:58
That sucks. I'd love to lend you my second airbrush, but unfortunately that's also just an old Chinese product at the moment. Probably wouldn't help much.
8 August, 18:10
I will try scratch building the canopy if that doesn't work I will have to get a vacuform machine.
20 August, 19:17
I wish I could add another like for your vacuum machine! Man, you're really cool!
21 August, 14:43
No, I just needed to make a canopy so I first tried replacing the front windshield with a clear plastic piece from a CD cover and glueing the original side windows to it but when I finished it was too thick. So then I made the front windshield out of thin plastic sheet from some packaging I had laying around. That worked but the bubble canopy was now too thick. So I tried making a bubble canopy by heating up some of the plastic sheet over a candle and pressing it down over the original with my fingers but that didn't really work. I only got one that looked right but I burnt it so I realized I needed to use a vacuum and change my heat source. My hair dryer runs so hot it overheats and turns off, so I tried that with the vacuum and it worked. You just need to tape the plastic on a piece of cardboard with a hole cut into it and practice. You can make the vacuum screen out of anything. I just used an old sanding disc that I punched holes into and taped down on my sweeper.
21 August, 19:02
I'm not sure I can visualize that yet but I'll see if there's something on YouTube. I have a truck I need to make a windshield for.
21 August, 23:11
🤣🤣 love the vacform 😁, l split the canopy on my little mig-23 project, to heavy with the Quetip/ ear cleaner!!
I used toaster n paintbrush end 🤣, it worked...but was just a little 1/144 mig-23, it's my wall.
The homebrew job was clearer than the original 🙄,
Would love a little vacform.
Love the scale detail you go to.
👍👍👍
21 August, 23:58
Ben here is an example I found on YouTube of vacuforming. youtube.com/shorts/GFSJxs51uoY?feature=shared
2 September, 08:17
Just make sure that the plastic you are heating up is polystyrene and not PVC. You don't want to poison yourself with heavy chemicals. Polystyrene is bad enough. And don't use your oven or anything that will be in contact with food.
2 September, 21:36
I made another canopy. This time as one piece. After painting I will try to separate it.
5 September, 14:13
That canopy has come out nice n clear.👌
I think it would be nice model with closed canopy also.
I like closed as keeps the dust out n preservation on cockpit.... Little time capsule too.
Doing a good job, persistence is a good trait in this hobby 🙄😆.
I've spent more time making a missing gun turret.! Than on the rest of the build !!
5 September, 14:30
You mean you build an entirely new landing gear, right? At least this is how it looks 😉 Impressive work and dedication!
8 September, 16:44
Cannot wait to see more. Amazed at the effort expended to correct, such an old kit. Reminds me of a favorite saying of a long lost friend. "that wouldn't stop a good modeler". A good modeler you are. I thought Inwas pretty good, but am in awe of your talent and dedication. Am following
8 September, 17:45
An amazing amount of improvement and scratch work to improve the model.
Very impressive..👍👍
8 September, 19:33
Thanks guys. I'm trying. Learning a lot on this model. It certainly is a challenge, but I'm having fun.
8 September, 20:56
Can l ask what the 🕯️ candle wax was for?? I was guessing 🤔 maybe to build up higher for super glue. ? I like watching builds as you can learn new skills.
Also if you don't mind, how did you thin down the retract arms ...looked machine down.
Enjoyed watching so far being fascinating,
I built the Revell FW-190 this year ...that wasn't to bad.... Few of the engine fan blades hadn't been moulded in !! So l built them back with super glue gell, back wheel was fragile n came off. But rest ok .
Thanks 👍👍
9 September, 09:48
Mr D. The candle is used as a receptacle for the super glue. It helps to keep the super glue from setting. By putting it on wax and covering it with foil it will remain in a liquid form for a whole day. The retractable arms were made from styrene rod and stretched sprue. The thick end is the rod. The thin end is sprue and the raised area is very thin sprue wrapped around it.
9 September, 10:04
Thanks for the info 👍👍.
Have you tried super glue gel?? It's slow to dry but builds up more.well.
9 September, 13:54
No, I haven't had a need for that. I just use cheap super glue. 5 tubes for a Euro.
9 September, 18:51
Impressive work, I am currently working on a similar kit, I didn't know whether to repanel, but I don't think I have reached that level that you achieve... excellent, I will follow your work closely!!!
12 September, 16:30
I've got one of these in the stash and every time I look at it I go "nahhh..." and grab something else to work on. This project has given me hope that something good can be done with that kit. Nice work!
20 September, 15:31
Thanks Greg. With enough attention it can be pretty decent. I guess it just depends on how much time you want to invest. Certainly there are better and easier kits on the market. But I enjoy reworking old kits every once in a while to push my skills. Just painting perfectly molded kits somehow doesn't seem like modeling to me.
20 September, 15:38
Well I broke both retractable arms from the landing gear today. Tomorrow I will have to come up with a better solution. Luckily I just got a shipment of brass tubing that just might work.
20 September, 18:36
@Skyhiker
It can be one step forward n two back sometimes!!
I've had few instances this week...paint to re-do and now bit of glue gone on my tire!
Good luck with brass tube🤞.
Can't be as bad as a snapped canopy 🙄....keep going 🤣
20 September, 19:38
I think this back and forth that I experience with every model is just the plight of being an intermediate model maker. I hope to one day have enough experience that things go easy but maybe that's just wishful thinking.
20 September, 19:43
That brass tube is better job around 👌. nice n strong.
Wouldn't mind some myself?? 🤣
Every day's a school day..🤣 always learning hopefully, you must be doing something right as you have alot of interest in the project.. Enjoying the process is most important part.
20 September, 21:47
So, today when I woke up I realized that there was a problem with the horizontal stabilizers. So I had to take them off and rebuild them. If course that lead me to seeing more areas that needed sanding. In the process of sanding I knocked off the wing tips and canopy. Glued them back on. Polished things up and tomorrow I will give it another spray of polished aluminum.
21 September, 22:24
Hi Skyhiker 😃👍
Chin up...and move on, .... These are the times when we say "l just want to get this built now" 🤣
I nearly messed up my current IAR-80 build from the first step's .... assembled the cockpit floor upside down!! Assuming and not double visual checking! Could have screamed 😲. Anyway....l cut X3 levers n rudder pedals off n glued on right side ... Just about recovered it.
I didn't think the VS's looked to far off ?? The 190 had bit of dihedral... But not the 152.
Do you use PVA on canopy ??
Good luck on next steps..... Getting near finish line now😁👍👍
21 September, 23:31
I am using Glue n Glaze (a type of PVA) on the canopy because I will need to remove it later and cut it apart to have an open canopy.
22 September, 00:35
Thanks Mr D. I added a bit of dry brushing and will start with the main color tomorrow.
26 September, 22:05
🤣
Doing ok👍 nice when a bit of colour starts going on.
I'm at painting stage on my project.
Does this one have any mottling? Like on the 190 ??
27 September, 12:54
That answer my question? 🤣
That's come out good, nice balance 👍👍 it's easy to over do it .
Looking good 👌
27 September, 16:45
Thanks Dave, it took me a while because my airbrush was giving me trouble and the paint is finicky. Unfortunately I broke my good airbrush last month. But with enough persistent I think I made something presentable.
27 September, 17:05
Hi Skyhiker 👋
Nice.... looking good, the striping set's it off nice and number's ....not easy to cut out numbers.... takes time., Works paying off..👍👍👍
30 September, 20:49
I considered printing my own decals but the white decal paper I have is way too thick. So, I tried a bunch of ways to make the number on a piece of paper but the thin black line was always giving me trouble until I tried painting the green by hand. That worked.
30 September, 21:10
Excellent progress!!! I have mine paralyzed (of course I don't reach the scratch level that you implemented) and I just need to start the painting job.
Seeing your work helps motivate; I hope to do something these days.
1 October, 12:56
It's been great the way you have documented the build, l think us modders.... like to see the nuts n bolts of things.
It's encouraged me to scratch up all the missing details to my current Be-6 build.
👍👍👍⚡
1 October, 14:06
So great! It might not work for this build, but in the past, I've used homemade decals on white backing and laid them down on the undercoat. Then I seal them with a coat of Future (but any clear coat would probably do) and then CAREFULLY mask them and paint over them. If you use small enough bits of tape, it usually come off without tearing the decal and the blending is MUCH less noticeable than applying it on top of the paint. Something to try for next time maybe.
1 October, 18:32
")
володіє цим предметом
")
M4A3 76W HVSS Sherman With full interior and workable track links
Rye Field Model (RFM) 1:35
RM-5042 2020 Нові деталі 1 October, 18:31
")
")


додав новий фотоальбом.


21 17 July, 16:04
Made a start on this kit with the cockpit which is quite basic to say the least, part of the reason I put the pilot and navigator in. 🙂
Welcome Nicolas, pull up a seat. 👍
Many thanks mates for your interest and likes Freak, Andrew B, Istvan S, Villiers DV, J35J, Andre K, Juskifo, Tommy A, NordMito & 1 other mate. 👍
26 July, 17:32
Added cockpit to the upper fuselage. Lower parts of the tail added to the lower fuselage. Wings and folding mechanism added to lower fuselage. Weight added to the lower part of the nose. I wasn't certain how much to add as there is no indication in the instructions. 🙂
27 July, 16:06
Fuselage now together and bits of filler here and there. 🙂
Many thanks mate for your interest and like Matti T. 👍
28 July, 14:46
Just the jet engine intakes added this week as have been away. On the right hand side I had to cut and sand as there was a big extra part of moulding plastic in the way. 🙂
4 August, 17:17
Hataka Medium Sea Grey added as the main colour. Tail sprayed Hataka Jet Black. 🙂
6 September, 16:30
Tail now attached and the rest of the jet black (Hataka) has been added to the middle of the aircraft. Next will be painting the nose and the rear engines. 🙂
Many thanks mate for your interest and like Mr D. 👍
8 September, 16:25
Nose painted Hataka light grey and wing tips Hataka jet black. 🙂
Welcome Ekki. 👍
Many thanks mate for your interest and like Sergej I 👍
12 September, 14:49
Decals now on, next will be the undercarriage and weapons. 🙂
Many thanks mates for your interest and likes Tcamp, Patryk S & Randy K. 👍
22 September, 15:21
I call this completed. The plane denoted is a Tornado from 111 (F) Sqn, RAF Leuchars in 2010.
111 (Fighter) Sqn converted to the Tornado F3 from the Phantom FGR.2 in 1990 at RAF Leuchars in Scotland. Its main role there was as a part of the UK's Quick Reaction Alert to identify and if necessary, destroy hostile aircraft entering UK air space. The Sqn also carried out air operations over Bosnia in 1994/95 and took an active part on Operation Telic commanded by Wing Commander Rob Birch in 2003. 111 Sqn was the last RAF Sqn to operate the Tornado F3 and was disbanded in 2011.
Many thanks mates for your interest and likes Sergio O & Moreno B. 👍
29 September, 15:09
Many thanks for your kind comments J35J & Nicolas, I greatly appreciate them. 👍
Many thanks mates for your interest and likes Neuling & Mirko R. 👍
1 October, 15:53
позначив цей предмет як замовлений
")
SPAD VIIs of the Lafayette Escadrille, SPA124 and the 103rd Aero Squadron
Pheon Decals 1:32
32001 2009 Нова прес-форма 1 October, 18:30
")
")
")
")
")
")
")
")
")
")
/uk/search.php?q=*&page=newsfeed&fkSECTION[]=Newsfeed
search-solr.php?lang=uk
35
35
/uk/search.php?q=*&page=newsfeed&fkSECTION[]=Newsfeed
35
todo