- SH-60 Seahawk

The Armycast.cz resin


One those bits is one the wrong side, they are part of the colective and must be on the left of both pilots

Drilling and cutting


It looks like I've cut too much and there is a correction to make


starting to change some parts

The "joystick" is a bit like a plane, so I've build them new heads, remember to cut them because they are too high (see the red arrow)

Changing the panel, but do dry-fit it with the glass, you may have to reduce it a bit

Working on the pilot door

Reduce the side door thickness

Use the door to align the pilon

Cutting door glass and remove wipers


Adding texture to the pilots chairs and stretchers for the small chairs

The rebuild joystick and new colectives


Mask and spray those stripes on the floor like you've never seen an airbrush, to give the non-slip floor look 😉


Now I don't want to put the celling and close to hide all of this 🙁


Meanwhile let's work on the rotors

Accidents happen, but one thing is sure: in case of future accidents this Blade should be the only one that is sure to endure


And now the scary part, gluing the two half This time progressively in three phases from tail to nose.


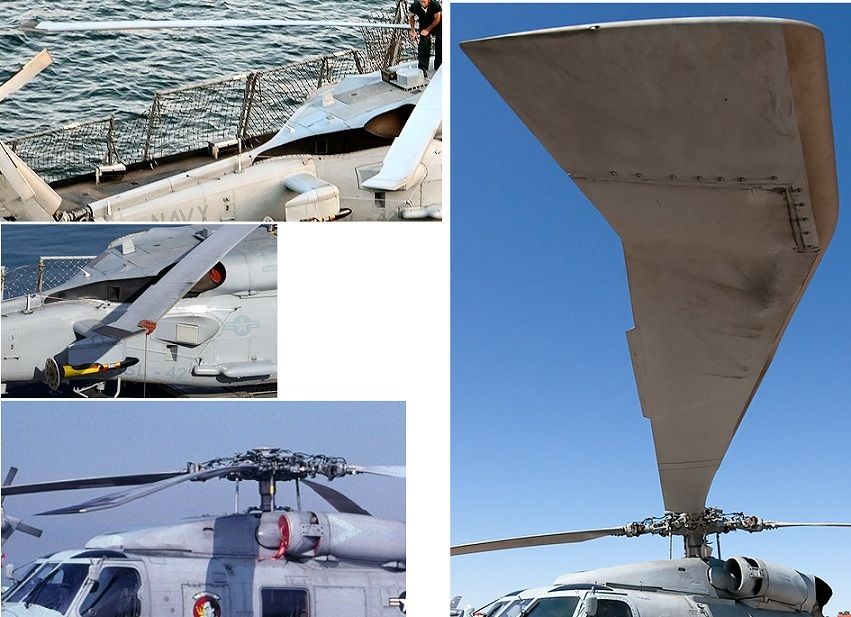
Thanks to "Robertas Vasiliauskas" and "Austin K" for this detail, I didn’t notice that the kit blades were the army version, and had to cut them to the Navy style


Even using the kit out of the box this detail i'll look better


dilemma: As I am a large paws I bet I'll break the antennas if I glue them before painting. On the other hand if glue them after I'll get some CA glue spots and paint less homogeneous

So me and my friend with the helmet build some rigs in Lego and now only touch the model as little as possible, let's see ... First a thin layer of color base and then the shading of the panels

It may not be very clear but in the Seahawks the gray underneath is lighter than the rest (some instructions do not show this and others show a 3rd darker gray on top)

The old trick to avoid a hard transition between both gray

The rest is the mask and paint, mask and paint, mask and paint ...


Next color: Black

Here is the metal detector

I know that making masks is really boring...

... but I think it gives a nice touch to some details

Scorpion placed and now let’s seal it and give some light weathering


Applying oils - Only with a fine brush through the lines and wiping a few minutes after

Here is how I have led and glue the wire point-by-point (and it’s 6 points in this one ) A clamp to make weight and “Lego†to give the right height and guide the wire to the right spot to glue, then put a bit of CA, wait and go for the

I was going around and around trying to make the very small covers of the air intakes until I came up with this simple idea: Paint sculpt paste and when it’s dry, but not totally hard, just mold it in place


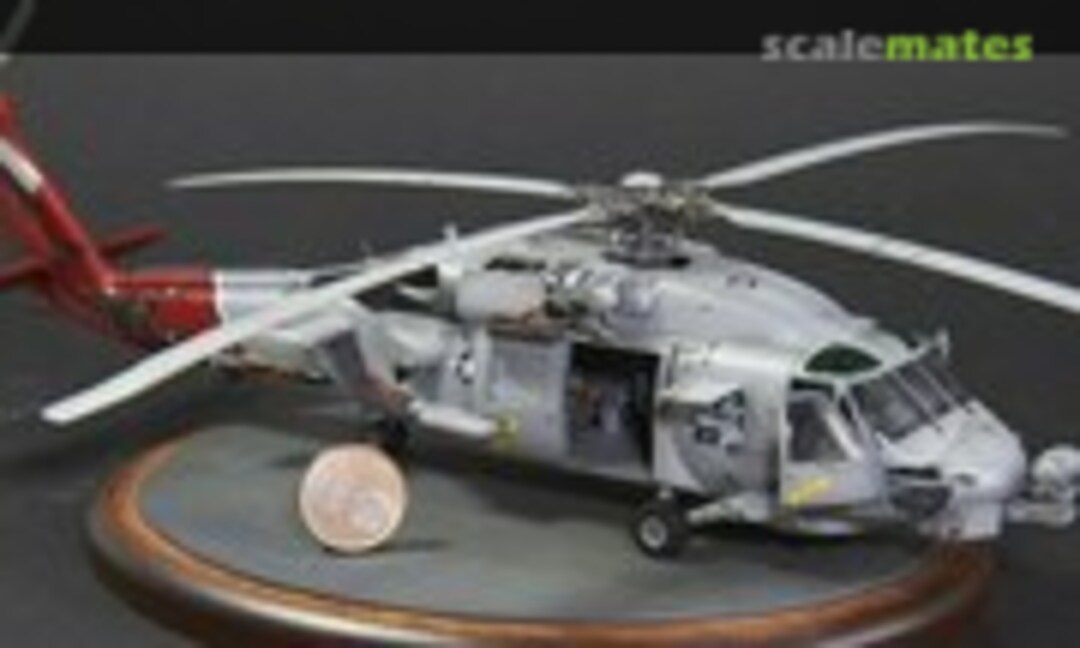
Finally, with its base

Finally, with its base

Finally, with its base
评论
6 11 January 2013, 18:58
are you a micro surgeon?some outstanding work in 1/72 i would never try to attempt it at that size
28 January 2013, 22:08
you are truly a mad man,do you always work in 1/72?or do you go wild with 1/48?lol
29 January 2013, 11:16
well what else can i say,using needles for barrels at this size is genius,and the blade repair is awesome,though i tend to use pins snapped to size,i`m doing a biggish job on a 1/24 plane and i struggle with this size and you seem to relish in it,fantastic
29 January 2013, 11:22
Hi Vitor,
pilots seats is in bad position (need push to forward), also yuo need cut rotor blades tips. Model contains army style blades.
29 January 2013, 14:45
Thanks for your comments guys.
*ole moller: 1/72 is my scale, maybe one day i'll try a rotor on 1/48 (if I can finish it)
* Robertas: Thanks for your sharp seeing, in fact the seats are to far back, as I'll open one door i thought I could put them a bit back as they are on rails, but seeing again real photos now I see they are a bit far.
Now what do you mean with "cut rotor blades tips"?
I've been comparing with photos and didn't understand it
[img1]
[img2]

29 January 2013, 19:52
*Robertas: I see it now, "Austin K" show it to me in another post😉 Thanks mate
29 January 2013, 21:13
Vitor,
sorry, I work in the evening. Austin good Hawks spec, thanks him.
30 January 2013, 13:10
Tse, i´m watching and watching and totally forgot to say: Marvelous work, Vitor! Great job in 1:72! 👍
30 January 2013, 14:20
eh eh eh, I just use a magnifying glasses and a lot of patience 🤔
30 January 2013, 17:38
@Vitor: I guess the last one you need a lot for such tiny parts! Stuning work, can't repeat it enough! 👍
30 January 2013, 18:31
Bom dia. Muito bom mesmo. Onde arranja o Alclad e Mr. Surfacer em Lisboa?
28 March 2013, 10:20
Os que comprei foram on-line em lojas de Lisboa, ou na zmodels.pt ou na vlmodels.com.
Mas creio que a casa Antunes no CC do Martim Moniz também terá, é ligar para lá. Aqui fica uma listagem dos contactos das lojas físicas em Portugal forum.modelismo-na.n..t=14542&start=90
28 March 2013, 10:33
Estive lá antes de ontem e não reparei. Acho que vou lá vou voltar. Gostava de experimentar. Agora as outras duas que indicou desconhecia em absoluto. Obg.
28 March 2013, 11:00
Uindo!!! I like it! But i think you miss something there!! on the console... the white/red stick paper 🙂
3 April 2013, 23:53
Que maravilha! O teu melhor trabalho até hoje, (na minha opinião) Parabéns.
Congratulations, your best work ever! (on my opinion).
😄
12 April 2013, 13:01

Awesome job Vitor, great details on this little chopper and a great paintjob, I love it 👍
Greetz Phil
12 April 2013, 15:38
Wow this is just stunning. Great work on the colors and the details.
14 April 2013, 22:24
I especially like this comment of yours after spending so much time on minute details "As I am a large paws I bet I'll break the antennas if I glue them before painting" 😄
Great project!
15 April 2013, 11:55
Outstanding, cannot have enough of this 👍👍👍
On top, thank you for the very instructive photos! 🙂
9 February 2014, 09:00
Incredibly fine work my friend. 👍
Was not aware of 'Armycast M&M' products but now I am and will be picking some up.
9 February 2014, 15:02
Not sure how I missed this one last year - excellent work and a great tutorial. I've learned some new tricks! Thanks! 👍
9 February 2014, 15:11