DAP Kart - Parma 1981 - Reference pics

First let's look at some reference pics. Here we see Senna in action in 1981.

Other action pic of Senna in Parma 1981.
Interesting pic showing the white racing blouse with Martini sponsor and racenumber (not provided in the kit)...

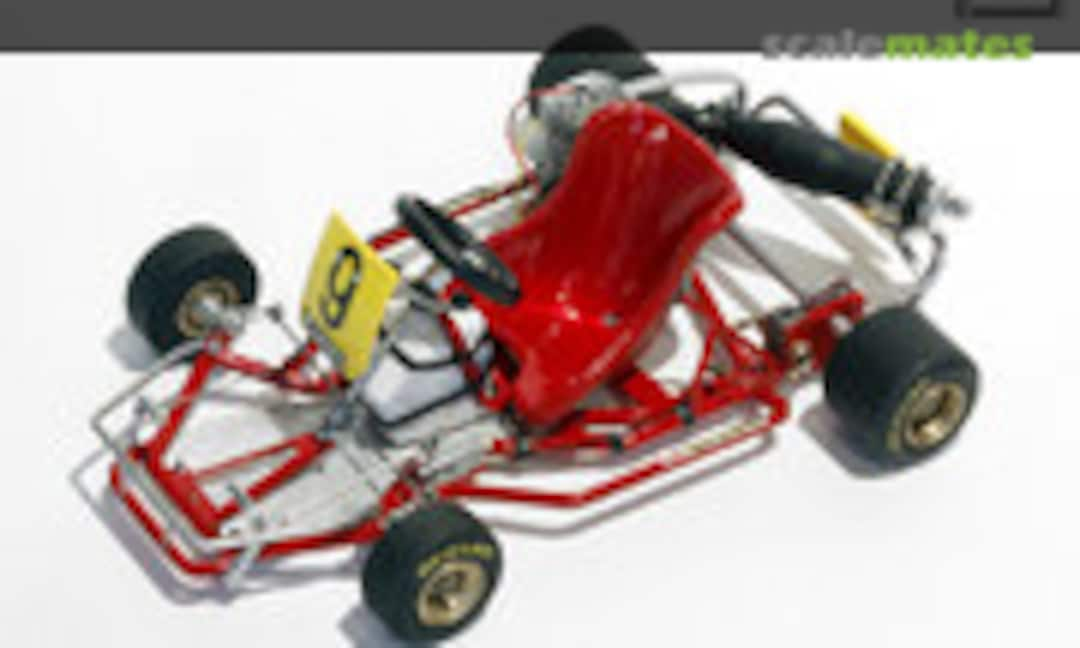
And even more interesting: a picture of the DAP kart, similar to the Senna kart back in 1981.

The last reference pic (for now) shows the steering system seen from the drivers point of view.

Ok, let's get started. The driver figure is entirely made from clear plastic. I have no clue why. Even the vizor should be painted gloss black since there is no face behind it in the kit. I replaced the helmet by a helmet with a face + clear vizor.

The steering system in the kit is ridiculous. It's overdimensioned and lacks all detail. I will cut it away and replace it completely.

First I cut away the wrong parts, then I fixed new suspension points (red arrows). Next I replaced all the steering parts by scratchbuilt metal parts.

A comparison pic between the corrected kart (left) and the OOB version (right). This build will show that there are a lot more errors in the kit which I intend to correct as well...

Another pic of the poorly detailed steering system... The steering rods are of the same diameter as the chassis rods!!

This is how it should look like. Never 100% perfect of course, but a whole lot better looking anyway.

Dryfit of the kart so far with the tiny wheels.

And a pic from another angle. The wheel nuts are not attached yet.

Next I flattened the fixation points of the floorpan (green arrows), I cut away the ugly fixation points of the safety bar (red circles) and replaced them with proper fixation points (red arrows), and I fixed uprights for the safety bar (yellow arrows).

Not everything always works right away... Top left is the plastic safety bar; which broke in the middle when I removed it from the sprue. No harm done, I was gonna replace it anyway. To the right are 2 rejected prototypes, bottom left is the correct one.

The flat ends of the safety bar fit the plastic fixation points; the green uprights fit as well. All I will have to do when the chassis will be painted in red is remove the paint of the metal uprights, because they were not painted in reality.

Next I improved the brake pedal which shows an overdimenioned braking rod. I replaced it by metal wire.

Next I dryfitted the throttle and brake pedals, to make sure they still fit with the scratchbuilt safety bar. The red arrows is the throttle; the green arrow is the brake pedal.

Here the red arrows point to the locations where the throttle cable and the braking cable will be fixed.

Next I dryfitted the front and rear wheels to check the ride height of the kart. Looking good.

I also dryfitted the racing seat to check if the supports all sit right, which seems to be the case.

Now the whole chassis is pretty much ready. I can start concentrating on the engine and the brake system. To be continued!

Now lets take a look at the engine. The 1993 kart had a silencer (red arrow) which is also present in the Fujimi kit. So far so good.

But the 1981 kart didn't have a silencer! And yet, the same part is present in the Fujimi kit?? It took me a while to realize that the Fujimi guys designed the 1993 kart first and then copied the parts in the 1981 kit, but they overlooked this 'detail'...

Also, the bottom part of the engine shows cooling ribs, on both karts (1981 and 1993). Yet, they are nowhere to be found in either kit...

Time to correct things! 1: close gap for silencer + add cooling fins. 2: relocate carburetor from front to right hand side + add details. 3: Add cooling fins to bottom engine part. 4: Scratch coil + wiring. 5: Scratch spark plug + drill out location.

The result: to the left the standard kit engine, to the right the corrected engine.

And this is how the engine should look once installed into the chassis. The red arrows point to the locations of the throttle cable and the fuel line. To be continued!

The reference pic of Senna's kart also shows that the muffler is attached with small springs. In order to model this detail, I had to replace one of the attachment rings (red arrow). Next I filled a large gap at the muffler's bottom (green arrows).

Next I scratched the muffler's support and the 2 large springs, as well as the 4 small springs (blue arrows on other picture).

I didn't risk to dryfit the small springs because I'm afraid I can't remove them anymore, but I did dryfit the muffler and the large springs.

Last but not least I scratched the brake lines, brake cilinders and the brake patches (red arrow). I believe that at this point I can start to put it all in paint...

And that is exactly what I have been doing: putting it all in color. All colors are Tamiya TS spraycan colors, but sprayed by airbrush.

I want to give the fuel tank a 'filled' look, so I masked it halfway and sprayed a mixture of clear orange and brown at the lower half.

I sprayed the driver flat white since that is the color of the racing blouse. Next I applied the Martini and N° 9 decals (coming from my spare part box). I also painted the yellow stripes on the racesuit.

Later on I will fill the correct areas with flat black, or grey (for the gloves).

Once the muffler has been painted, I could fix the small springs. I used a drop of superglue to make sure they will stay where they are. The support with the large springs and the muffler end cap are only dryfitted.

Muffler seen from the bottom. The hole fits a connection tap on the kart.

This is how the engine + muffler will look once attached to the chassis. The engine hasn't been weathered yet, and the wiring is still missing as well.

View from the rear of the kart.

Here you can see the coil, painted dull red, where the wiring is still missing.

All the parts have been put in color now, except for the Senna helmet, which still needs some details. All the small parts like nuts and bolts, and some wiring are missing here as well. I also have to weather everything before starting to assemble...

Allright! Let's get movin' ! Step 1: assembly of the chassis...

The plastic chassis was replaced by an aluminium sheet. The connections with the chassis have been simulated with punched roundels of aluminium and plastic strip 'bolts'. The gas tank has been 'filled' halfway.

Step 2: assembly of the steering system and throttle/brakes pedals.

The complete steering system was replaced by metal rods and scratched parts. The pedals are kit parts.

Step 3: assembly of the safety bar and steering support.

The complete safety system was replaced by scratched metal parts. The steering support is the kit part.

Rear view of the assembled chassis so far.

Step 4: assembly of the race number and racing seat.

No special remarks here: everything in this step are kit parts. The race number plate will receive some small bolts though.

Step 5: attaching of the engine and brake disc.

The engine was wired up partly, and weathered. The brake disc was weathered as well. Also note the small bolts on the race number plate.

Here you can have a better look at the weathered engine and brake disc.

Step 6: attaching of the wheels, chain and sprocket.

This is how the kart looks like with the wheels attached. I also completed the kart by adding the brake lines.

At the right side you can see the fuel line, the fuel spill line and the throttle cable.

I also secured the gas tank with 'Ducktape'.

Here you can get a closer look at the brake lines.

The Senna driver figure was assembled and painted as well.

The helmet comes from a Tamiya kit; the race blouse was scratched.

The racing blouse and the shoe soles have been weathered a bit.

This is how the kart looks like, all finished but without Senna on board...

And this is how it looks with Senna behind the wheel.
评论
21 January 2013, 19:37
I started my modelling year with Ayrton Senna's DAP kart from 1981. An interesting kit, but with a great deal of mistakes to correct. But a lot of potential as well of course...
21 January 2013, 19:59
A very interesting project!
Chapeau, for your scratch built details!
Why did you made all additional parts from metal and not from plastic?
Static motives?
Greetz
Dirk
22 January 2013, 00:17
Partly yes, and also because all these parts are made from metal in real as well, so I can save some paint: nothing looks as close as metal as ... metal! 😉
22 January 2013, 05:36
Thats really cool!!
Great scratch Job. Wish i could do things like that.
Iam glad that i can handle PE so far! 👍 👍
22 January 2013, 06:59
Oh Ha.
My Mistake.
It isnt a scratch build!!!
I was irritated from by white plastic!It s a complete Kit.
Nevertheless it looks very good!
23 January 2013, 17:25
Update! The engine has been corrected and I added some progress pics.
24 January 2013, 17:26
The last preparations have been executed. Now it's time to start to apply some paint!
25 January 2013, 21:12
Love this work on this Go Kart!! Its Just amazing... and has a Senna Fan this really touches my heart!!
Best of luck with the rest of the Build!!!
25 January 2013, 22:40
I finally was able to give the parts some color... Progress pics have been uploaded.
27 January 2013, 17:53
Guy,
Flemish master of Racer Models!
Looks very very fine! Great stuff!! 🙂 🙂
27 January 2013, 22:31
Like the real thing. 👍 Top, Guy! 👍 It's real fun following your progress.
27 January 2013, 23:03
Some progress is made: all the details have been hand painted. I'm almost ready to start assembling...
28 January 2013, 20:26
Assembly of the Senna kart has finally started! Progress pics are uploaded!
30 January 2013, 17:37
Hi Guy, take another background for the photos and noone will believe, that it's a model! Absolute TOP! 👍
30 January 2013, 18:15
A wonderful amazing art of craftsmanship!
And of course a fantastic memory for one of the best and brave F1 driver and a fallen archangel....
4 February 2013, 16:39
Is it possible that I can examine a part of the Senna collection in Mol???
6 February 2013, 10:51
That is still a long way, but if I can remember it I can surely bring my Senna models to KMK at Mol. For now, you can check them out on my homepage :
www.sennake.be
6 February 2013, 12:59
In the meantime I took my Senna Kart to the modelling contest at Moveleo 'Model Force' and it won 'best of show' award in the category civilian vehicles 😉
7 April 2013, 18:16